Winning at Learning: 7 Efficient Techniques for Windows
Winning at Learning: 7 Efficient Techniques for Windows
Windows outperforms any other operating system when it comes to features. Be it customizing themes, wallpapers, or anything else, you can easily do so with Windows.
As a student, you can get the most out of your Windows PC with just a few tweaks. Want to know some useful ones? In this article, we’ll show you some of the best ways to set up your Windows PC like a pro.
1. Create an Organized Folder Structure
Like any workstation, keeping your files nicely organized helps enhance your productivity. However, things may quickly get disorganized with Downloads, Documents, Pictures, and other folders. Your notes may be scattered across multiple folders, making it difficult to remember where files are located.
Let’s set up an organized folder structure to organize all your college-related files much better:
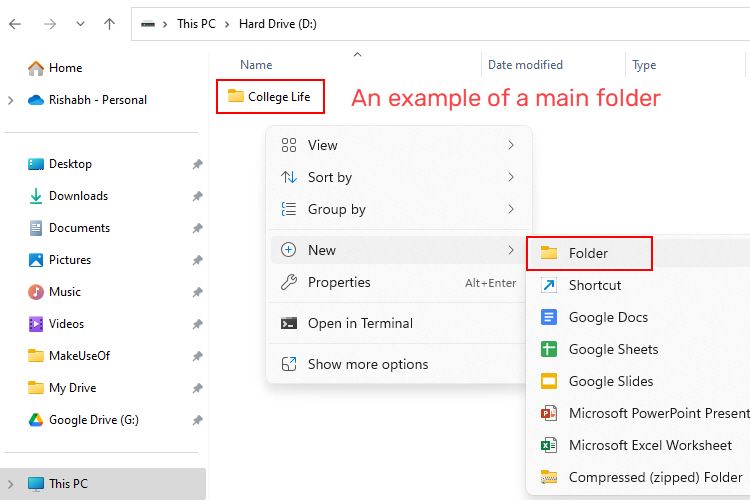
- Open the File Explorer by pressingthe Win + E key.
- You must first select a main location where all the folders will be saved. We recommend storing the main folder on a separate volume for easy access. Go to the location, create a new folder, and name it.

- Go inside the folder you just created. Now, let’s create four different folders to organize the folder structure. We’ll use the PARA approach to name the folder. PARA refers to Projects, Areas, Resources, and Archives.
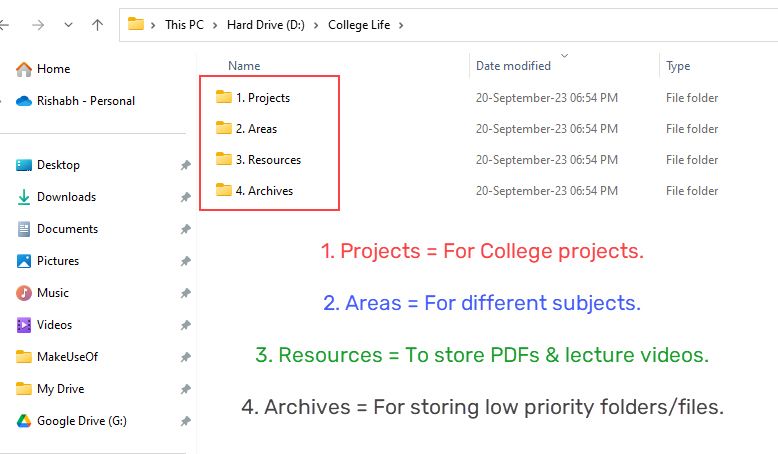
Here is an overview of how the PARA approach can help organize student materials:
- P (Projects): In this folder, you can create subfolders for your academic projects.
- A (Areas): This folder is for organizing materials related to different subjects.
- R (Resources): Here, you can gather educational resources unrelated to specific projects/subjects. This can include e-books, online articles, video lectures, or any study aids you find valuable.
- A (Archives): The Archives folder is where you can store completed or older materials that you may want to reference in the future.
Now that you have the structure, you can logically group related files.
2. Set Up Google Drive for Cloud Sync
As a student, you likely use Google Drive on your smartphone to store college notes, PDFs, or other such things. If you use your PC most of the time, setting up Google Drive will help you get the most out of its cross-platform functionality.
Follow these steps if you need help with that:
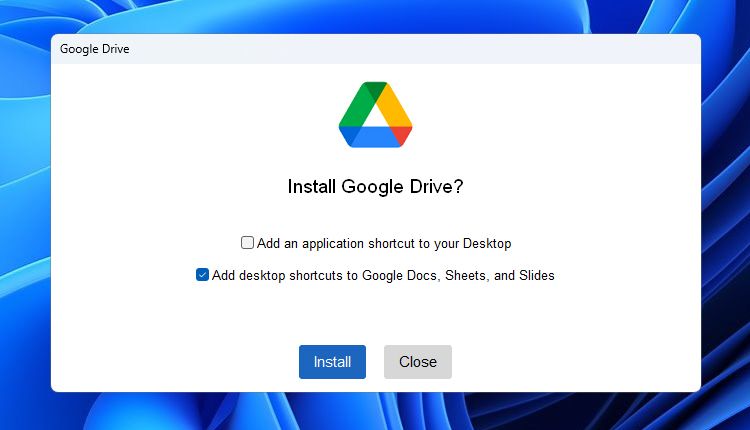
- Go to the Google Drive website and click the Download Drive for Desktop button.
- Run the Google Drive installer file and click on Install.
- Click Launch and log in with your primary Google account.
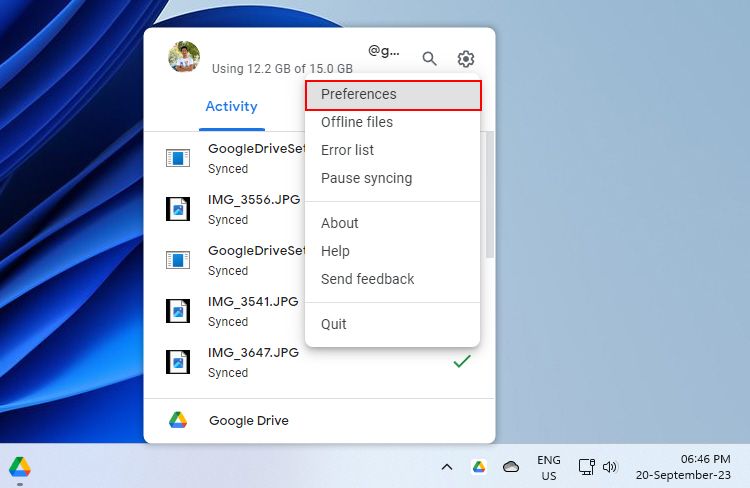
- Once logged in, right-click on the Google Drive icon on the taskbar. Click on the gear (settings) icon and then Preferences.
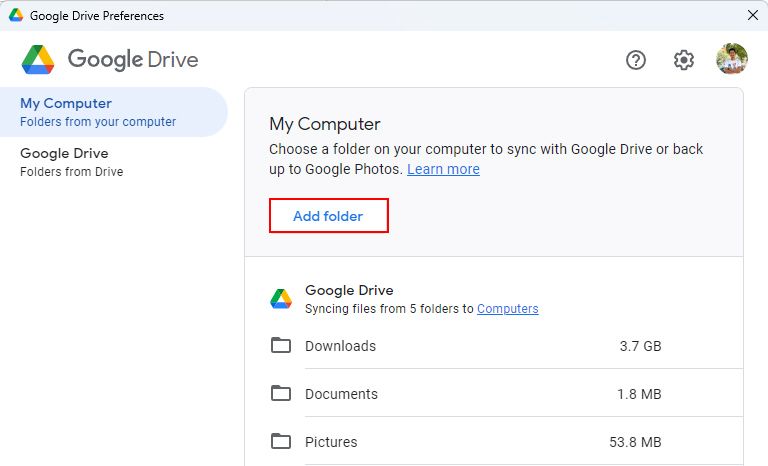
- Click on the Add folder button and select the main folder location that you created before.
- Click on Done and then Save to finish the backup process.
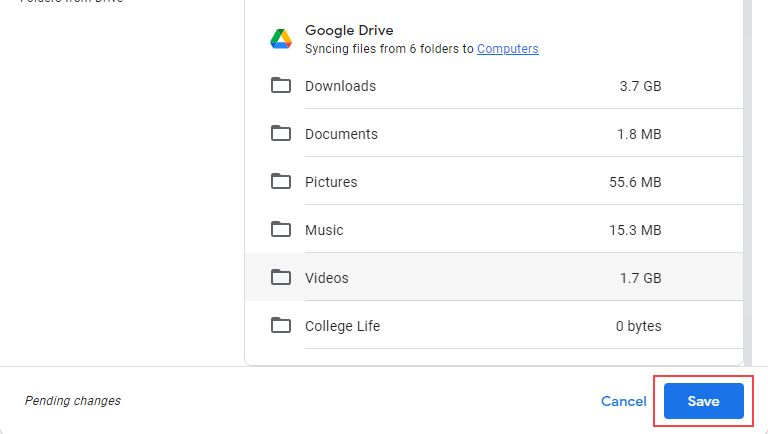
We asked you to create the main folder (in the previous section) for a reason. Now that your main folder is synced live, whatever files/folders you save to that, you can access all of them from your smartphone.
3. Use Focus Sessions
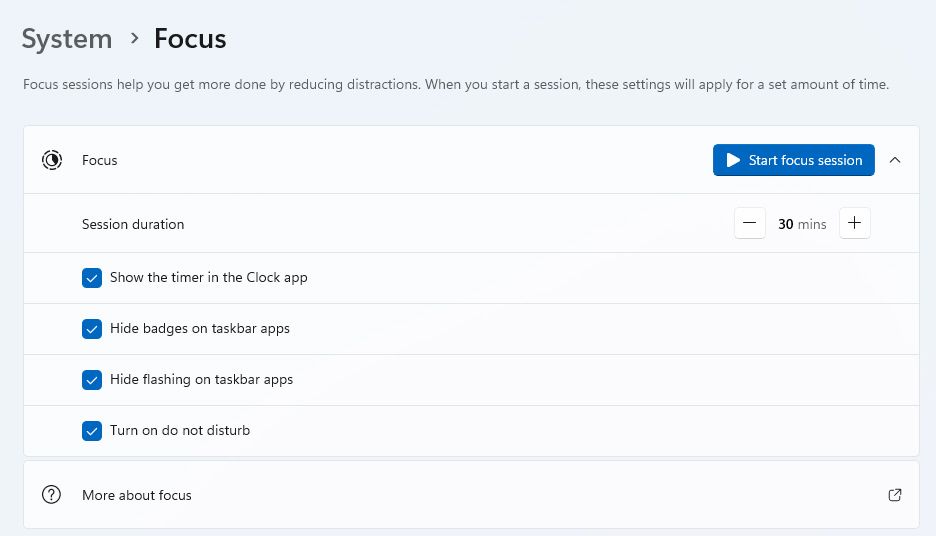
If you actively use your Windows PC, repeated notifications may make it difficult to focus on studying. Fortunately, Windows 11 offers a Focus session feature to help you block out all such distractions for a specific time.
Depending on your needs, you can customize sessions as short as 5 minutes or as long as multiple hours. You can access this feature from your Windows Settings > System > Focus section. Click the Start focus session button to start a session for the set amount. If you want to change the default timer, click the Plus or Minus button to adjust it.
4. Install Useful Browser Extensions
Our web browsers are one of the most essential apps we visit daily. But did you know that adding extensions (or add-ons) can further improve their functionality and optimize your note-taking workflow?
Here are some must-have extensions for boosting your productivity while browsing:
- Grammarly: This extension checks for grammar and spelling errors as you type across all the websites you visit.
- OCR Image Reader: Suppose you come across an image or screenshot and want to copy everything written in the image. In such a case, the OCR Image Reader extension can help.
- Dark Reader: This extension inverts bright web pages to dark mode for more comfortable reading. It’s helpful if you study late at night, sitting in front of the screen and making college notes.
- 1Password: 1Password is one of the leading password managers. The best part is, if you’re a student (with a valid college mail ID), you’ll receive its premium version for free for a year.
- Picture-in-Picture: If you prepare your digital notes from YouTube lectures, Picture-in-Picture is for you. This extension can keep YouTube lectures, music, or tutorials playing in a floating mini-player while multitasking.
For non-Chromium based browsers, you can visit the official websites of the respective extensions to download supported add-ons.
5. Annotate Your PDFs With Drawboard PDF
Wouldn’t it be great if you could annotate and take notes directly on PDFs, just like you would on paper? There’s a helpful app called Drawboard PDF that makes this possible.
Drawboard turns PDFs into an interactive canvas. It offers various built-in tools to highlight, comment, draw, fill forms, sign, and do more on your PDF files.
To get started with Drawboard PDF:
- Install Drawboard PDF from the Microsoft Store .
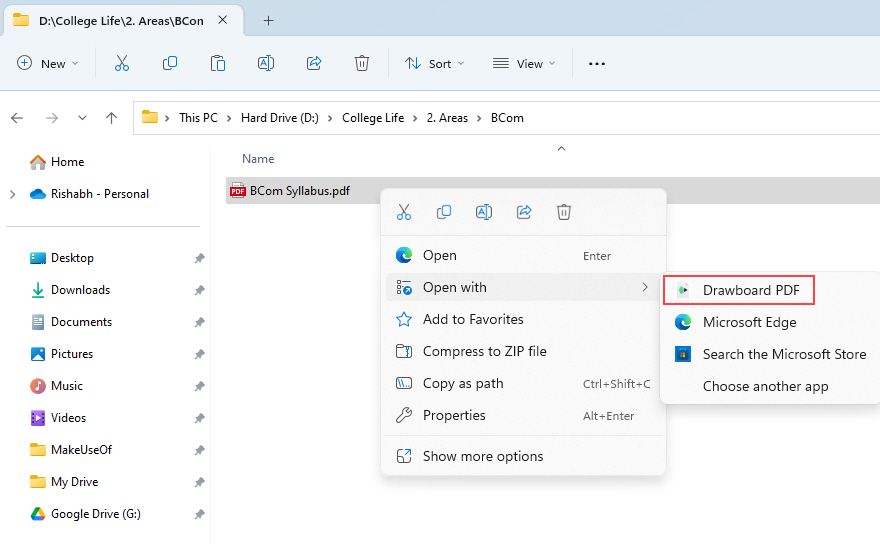
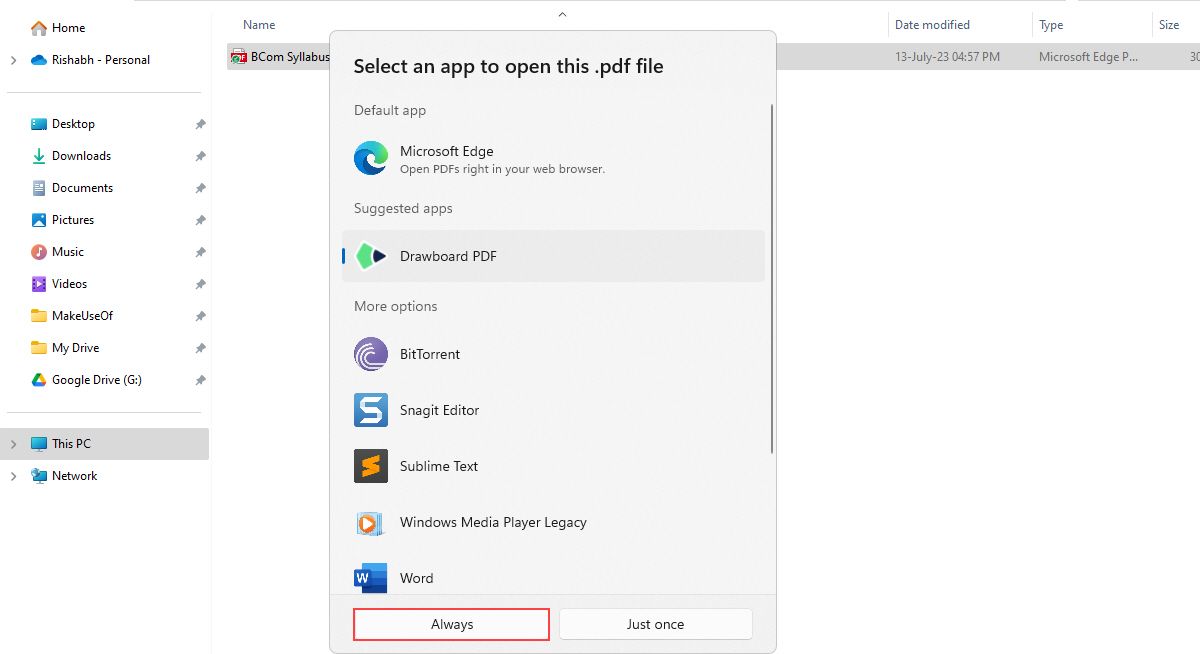
- Before opening the app, we’ll set Drawboard PDF as the default app to open all the PDF files. For that, right-click on any PDF file and select Open With Drawboard.
- Click on Always to set Drawboard as your default PDF viewer app.
- The app will ask you to create a new Drawboard account or sign in with your already existing one.
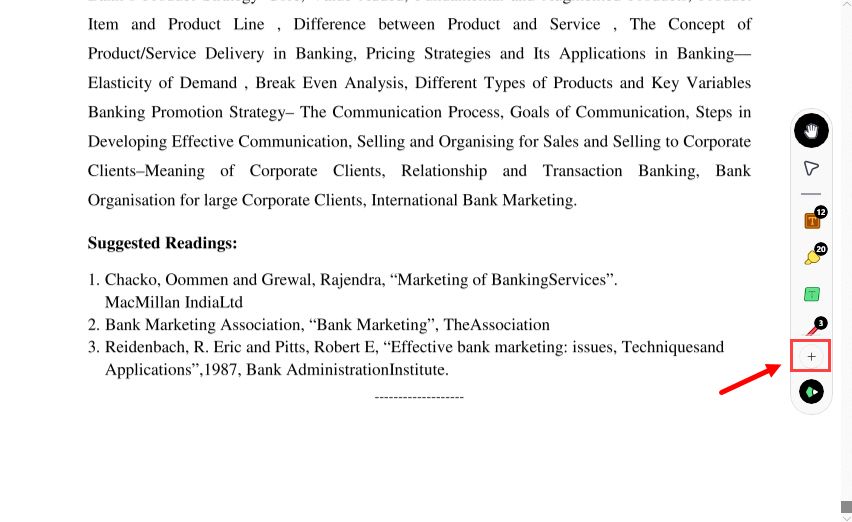
- The PDF file should open in Drawboard now. If you’ve not used Drawboard before, we suggest clicking on the (+) plus button on the left side of the ribbon. Set up or configure the annotation tools to add highlights, text, or shapes at your convenience.

 Easy GIF Animator is a powerful animated GIF editor and the top tool for creating animated pictures, banners, buttons and GIF videos. You get extensive animation editing features, animation effects, unmatched image quality and optimization for the web. No other GIF animation software matches our features and ease of use, that’s why Easy GIF Animator is so popular.
6. Take Digital Notes With Obsidian and OneNote
Transcribing handwritten notes digitally can be tiresome with time. But the good thing is powerful note-taking apps that even support the use of AI technology now exist.
Two great Windows options are OneNote and Obsidian. Both help create and organize notes easily. OneNote’s expandable canvas and sections make note-taking with a stylus easy. Check our tips to get started with OneNote .
Obsidian is perfect for long-form writing and connecting concepts. It uses backlinks to display a knowledge graph of your notes. We have a how to get started with Obsidian guide for those who want to go deep into note-taking with it.
 DLNow Video Downloader
7. Download Notion and Set It Up
As a student, keeping track of classes, deadlines, and college activities can quickly become chaotic. You’ll surely agree that managing academic life requires organization. This is where Notion can help.
Notion is a productivity tool to organize every aspect of your college life in one place. It’s not just for taking notes but is useful across multiple fields.
You can view a sample college student template in Notion to understand its usability. You can not only track your current semester’s classes, notes, and materials; but can also manage your exam schedules in one searchable place.
We already have a beginner’s guide to get started with Notion . Besides, you can also browse Notion templates for students to start with an attractive setup.
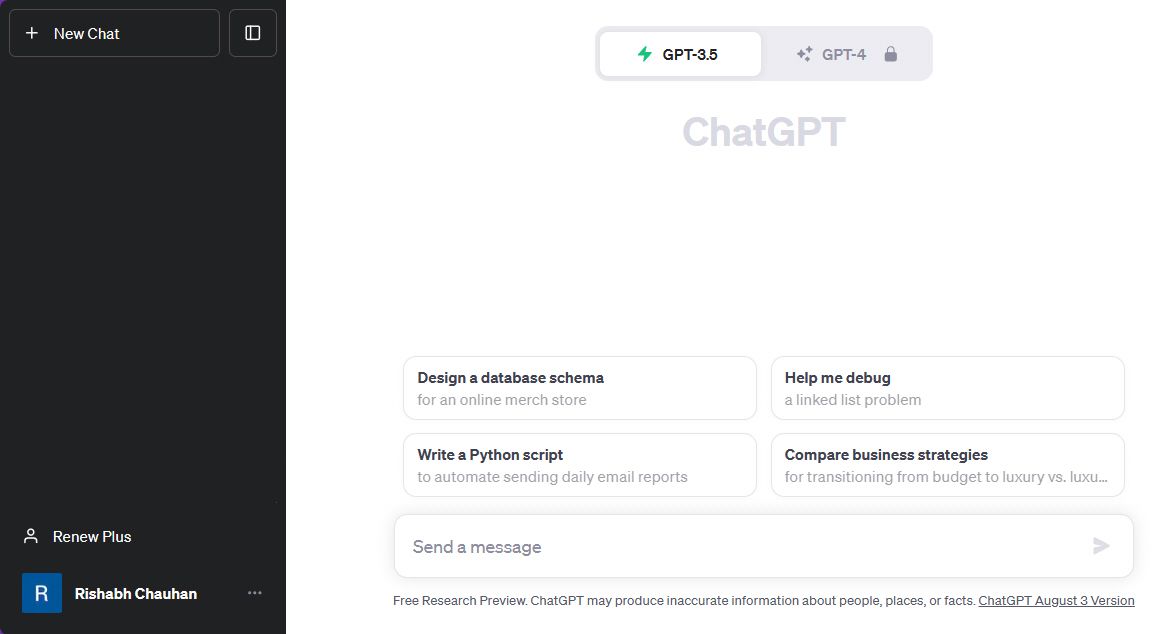
8. Install ChatGPT on Your PC
ChatGPT is making a buzz in the education industry. It is gradually changing the way you gather information and write documents.
As it’s a web-based service, you must open your browser and visit chat.openai.com to use it. But, If you don’t want to open your web browser every time, learn how to install ChatGPT as a Windows app . Once done, you can one-click to open it and use it to brainstorm ideas, helpful resources, and draft outlines for your next project.
Besides, if you don’t know how to use ChatGPT for note-taking, you can refer to our guide on how to use ChatGPT to take notes .
Your Windows Productivity Hub Is Now Ready
Drawboard PDF, Google Drive, Notion, and Obsidian are just a few apps to add to your productivity workflow. The best part is some of them use AI to help you further in your studies.
With your student life still going on, keep yourself updated with the AI field, as it will revolutionize your study pattern soon. But, make sure not to over-rely upon such futuristic things as it may impact your personal growth in the long run.
As a student, you can get the most out of your Windows PC with just a few tweaks. Want to know some useful ones? In this article, we’ll show you some of the best ways to set up your Windows PC like a pro.
- Title: Winning at Learning: 7 Efficient Techniques for Windows
- Author: Joseph
- Created at : 2024-08-15 16:02:50
- Updated at : 2024-08-16 16:02:50
- Link: https://windows11.techidaily.com/winning-at-learning-7-efficient-techniques-for-windows/
- License: This work is licensed under CC BY-NC-SA 4.0.