Understanding and Tailoring Your System's Startups in Windows 11

Understanding and Tailoring Your System’s Startups in Windows 11
Leaving excess services running can drain system resources and cause your computer to appear to run slower than it actually is. Additionally, these excess resources can take up network bandwidth.
To regain your lost speed and keep your computer running at peak shape, here’s how to deactivate unnecessary startup services on Windows 11
Why Change Your Startup Services?
When you install a new program on Windows it isn’t uncommon for it to set itself up as a startup service or enable other services on startup. While this might not be a bad thing, it is possible over time for a computer to become bogged down by an overabundance of services.
If too many services are run at once, extra system resources will be taken up. This will result in slower performance that, over time, may lead to greater issues. Additionally, certain services require a constant open connection to a remote server.
When you deactivate the services that run when your computer starts to boost your PC’s speed, you shouldn’t blindly turn them off. If you turn off a service linked to a program you commonly use it may cause the program to be slower to start, or not function at all.
The simplest way to double-check before you shut the service off is to do a quick Google search of the service’s name when you aren’t certain. In most cases this will quickly clear up the service’s purpose, to help you determine whether it is worth it to shut it down.
Accessing the Windows Service Manager
The first step to deactivate any service in Windows is to access Windows Service Manager. The quickest and easiest way to do so is to use the Windows run dialog, which you can open withWin + R .
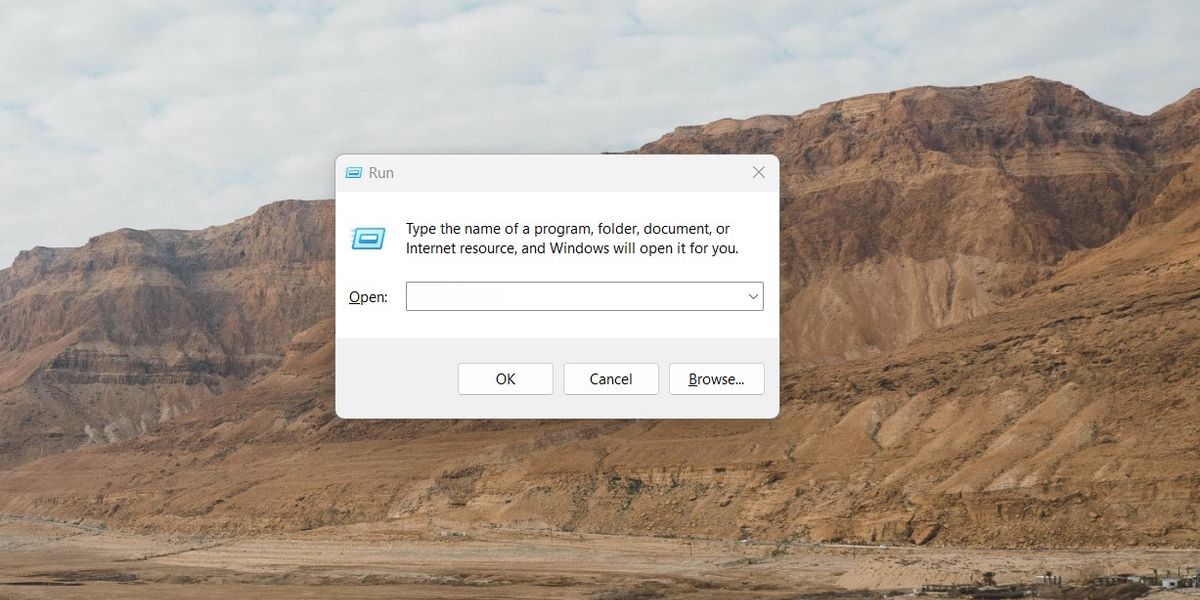
Now, type inservices.msc into the box and pressEnter . When you do so the Windows Service Manager will immediately be pulled up. This will open a new window with every currently registered service on your computer listed.
Alternatively, if you aren’t able to access the run dialog, you can also use the search bar in the taskbar to locate the Service Manager. Type the wordServices into the search bar. The top result will sayServices with an icon next to it of a pair of gears, which will open the Windows Service Manager.
Identifying the Current Startup Services
With the service manager pulled up, you will be faced with a complete list of the services currently registered on your computer. This includes any services that the programs you use require in order to run.
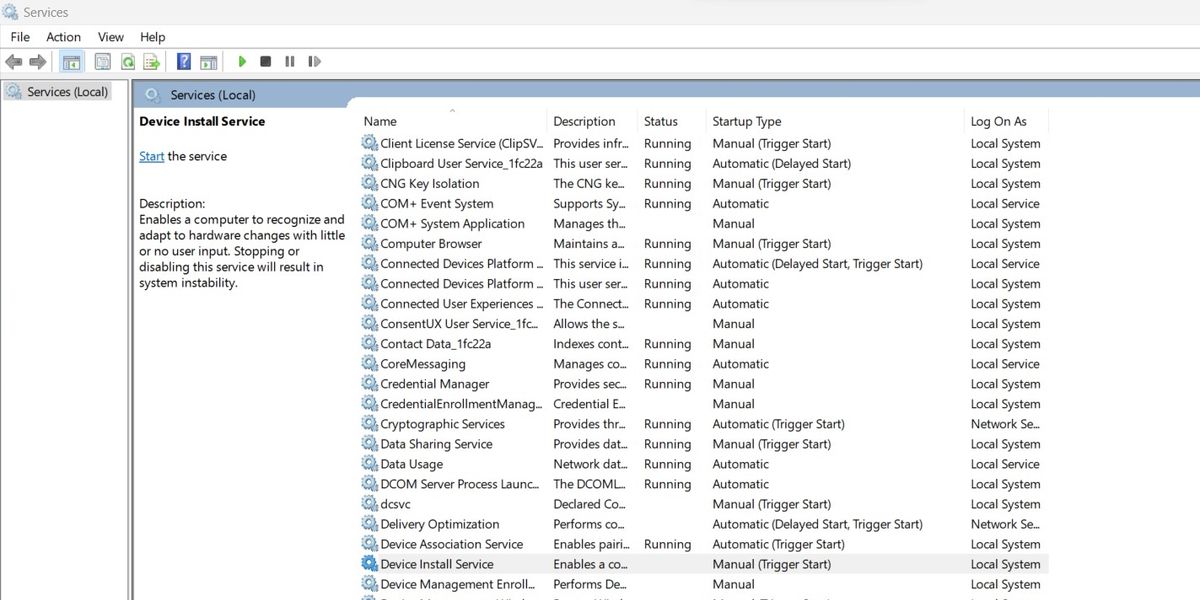
The list of startup services is composed of five separate columns, the service name, a description of the service, its current status, the startup type, and the user it acts as. The fourth column is the most important one for our purposes as it lists how and when the service starts.
Changing the Status of Services
Once you have identified one or more services that need to be deactivated, simply switch their startup type. Right-click on any service to bring up a context menu with a number of management options on it. Near the bottom, you will see an option labeledProperties .
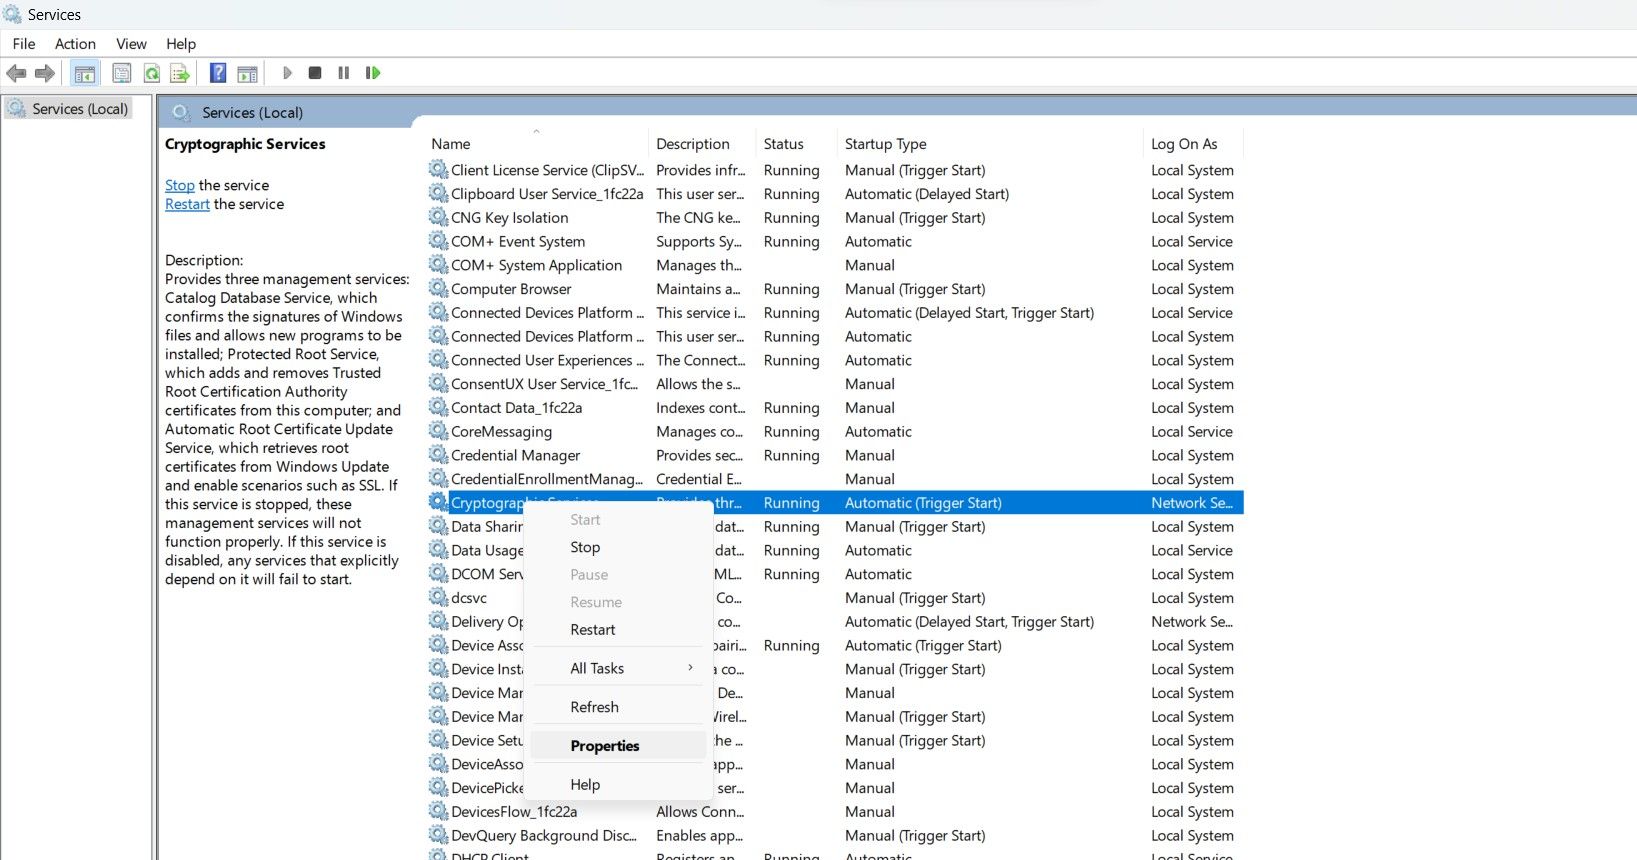
Once you click it, a new window will open with the properties for the service you clicked on. Halfway down the window you will see a select box labeledStartup Type . This select box contains all the different startup types that a service can use.
Service Startup Types
There are two main types of startup types for services. Automatic indicates that the service starts up on its own when Windows starts. Manual, on the other hand, means that another program triggers this service to start. Some services, such as theWindows Installer Service, can be enabled or disabled as needed.
Aside from Manual and Automatic, you may also see the wordsDelayed Start orTrigger Start in parentheses after the type. These modifiers indicate further info about the start type, however, for the purposes of deactivating startup services, they can be ignored.
Changing Startup Types
The dropdown menu will offer several options that depend on the service selected. The three main options that will be present for all services areAutomatic ,Manual , andDisabled .
Set the type toAutomatic to start the service up when Windows first boots.Manual will wait until an outside trigger from either a program or the user to run the service.Disabled will prevent the service from running. This may cause problems if the service is required by a program that you use.
As such, don’t useDisabled unless you are certain that the service is unnecessary or malicious. In the event that the service will never again be needed, you candelete the service from your Windows device altogether.
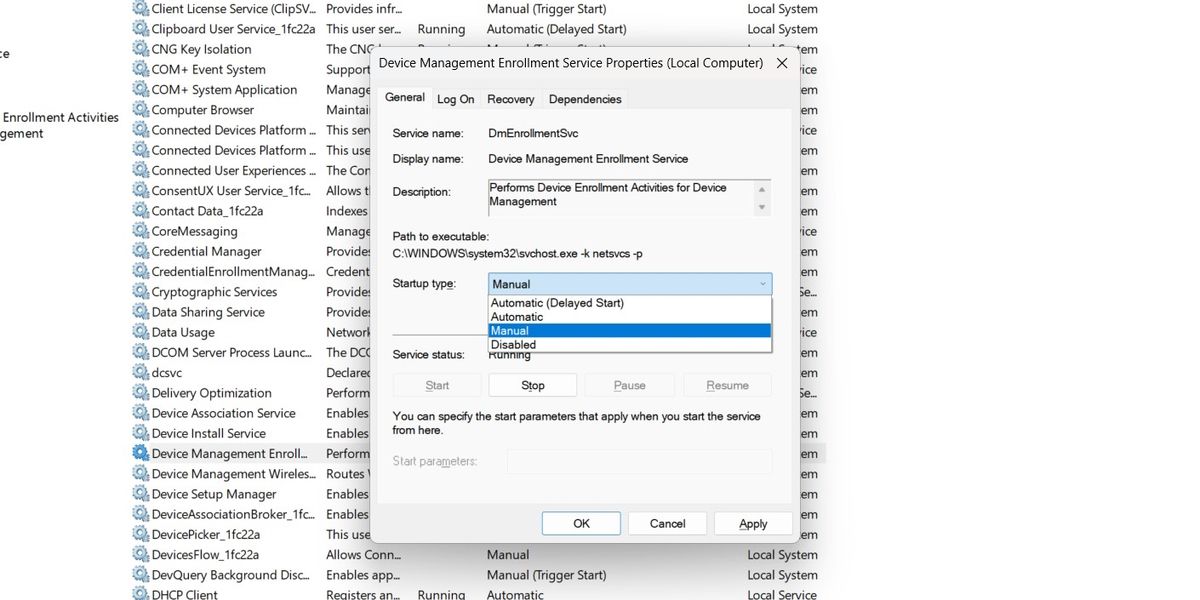
Once you have selected the proper startup type, click on theApply button at the bottom of the screen. This saves the current setting for the service. The next time you start up your computer, the setting you have selected will be used.
Stopping Running Services
Once you have selected the new startup type for the service, you can determine if the service needs to be run currently. If not, you can stop the service now, without the need to restart your PC.
Below the startup type, there is another section labeledService Status . This section shows whether the service you have selected isRunning ,Paused , orStopped . If you want to stop the service immediately, select the button that saysStop in this section.
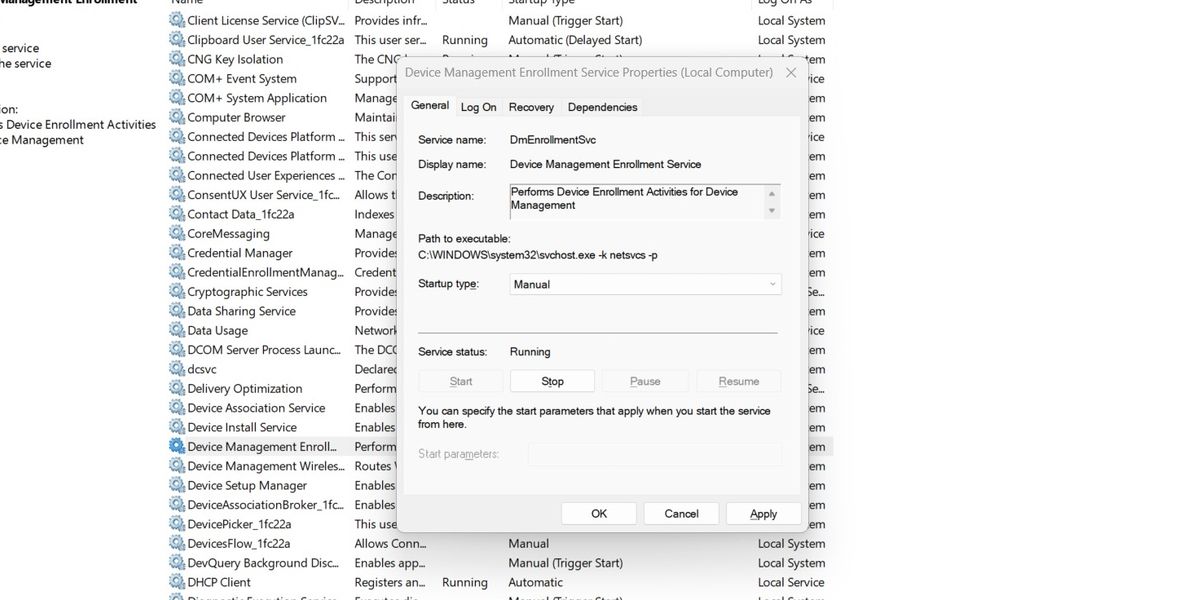
Once the button has been pressed, Windows will attempt to gracefully shut the service down. Once terminated, it will remain deactivated until another program triggers it to run again. This is just one of the possible ways tostart or stop a service in Windows .
Configure Your Startup Services in Windows
Unnecessary services that you run on your computer can drain your resources and limit network bandwidth. To keep your PC running well, periodically turn off the excess services that have been enabled by various programs.
Also read:
- [New] 2022'S Top Figure Skating Performances
- [New] 2024 Approved The Beginner's Blueprint to Building Top 10 Easy-to-Create Biz YouTubes
- [Updated] In 2024, Tips for Efficiently Implementing Windows 11'S Auto HDR Mode
- 2024 Approved A Beginner’s Strategy Boosting Business via Telegram Marketing
- 2024 Approved Fast & Efficient Image Captures PC's Top Snipping Software Ranked
- Boosting Windows Discord Speed: A Step-by-Step Guide
- Customizing Window 11 UI Elements - Larger Icons
- How to Check Distance and Radius on Google Maps For your Motorola Razr 40 | Dr.fone
- How to Fix the Windows 11 Version 22H2 Update Not Installing
- How to Master the Use of Winservices.exe on Windows
- How To Upgrade or Downgrade iPhone 11 Pro Max Without Data Loss? | Dr.fone
- Mastering Second Screen Harmony: Windows + Android Tablets
- Overcoming ISArcExtract Error: A Window 11 Solution
- Quick Access to Troubleshooters in Windows 11 with Custom Keys
- Solving Your IPhone Screen Orientation Problem: Tips for Switching From Portrait to Landscape
- Top 7 Fixes for Rename Restrictions on Files and Directories of Windows 11
- Trends in Firmware Enhancement: What Every Surface User Needs to Know
- Troubleshooting Guide: Resolving Your Xbox One 'No Input Signal' Issue
- Will ChatGPT Be Able To Formulate Effective And Secure Custom Workouts Perfect For Your Fitness Goals?
- Title: Understanding and Tailoring Your System's Startups in Windows 11
- Author: Joseph
- Created at : 2024-09-29 22:14:11
- Updated at : 2024-10-01 19:51:47
- Link: https://windows11.techidaily.com/understanding-and-tailoring-your-systems-startups-in-windows-11/
- License: This work is licensed under CC BY-NC-SA 4.0.