
Steps to Overcome Windows Memory Errors
Steps to Overcome Windows Memory Errors
The “The instruction at 0x000… referenced memory at 0x0000000000000014. The memory could not be written” error can appear in several situations, such as when shutting down a Windows PC without closing all applications, opening web browsers, launching a graphics-intensive program, or even during gameplay.
While it usually shows up when your device is running low on memory resources, it can also occur due to outdated graphics drivers, corrupted system files, a temporary memory glitch, corrupted files, improperly configured graphics software, interference from third-party services, or technical issues with your hardware.
Here are a few solutions to fix this annoying problem.
1. Properly Close Your Apps Before Shutting Down Your Computer
If you encounter the “memory could not be written error” when shutting down your PC, check if you still have open apps. If this is the case, close all apps first before turning off your computer. Doing so could help you avoid this error and stop it from recurring.
Should you get this error randomly while you’re using your computer, you should restart it. If it doesn’t recur after turning on your PC again, then it confirms that the problem might have only been a temporary hiccup.
2. Repair Corrupt System Files
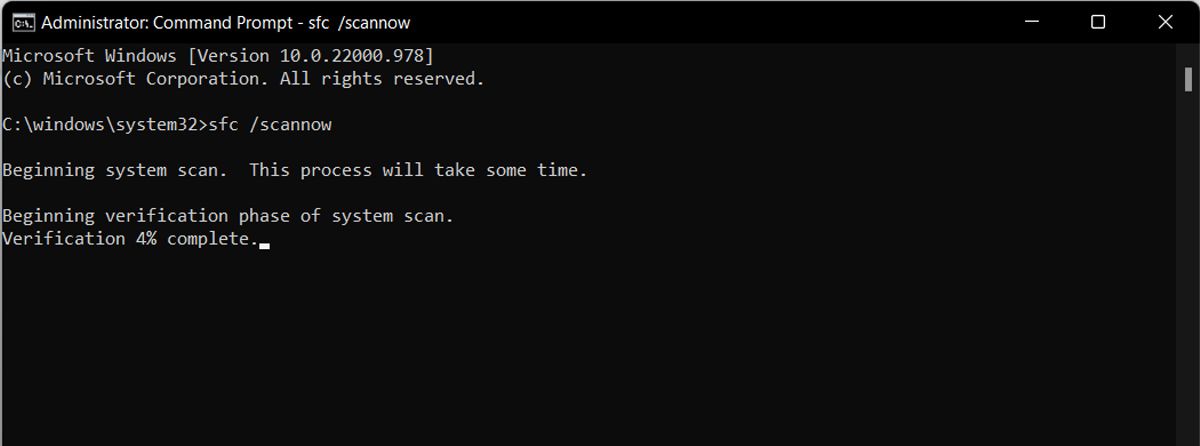
If you’re still encountering the error, ensure it isn’t caused by corrupted or missing system files. The best way to do this is by running an SFC scan. SFC checks the integrity of your system—it repairs corrupted files and rebuilds missing ones. It often resolves most issues on Windows PCs.
In most cases, SFC scans complete successfully and notifies users that no issues with system files were detected or that corrupted files have been automatically repaired. Occasionally, it directs users to repair corrupt files themselves. Be sure to read the scan results carefully and take any requested action.
Refer to our guide on running the SFC scan if you aren’t familiar with using it and analyzing its results.
3. Perform a Clean Boot to Disable Third-Party Services
Another solution suggested by users in the Microsoft Community thread is to perform a clean boot. Technically, performing a clean boot means starting Windows with minimal drivers and without third-party apps and services. This technique helps identify whether a conflict from another app is responsible for the issue.

It’s easy to clean boot your PC. If you’re unfamiliar with it, refer to our guide on performing a clean boot on Windows 11 or Windows 10 .
4. Run a Memory Diagnostic Check
If you’re RAM is starting to have issues, it could cause this error too. The best way to test your RAM’s health is by using the Windows Memory Diagnostic Tool.
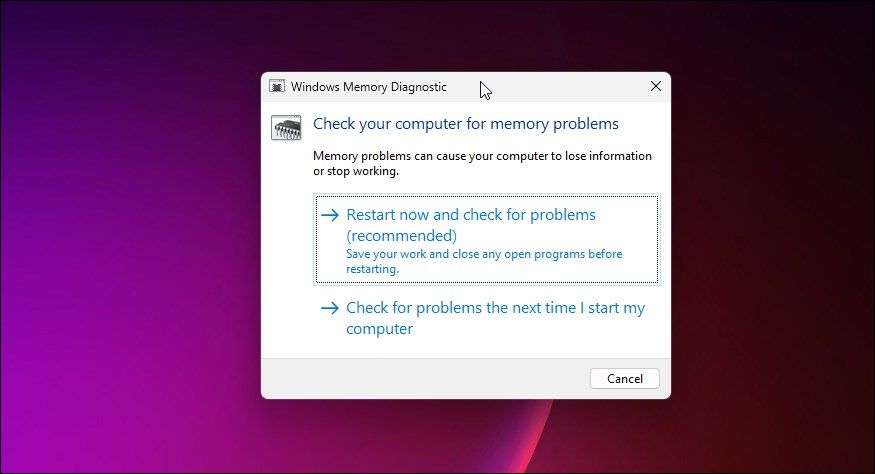
If the system detects any problems with your RAM, get it checked as soon as possible. If a severe technical issue affects your PC’s memory, it could fail at the most inopportune moment. If you keep using it without having it at least checked, your memory modules might break while you’re in the middle of catching a deadline. Avoid this trouble by installing reliable RAM sticks on your PC.
5. Increase the Virtual Memory
Virtual memory refers to the small space on your HDD or SSD that your operating system uses as memory when other processes consume all available system memory. Allocating more virtual memory will ensure your device has enough memory to process its needs, thereby resolving the error.
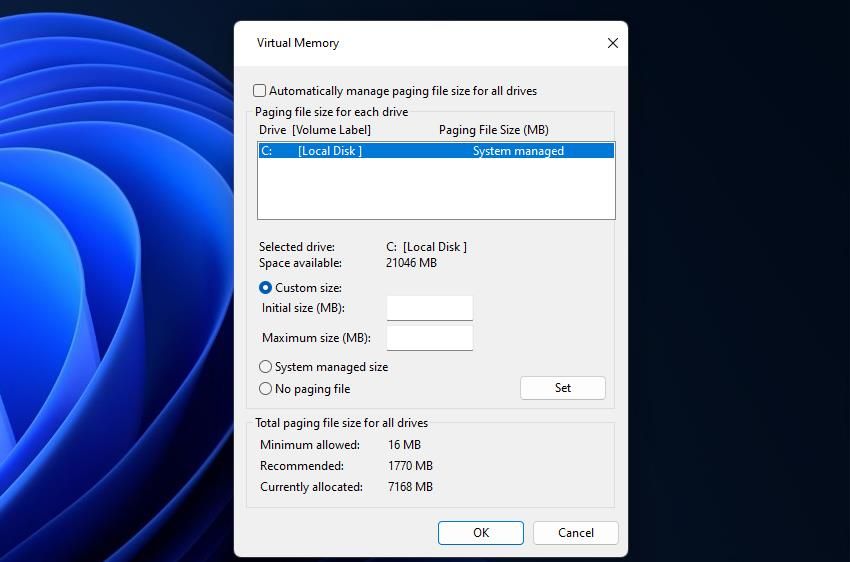
If you’ve never changed the virtual memory before, refer to our guide about increasing the virtual memory in Windows 11 .
6. Repair Corrupted App or Game Files
If you experience the error when running a particular app or game, then its files might be corrupted. You should repair or reset the problematic app to see if it deals with the issue you’re experiencing. You should check out our solutions to misbehaving apps if you’re unfamiliar with how to go about these procedures.
As a last resort for app-specific problems, you can reinstall the app. Although it isn’t the most favorable fix, it usually fixes app-specific problems. And if it still causes issues after reinstalling it, the nuclear option is to remove the app and replace it with a different but similar one.
7. Perform a System Restore
If none of the other fixes work and you still encounter the error, you should restore your system to a previous restore point as a last resort. This process reverts your operating system settings and files to an earlier point, often effectively fixing critical Windows issues.
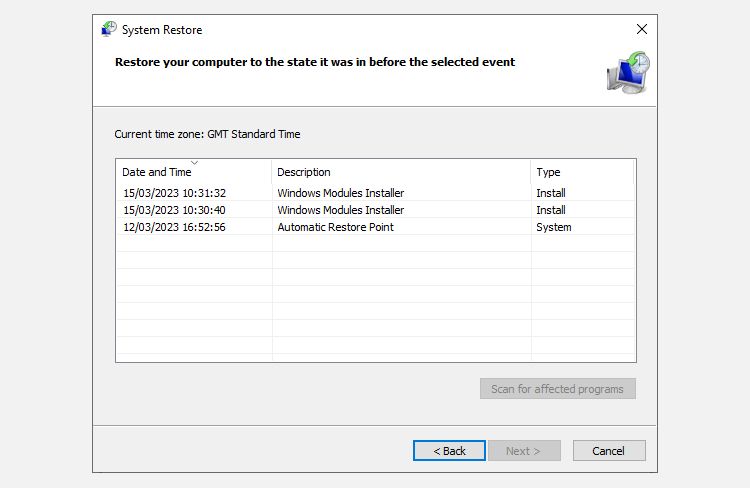
If you are unfamiliar with the process, see our guide on creating a restore point in Windows 11 for instructions on performing a System Restore. However, remember that you can only restore your system if you have already created a restore point. If you haven’t made it before, you can skip this step.
8. Repair the .Net Framework on Windows
The .Net framework a necessary for running many apps on your PC. If it’s corrupted, it can cause memory issues and more. To fix this issue, you can run the SFC scan we mentioned in step two. You can also check out the other ways to repair the .Net framework on Windows to get it running again.
9. Configure the Problem App to Use a Different GPU
If you get the error with a GPU-intensive app, like AAA games, it might use too much RAM on your integrated GPU. To solve this,configure the problematic app to use your dedicated GPU . That way, you can ensure that it uses the more powerful video card instead of the less powerful integrated GPU on your CPU that shares your system RAM.
Get Rid of Annoying Memory-Related Errors
Without a doubt, memory errors have been one of the most annoying problems that Windows users have faced over the years. Hopefully, the above steps will help you identify the primary cause of the “the memory could not be written” error and fix it.
If nothing works or the memory diagnostic test finds problems with your RAM, it’s best to get your device inspected by a technician. This is the only way to determine if there is a hardware issue with any component of your system that needs to be repaired.
Also read:
- [New] In 2024, Capturing Your Gaming Adventures Best Practices Reviewed
- [New] Reinstate Precise Sound in Zoom Chats
- Download the Ultimate Total Video Player for PC – No Cost! Compatible with Windows 64-Bit & 32-Bit Versions
- In 2024, Constructing Compelling Trailer Crafts
- Mastery over Sticky Notifications: Maximizing Win 11 Potential
- Quick Download: Windows 11-Compatible Realtek AIoT Drivers - Get Them Now!
- Speed Up Redoing Tasks on Windows with Key Combinations
- Speeding Up Sluggish Excel: Troubleshooting Steps for Windows Users
- Transform Your YouTube Footage Into Cinematic Delight with iMovie Expertise for 2024
- Troubleshooting Epic Games Sign-In Problems on PC
- Unlock Off-Screen App Functionality: Win 10/11'S Best Recovery Approaches (6 Key Techniques)
- Title: Steps to Overcome Windows Memory Errors
- Author: Joseph
- Created at : 2025-02-28 19:43:35
- Updated at : 2025-03-02 09:47:27
- Link: https://windows11.techidaily.com/steps-to-overcome-windows-memory-errors/
- License: This work is licensed under CC BY-NC-SA 4.0.