Steps to Install Non-Verified Windows Applications

Steps to Install Non-Verified Windows Applications
Have you encountered the error”the app you’re trying to install isn’t a Microsoft-verified app”while installing an app? The error occurs if you have configured your system to only install apps from the Microsoft Store. You could have set this permission on purpose, or it might have been set by default.
Other than that, a corrupted Microsoft Store cache, installing an app from an unofficial source, and enabling Windows S mode can also cause the error. Below, you will find a few checks and fixes you should apply to resolve the error and install the app successfully.
1. Install the App From the Microsoft Store
Considering you get the error when downloading apps outside the Microsoft Store, it makes sense to first check if the same app is available there. If the app is available, you can download it from there, and there won’t be any need to go through advanced troubleshooting.
Therefore, open the Microsoft Store and search for the app. If you find the app in the store, click the Get button to install it. However, if the app isn’t available in the store and can only be downloaded from another source, ensure it is safe to download.
2. Make Sure the App You’re Downloading Is Safe
Microsoft doesn’t allow untrusted publishers to list their apps on the Microsoft Store. If you haven’t found the app on the store, it could be unsafe and infect your computer. Thus, ensure that the app you want to download is secure before downloading.
To determine if an app is safe, copy its download link and paste it into VirusTotal’s URL search box . After that, press Enter.
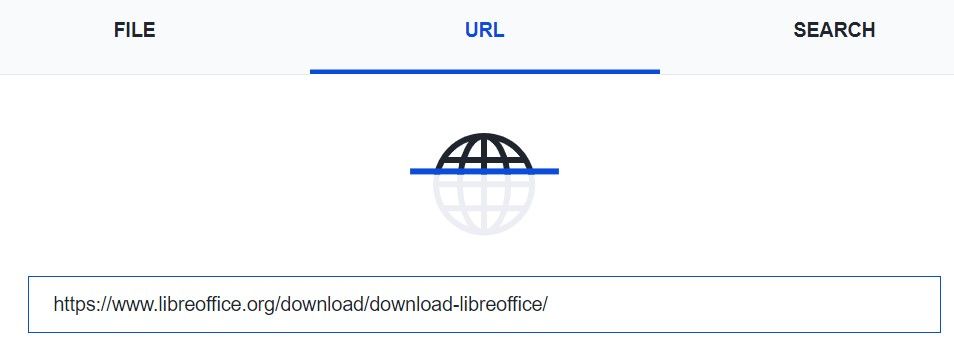
If the scanner doesn’t find any problems with the download link, it’s probably safe. After ensuring that, you can apply the remaining fixes to enable app installation outside the store.
3. Change the Operating System App Settings
Microsoft cares about the safety and security of its Windows users. To facilitate that, Windows offers a feature that blocks the installation of apps outside the Microsoft Store. The downside of enabling this feature is that it prevents users from installing popular and safe applications from the web.
When users try to install an app with this restriction turned on, Windows will likely display an error message saying that the app isn’t a Microsoft-verified app. Therefore, to avoid encountering the error described above, you should allow Windows to install apps outside the Microsoft Store.
To modify the app permissions on Windows 10, follow the steps below:
- Open the Settings app.
- Open Apps settings and select Apps and Features from the left sidebar.
- Select Anywhere from the dropdown menu under Choose where to get apps.
To modify app permissions on Windows 11, open the Settings app, select the Apps tab, and then go to Advanced app settings.
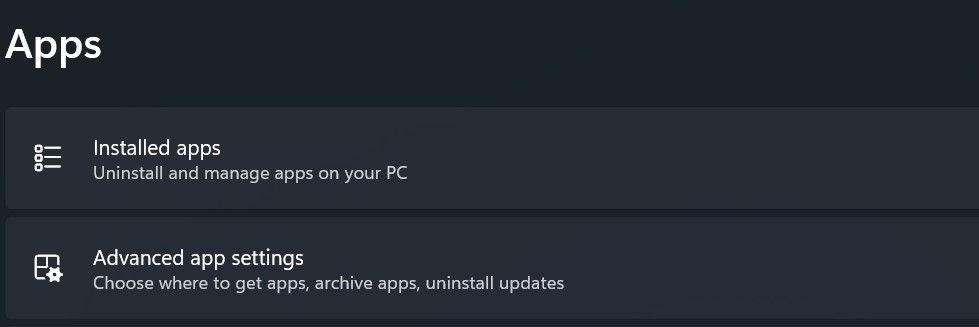
Select Anywhere from the dropdown menu next to Choose where to get apps.

4. Turn Off the App Install Control Policy
The App Install Control is a Microsoft Defender SmartScreen feature that prevents users from installing apps outside the Microsoft Store. It does this to prevent users from infecting their devices with third-party applications.
Therefore, you should turn off this feature to remove any restrictions. To turn it off, follow these steps:
- Open the Local Group Policy Editor. To do this, check out how to open the Local Group Policy Editor if you’re not using Windows Home edition, and learn how to access the Group Policy Editor on Windows Home if you are.
- Navigate to Computer Configuration > Administrative Templates > Windows Components > Windows Defender SmartScreen > Explorer.

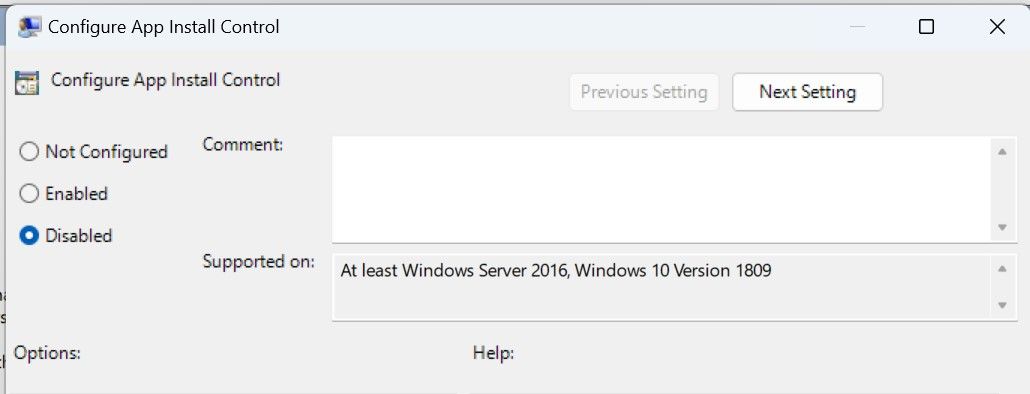
- Open the policy for Configure App Install Control.
- Select Disabled to turn off this feature.

5. Change the App Install Control Permission in the Registry Editor
To modify the App Install Control permissions via the Registry Editor, follow the below steps:
- Open the Registry Editor.
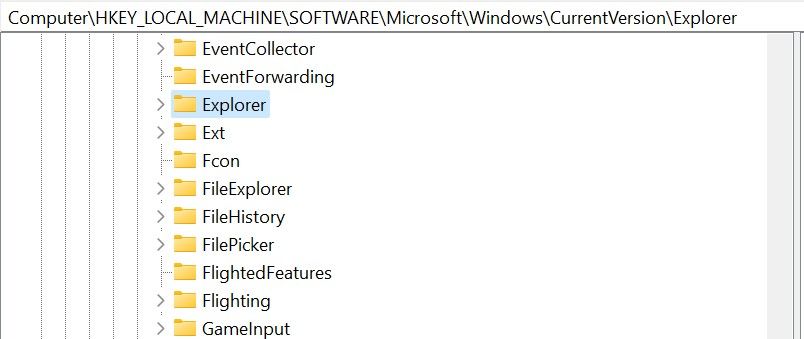
- Navigate to HKEY_LOCAL_MACHINE > SOFTWARE > Microsoft > Windows > CurrentVersion > Explorer.

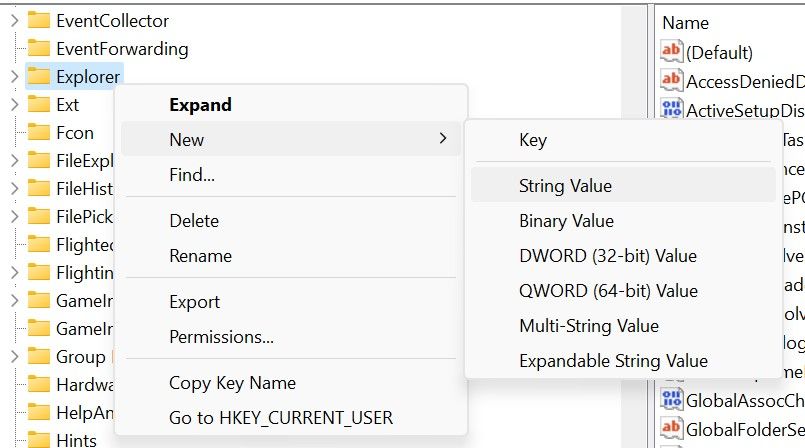
- Right-click on Explorer and select New > String value.

- Name this new value “AicEnabled.”

- Double-click on the newly created string and type “Anywhere” in the Value data field.

- Restart the computer for the changes to take effect.
If the above Registry tweak does not resolve the issue, turn off S mode.
6. Disable Windows S Mode
Windows S mode is primarily the most secure environment you can get in Windows. It mainly serves as a means of protecting your children and keeping sensitive documents away from prying eyes.
When this mode is active, users can only download apps from the Microsoft Store, can’t use the command line or code editors, and can’t modify the Windows Registry Editor.
Therefore, if you have recently bought a new device and this mode is enabled there by default, Windows will probably throw the error if you attempt to install any app outside the store. Therefore, you should make sure it isn’t enabled and disable it if it is.
To determine whether your device is running S mode, open the Settings app, select the System tab on the left, and open the About page.
If the S mode is enabled on your device, you’ll see it there. If the feature is active, turn it off by following these steps:
- Open the Settings app.
- Navigate to the System tab and go to Activation.
- Click on Go to the store under Switch to Windows 11 Home/Pro, which will take you to the Microsoft Store page where you can opt out of S mode.
- Click the Get button and follow the on-screen instructions to get out of S mode.
7. Run the Windows Store Apps Troubleshooter
If the Windows S mode isn’t enabled, and you haven’t restricted your operating system from downloading apps from outside Microsoft, the error could be caused by an underlying issue with the Microsoft Store. To ensure this is not the case, you should run the Windows Store Apps troubleshooter, which is a built-in tool for troubleshooting issues with the Store.
If you’ve never run the troubleshooter before, refer to our guide on how to run a troubleshooter on Windows 10 or 11 .
Successfully Install Third-Party Applications Again on Windows
Microsoft blocks the installation of third-party apps for your security, but it’s pointless if it prevents you from installing vital apps. Hopefully, you now better understand why the Microsoft Store presents the “the app you’re trying to install isn’t a Microsoft-verified app” error. Following the fixes above will enable you to download the apps from unofficial sources.
Have you encountered the error”the app you’re trying to install isn’t a Microsoft-verified app”while installing an app? The error occurs if you have configured your system to only install apps from the Microsoft Store. You could have set this permission on purpose, or it might have been set by default.
Other than that, a corrupted Microsoft Store cache, installing an app from an unofficial source, and enabling Windows S mode can also cause the error. Below, you will find a few checks and fixes you should apply to resolve the error and install the app successfully.
Also read:
- [Updated] Save While You Teach Hosting Low-Cost Seminars via YouTube
- 2024 Approved From Concept Art to Cinematic Masterpiece Utilizing Luts From CG Central
- 2024 Approved Mastering Aspect Ratio Compliance in Micro-Video Tweets
- 4 Solutions to Fix Unfortunately Your App Has Stopped Error on Honor Magic 5 | Dr.fone
- Effortless File Management: WinPC's Most Valuable Fileshare Apps
- Eliminating Error 0X80072EFD: A Windows Store Solution
- Eliminating Windows 11 Zoom Problem: Code 1132
- Enhancing and Streamlining Windows-Based Discord Searches
- Enhancing Visual Quality: Setting Sizes on Win11
- Eradicate the ‘Current Password Needed’ Issue on Windows 11
- Expert Analysis: Galaxy's Mighty F150 Off-Road Remote Control Trucks Unveiled
- GoPro's Top Tier Face-Off Hero5 B & Sessions
- Test Ride: Experiencing the Latest CycWagen Cargo Electric Bike
- Ultimate Selections Top-Rated Webcam Platforms
- Title: Steps to Install Non-Verified Windows Applications
- Author: Joseph
- Created at : 2025-02-24 20:16:20
- Updated at : 2025-03-01 17:12:41
- Link: https://windows11.techidaily.com/steps-to-install-non-verified-windows-applications/
- License: This work is licensed under CC BY-NC-SA 4.0.

