
Solving Screen Glitches in Windows 11: A Step-by-Step Guide

Solving Screen Glitches in Windows 11: A Step-by-Step Guide
If your Windows 10 or Windows 11 screen is constantly flickering, it’s likely because you have a troublesome application installed or an unsuitable display driver. It’s time for you to resolve that annoying screen flash.
The problem often begins when upgrading to Windows 10/11 from a previous version of the operating system, but it can occur at any time. We’re going to show you various methods to fix a Windows 10 or Windows 11 flashing screen.
Perform This Screen Flickering Test First
First, you need to establish what might be causing the flickering screen. To do this,open Task Manager by pressingCtrl + Shift + Esc simultaneously.
Alternatively, on Windows 10 you canright-click your taskbar and selectTask Manager . You don’t actually need to use Task Manager, but you do need it open.
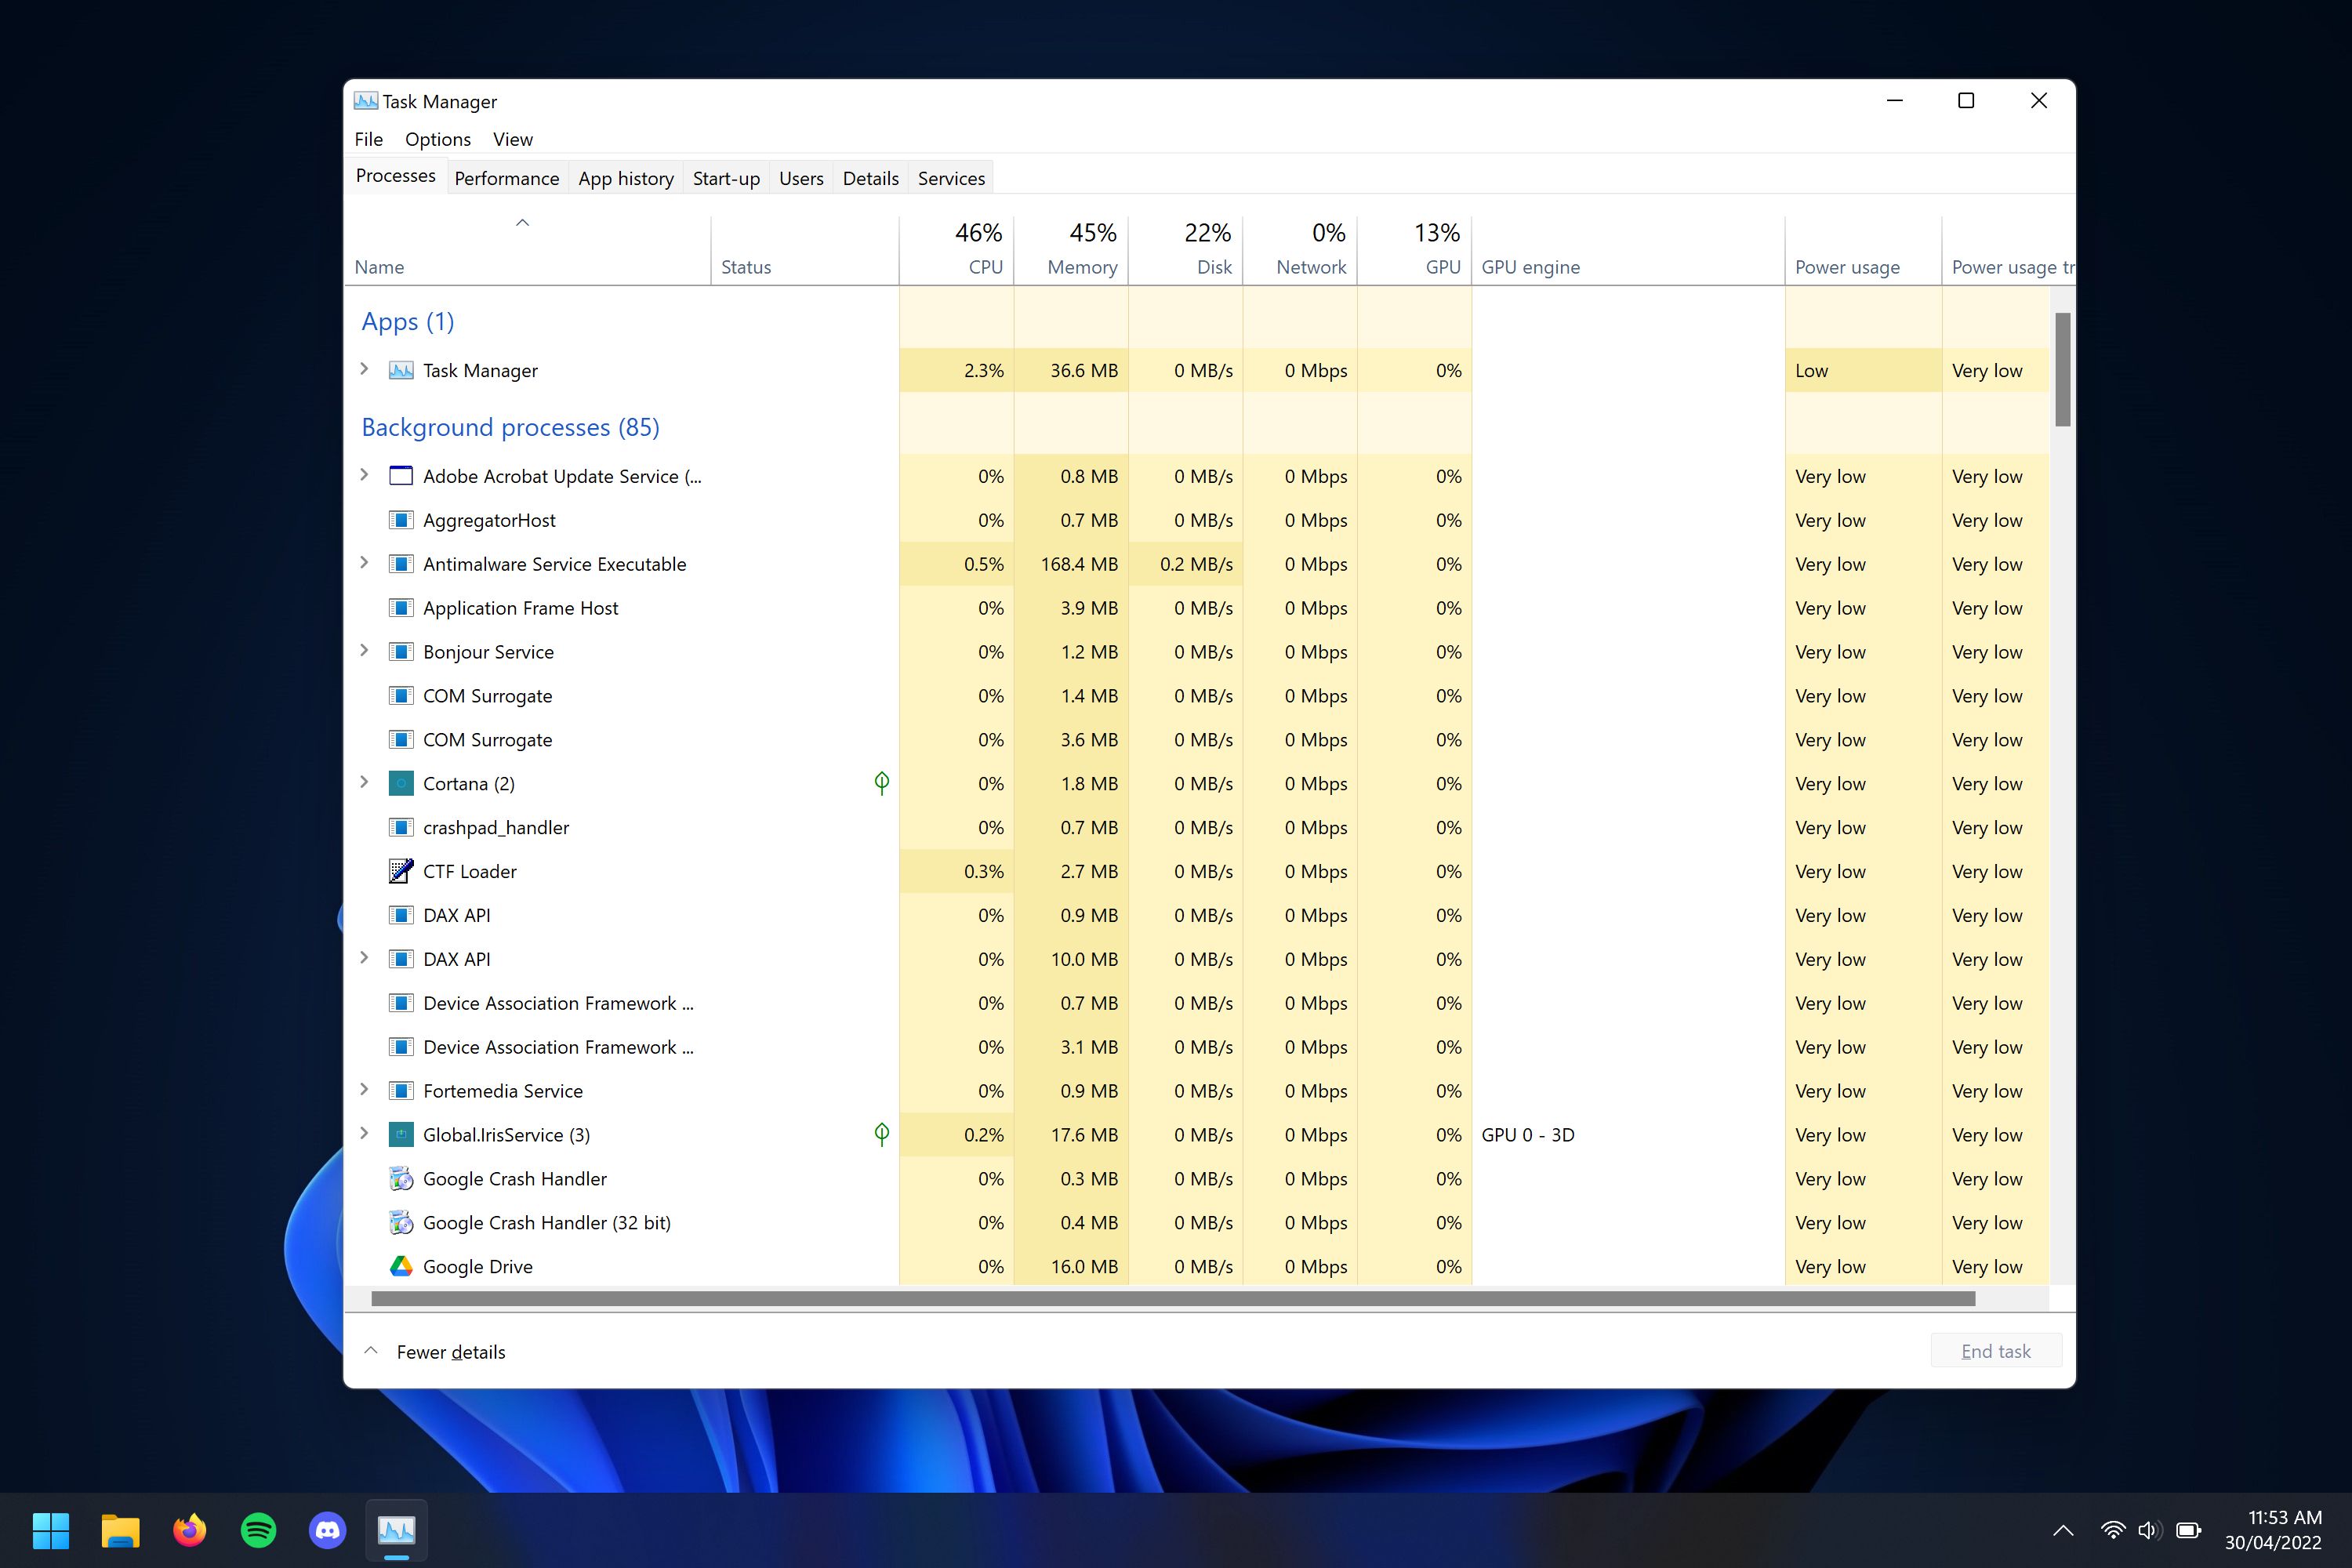
Now, watch your screen to see if Task Manager flickers. If it does, along with everything else on the screen, the problem is likely caused by your hardware or a faulty display driver. On the other hand, if everything except Task Manager flickers, the issue is likely due to an application.
If it’s the former, follow the instructions below in order. If it’s the latter, skip to step five. That said, if the advice there doesn’t work, check the advice in the other sections too.
1. Check Your Monitor and Cables
If you have a flashing screen, the first thing to rule out is the hardware. Check all the cable connections from the monitor to the computer—take them out and plug them back in to ensure the cables are secure.
If you have a spare monitor cable, try using it instead. Or buy a replacement online, since it’s an inexpensive purchase. Cables can degrade over time, or maybe a pet has had a sneaky chew. Either way, switch the cable and see if it stops the screen flickering.
If you can, try a different monitor. If this resolves the problem, you know it’s your monitor that’s the issue. At that point, contact the manufacturer for support or to raise a warranty claim.
2. Set the Correct Refresh Rate
A monitor’s refresh rate is the speed at which the screen updates the image per second, measured in hertz (Hz). Basic monitors can usually only handle a 60Hz refresh rate, while more advanced ones—typically aimed at gamers—can go to 360Hz and beyond.
It’s important that you set a suitable refresh rate for your monitor . Sometimes a monitor manufacturer will support an overclocked refresh rate, but this can cause screen flickering.
To adjust your refresh rate:
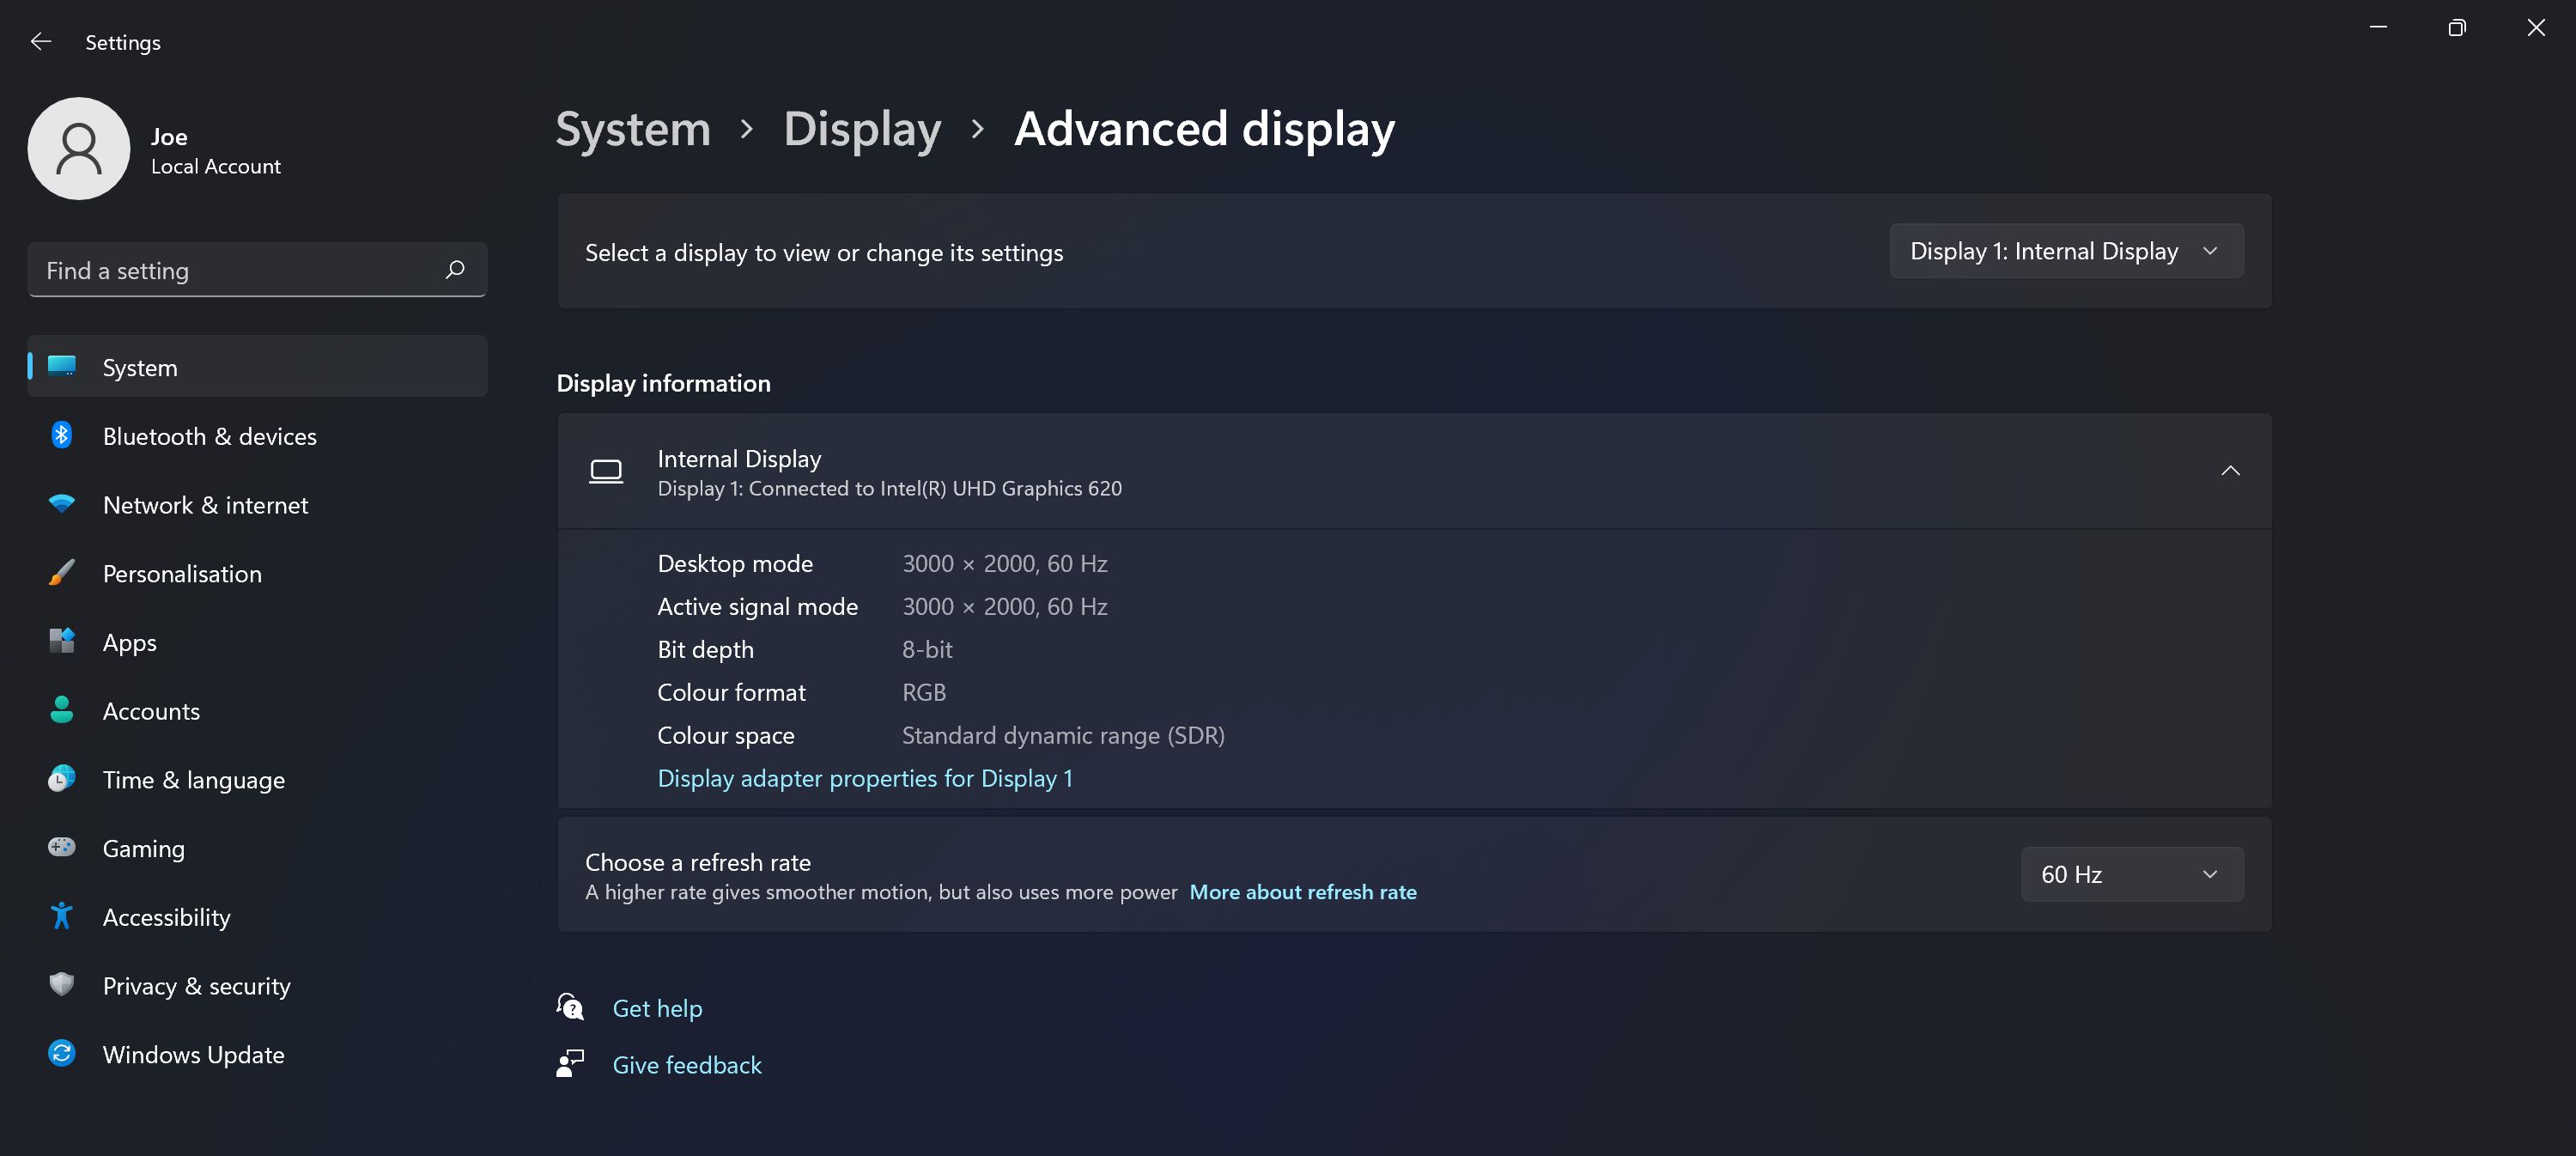
- PressWindows key + I to open Settings.
- ClickSystem >Display .
- ClickAdvanced display settings (Windows 10) orAdvanced display (Windows 11).
- Use theRefresh rate dropdown and incrementally select lower rates until the screen flashing stops. If the flashing continues, revert to your monitor’s recommended refresh rate.
3. Reset Your Display Driver
The screen flashing could be caused by your display driver. You might have an old driver or a faulty new one. Let’s make sure you are running the right version for your system.
Step 1: Remove the Driver
First,boot Windows in safe mode :
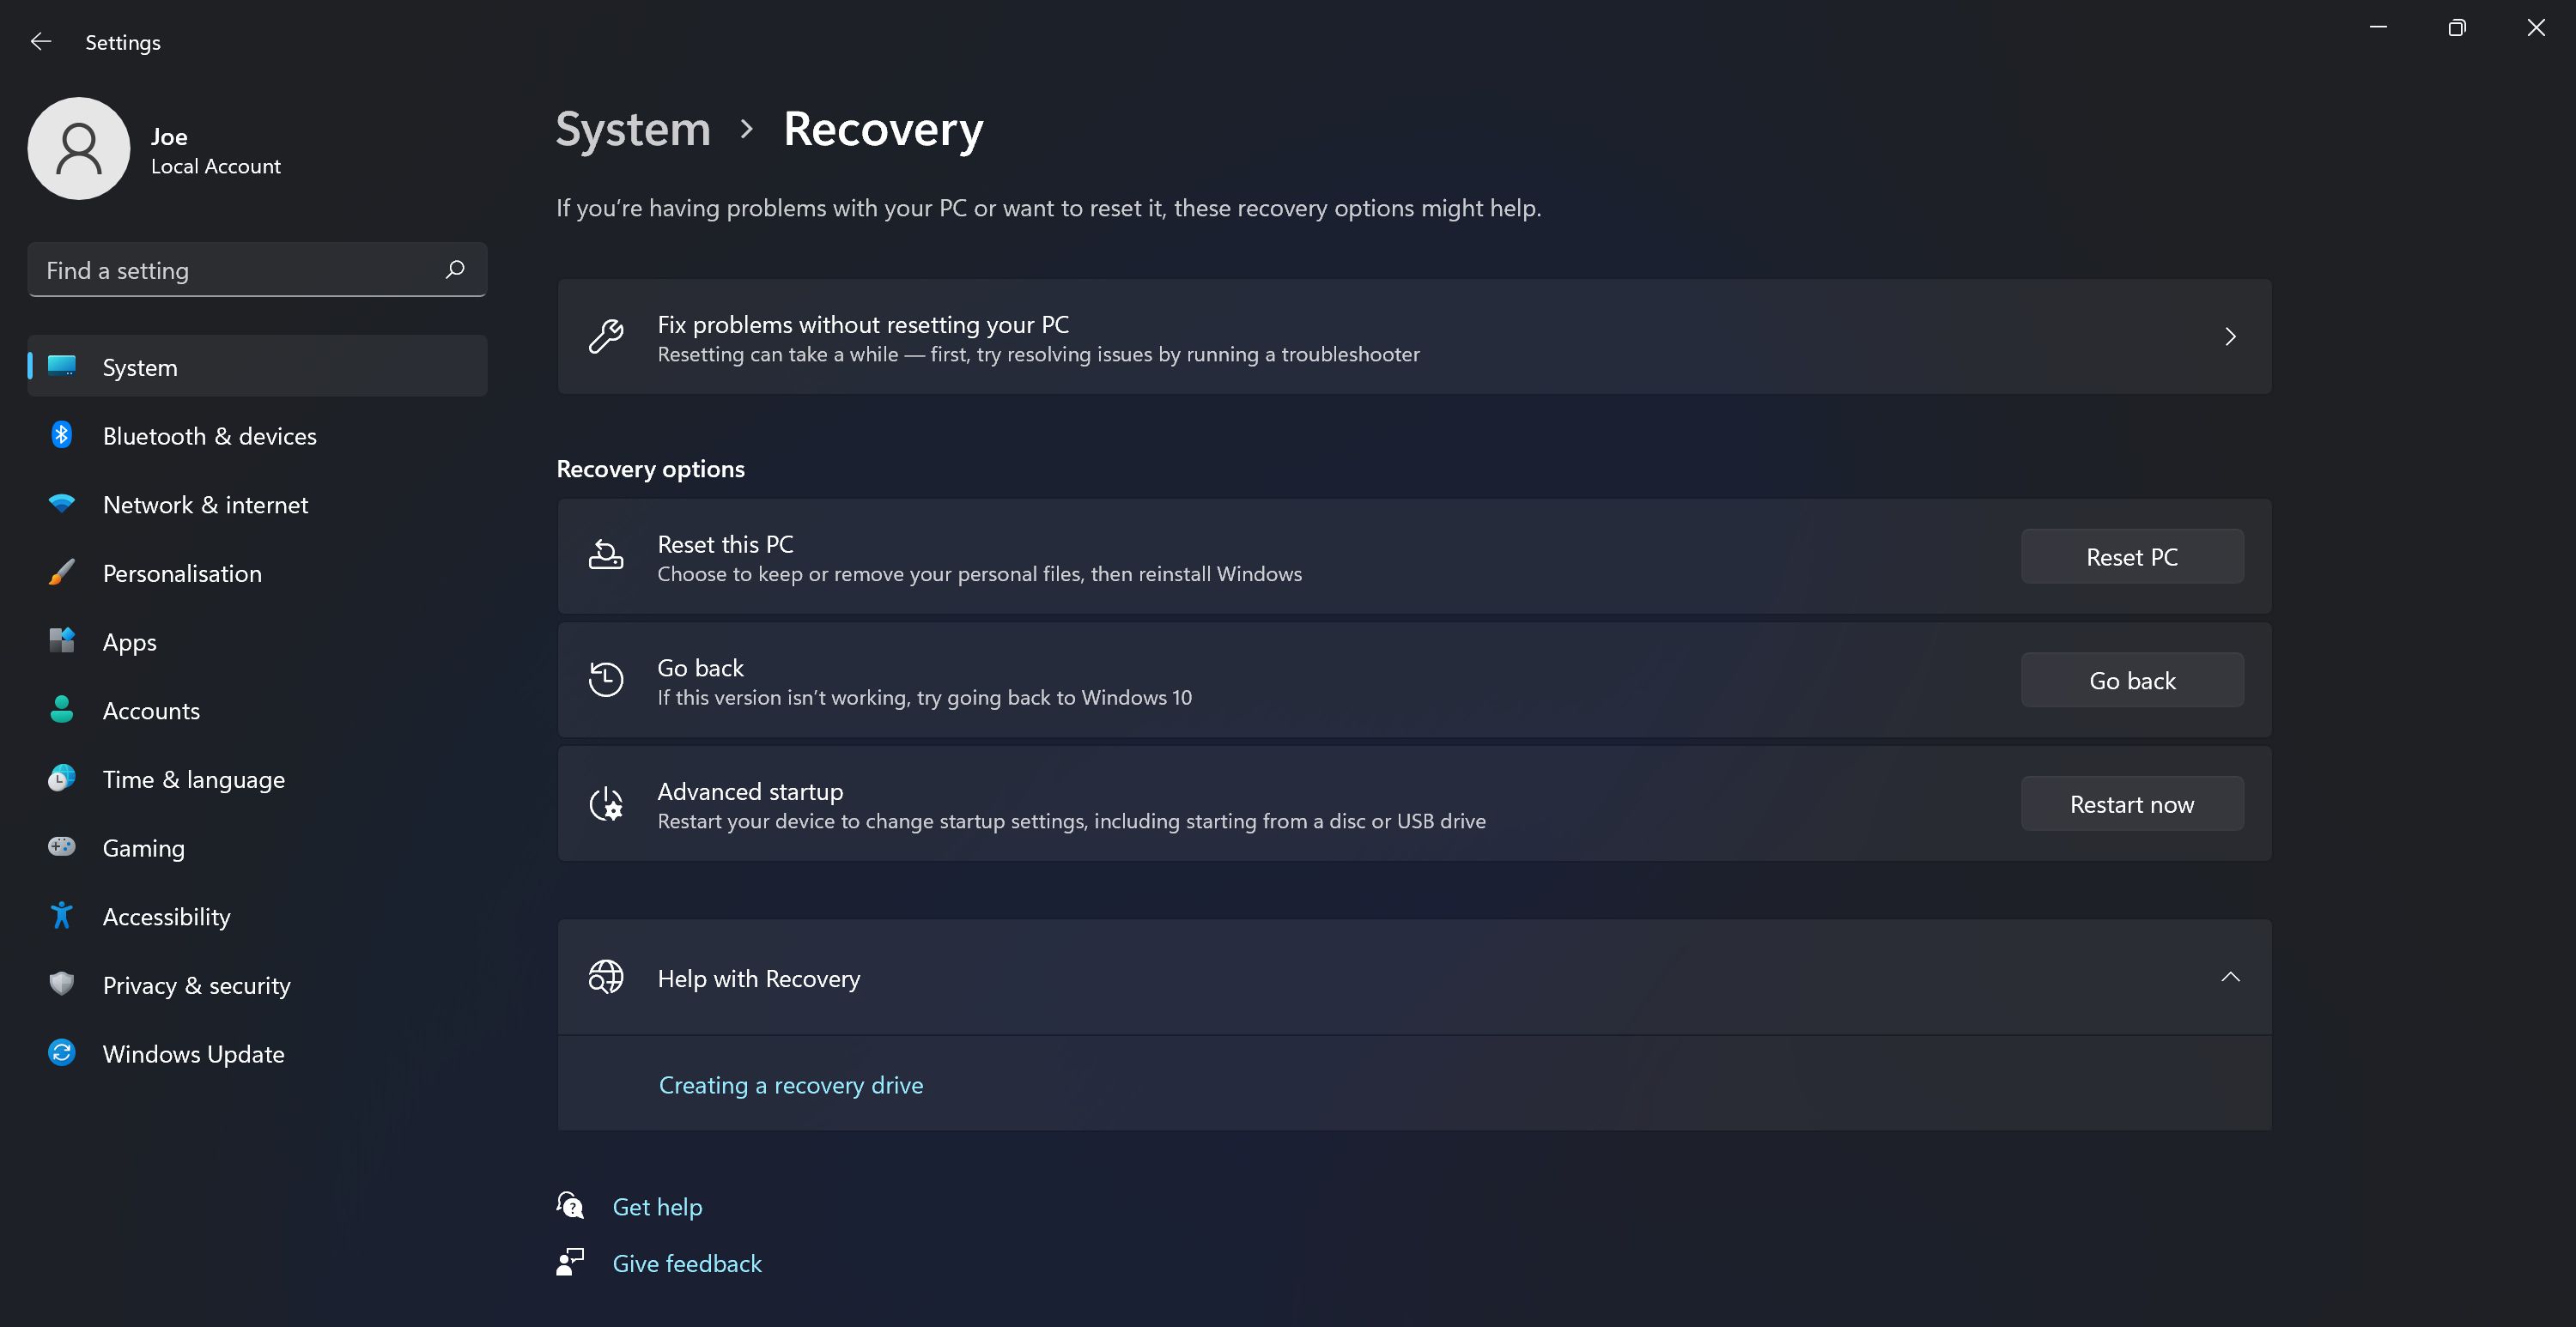
- PressWindows key + I to open Settings.
- SelectUpdate & Security > Recovery (Windows 10) orSystem > Recovery (Windows 11).
- UnderneathAdvanced start-up , clickRestart now .
- When your system restarts, select Troubleshoot > Advanced options > Startup settings > Restart .
- Again, once restarted, select option five to launch your PC intoSafe Mode with Networking .
Next, use Device Manager to uninstall the display driver:
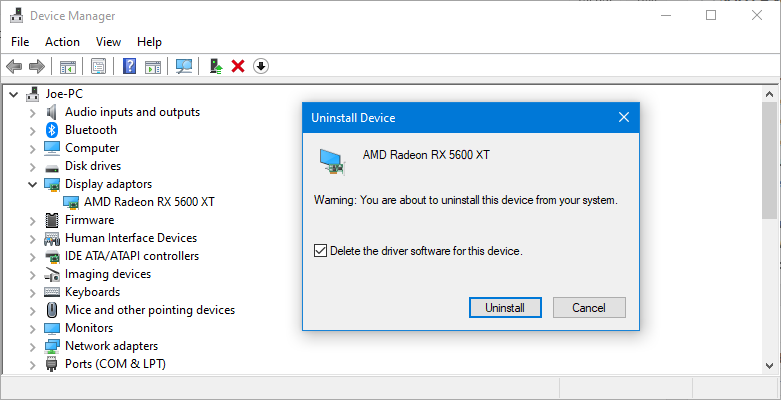
- PressWindows key + X and clickDevice Manager .
- Double-click onDisplay adapters to expand the category.
- Right-click your graphics card, clickUninstall device , checkDelete the driver software for this device and then clickOK .
- Restart your system again.
Alternatively, you can use third-party software Display Driver Uninstaller , which will completely wipe any traces of the driver from your system.
Step 2: Install a New Driver
You now want to install the latest driver for your system. Windows Update will provide the driver it thinks is compatible with your system. To do this:
- PressWindows Key + I to open Settings.
- ClickUpdate & Security (Windows 10) orWindows Update (Windows 11).
- ClickCheck for updates .
Alternatively, you can go to your graphics card manufacturer’s website (likely AMD ,NVIDIA , or Intel ) and manually download the driver from there.
Download the driver, install it, and see if the screen flashing problem has ceased.
Roll Back to an Older Driver
If the problem continues, it might be that the newest driver hasn’t patched the problem. If the screen flickering occurred after a driver update, try rolling back to an older version.
Follow the steps above to uninstall the driver, then head to the old driver page for either AMD ,NVIDIA , or Intel . This might be a bit of trial and error, but try selecting one released when your screen wasn’t flickering.
4. Reseat Your Graphics Card
If the problem isn’t with your display driver, it doesn’t mean your graphics card isn’t to blame. If your graphics card isn’t seated correctly in your motherboard, it can cause your monitor display to flicker on and off.
You can easily check this if your motherboard has inbuilt graphics. Remove the monitor cable from your graphics card and plug it into the motherboard’s display slot instead. If the flashing stops, you know the graphics card is the problem.
Power off your PC , unplug everything, open the case, and remove your graphics card from the motherboard. Then carefully reseat it, ensuring the card firmly clips into the motherboard. Of course, don’t do this if you’re not comfortable working inside a computer because you might make things worse.
If this doesn’t fix it,your graphics card might be faulty or dying . Contact the manufacturer for support or to claim on the warranty.
5. Uninstall Problematic Applications
Some apps are incompatible with Windows 10/11 and can cause screen flickering. Think about whether you installed any new software before the screen flashing began or if an app recently updated. In the past, three problematic apps have been Norton Antivirus, iCloud, and IDT Audio.
Across all your applications, make sure you’re running the latest versions. Either update within the app itself or head to the respective official websites and download the most up-to-date release. Alternatively, check the developer’s support page for recently updated apps to see if screen flashing is known as a recent bug.
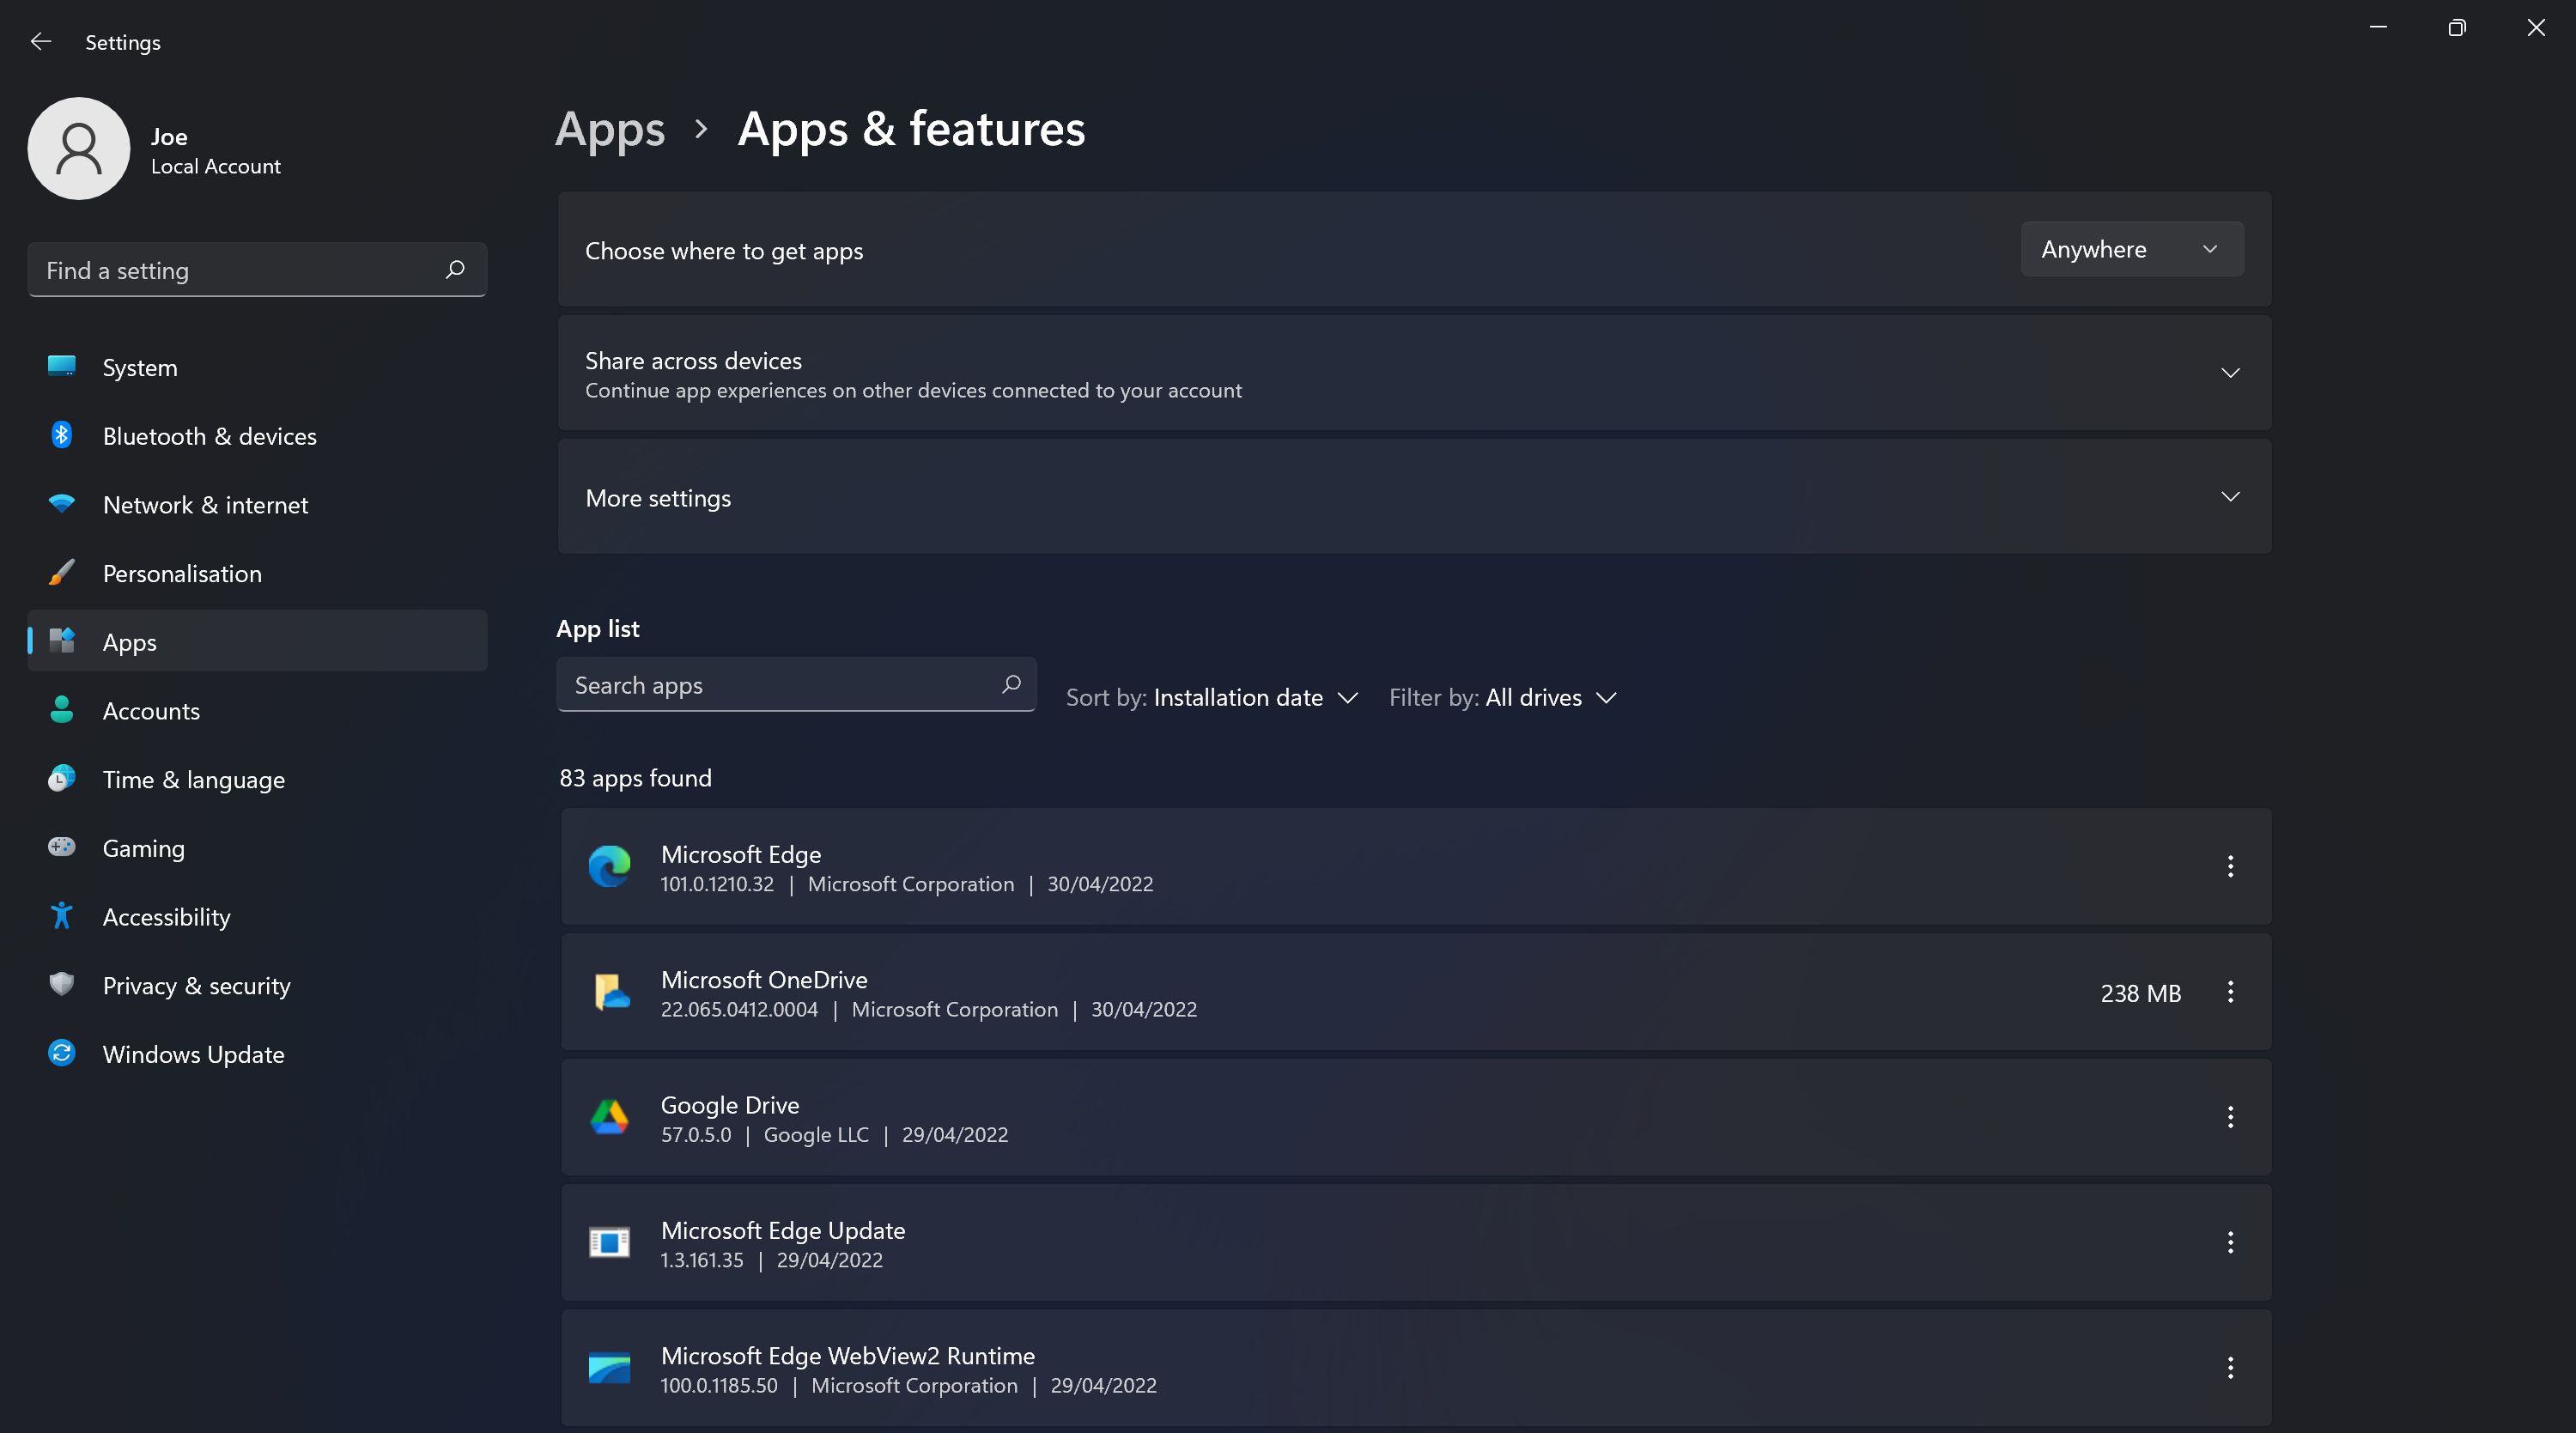
If this doesn’t work, uninstall the program. To do so:
- PressWindows Key + I to open Settings.
- ClickApps >Apps & features .
- ClickSort by and chooseInstallation date .
- Click the offending app and clickUninstall . You may need to restart your system for the changes to take full effect.
6. Create a New Windows User Profile
How do you stop your laptop or computer screen from flickering? Well, many Windows 10 and Windows 11 problems can often be solved by creating a new user profile . Screen flickering is one of them.
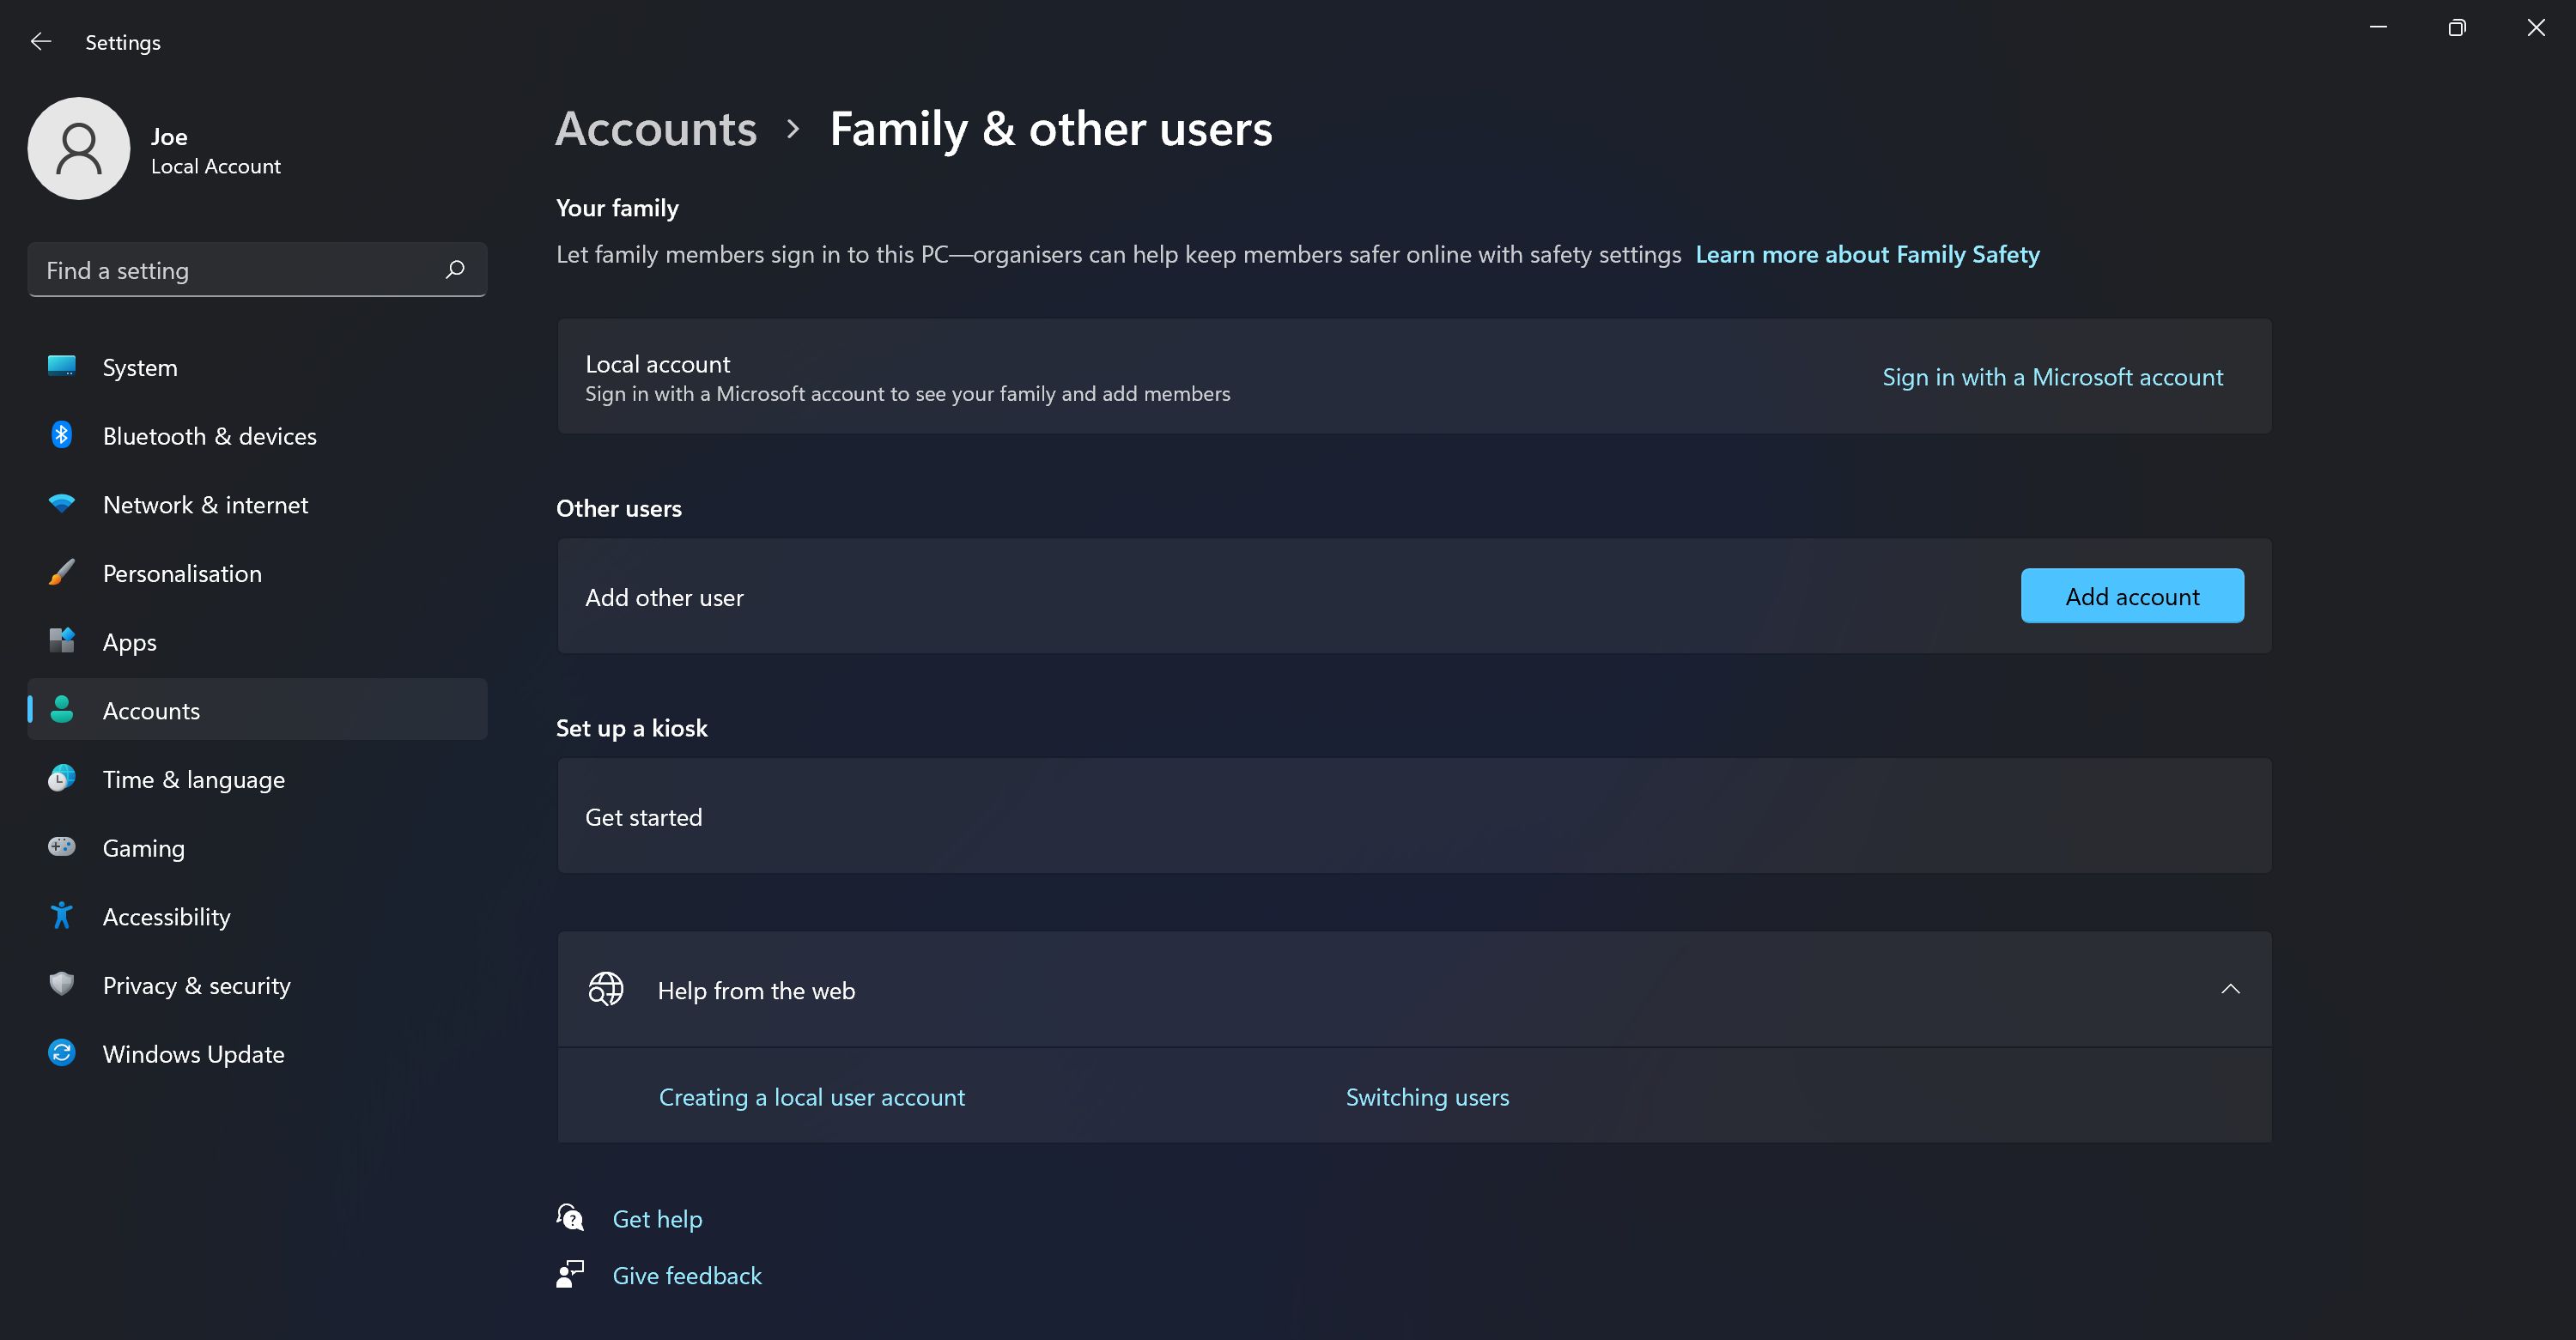
To create a new account:
- PressWindows Key + I to open Settings.
- Go toAccounts > Family & other users .
- ClickAdd someone else to this PC (Windows 10) orAdd account (Windows 11) and follow the wizard.
Windows Screen Flickers… No More
As with most Windows 10/11 issues, no single fix will work for everyone. Hopefully, one of the steps above has solved your Windows 10 or Windows 11 screen flashing problem.
If it is time for a new monitor, there are plenty of productive and fun things you can do with the old one. Otherwise, take it off for recycling so it can rest in monitor heaven.
- Title: Solving Screen Glitches in Windows 11: A Step-by-Step Guide
- Author: Joseph
- Created at : 2024-08-15 16:08:42
- Updated at : 2024-08-16 16:08:42
- Link: https://windows11.techidaily.com/solving-screen-glitches-in-windows-11-a-step-by-step-guide/
- License: This work is licensed under CC BY-NC-SA 4.0.

 PCDJ DEX 3 for Windows & MAC is the total entertainment DJ software solution, offering audio, video, and karaoke mixing ability. Automatic beat-sync, smart looping, 4 decks, DJ MIDI controller support, Karaoke Streaming and much more.
 Forex Robotron Basic Package