Set Up Wi-Fi Cost Meter on Windows 11

Set Up Wi-Fi Cost Meter on Windows 11
If you’re using a capped internet connection, such as a mobile hotspot, you’d want to limit your Windows PC’s background data usage. That way, you ensure that background processes, like OneDrive or Steam, do not use up all your data while your computer’s on.
But how do you configure your PC to treat a Wi-Fi network as a metered or unmetered connection? Luckily, Windows 11 provides a couple of different ways to enable or disable metered connections for a Wi-Fi network. Let’s go over both of them in detail.
Disclaimer: This post includes affiliate links
If you click on a link and make a purchase, I may receive a commission at no extra cost to you.
1. Enable or Disable Metered Connections for a Wi-Fi Network Using the Settings App
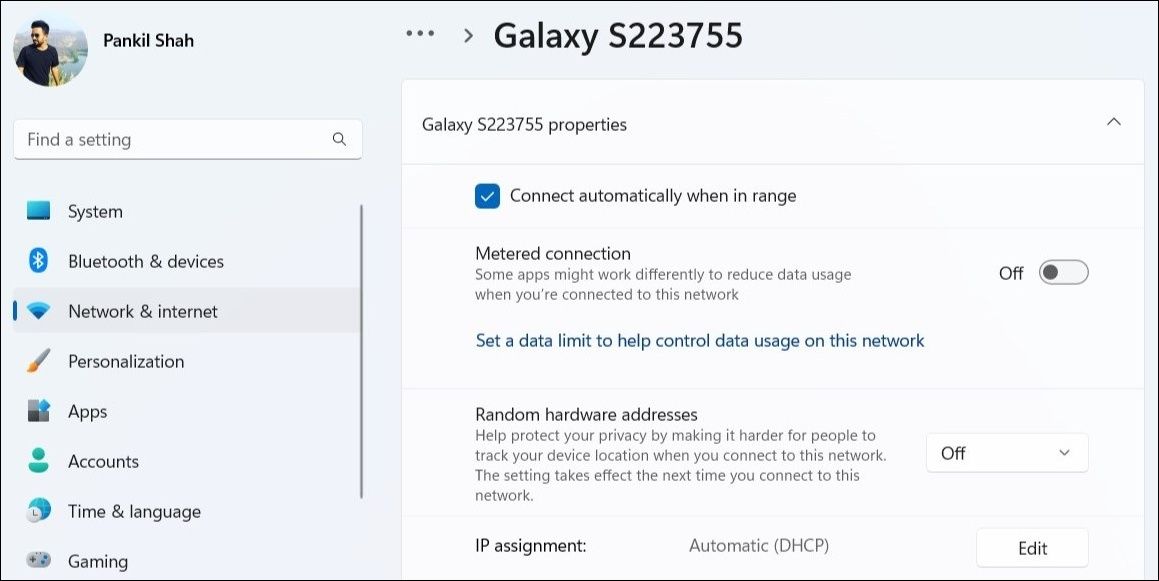
TheNetwork & internet section in the Settings app serves as a central location for all the network-related settings on Windows. You can visit that section to quickly enable or disable a metered connection for your computer’s Wi-Fi network. Here are the steps for the same.
- Open theStart menu and click thegear-shaped icon tolaunch the Settings app .
- SelectNetwork & internet from the left sidebar.
- Click onWi-Fi from the right pane.
- Go toManage known networks .
- Select the network you want to configure.
- Enable the toggle next toMetered connection to set the Wi-Fi network as metered. If you want to set the network as an unmetered connection, disable the toggle.

Note that you’ll have to repeat the above steps for each Wi-Fi network separately. Following that, Windows will remember your network preferences.
2. Enable or Disable Wi-Fi Metered Connections via the Command Prompt
If you’re a power user who prefers to make system changes with a command-line tool, you can use theCommand Prompt to enable or disable metered connection for a Wi-Fi network on Windows. Here’s how you can go about it.
Right-click theStart icon or use theWin + X keyboard shortcut to open the Power User menu.
SelectTerminal (Admin) from the list.
SelectYes when the User Account Control (UAC) prompt appears.
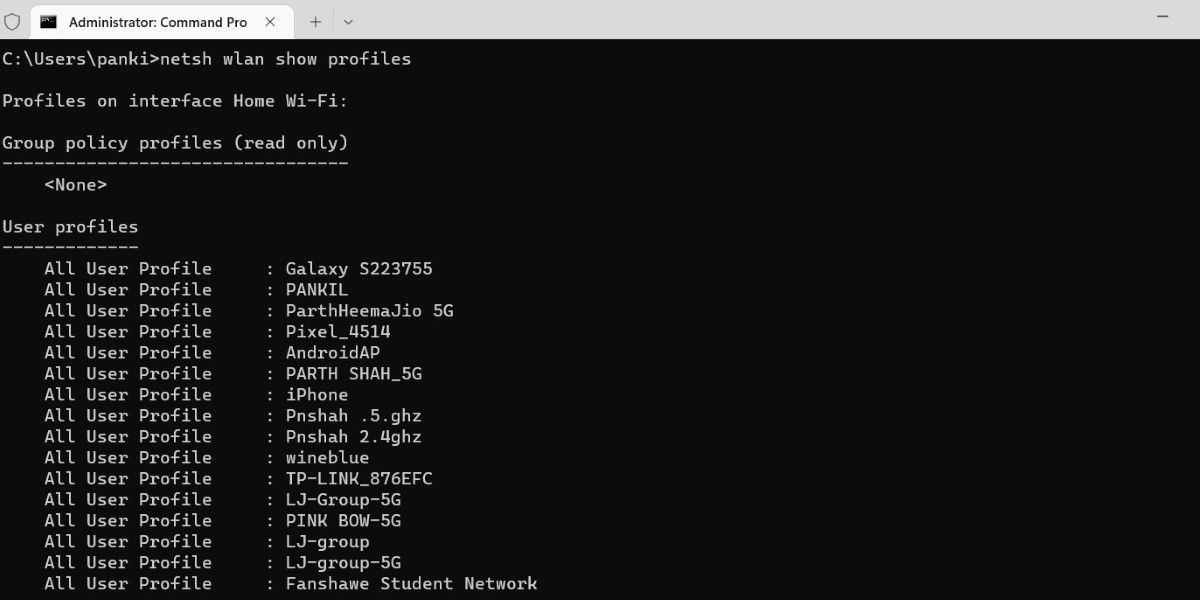
In the terminal window, type the following command and pressEnter to view a list of network profiles on your computer:
netsh wlan show profiles
Note down the Wi-Fi network name for which you want to enable or disable the metered connection option.
Next, run the following command to determine whether your connection is metered or unmetered.
netsh wlan show profile name="Wi-Fi Name"
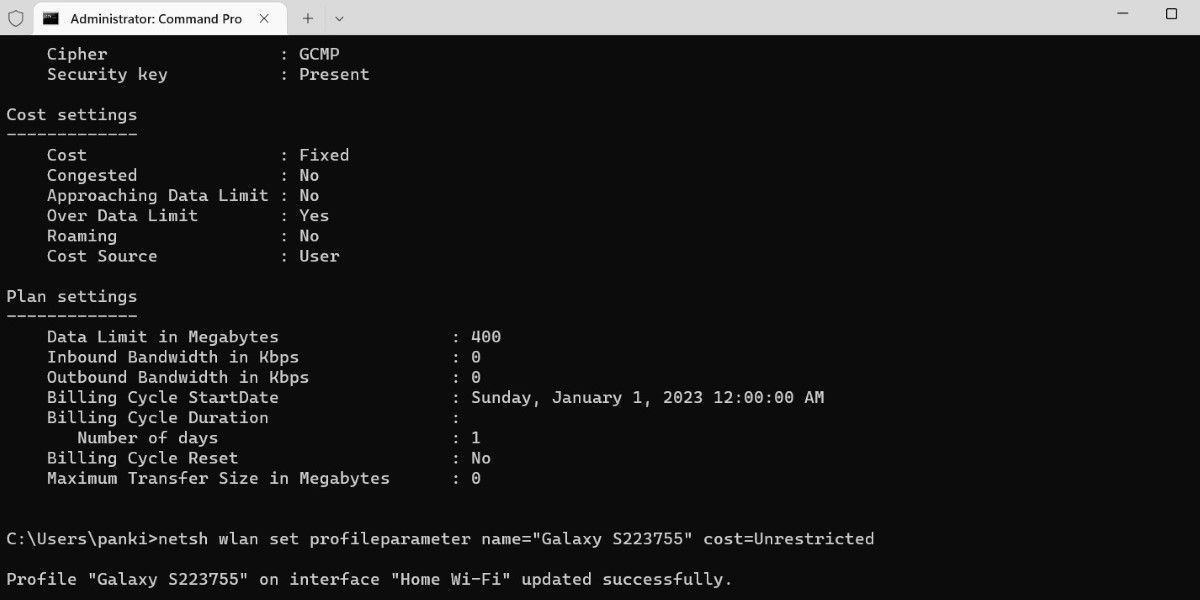
Make sure you replaceWi-Fi Name in the above command with the actual name of the network noted in the last step.Under theCost settings section, check the value next to theCost field. If it readsFixed , the network is set as a metered connection. Conversely, if it readsUnrestricted , it is designated as an unmetered connection.
Type the following command and pressEnter to mark the network as a metered connection.
netsh wlan set profileparameter name="Wi-Fi Name" cost=Fixed
If you want to disable the metered connection for a network, run the following command instead.
netsh wlan set profileparameter name="Wi-Fi Name" cost=Unrestricted
The Command Prompt should display a message once the network profile is updated. After that, you can close the terminal window.
Aside from the above, you can view important details about your Wi-Fi network using the Command Prompt. If you’re interested in doing that, check our guide onthe best commands to manage wireless networks on Windows .
Efficiently Manage Your Data With Metered Connection
Enabling or disabling the metered connection option for Wi-Fi networks in Windows is relatively simple, regardless of the method you use.
If you have a limited data plan, you can also set a data usage limit for your Wi-Fi connection. This way, Windows will notify you when you approach the set data limit.
Also read:
- [New] 2024 Approved Captivating Clips Transforming Footage Vertically in Final Cut X
- [New] 2024 Approved Hitting the High Score in PS4 Game Capture Mastery
- [New] 2024 Approved Ranking the Best Cameras That Don't Feature a GoPro Brand
- [Updated] The Complete Guide to Selecting High-Performance FPV Drone Propellers
- 2024 Approved Unlock Your Earning Potential Maximizing YouTube Revenue on Mobile
- Easy Fixes for the Common Spotify Errors on Win11
- Elevate Video Quality Converter's Triad of Tactics
- Festive Glamour: Inspiring Window Decorations
- How to Re-Position Your qBittorrent on Different Windows Devices
- Making Your Life Easier: Deploying Multiple Apps on Windows 11 via Winstall
- Master Task Manager: Advanced Filters, Personalized Theme Setting Guide (Windows 11)
- Reignite Your Wi-Fi Mouse - Simple Steps for Windows Users
- Resolving Your Google Hangouts Audio Issue - Mic Troubleshooting Guide
- Reveal and Restore Absent Cameras to System List
- Saving the Day: Unraveling Steam Storage Errors
- Solutions for Scaling Problems in Windows High DPI Environments
- Solutions to Windows Admin-Managed Security Issues
- Streamline Your Workflow with Enabled WSL Support
- Taylor Swift in Cinema: How to Enjoy Her Movies Chronologically
- Title: Set Up Wi-Fi Cost Meter on Windows 11
- Author: Joseph
- Created at : 2025-02-24 05:28:27
- Updated at : 2025-03-02 05:38:58
- Link: https://windows11.techidaily.com/set-up-wi-fi-cost-meter-on-windows-11/
- License: This work is licensed under CC BY-NC-SA 4.0.


