
Reviving Non-Active Thermal Management on PCs
Reviving Non-Active Thermal Management on PCs
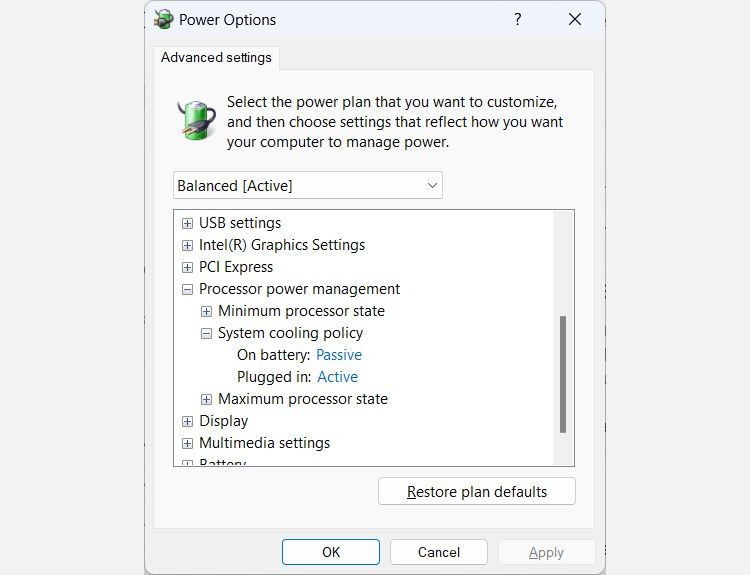
Normally, you should be able to find and set the system cooling policy in the Power Options menu. However, if you find that it’s missing, you can bring it back using PowerShell or by making a simple registry tweak.
Here’s how to do that.
How to Fix a Missing System Cooling Policy Using PowerShell
For this method, start by pressingWin + S to bring up Windows search. Typepowershell in the search box and click onWindows PowerShell in the search results.
Next, enter the below command in PowerShell and then hit theEnter key to run it:
powercfg -attributes SUB_PROCESSOR 94D3A615-A899-4AC5-AE2B-E4D8F634367F -ATTRIB_HIDE
Now you can go ahead and set the policy. If you need a refresher on how to do that, please read our guide on what the Windows system cooling policy is and how to set it .
If you want to hide it again after you’ve set it, you can enter the following command and then pressEnter to run it:
powercfg -attributes SUB_PROCESSOR 94D3A615-A899-4AC5-AE2B-E4D8F634367F +ATTRIB_HIDE
If you go back to the Power Options menu, you’ll find that it’s gone.

How to Fix a Missing System Cooling Policy Using the Windows Registry
Another way to fix the system cooling policy missing from Power Options is by editing the Windows Registry. Before you proceed, please make a copy of it so you have something to restore if something goes wrong. To do that please read our guide on how to backup and restore the Windows Registry .
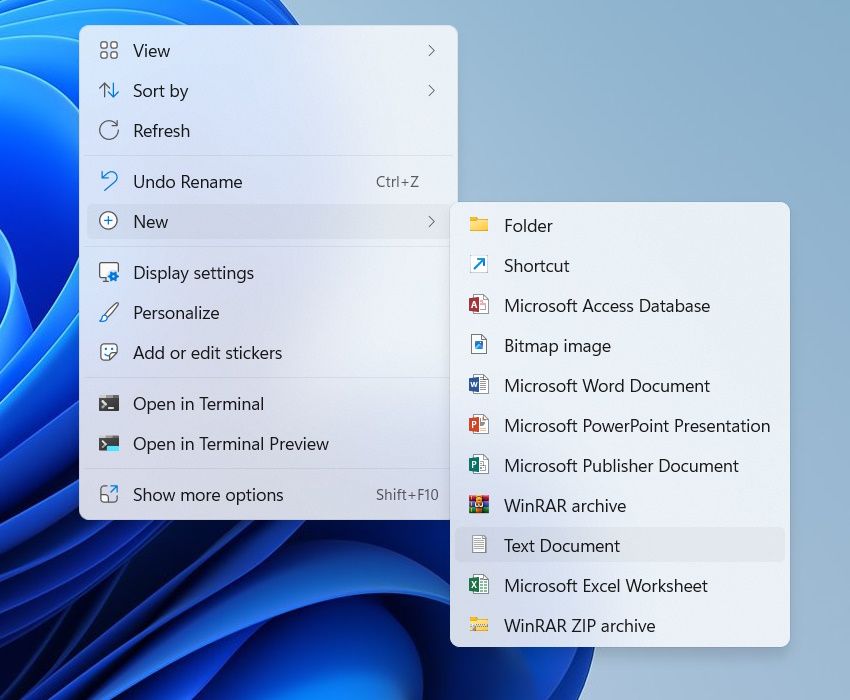
Next, click on an empty part of the desktop and selectNew > Text document and name itadd-system-cooling-policy.reg . You’ve basically created a registry file on Windows here.

In the text document, enter the following code:
Windows Registry Editor Version 5.00 [HKEY_LOCAL_MACHINE\SYSTEM\CurrentControlSet\Control\Power\PowerSettings\54533251-82be-4824-96c1-47b60b740d00\94d3a615-a899-4ac5-ae2b-e4d8f634367f]"Attributes"=dword:00000002
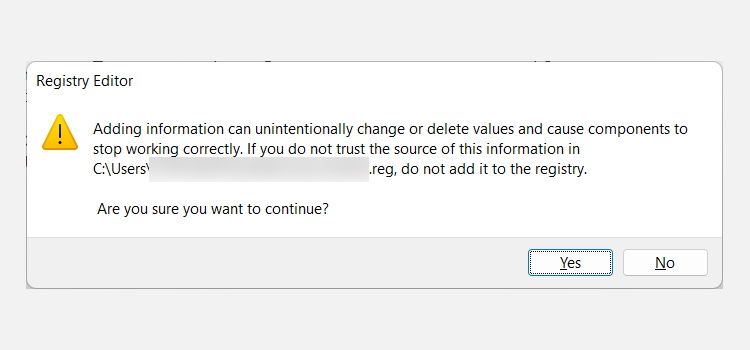
Save the file by clickingFile > Save . Next, double-click on the registry file and then clickYes on the UAC prompt. In the pop-up, clickYes to merge the keys and values in the registry file with the Windows Registry.

You should now see the system cooling policy in the Power Options menu.
To remove the system cooling policy again after you’ve made your changes, create another registry file namedadd-system-cooling-policy.reg . Then, paste the below text into the document and save it:
Windows Registry Editor Version 5.00 [HKEY_LOCAL_MACHINE\SYSTEM\CurrentControlSet\Control\Power\PowerSettings\54533251-82be-4824-96c1-47b60b740d00\94d3a615-a899-4ac5-ae2b-e4d8f634367f]"Attributes"=dword:00000001
Once you run this file, the system cooling policy will be hidden again in the Power Options menu.
Bringing Back the System Cooling Policy on Windows
Now that the system cooling policy has returned you can tweak it to your liking. We have even shown you how to hide it again in case you don’t want others messing with it. If these methods don’t work, you might have another problem with your computer.
- Title: Reviving Non-Active Thermal Management on PCs
- Author: Joseph
- Created at : 2024-08-15 16:10:39
- Updated at : 2024-08-16 16:10:39
- Link: https://windows11.techidaily.com/reviving-non-active-thermal-management-on-pcs/
- License: This work is licensed under CC BY-NC-SA 4.0.