
Rectify Windows Error: Reestablishing Java VM
Rectify Windows Error: Reestablishing Java VM
Your Windows 11 computer may require the latest version of Java installed for some applications to work. However, sometimes some Java apps may abruptly crash with the error Could not create the Java virtual machine.
This error is often a case of insufficient memory allocation for Java apps. Additionally, check for permission issues and glitches with the Java release itself. If you are using it on your work computer for programming purposes, check if you have the correct version of Java IDE installed.
Here we show you a few troubleshooting steps to fix the could not create the java virtual machine error on Windows.
1. Verify Your Java Installation

Verifying your Java installation can help you determine issues with the release itself. You can use thejava -version command in Command Prompt to check the current version of Java installed along with the date of installation.
To check the Java version installed on Windows:
- Press theWin key and typecmd .
- Right-click onCommand Prompt and selectRun as administrator .
- In the Command Prompt window, type the following command and pressEnter :
java -version - The output will list the JDK version installed on your computer and the installation date.
- If you have recently installed an update, check if the information checks out. If not, try to install the latest version available from the Java website .
2. End the Java Process in Task Manager
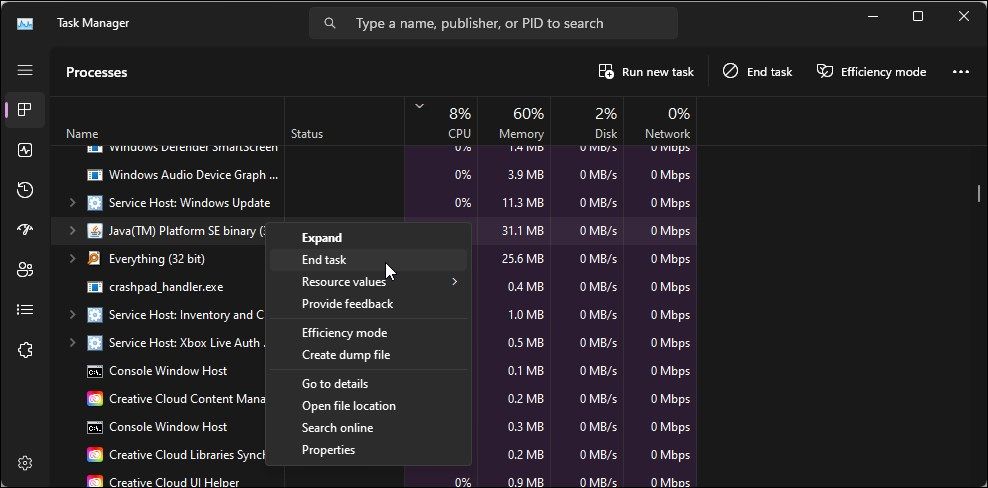

If the error is triggered when installing Java, check if a Java process is running in the background. You can use Task Manager to find and end background processes that may prevent you from installing the Java Runtime Environment or the development kit.
- PressWin + X to open theWinX menu and selectTask Manager .
- In Task Manager, open theProcesses tab and locate instances ofJava Virtual Machine .
- Select and clickEnd Task to close the process.
3. Run Java as an Administrator
Insufficient permission can prevent some Java apps from running on your computer. To fix the problem, run Java with administrative privilege. To run Java as an administrator on Windows, right-click onJava.exe and selectRun as administrator .
Alternatively, you can set the Java.exe to always run as administrator. This way, you don’t need to run Java with administrative privileges each time you want to launch it. Check out how to always run a program as an administrator for more information.
 PDF application, powered by AI-based OCR, for unified workflows with both digital and scanned documents.
 4. Increase the System Memory for Java
A common reason for the Could not create the Java virtual machine error is insufficient memory allocation, also known as Java heaps. Insufficient memory allocation can throttle the performance or cause the app to crash.
To remedy this issue, you can increase the Java heap size. You can do this by modifying theRuntime Parameters fromJava Runtime Environment Settings or changing the_JAVA_OPTIONS variable value to your preference.
How to Increase Java Heap Size by Manually Modifying Variables
To change Java heap size by modifying the _JAVA_OPTIONS variable:
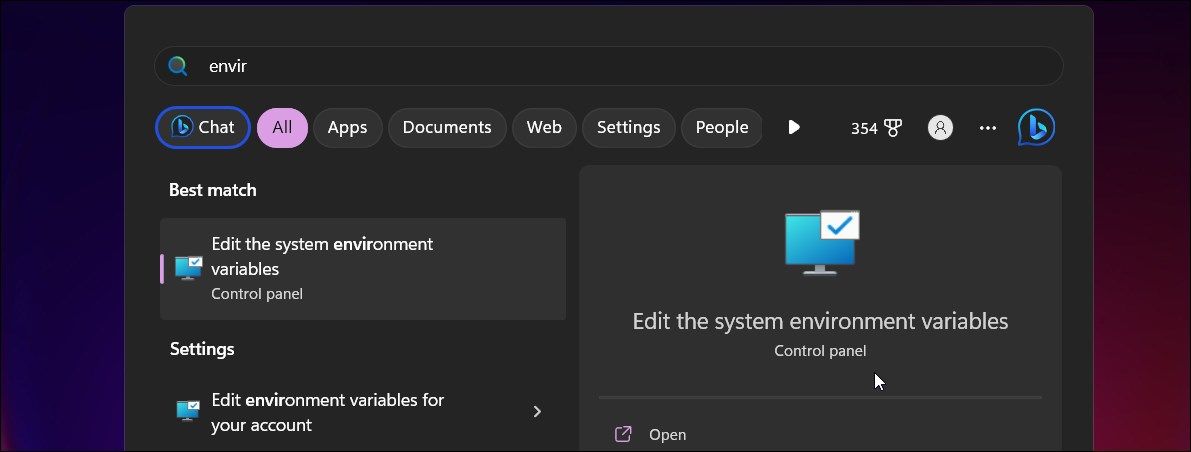
- Press theWin key and typeenvironmental variables .
- Next, selectEdit the system environment variables to openSystem Properties .
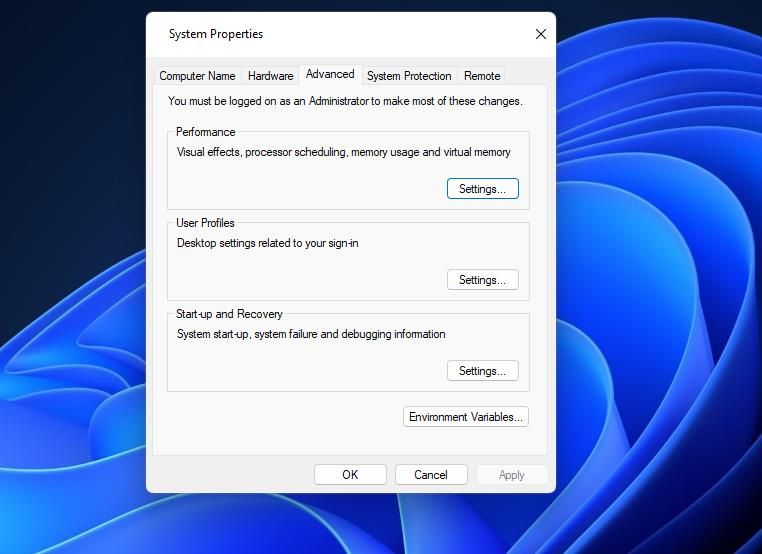
- In theAdvanced tab, clickEnvironment Variables .
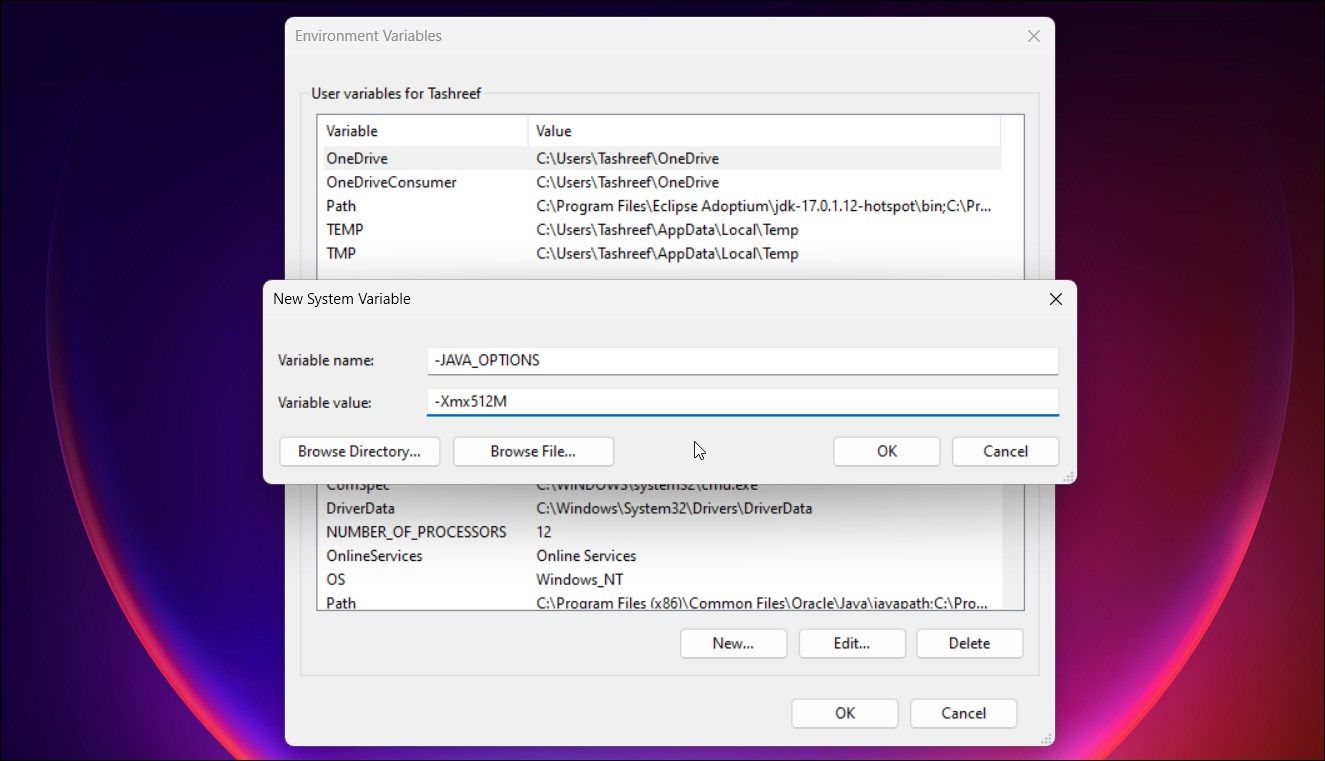
- In theSystem Variables section, clickNew . It is important to select the correct section.
- Type-JAVA_OPTIONS in theVariable name field.
- Next, type-Xmx512M in theVariable value field. Here,-Xmx512M defines the amount of memory you want to allocate. In this case, it is512MB of system memory.
- ClickOK , andOK once more to save the changes.
Next, launch the app that shows the error and check if the error is resolved. If not, openEnvironmental Variables again. Select the -JAVA_OPTIONS variable and clickEdit . In theValue data field, type-Xmx1024M to increase the memory size to 1024 MB (1GB) . ClickOK and check for any improvements.
How to Increase Java Heap Size Using the Java Control Panel
You can also modify the default Java heap size from Java Runtime Environment Settings. Here’s how to do it.
- PressWin + R to openRun .
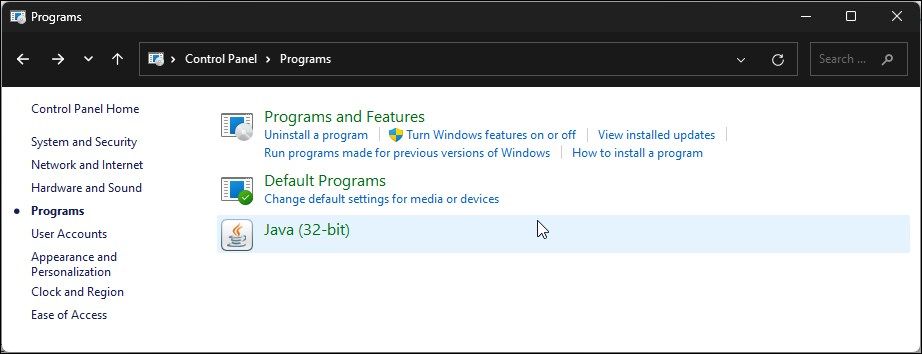
- Typecontrol and clickOK to open Control Panel.
- Next, click onPrograms and click onJava (32-bit) .
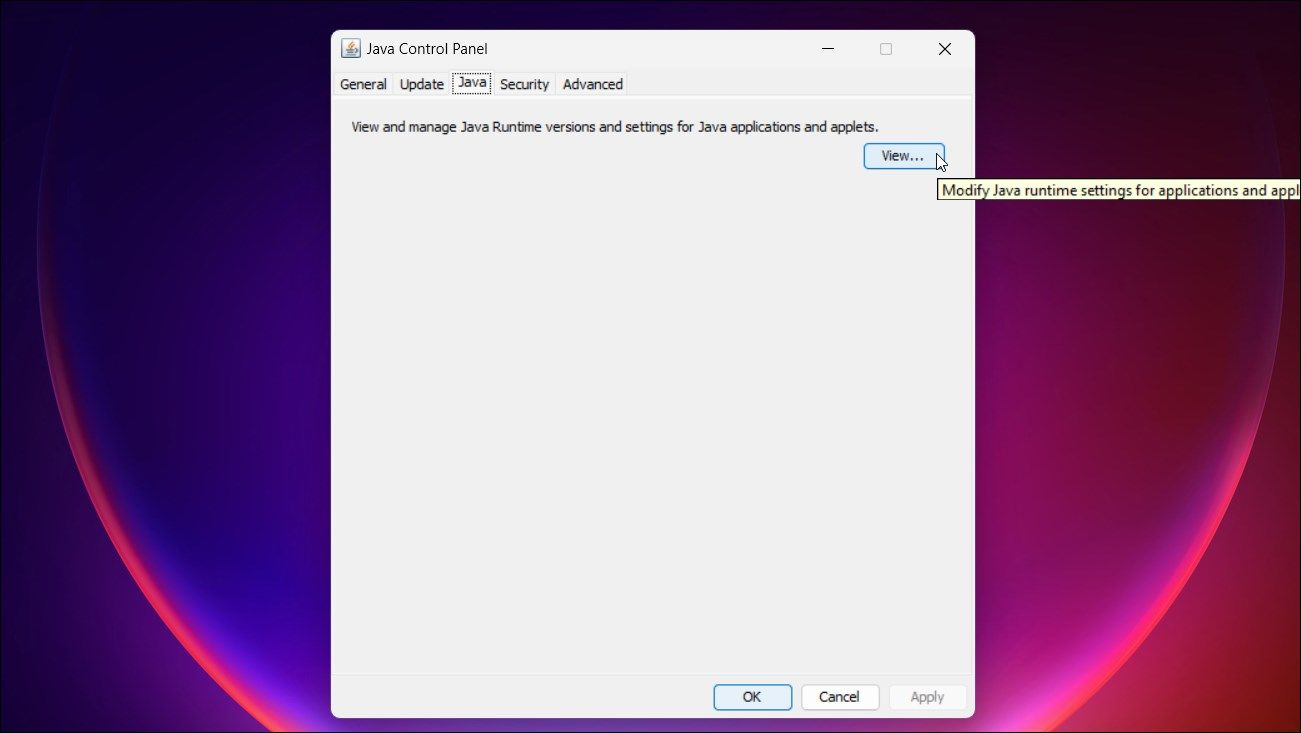
- In theJava Control Panel dialog, open theJava tab.
- Click theView button.
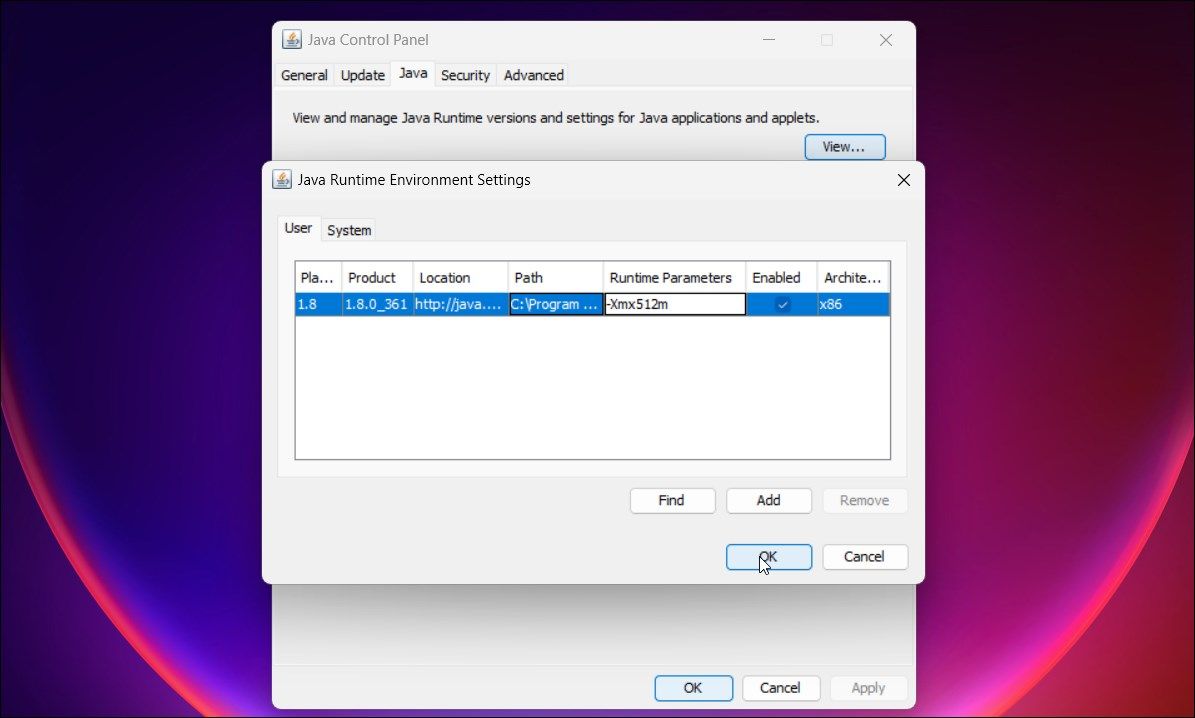
- Double-click on theRuntime Parameters column and type-Xmx512m to assign 512 MB memory for the Java apps.
- ClickOK to save the changes.

 PaperScan Professional: PaperScan Scanner Software is a powerful TWAIN & WIA scanning application centered on one idea: making document acquisition an unparalleled easy task for anyone.
5. Uninstall and Reinstall Java

If the issue persists, a reinstall may be necessary. You can uninstall and reinstall Java to fix any issues with the release. These issues may remain even if you install a newer version. To fix the issue, uninstall Java using the Java uninstaller and then reinstall the latest version available.
To clean install Java:
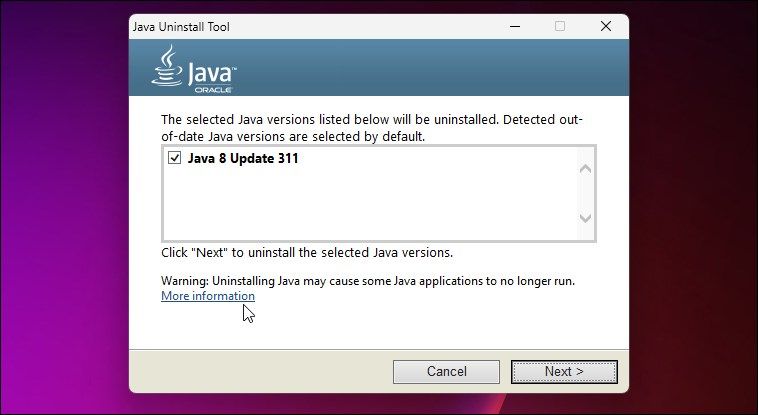
- Go to the Java Uninstall Tool page and download the uninstaller.
- Run the executable and clickAgree .
- Select all the versions of Java detected by the tool and clickNext .
- ClickYes and wait as the uninstaller removes Java from your computer. ClickClose .
- Restart your computer to apply the changes.
- Next, go to the Java Downloads page and download the latest version available for your operating system. Make sure to download the correct version (32-bit/64-bit), depending on the system architecture.
- Run the installer and clickInstall . Follow the on-screen instructions to complete the installation and restart your computer.
6. Install Java in a WindowsClean Boot State
In Clean Boot State, Windows starts with only essential Microsoft services and apps. It’s a troubleshooting method to determine and find third-party app conflicts causing system errors. If you continue to see the error when installing Java,start your Windows computer in a clean boot state and try installing it again.
Fixing the “Could Not Create the Java Virtual Machine” Error on Windows
Insufficient Java heap size is what often triggers the Java virtual machine error. To fix the issue, modify the default heap size to be able to run Java apps without any problems.
If the error occurs when installing Java, try to install the app in a clean boot state. Installing pending Windows updates can also help fix compatibility issues with the release.
- Title: Rectify Windows Error: Reestablishing Java VM
- Author: Joseph
- Created at : 2024-08-15 16:08:31
- Updated at : 2024-08-16 16:08:31
- Link: https://windows11.techidaily.com/rectify-windows-error-reestablishing-java-vm/
- License: This work is licensed under CC BY-NC-SA 4.0.