
Pushing Boundaries: My Quest to Overcome App Guard Censorship
Pushing Boundaries: My Quest to Overcome App Guard Censorship
Microsoft’s Application Guard for Edge is a great tool to shield your browsing from malicious interference. For extra protection, both the camera and microphone are deactivated by default in this environment; however, there may be times when you need these features enabled to utilize certain web applications.
If that’s the case, follow this guide which will show you how to enable the camera and microphone in Application Guard for Edge on Windows 11.
1. How to Enable the Camera and Microphone via Windows Settings
To enable the camera and microphone in Application Guard for Edge, follow the steps below:
- Click on Start, typeSettings and pressEnter .
- On the left side of the screen, selectPrivacy & security .
- Click theWindows Security option on the right.
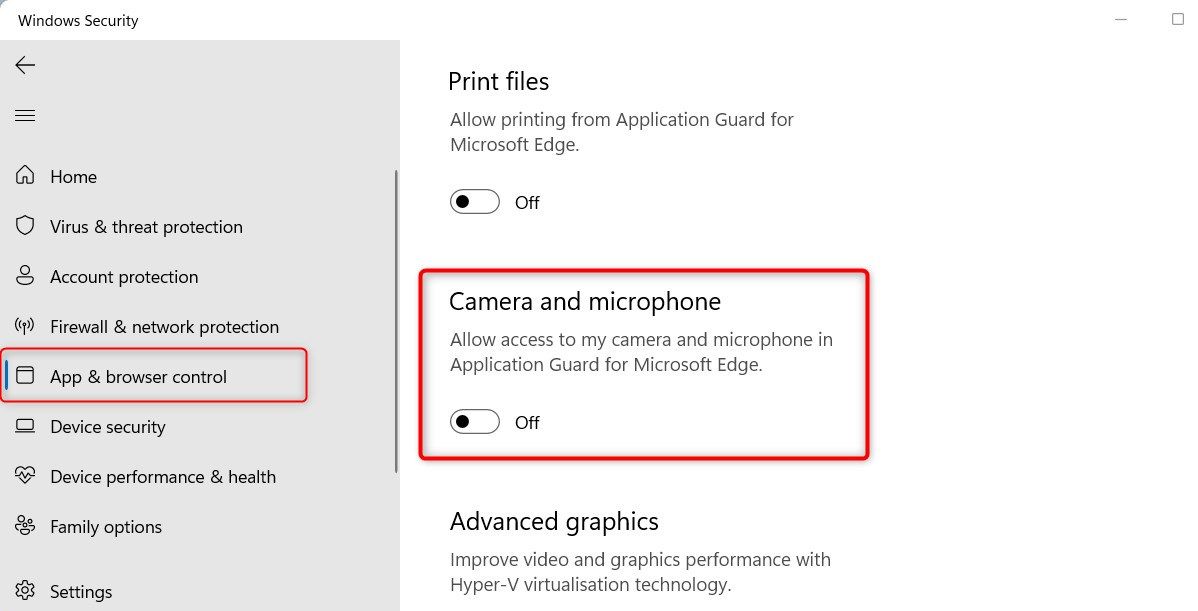
- Then, on the next screen, selectApp & browser control .
- In the new window that opens, clickChange Application Guard settings under Isolated browsing.
- Look for theCamera and microphone option, and then toggle it on.

- If the UAC prompt appears, clickYes to continue.
After you perform the above action, restart your computer for the changes to take effect. Upon restarting, all your camera and microphone settings should now be applied to the Application Guard for Edge.
In case you need to turn off the feature again, just follow the same steps and toggle the Camera and microphone option to Off. That’s all there is to it.

2. How to Enable the Camera and Microphone Using Registry Editor
If you are more comfortable using the registry editor, you can enable your camera and microphone for Application Guard for Edge. All you need to do is open up the registry folder, make a few easy modifications, and restart your computer so that they can take effect.
However, before you make any changes, it’s essential that you create a backup of the registry file just in case something goes wrong.
To enable your mic & camera with the help of this tool, follow these steps:
- Search forregedit in the Windows search bar and click on the result to open the registry editor. To find out more, see how to open the registry .
- When the UAC prompt appears, clickYes to confirm.
- In the Registry Editor window, go to the following location:
Computer\HKEY_LOCAL_MACHINE\SOFTWARE\Microsoft\Hvsi
Copy and paste the given location into the address bar at the top of the registry window and press Enter to quickly jump to the folder. - If you don’t see theHvsi key there, you need to create it first. In order to do this, right-click on theMicrosoft folder and selectNew > Key .
- Name the fileHvsi , then hitEnter to save it.
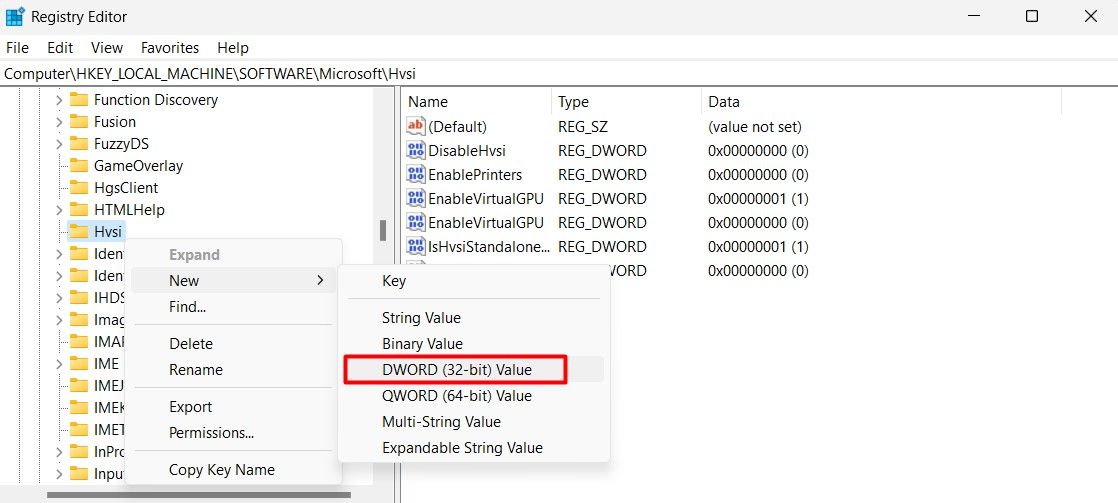
- Right-click on Hvsi, chooseNew > DWORD (32-bit) Value , then name itEnableCameraMicrophoneRedirection .
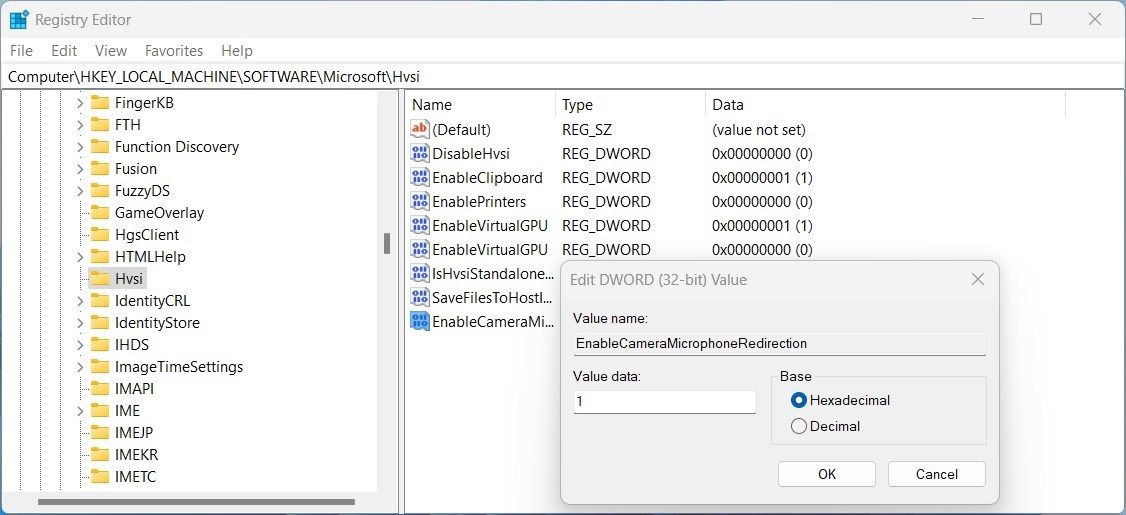
- Now double-click on the newly created DWORD key, and you will see a pop-up window appear.
- Be sure theHexadecimal base is selected, and set the Value data to1 .
PDF application, powered by AI-based OCR, for unified workflows with both digital and scanned documents.
- Then clickOK to save the changes.
 PDF application, powered by AI-based OCR, for unified workflows with both digital and scanned documents.
 Once you’ve done editing the registry, restart your computer to apply the changes. After restarting, Edge’s Application Guard will be able to access your camera and microphone hardware for websites that require it.
If you want to revert the changes, simply set the EnableCameraMicrophoneRedirection key’s value back to0 and restart your computer.

Your Camera and Mic Is Now Supported in Edge Application Guard
Application Guard for Edge is a tool that serves as an extra layer of protection from malicious websites and other threats. By default, your camera and microphone are disabled to ensure maximum security. In this guide, we’ve explained two quick ways in which you can easily activate these features - via Windows Settings or Registry Editor.
- Title: Pushing Boundaries: My Quest to Overcome App Guard Censorship
- Author: Joseph
- Created at : 2024-08-15 16:07:32
- Updated at : 2024-08-16 16:07:32
- Link: https://windows11.techidaily.com/pushing-boundaries-my-quest-to-overcome-app-guard-censorship/
- License: This work is licensed under CC BY-NC-SA 4.0.