
Precise Strategies: Resetting Razer's System Integration
Precise Strategies: Resetting Razer’s System Integration
Razer Synapse is the software for configuring Razer peripherals, such as mice, keyboards, and headphones. However, this software has its fair share of technical hiccups that prevent it from starting for some users. Razer Synapse might throw up an error message like “Failed to start” or not open without showing any message when such hiccups arise.
Razer Synapse not working means users can’t open and utilize that software when needed. Is your Synapse software effectively broken as well? If so, this is how you can fix Razer Synapse not opening on a Windows 11/10 PC.
1. Run Synapse in Compatibility Mode
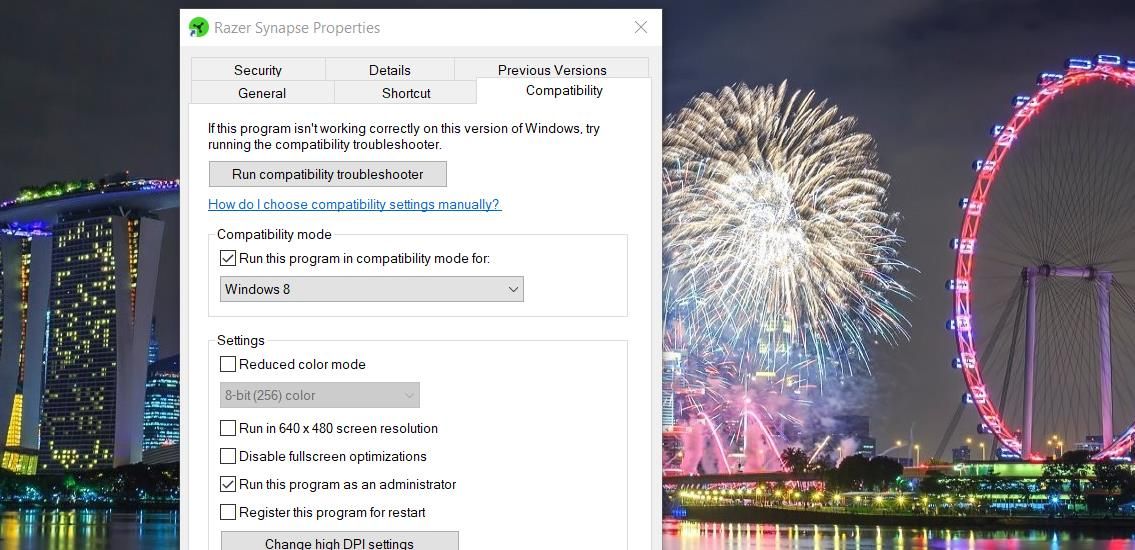
Some users confirm running Synapse in compatibility mode can help to fix that software not starting. You can run Synapse in compatibility mode as follows:
- If you have a Razer Synapse desktop shortcut, right-click on it and select Properties. Or right-click the Razer Synapse.exe file in the Razer Synapse 3 Host subfolder within the Synapse3 installation directory.
- Select Properties on Synapse’s context menu.
- Click Compatibility to access options on that tab.
- Select the checkbox labeled Run this program in compatibility mode.

- Choose Windows 8 on the compatibility drop-down menu.
- Press Apply to set the new compatibility setting.
- Click OK to exit Synapse’s properties window.
 Project Manager - Asset Browser for 3Ds Max
2. Set Synapse to Run as An Administrator
A lack of system admin permissions can sometimes be a cause for Razer Synapse not working. To address that, open the Compatibility tab for Synapse as covered within steps one to three of the previous resolution. Select the Run as administrator option on the Compatibility tab and click Apply > OK.

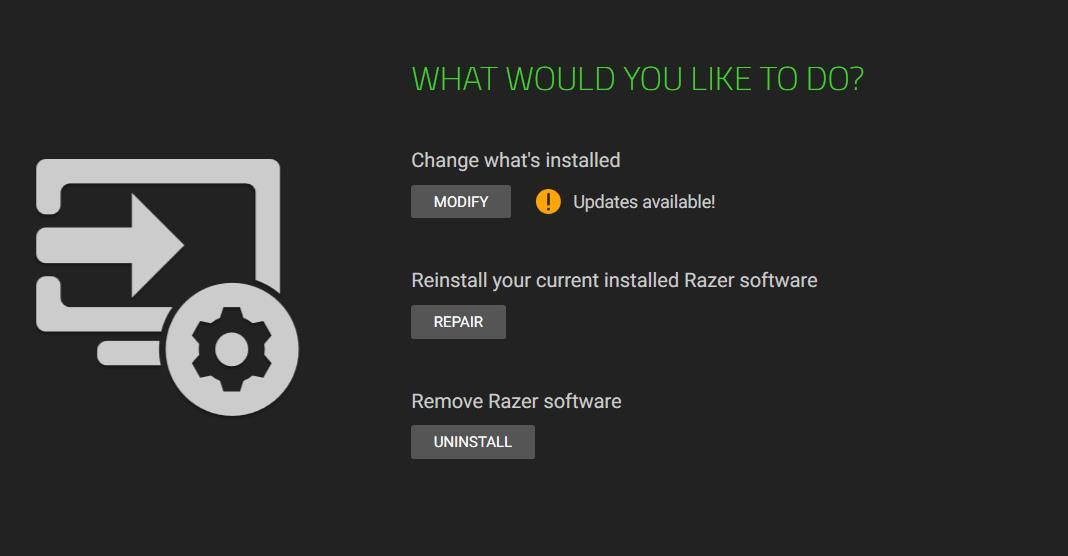
3. Select to Repair Razer Synapse
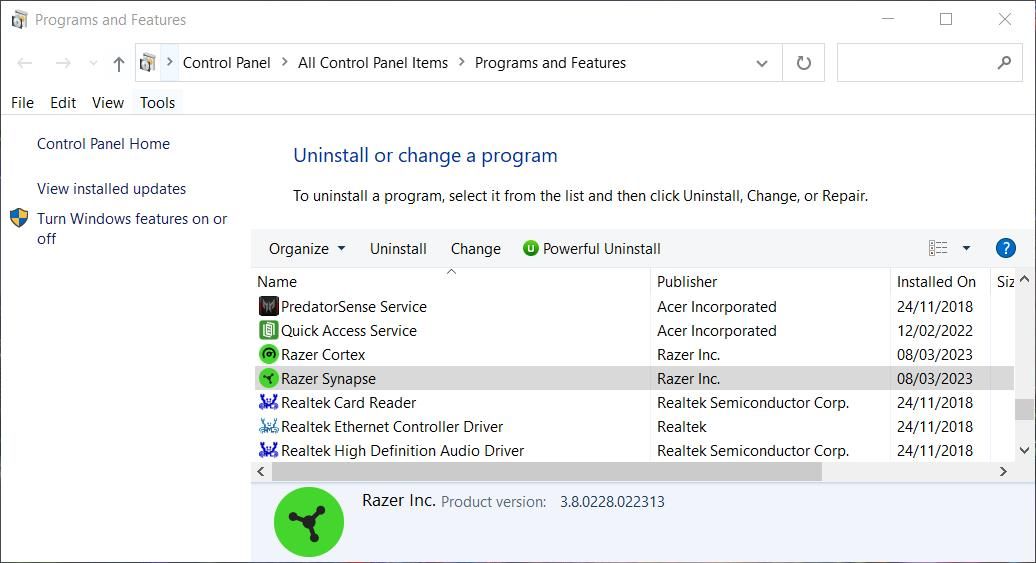
Synapse has a Repair troubleshooting you can select to resolve issues with that software. That option is available within the uninstall window for Synapse. This is how you can select to repair Razer Synapse:
- First, press the Windows key + R to input an appwiz.cpl command into the Run dialog, and select the OK option to open Programs and Features .
- Select the Razer Synapse software listed within Programs and Features.
- Click the Change button for Razer Synapse.
- Press the Repair button.

4. Start or Restart the Razer Services
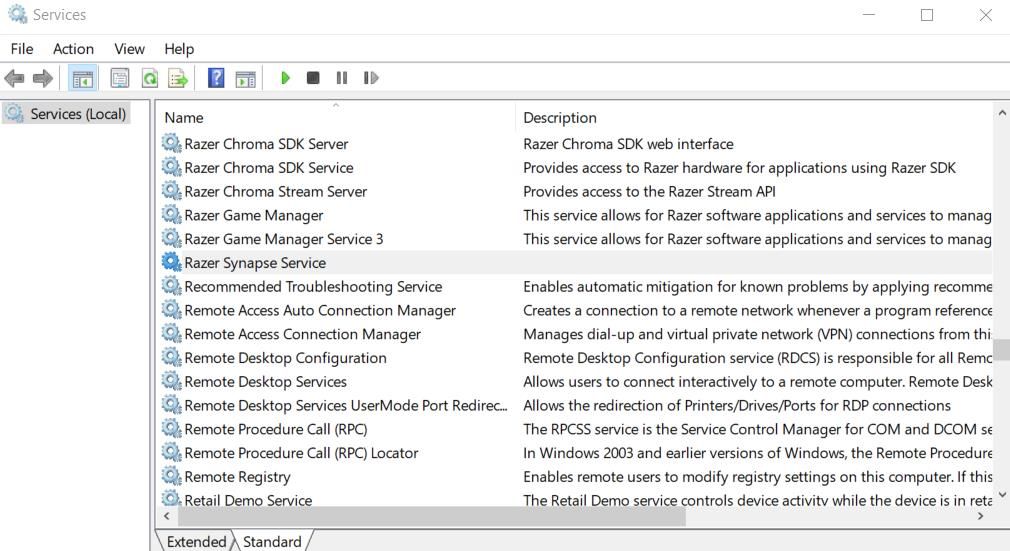
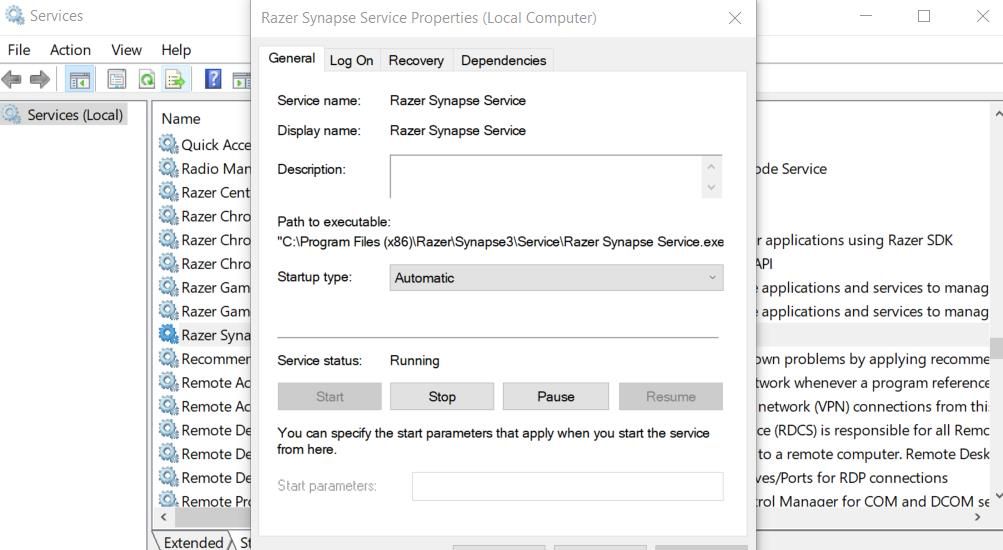
A couple of services need to be running for Razer Synapse to work. Some users have fixed Synapse not working by restarting the Razer Synapse Service or Razer Central Service. Try starting those two services as follows:
- Start the Run accessory and input a services.msc command into the Open box.
- Click OK to open the Services app.
- Double-click the Razer Synapse Service.
- If the Razer Synapse Service has been disabled, change the Startup type option to Automatic.
- Click Start within the service’s window.
- Select Apply to save the Razer Synapse Service settings.
- Press OK to exit the service window.
- Repeat steps three to seven for the Razer Central Service.
- If those services are already running when you check them, right-click on them and select Restart. Or you can open the properties windows for the services and click Stop and Start.
5. Clear Razer Synapse’s Cache Data
Razer Synapse has a data folder that includes cache files. Clearing that folder can resolve Synapse issues caused by accumulated or corrupted cached data. You can clear Synapse’s cached data folder by deleting it as follows:
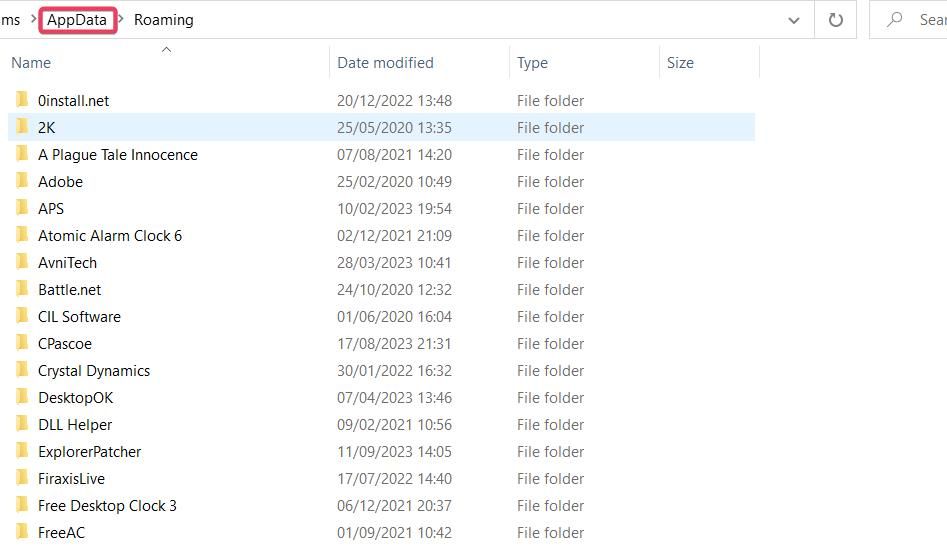
- Open Run and input %appdata% inside that accessory’s text box.
- Click OK to bring up a Roaming folder in Explorer.
- Next, click AppData in Explorer’s address bar to view that directory.
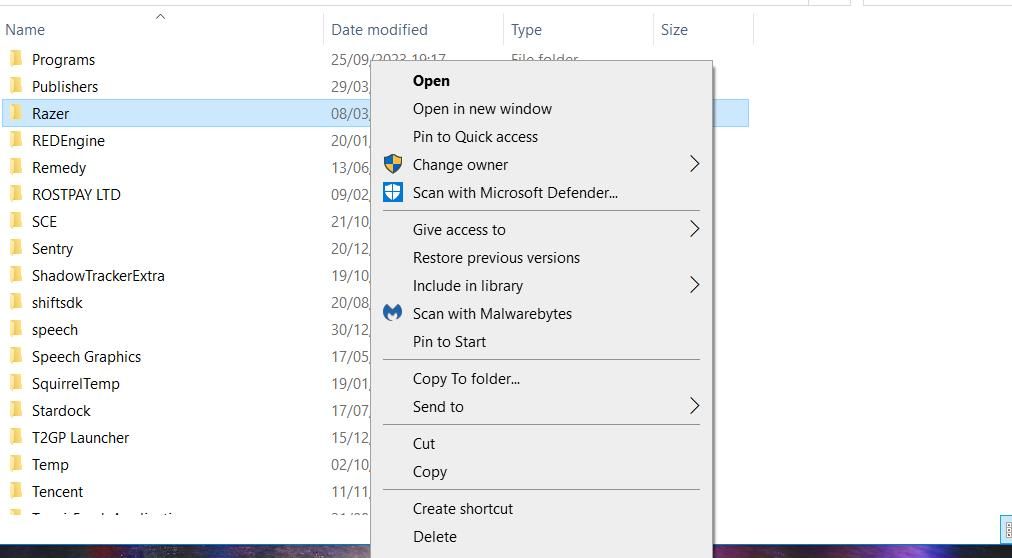
- Double-click the Local folder to open it.
- Right-click the Razer folder in that directory to select Delete.
6. Install .NET Framework 4.8.1
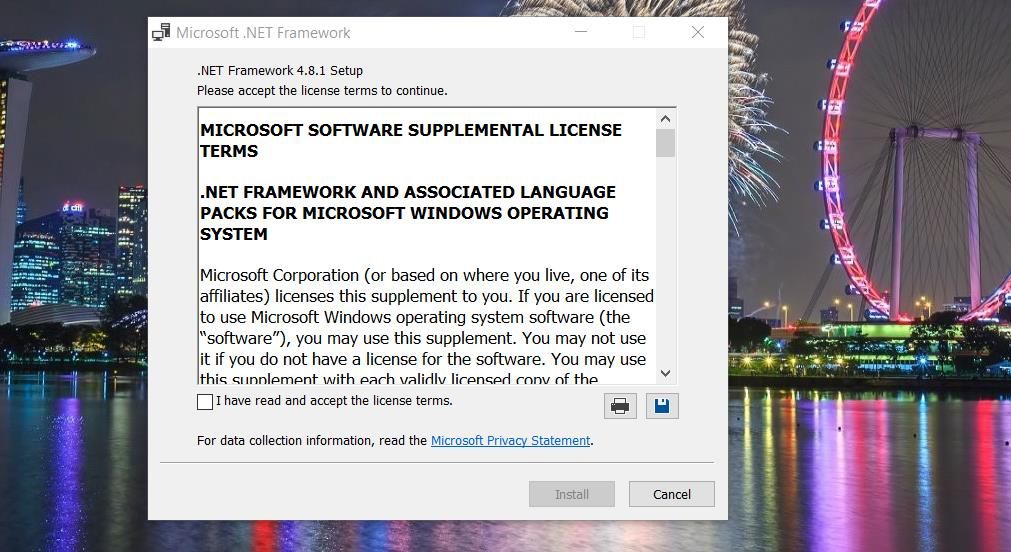
Although a .NET Framework version will likely be installed on your Windows 11/10 PC, you might need to update it for Razer Synapse to work. Try downloading and installing the latest .NET Framework 4.8.1 as follows:
- Open this .NET Framework download page .
- Then click .NET Framework 4.8.1 on that page
- Click the Download .NET Framework 4.8.1 Runtime link on the next page.
- Go into your browser’s Downloads tab and click the NDP481-Web.exe file.
- Select I have read and accept the license terms box.
- Click Install to proceed with the .NET Framework 4.8.1 installation.

You can also try repairing the current .NET Framework installation on your PC. To do so, check out our guide to repairing .NET Framework on Windows PCs .
7. Temporarily Disable Firewalls
Firewalls can cause Synapse startup issues to occur when they’re set to block that software’s internet connectivity. You can quickly check if Microsoft Defender Firewall is causing the issue by disabling it. Follow the instructions in this how to disable Microsoft Defender Firewall guide to apply this potential solution. Then run Razer Synapse with the firewall off.


If the software works with the firewall off, configure MDF to allow Razer Synapse through it. Our article about allowing apps through the Windows firewall tells you how to do so.
This potential resolution also applies to third-party firewalls. Temporarily disable whatever firewall you’ve got installed (or a firewall antivirus component) to see if that makes any difference. If it does, add Synapse to the firewall’s allowed apps list.
8. Uninstall the Razer Surround
Razer Surround is an optional module of the Synapse software. If you’ve installed that module, consider removing it to ensure it does not conflict with the Synapse app. You can uninstall the Razer Surround app with the Programs and Features Control Panel applet as outlined in this guide to removing Windows software .
9. Reinstall Razer Synapse
If other potential resolutions don’t fix Razer Synapse not working, corrupted or missing software files could be causing the issue. In this case, a reinstallation of Synapse will likely be required. To remove the software, click the Change button for Synapse in Programs and Features, as outlined for the first three steps of this guide’s third method, and select Uninstall.
Before reinstalling Synapse, delete any leftover folders and files from the software. You can erase any remaining Synapse data as covered in this guide to deleting leftovers from uninstalled software .
Then go to this Synapse page , click Download Now, and install the software by double-clicking the RazerSynapseInstaller file. When reinstalling Synapse, don’t install any superfluous optional modules, such as Razer Surround. Select to only install Razer Synapse.

Manage Your Razer Devices With Synapse Again
As the potential causes for Razer Synapse not working are varied, it’s not always easy to fix that app when it doesn’t open. You’ll probably need to try a few possible fixes to find one that revives Synapse. However, there’s a good chance one of the above solutions will kick-start Synapse on your Windows 11/10 PC, enabling you to manage your Razer devices again.
Razer Synapse not working means users can’t open and utilize that software when needed. Is your Synapse software effectively broken as well? If so, this is how you can fix Razer Synapse not opening on a Windows 11/10 PC.
- Title: Precise Strategies: Resetting Razer's System Integration
- Author: Joseph
- Created at : 2024-08-15 15:52:04
- Updated at : 2024-08-16 15:52:04
- Link: https://windows11.techidaily.com/precise-strategies-resetting-razers-system-integration/
- License: This work is licensed under CC BY-NC-SA 4.0.