
Power Up Your VMs in Windows Using These Top 6 Enhancers
Power Up Your VMs in Windows Using These Top 6 Enhancers
Virtual machines are a great way to set up test environments, run multiple operating systems, and do much more. However, running virtual machines on a low-end PC may affect its overall performance.
Virtual machines require heavy system resources to create a clone and run an operating system. So, let’s look at some easy steps to improve your Windows virtual machine performance
1. Allocate Enough System Resources to the Virtual Machine
The first step is allocating enough resources for your virtual machine so it can do its job properly. It’s entirely up to you how many system resources you want to allocate to your virtual machine.
For this article, we will demonstrate the steps using a free VM manager called Oracle VM VirtualBox . The general settings, steps, and names may change if you use a different VM manager.
Here’s how you can allocate more system resources to your VM on Windows:
- Open your VM manager and open the menu from where you can access all your VMs.
- Navigate to your current VM’s settings menu.
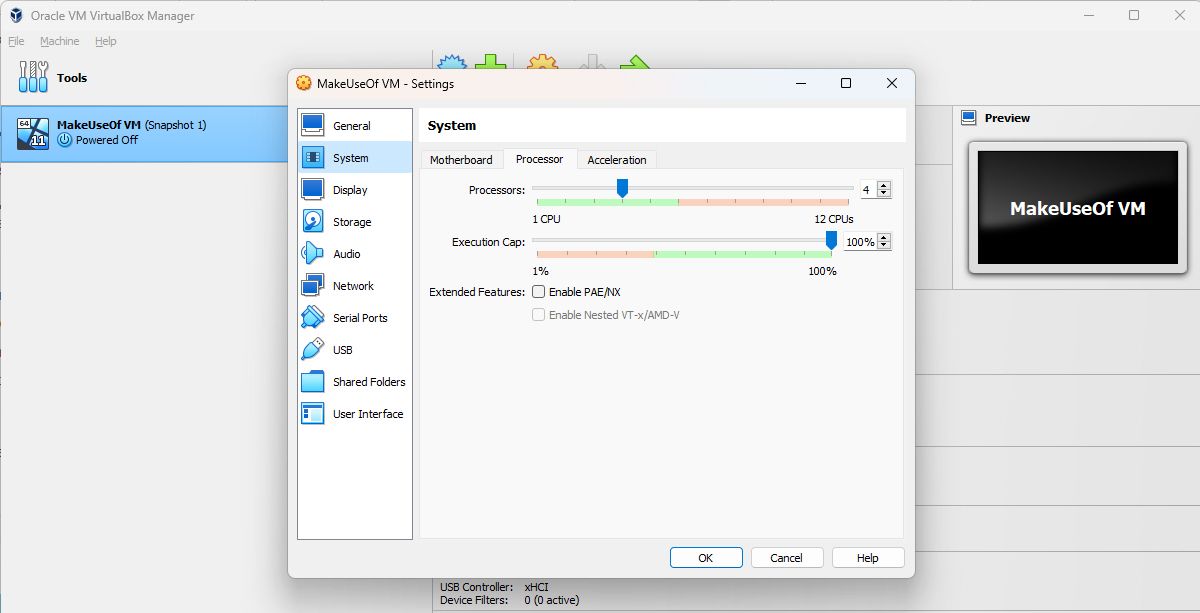
- Navigate to its system properties. In the Oracle VM VirtualBox, it is located in theSettings > System tab.

- Allocate enough CPU cores orProcessors to your virtual machine. You should allocate at leastfour CPU cores to your virtual machine and more than4GB of RAM.
- If your system allows, allocate some more storage space. This will avoid situations like running out of storage space in the middle. 80-90GB may be sufficient for you in most cases.
- ClickOK to save the changes and restart your virtual machine.
Make sure to keep a check on your virtual machine’s performance. You can also adjust the resource allocation as needed.
If, due to any reason, you are unable to edit your VM settings, make sure to shut it down first! VM managers usually don’t allow tweaking their preferences in an active state.
 Any DRM Removal for Win:Remove DRM from Adobe, Kindle, Sony eReader, Kobo, etc, read your ebooks anywhere.
2. Switch to a Solid State Drive (SSD)
While defragmenting does help in the case of HDD, SSD (also known as Solid State Drive) has its own fan base. You don’t need to get confused between the terms HDD and SSD.
To simplify it, SSDs are much faster in all aspects in comparison with the old and traditional HDDs.
If you’ve already installed an SSD, well and good. You can allocate some storage from your SSD to your VM as well. The process is nearly similar to creating a new hard disk partition on Windows. You just need to create a virtual hard disk (from your SSD).
Here’s how to use an SSD to run your VM on Windows:
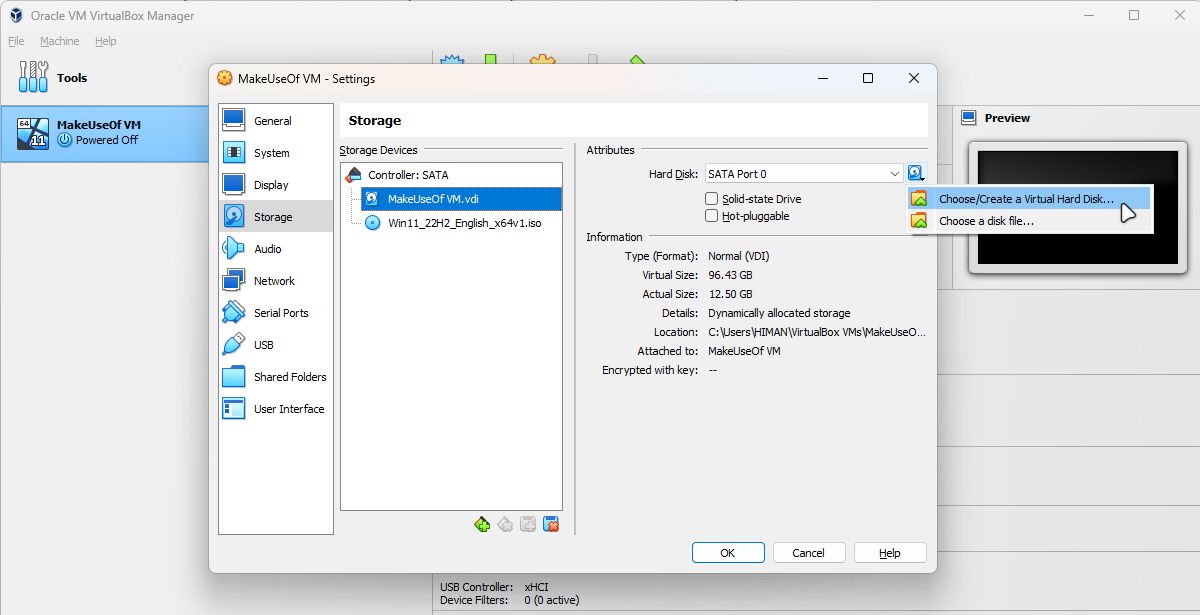
- To get started with this, look for theStorage settings of your VM.
- After selecting your desiredStorage devices , you can selectcreate a new Virtual Hard Disk .
- Select the disk type asVHD (Virtual Hard Disk) and choose the desiredFile location and size .
- Once done, clickFinish to save the changes and restart your VM.

Upgrading to an SSD can provide you with a significant boost to your Virtual Machine’s performance, so it’s an investment that’s well worth considering.

3. Debloat Your Virtual Machine
Like your physical computer, when you create a new virtual machine, it comes packed with lots of unwanted applications. Such apps eventually cause your VM to slow down.
We’ve got a guide covering ways to debloat Windows quickly . You can refer to that and clean your VM for a faster experience.
Before removing any bloatware, back up your VM for the safe side. If you’re using Oracle VM VirtualBox, you can do so from theMachine > Take Snapshot context menu. You don’t need to worry if you are not using Oracle’s VM manager, as you will find a similar option in other VM managers.

 Project Manager - Asset Browser for 3Ds Max
4. Tweak Your Virtual Machine Settings
Almost all virtual machine managers give you a plethora of options to customize your VM. And some of the options can even help you improve your VM’s performance.
Such settings include memory allocation, processor usage, display settings, and network configurations. By tweaking these settings, you can ensure your virtual machine runs using the best possible configuration and utilizing all available resources.
Below are some of the settings you should adjust right now for your virtual machine:
- Video memory: It decides the amount of memory to allocate for your VM while running graphics-intensive programs. If you’re using a low-end PC, you should adjust it to at least 100MB.
- Processor or CPU cores: The more, the better rule applies in this case. If you’re looking for suggestions, we suggest going with at least four CPU cores for better experience.
- Hard disk type: If possible, switch your VM’s hard disk type to SSD instead of an HDD.
- Network adapter: The default network adapter settings are not always the best. So, you need to experiment with it to increase your VM’s networking experience. For example, you can remove the bandwidth restrictions to improve the overall network speed.
5. Enable Hardware Virtualization on Windows
In easy words, hardware virtualization is a Windows technology that helps your computer generate a clone of your operating system. This technology enables your computer’s CPU to distribute your system resources to run multiple virtual machines more efficiently. So, if your computer supports hardware virtualization, enabling it can significantly improve your virtual machine’s performance.
Not all computers support hardware virtualization, so it is recommended to check your computer’s specifications before attempting to enable it.
We suggest you learn how to enter the BIOS first to get started with the steps. BIOS is an advanced utility that ships with every computer. Unfortunately, it looks different in appearance on other computers. So, the steps for configuring hardware virtualization may vary slightly.
Here’s an easy way to enter the BIOS setup via the Windows settings:
- PressWin + I to launch the Windows settings app.
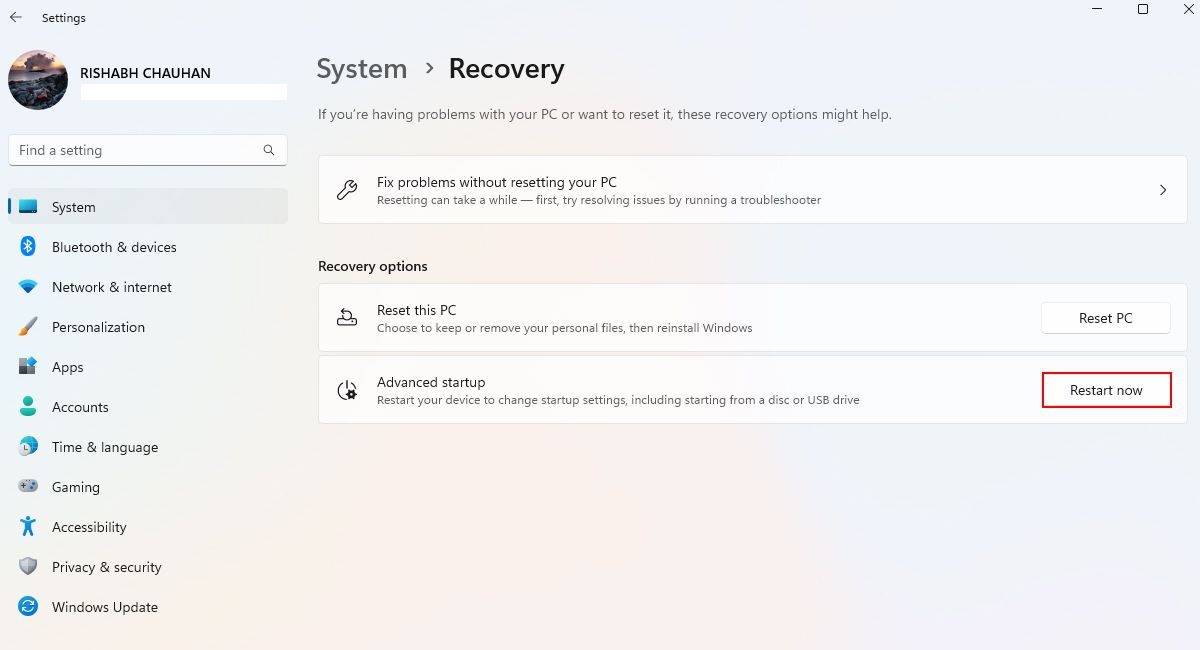
- Navigate toWindows Update > Advanced options > Recovery .
- Please save your pending work before proceeding further. Click theRestart now button next to theAdvanced startup text.
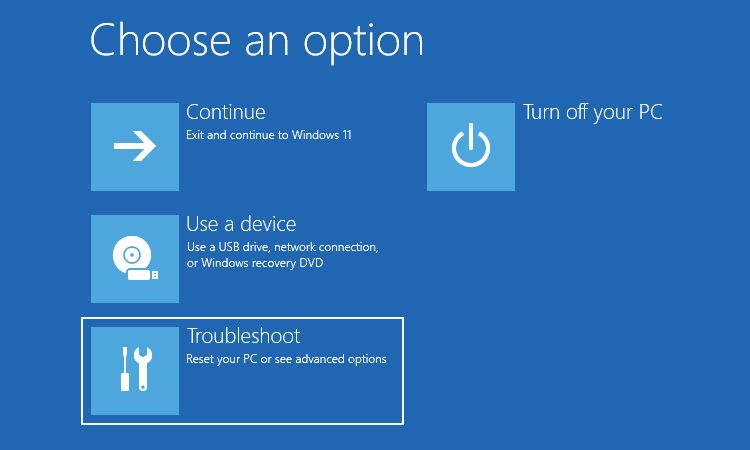
- Select theTroubleshoot option and pressenter .
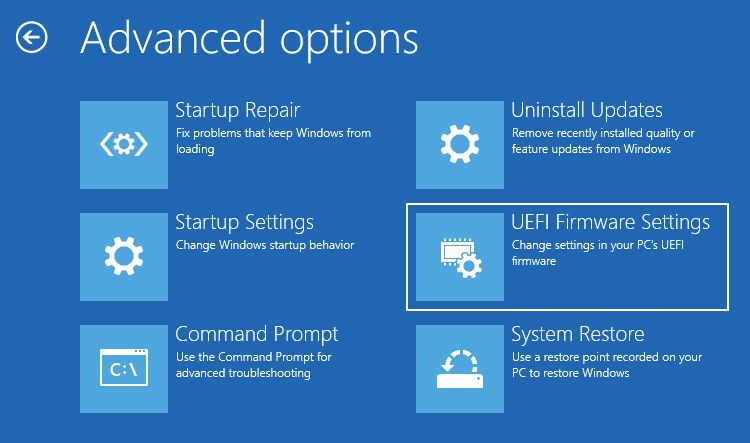
- On theAdvanced options window, choose theUEFI Firmware Settings to launch the BIOS setup.

Once you are in the BIOS utility, you just need to find theHardware Virtualization option there and toggle itON . This option may be with the name ofVirtualization Technology in some laptops.
To assist you better in this case, look at our guide on enabling hardware virtualization on Windows 11 .
6. Boost Windows’ Speed
Sometimes, the reason your virtual machine runs slow is because Windows itself isn’t running so great. As such, try these ways to speed up Windows to help your system run the best that it can.
Unlock the Full Potential of Your Virtual Machine on Windows
Virtual machines are only useful when they’re not going at a snail’s pace. Following the suggestions outlined in this article, your VM should now be faster than before.
- Title: Power Up Your VMs in Windows Using These Top 6 Enhancers
- Author: Joseph
- Created at : 2024-08-15 15:45:43
- Updated at : 2024-08-16 15:45:43
- Link: https://windows11.techidaily.com/power-up-your-vms-in-windows-using-these-top-6-enhancers/
- License: This work is licensed under CC BY-NC-SA 4.0.