Overcoming the Hurdle of Non-Responding Email Alerts on PCs

Overcoming the Hurdle of Non-Responding Email Alerts on PCs
Mail is a built-in Windows application that supports all popular accounts, including Outlook, Hotmail, Yahoo, Gmail, and iCloud. It also keeps you up to date with your most recent emails by sending you timely notification alerts. However, when those notifications stop working, you could miss out on important or urgent mail.
If this happens to you, here are some effective troubleshooting tips that will help you fix the problem.
1. Check the In-App Notification Settings
Your first step is to make sure that you haven’t turned off notifications from the Mail app.
To access notification settings in the Mail app:
- Open the Mail app on your PC.
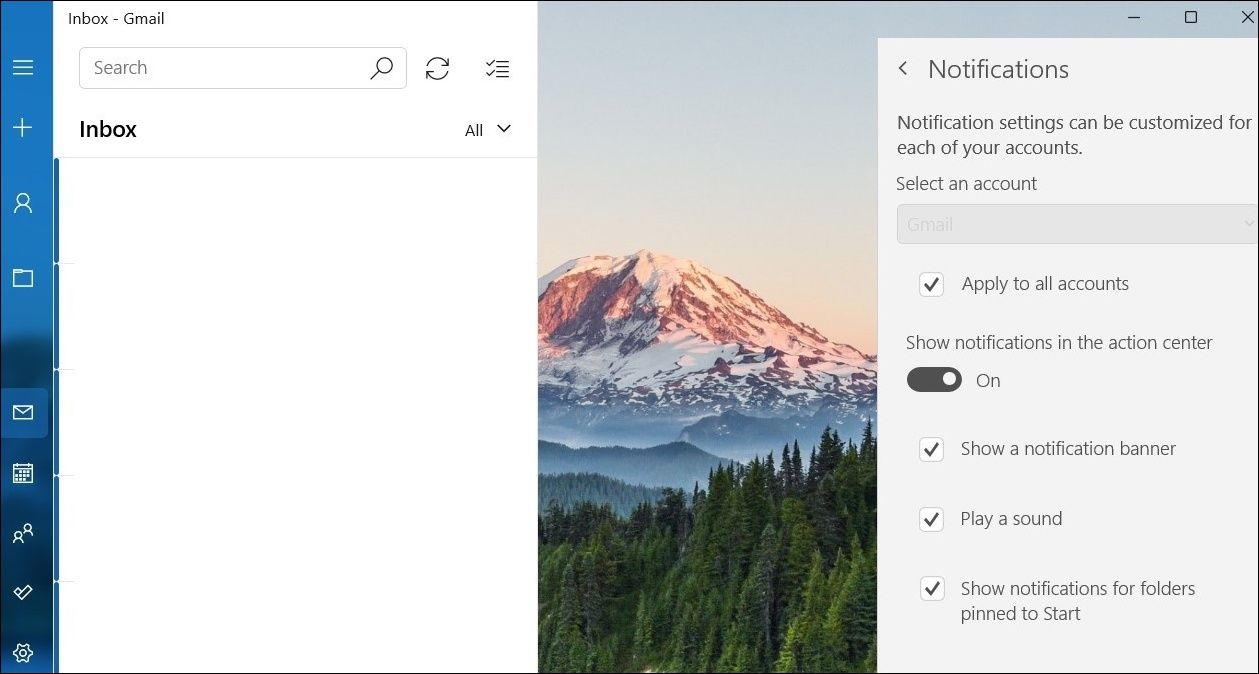
- Click on theSettings icon in the bottom left corner.
- SelectNotifications from the menu that appears on your right.
- Use the drop-down menu to select your account or check the box that readsApply to all accounts .
- Enable the toggle forShow notifications in the action center .
- Tick theShow a notification banner checkbox.
- Tick thePlay a sound checkbox.

Once you complete the above steps, the Mail app should start showing notifications on Windows.
2. Enable Mail App Notifications From Windows Settings
Windows includes numerous notification management options, including the ability to enable or disable notifications for specific apps. If you’ve previously learned how to customize your notifications on Windows 11 and turned off notifications for the Mail app, you won’t get any alerts.
To enable Mail app notifications from Windows Settings, do the following:
- Open theStart menu and click thegear-shaped icon to launch the Settings app.
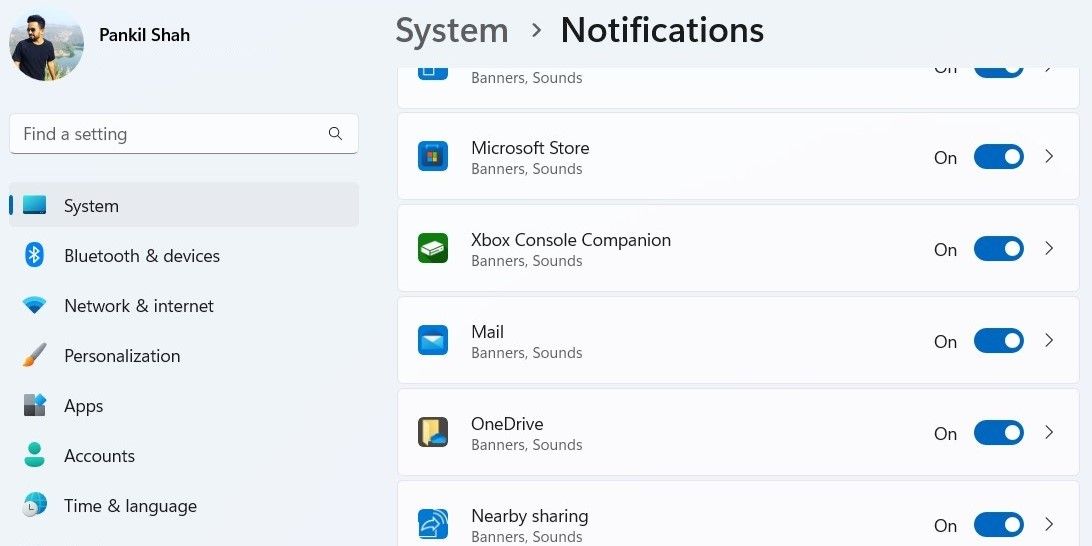
- In theSystem tab, click onNotifications .
- UnderNotifications from apps and other senders , enable the switch next toMail if it isn’t already.

3. Check Mailbox Sync Settings
You can configure the Mail app sync settings to specify how frequently the app should connect to the server to download new content. If Mail app notifications are arriving late, you can resolve the problem by modifying the mailbox sync settings. Here’s what you’ll need to do.
- Open the Mail app using the search menu.
- Click thegear icon in the bottom left corner to open app settings.
- SelectManage accounts from the menu that appears on your right.
- Select your email account.
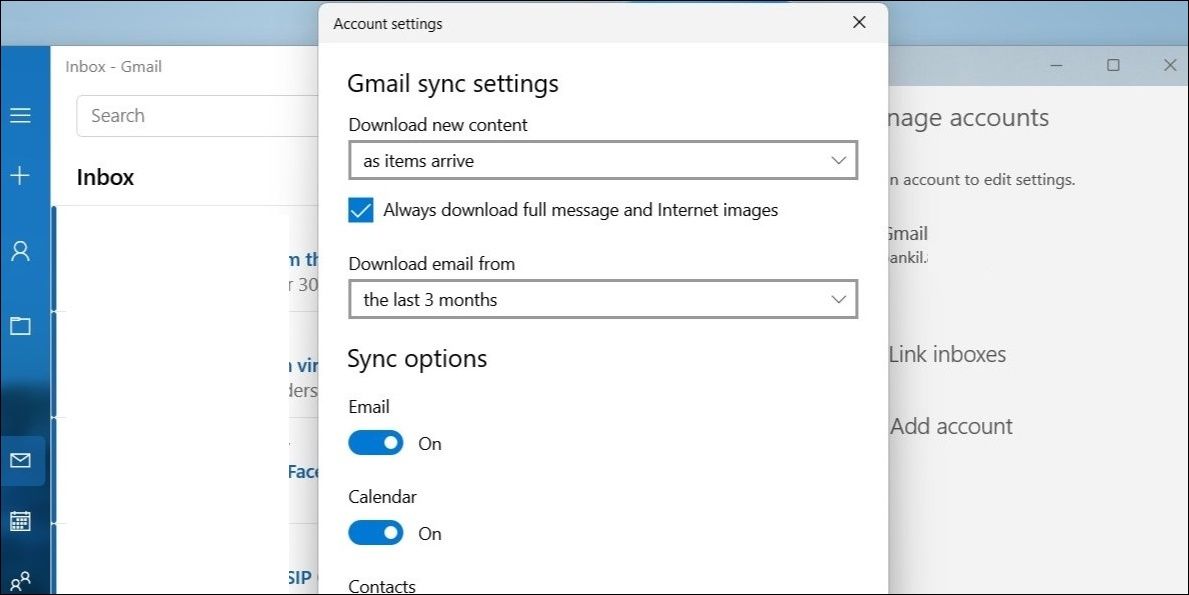
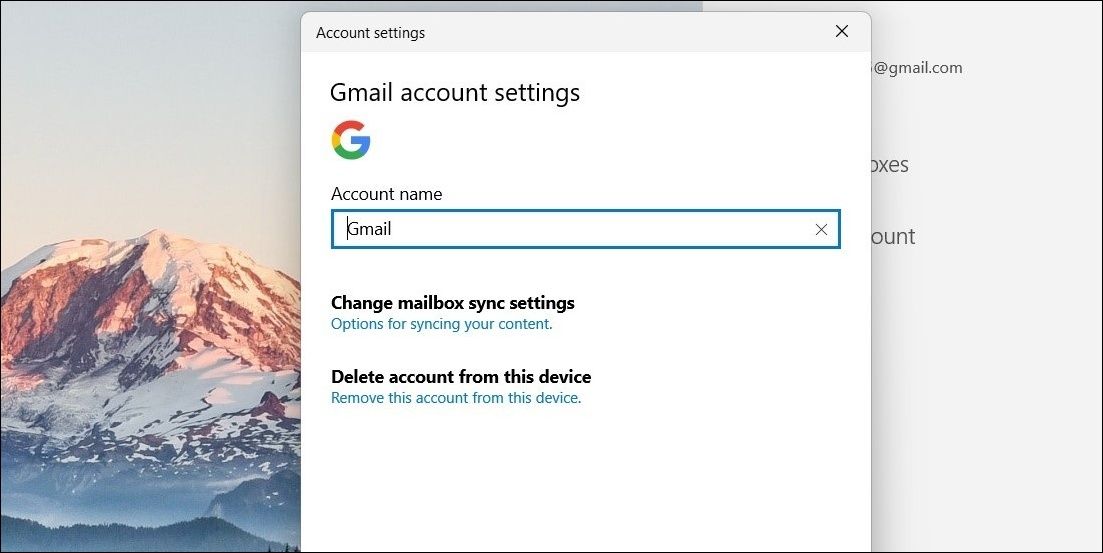
- Click onChange mailbox sync settings .
- UnderDownload new content , selectas items arrive .
- UnderSync options , enable the toggle forEmail .

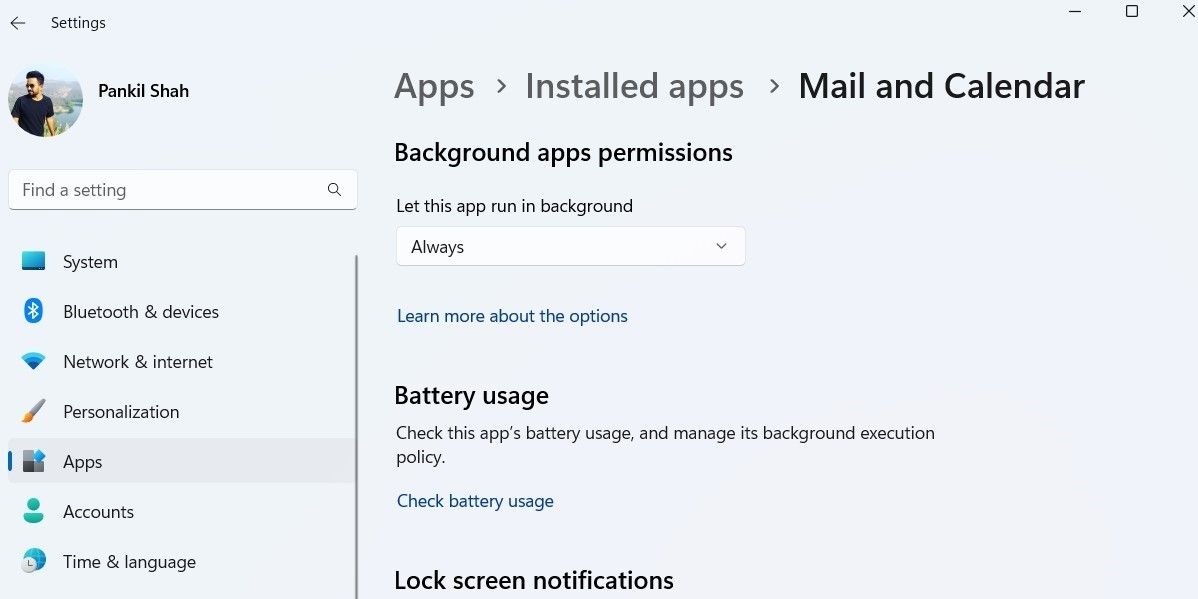
4. Allow the Mail App to Run in the Background
Windows lets you decide which apps and programs can run in the background. If you have denied the Mail app permission to run in the background, you will not receive notifications unless the app is open.
To fix this, you must allow background app permissions to the Mail app by following the steps below.
- PressWin + I to open the Settings app.
- Use the left pane to navigate to theApps tab.
- Click onInstalled apps .
- Scroll down or use the search bar at the top to locate the Mail app on the list.
- Click thethree-dot menu icon next to the app and selectAdvanced options .
- Click the drop-down menu underBackground apps permissions and chooseAlways .


5. Remove and Re-Add Your Email Account
If the Mail app still fails to show notifications, you can try removing your email account from the app and adding it again. This should reconnect your account to the app and resolve any issues.
- Open the Mail app on your PC and click thesettings icon .
- Click onManage accounts and select the account you want to remove.
- SelectDelete account from this device .
- ChooseDelete to confirm.

Once removed, restart the Mail app and add your account again.
6. Turn Off Focus Assist
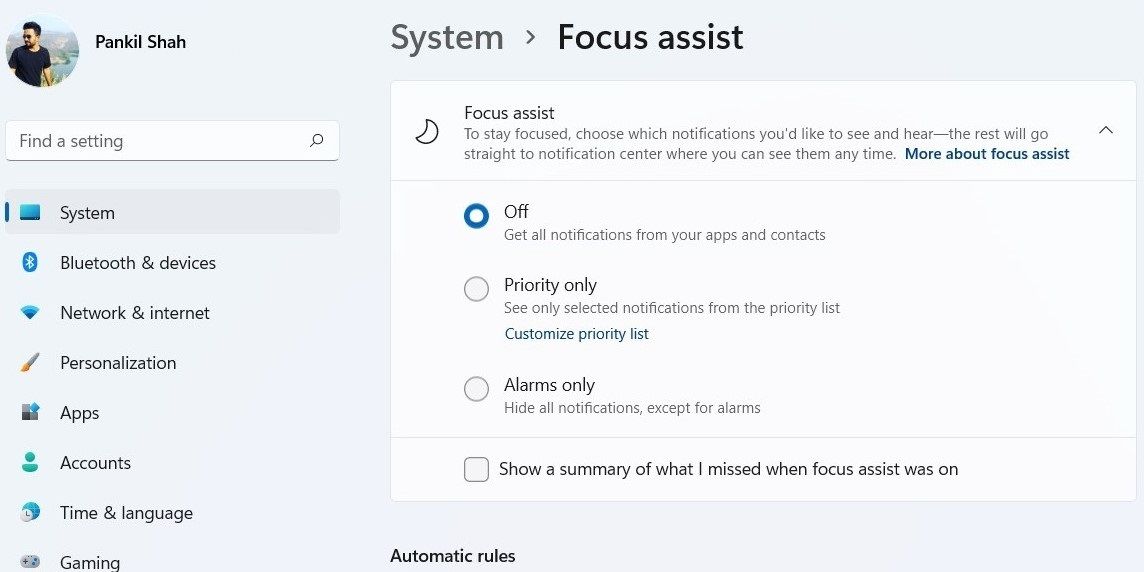
Focus Assist is a handy Windows feature that mutes notifications for all apps unless specified otherwise. If you’ve enabled this feature, you will not receive notifications from any apps, including the Mail app.
You must disable Focus Assist to start receiving notifications again. Here’s how to do it.
- Open theSettings app.
- Navigate toSystem > Focus .
- Set the Focus Assist toOff , so you get all notifications.


Further, check theAutomatic rules section to make sure Focus Assist is not set to enable itself automatically.
If you’re interested in Focus Assist, be sure to check out how to silence notifications in Focus Assist for Windows .
7. Disable Battery Saver Mode
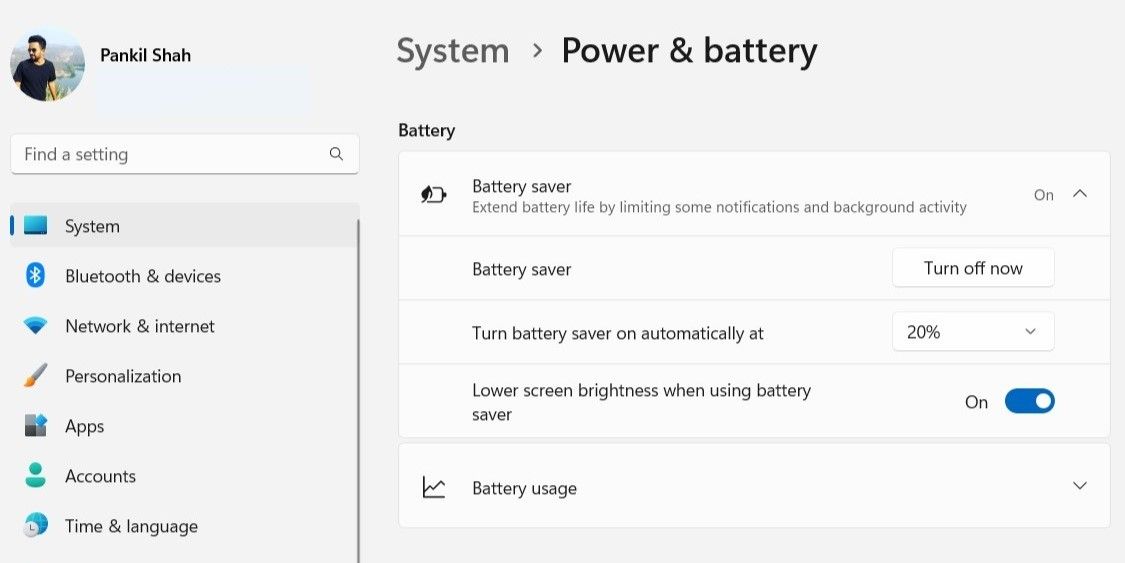
When you enable battery saver mode, Windows limits various background app activities in order to extend battery life. This can prevent apps like Mail from syncing in the background and displaying notifications. To avoid this, you should disable battery saver mode on Windows. Here’s how:
- PressWin + I to open the Settings app.
- Navigate toSystem > Power & battery .
- Click onBattery saver to expand it.
- Click theTurn off now button.

8. Repair or Reset the Mail App
If the Mail app is still failing to display notifications on Windows, you can try repairing the app. For that, you’ll need to use the Windows Settings app. Here are the steps you can follow.
- Right-click on theStart icon or pressWin + X to open the Power Menu .
- SelectInstalled apps from the menu.
- Scroll down to locate the Mail app on the list.
- Click thethree-dot menu icon next to the app and selectAdvanced options .
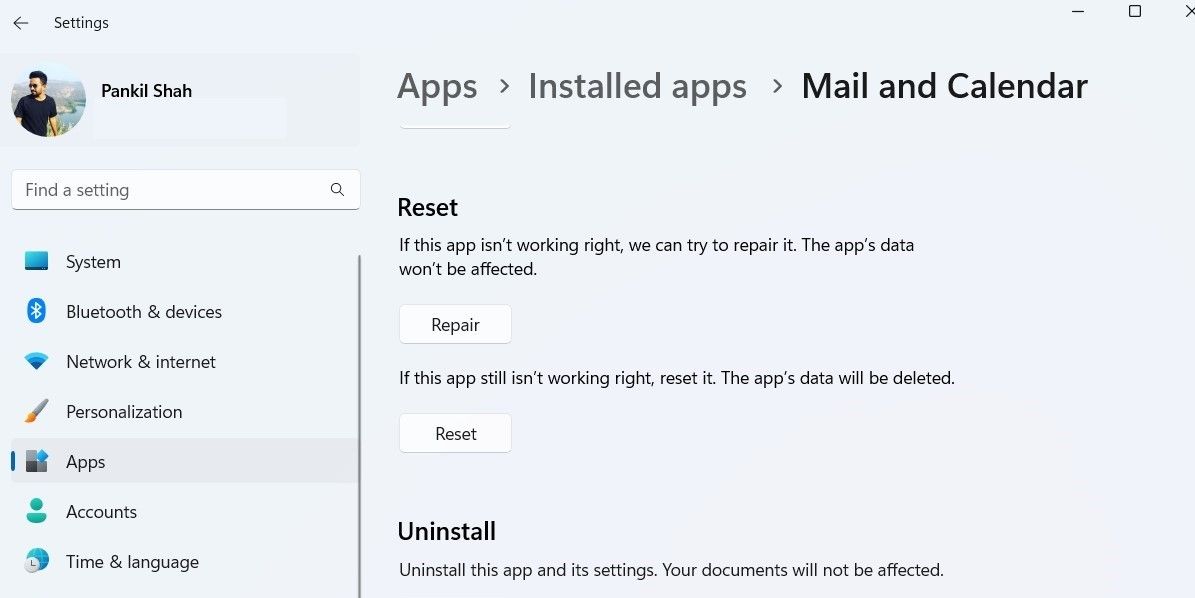
- Scroll down to theReset section and click onRepair .

Windows will attempt to repair the app. You should see a checkmark next to the Repair button once the process is complete. If the problem persists, you can try resetting the app instead. Note that this process will delete all the app data.
9. Update the Mail App
If you don’t update your apps on a regular basis, they will get outdated eventually. It’s possible that the Mail app notifications aren’t working because of a faulty app version. If that’s the case, updating the app will help more often than not.
Head over to the Microsoft Store on your PC. Search forMail and calendar app and click theUpdate button. If you do not see the Update option, then the app is already up-to-date.
Fixing Mail App Notifications on Windows
The Mail app notification issues can occur due to various factors, ranging from incorrectly configured settings to a faulty app update. In any case, going through the above-mentioned fixes should get the Mail app notifications to work again on Windows.
If you’ve gotten tired of such issues with the default Windows Mail app, there are plenty of third-party email apps you may want to try.
- Title: Overcoming the Hurdle of Non-Responding Email Alerts on PCs
- Author: Joseph
- Created at : 2024-08-15 16:03:32
- Updated at : 2024-08-16 16:03:32
- Link: https://windows11.techidaily.com/overcoming-the-hurdle-of-non-responding-email-alerts-on-pcs/
- License: This work is licensed under CC BY-NC-SA 4.0.




 Any DRM Removal for Mac: Remove DRM from Adobe, Kindle, Sony eReader, Kobo, etc, read your ebooks anywhere.