Method to Correct Windows Installation Glitch Xc004f050
Method to Correct Windows Installation Glitch Xc004f050
The upgrade error 0xc004f050 typically occurs when the users try to upgrade their Windows Home version to Windows Pro. It is usually triggered if you are trying to enter a product key that cannot be used to activate Windows, the activation servers are busy, or the system is experiencing a hardware-related problem.
Below, we discuss the different solutions you can try to resolve this error once and for all.
1. Wait It Out
At times, the Microsoft activation servers experience temporary issues or are undergoing maintenance, which can prevent you from upgrading your Windows version. If you are facing this problem while activating your Windows and you are sure that you have followed the activation steps properly, you can try waiting for a few hours or even a day and then attempt the activation process again.
During this, it is also a good idea to ensure that you are connected to a stable internet connection.
2. Use a Generic Product Key
If waiting hasn’t helped, you can try entering a generic product key in the Activation section of the Settings app, and then replace it with the original one.
This specific fix was suggested by an independent advisor on the Microsoft forum , and so far has helped a large number of users fix the problem. However, before you proceed, we highly recommend backing up your personal Windows data and files . You must also disconnect from the internet connection. Once that is done, proceed with the steps below:

How to Activate a Key on Windows 10
If you are a Windows 10 user, follow these steps:
- Press the Win + I keys together to open the Settings app.
- Navigate to Update and Security > Activation.
- Click on the Change Product key option and enter this generic product key “VK7JG-NPHTM-C97JM-9MPGT-3V66T.”
- Now, click on Activate Product. If you have trouble using the generic key, restart your computer and perform these steps again.

How to Activate a Key on Windows 11
If you are using Windows 11, here is how to proceed:
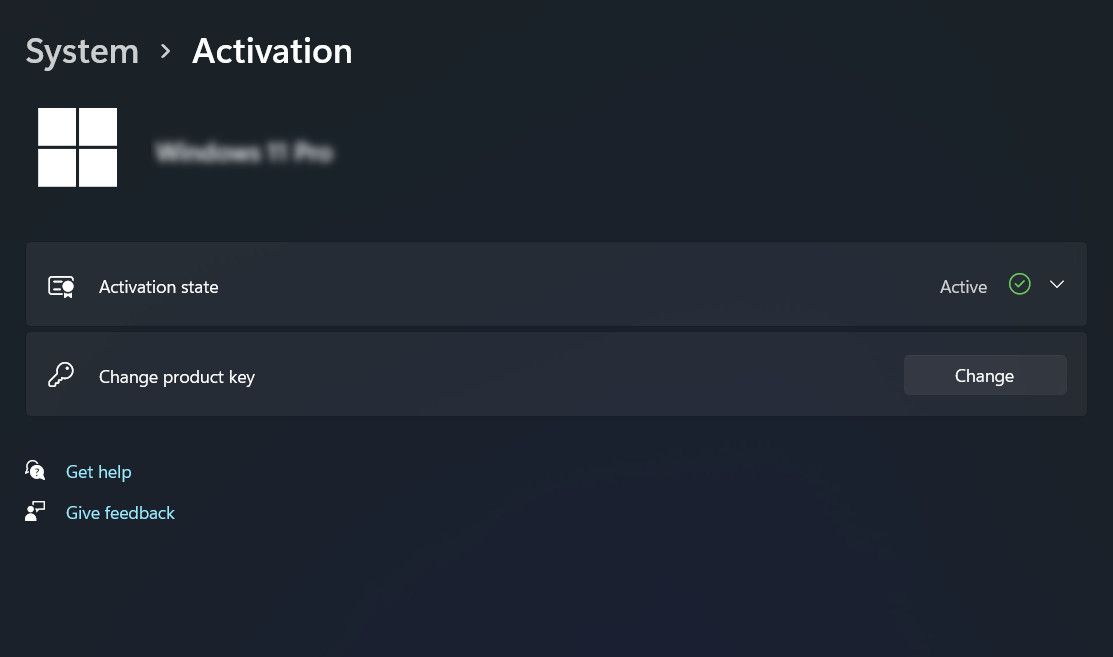
- Open the Settings app and choose System from the left pane.
- Choose Activation and click on the Change button for the Change Product key option.
- Enter the generic key “VK7JG-NPHTM-C97JM-9MPGT-3V66T.”
- Click on Activate Product and check if the system successfully upgrades. If it doesn’t. restart your computer and try again.
Once this is done, the Home edition will upgrade to the Pro version. Restart your computer again, and you can now enter your purchased Pro license key in the Activation section of the Settings app. Hopefully, this will fix the problem for good.
3. Activate Your License Through Your Phone
Windows also allows you to activate your license key through your phone. Thus, if the method above doesn’t make any difference, here is what to do next:
- Press the Win + R keys together to open Run.
- Type “slui.exe 4” in Run and click Enter. This will launch the Activation dialog.
- In the dialog, choose your region/country and click Next.
- Click on the Activate by phone option.
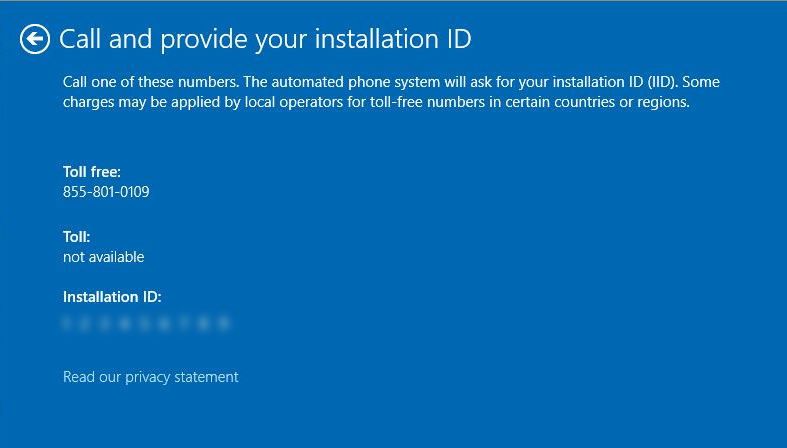
- Now, call one of the available phone numbers listed on your screen.
- Follow the automated instructions to proceed. Once you get in touch with the support team, explain to them the problem you are encountering. You will also need to provide them with the installation ID displayed on the Activation dialog.
- The representative will now guide you through the necessary steps to resolve the issue and activate your Windows Pro edition. They will provide you with a confirmation ID which you will need to enter in the Activation box to complete the activation process.

If you encounter difficulties during the phone activation process, it is best to ask the representative for assistance.
 Project Manager - Asset Browser for 3Ds Max
4. Run the Activation Troubleshooter

Microsoft has also equipped Windows with an activation troubleshooter, that is specifically designed to scan for activation-related errors and fix them automatically.
To run this troubleshooter, you must be signed in to Windows as an administrator. In case you are currently using a standard/local user account, you can change your user account type to administrator and proceed with these steps:
- Open the Settings app using the Win + I keys together.
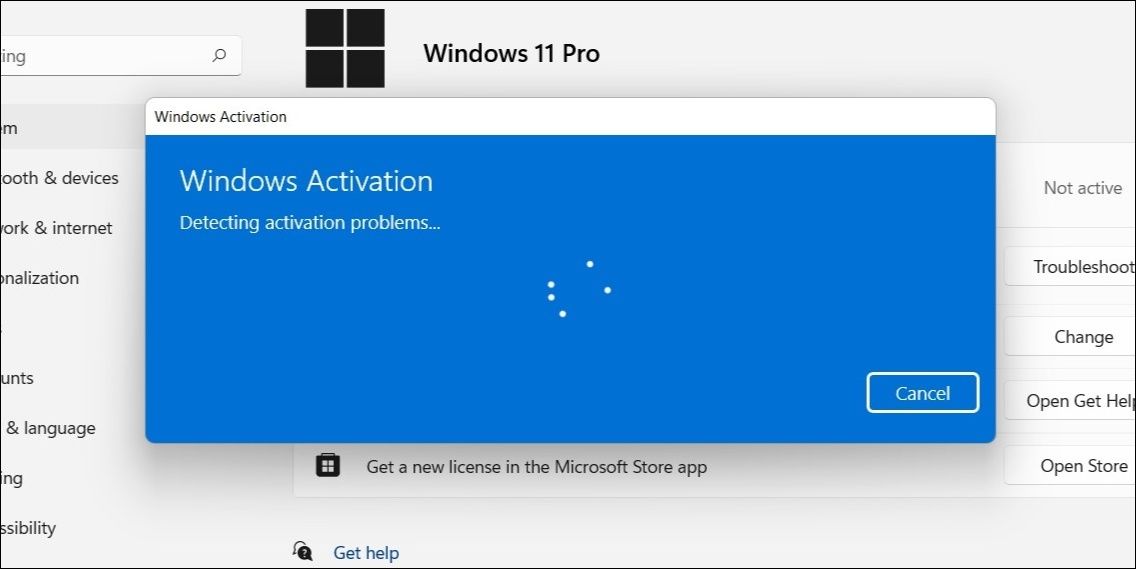
- Head over to System > Activation.
- In the following window, click on the Troubleshoot button.
- Wait for the troubleshooter to complete its scan and then review the results. If the troubleshooter has identified a problem and suggested fixes, click on the Apply this fix button. Occasionally, the troubleshooter may recommend solutions without being able to implement them automatically. In such cases, you can manually apply the suggested fixes.
5. Check for Hardware-Related Issues
Windows activation and the hardware configuration of your computer are related. If you have made significant hardware changes recently, like installing or removing essential components, it might trigger this activation error.
To check for hardware-related issues, start by verifying that all the connected components are compatible with the version of Windows you are trying to upgrade. It is best to check the system requirements of the targeted version on the official Microsoft website.
Next, ensure that every hardware component is properly connected to your computer. There should be no loose connections of improperly installed hardware, as that can contribute to the problem.
If you have multiple components connected, access the Device Manager and check for any warning signs or error indicators that may be pointing toward any hardware conflicts. In case you are having trouble identifying the issue, you can consider resetting certain hardware components.
Upgrade Windows Once More With These Fixes
If you are trying to upgrade using a valid product key and are following the activation steps properly, facing an error during the process repeatedly can be frustrating. Hopefully, the steps listed above will help you fix the issue for good.
In case all else fails, you can consider clean installing Windows 11 Pro from a bootable USB. Alternatively, you can reach out to the Microsoft support team again and wait for them to diagnose the issue for you.
Below, we discuss the different solutions you can try to resolve this error once and for all.
- Title: Method to Correct Windows Installation Glitch Xc004f050
- Author: Joseph
- Created at : 2024-07-29 04:20:46
- Updated at : 2024-07-30 04:20:46
- Link: https://windows11.techidaily.com/method-to-correct-windows-installation-glitch-xc004f050/
- License: This work is licensed under CC BY-NC-SA 4.0.