
Mending DirectX Setup Failures on PC
Mending DirectX Setup Failures on PC
If you have encountered an error message that says, “Setup could not download the file. Please retry later or check network connection” when installing DirectX, it means the DirectX setup has failed to download a required file. This error can occur because of an issue with your internet connection, a missing or corrupted .NET framework, Windows Defender interference, or installing the setup file from a standard user account.
If the error message makes it impossible for you to install DirectX and run the games or applications that require it, here are some possible solutions you can try.
1. Sign Into Your Windows Administrator Account
Installing or updating Windows components, such as DirectX, usually requires administrative privileges. If you try to install DirectX using a standard account, you’ll have to enter your administrator account’s PIN or password or confirm your identity with Windows Hello if you have it set up. Only then you can install DirectX.
However, some users have reported experiencing the error under discussion when installing DirectX on a standard account, despite granting administrative rights. So, before applying further fixes, please switch to your administrator account if you are signed in with a standard user account.

2. Ensure You’re Connected to the Internet
Since the error message suggests checking your internet connection, make sure your device is connected to the internet and that it is functioning properly. To confirm that, go to your preferred web browser and search for anything. If the search process goes successfully and search results appear, your device is connected to the internet.
However, if you encounter an error while searching on a browser, there could be a problem with your internet connection. In that case, refer to our guide for Windows 11 Wi-Fi problems , assess which problem is relevant to your situation, and apply the appropriate fixes. If the error was caused due to an unstable or inaccessible internet, restoring your connectivity will resolve it.
3. Disable and Re-enable Your Network Connection
If your internet is already connected, disable it once and then enable it again. Follow these steps to do that:
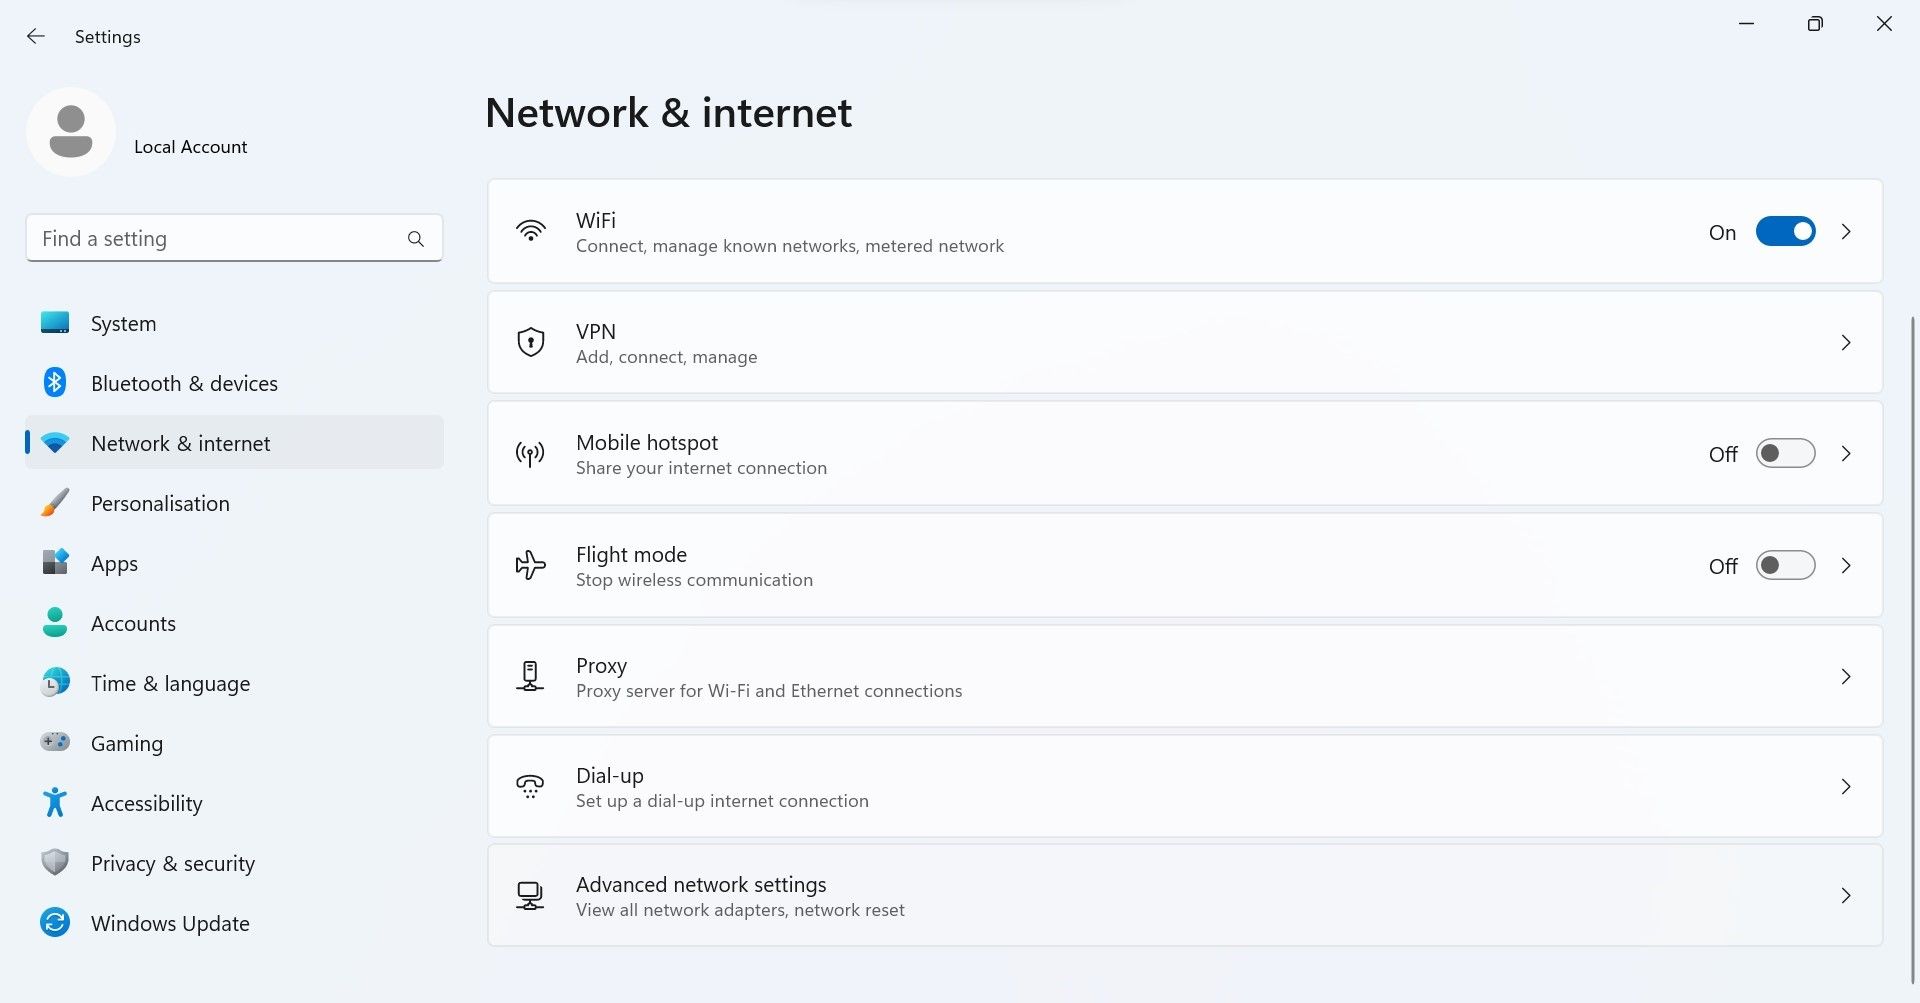
- Right-click on the WindowsStart button and selectSettings .
- Go to theNetwork and internet tab on the left.
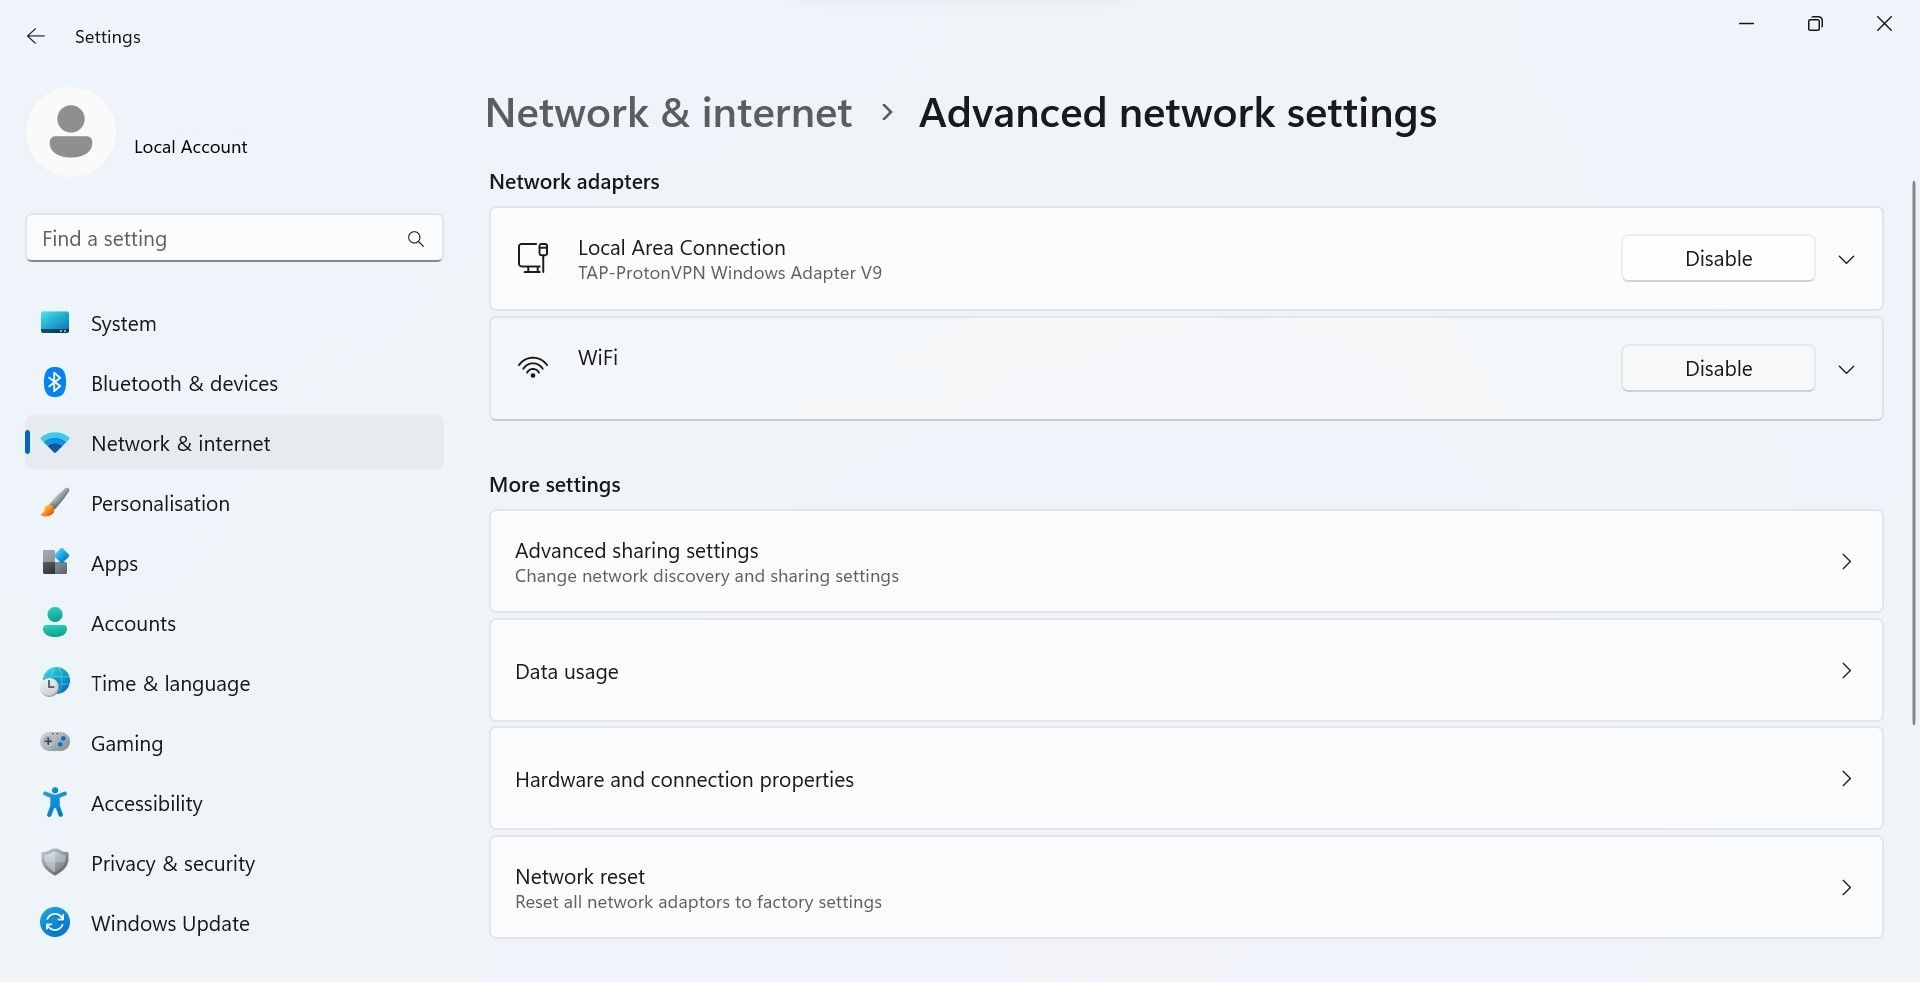
- Then, go toAdvanced network settings .
- Click theDisable button next to the internet connection you are using.
- Once you have disabled it, let it sit for 30 seconds, and then clickEnable to enable the internet connection again.
Any DRM Removal for Win:Remove DRM from Adobe, Kindle, Sony eReader, Kobo, etc, read your ebooks anywhere.
 Any DRM Removal for Win:Remove DRM from Adobe, Kindle, Sony eReader, Kobo, etc, read your ebooks anywhere.
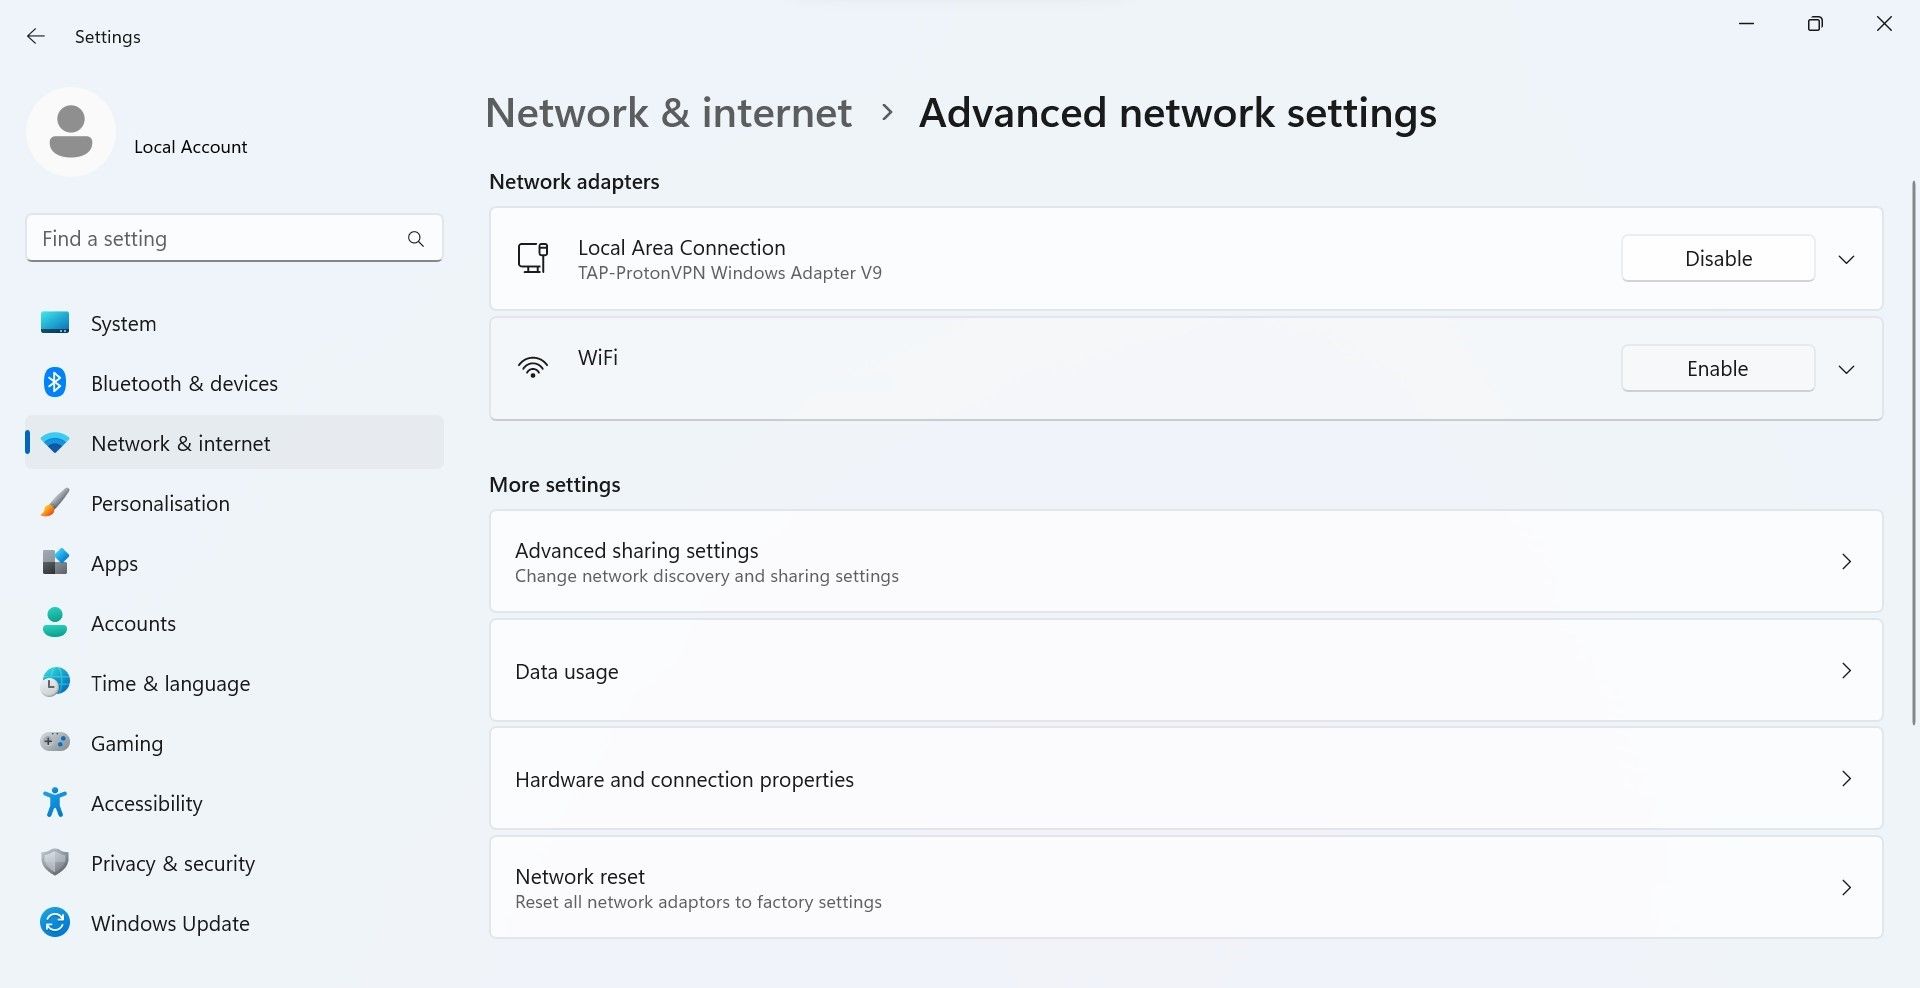
Even though it isn’t necessary, some users have recommended rebooting the router or disconnecting and reconnecting the Ethernet cable to resolve this issue.
4. Flush the DNS Cache and Reset the Network Settings
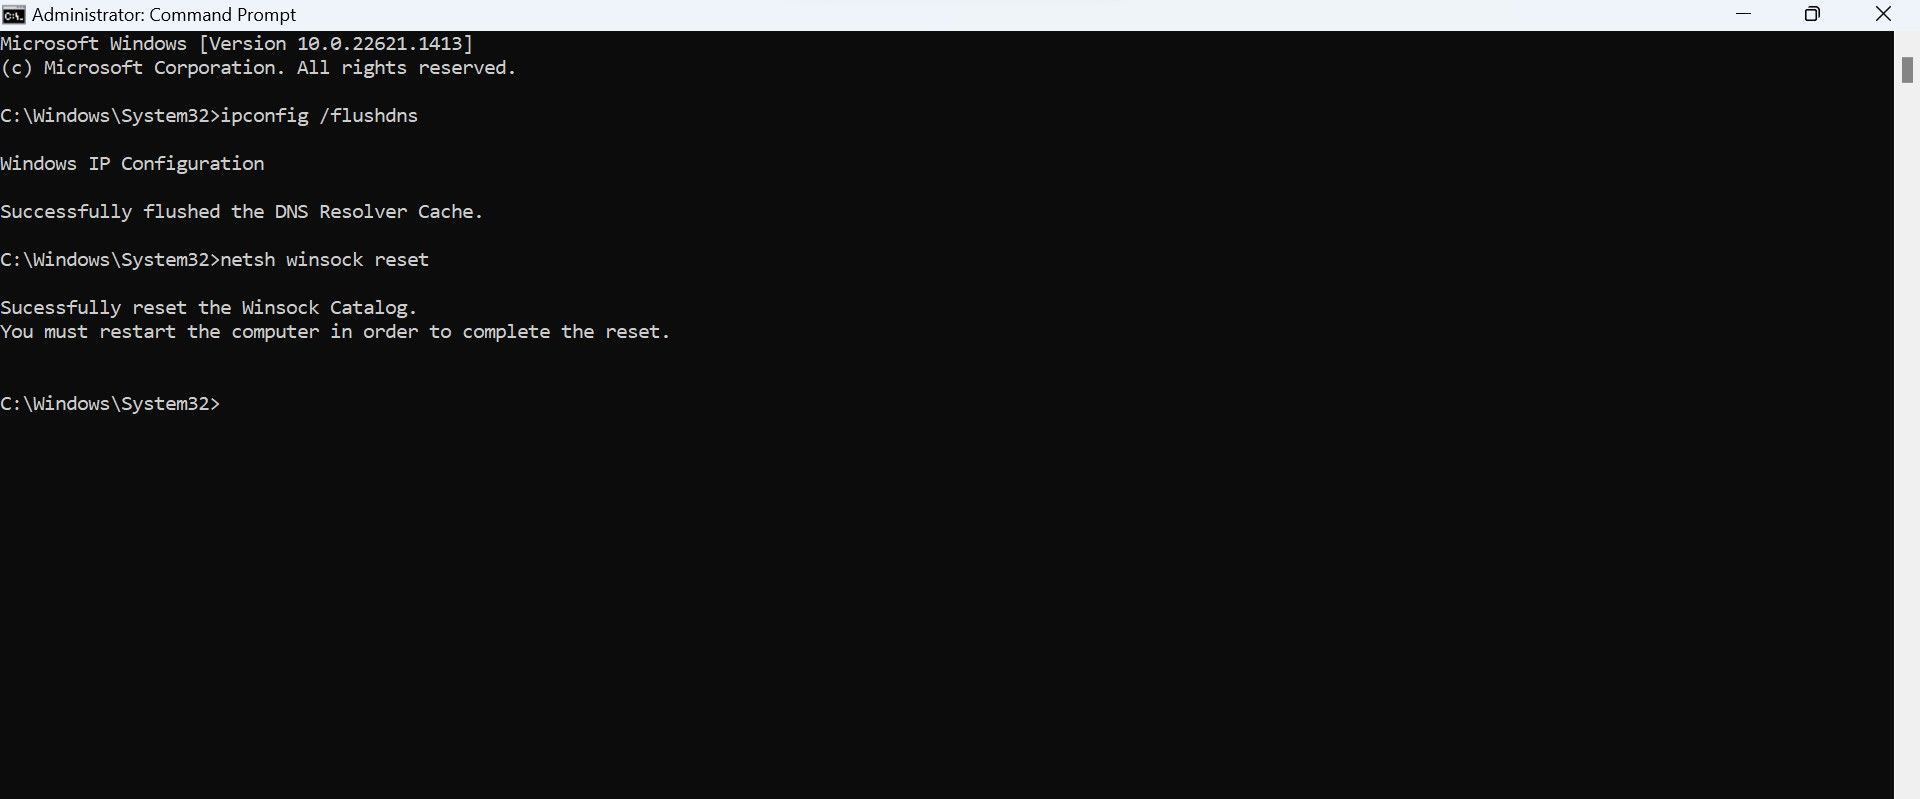
Your next step should be to flush the DNS cache and reset the network settings. Performing a DNS cache flush clears the old records in the cache. Similarly, resetting the network connection eliminates the likelihood of a misconfigured network setting causing the issue. Follow these steps to perform both fixes:
- Type**”Command Prompt”** into the Windows Search box.
- Right-click theCommand Prompt and selectRun as administrator .
- Type each of the following commands one at a time, then hitEnter :
ipconfig /flushdns netsh winsock reset
5. Temporarily Disable the Microsoft Defender Firewall
Provided that you grant the DirectX setup file administrative rights, the installation should run smoothly without any problems. If the error persists despite that, Microsoft Defender could be interfering with the installation process—-it’s common for the security suite to become overprotective when operating system changes are made.
To make sure that’s not the case, turn the firewall off temporarily. To disable Microsoft Defender properly, use the first method discussed in our guide on disabling the Microsoft Defender Firewall . After that, disable real-time protection by using the first method in our guide on temporarily disabling Windows Security .
Remember to re-enable both settings after following the rest of the steps, as keeping them enabled is essential for the security of your device.
6. Ensure the .NET Framework Is Properly Installed and Functional
The .NET framework must be fully functional for DirectX to be installed successfully. If it isn’t installed (which is highly unlikely) or has gone corrupted, you will encounter unforeseen issues installing new Windows components and running existing applications.
To ensure you have the framework installed on your device, refer to our guide on installing the .NET framework . This guide describes how to check if the framework is installed and, if not, how to install it.
If the framework is already installed, you should repair it once. This step will prevent corrupted framework files from causing problems when installing DirectX. Need help repairing it? Check out our guide on how to repair the .NET framework on Windows .
7. Install DirectX Using DXSetup
If you employ the above fixes properly, your DirectX setup should install successfully without any problems. If you encounter the same error again, try this simple trick:
- Go to the Microsoft website and download DirectX End-User Runtimes (June 2010).
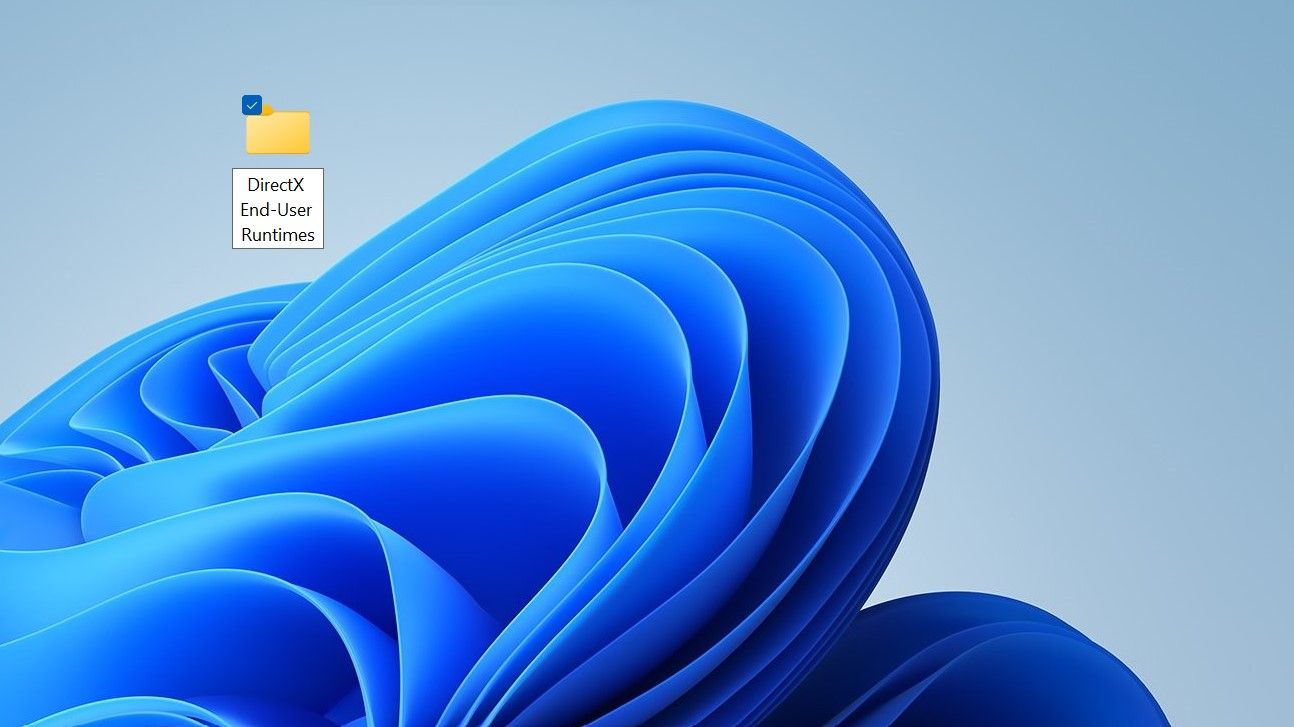
- After that, create a new folder on your Windows desktop and name it whatever you want.
- Then, go to the folder where you downloaded DirectX.
- Run the setup file and accept the agreement by clickingYes .
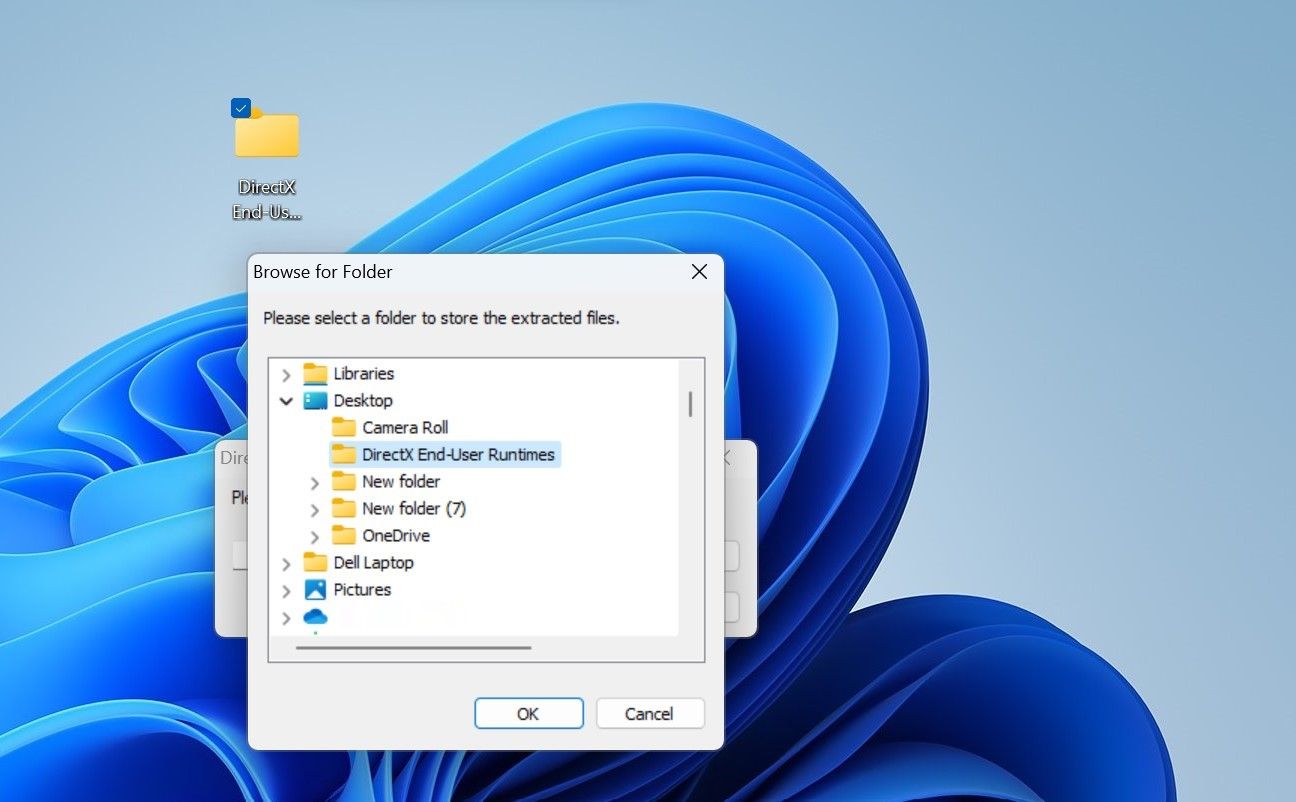
- ClickBrowse and select the location of the folder on your desktop. ClickOK after selecting it.
- Then, clickOK in theDirectX window, and its files will be extracted to the desktop folder.
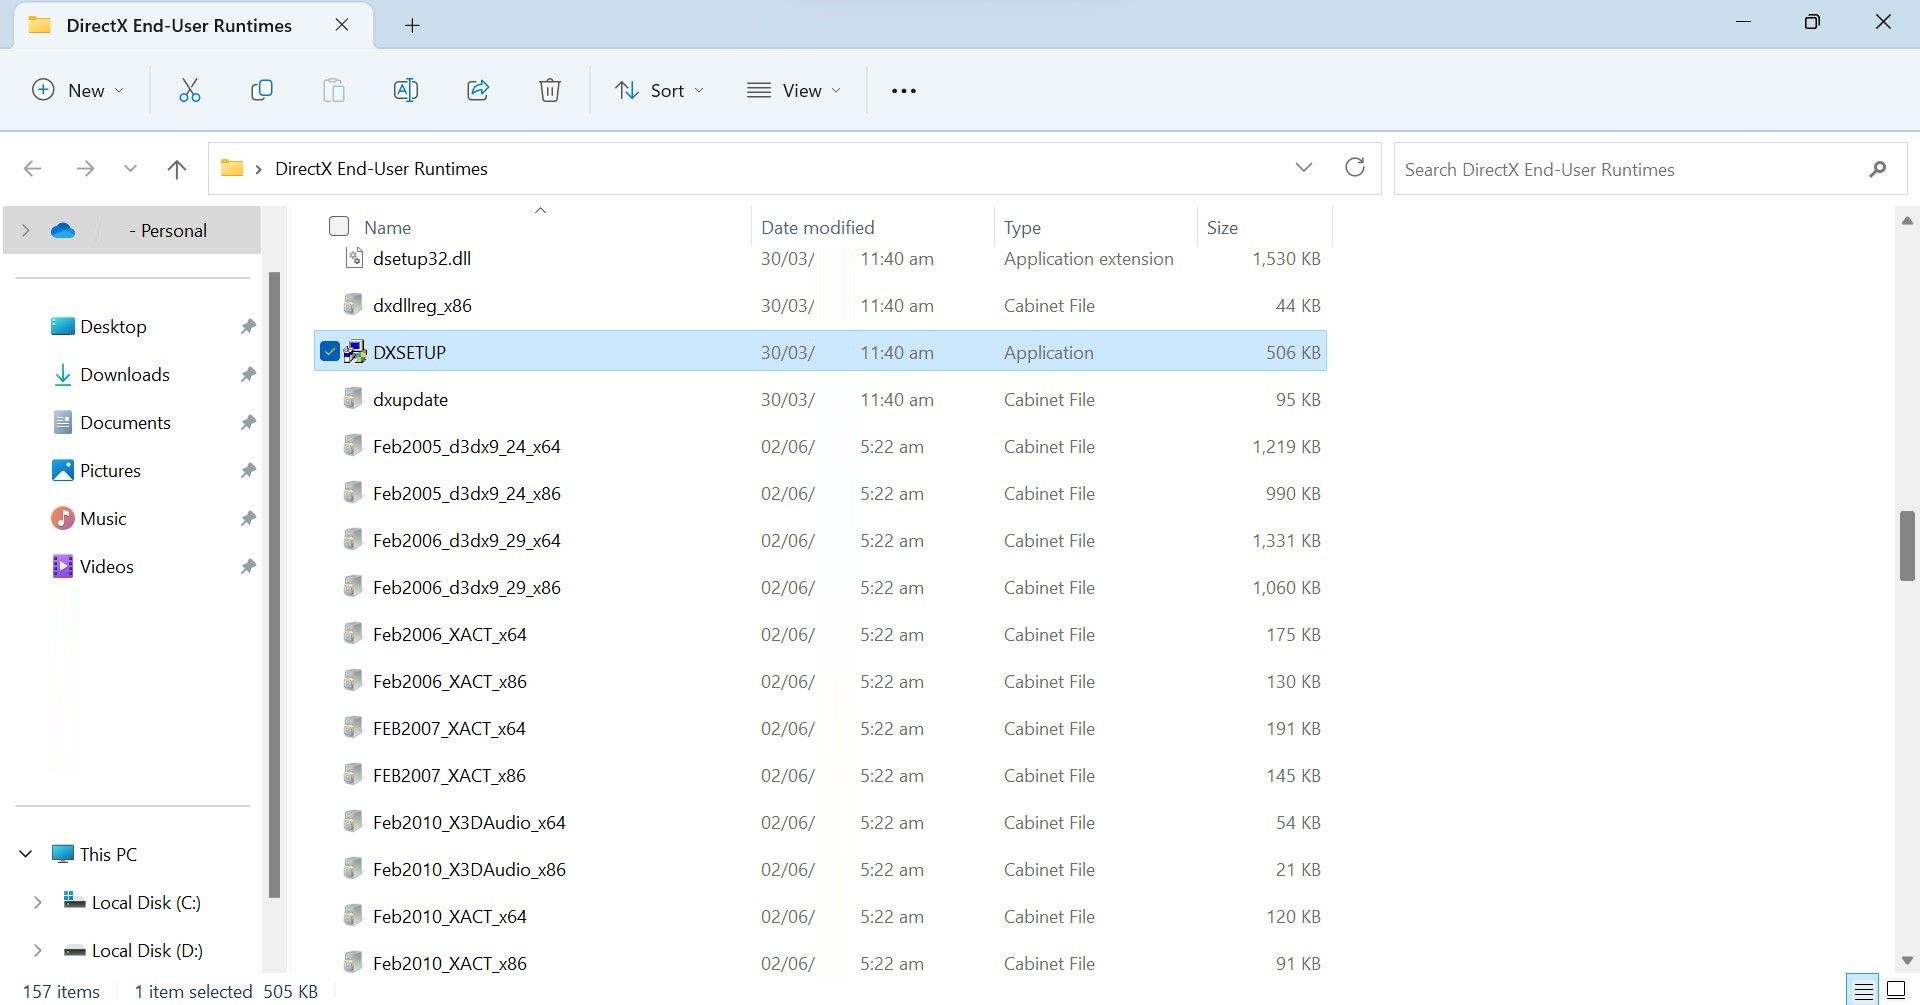
- Now, locateDXSetup in the folder.
Any DRM Removal for Mac: Remove DRM from Adobe, Kindle, Sony eReader, Kobo, etc, read your ebooks anywhere.
- Run the setup file and follow the on-screen instructions. Hopefully, it will be installed successfully this time.

Creating a desktop folder and extracting DirectX files within it has proven effective for many users. Therefore, we recommend you pay close attention and carefully follow each step.
Successfully Install DirectX on Your Windows Machine
Running a game and getting an error message about missing DirectX can be frustrating. And, when you get another error when installing DirectX, the situation gets even worse. If you follow the above steps correctly, you will hopefully be able to resolve the error and successfully install DirectX. Consequently, you will be able to play your favorite games again.
- Title: Mending DirectX Setup Failures on PC
- Author: Joseph
- Created at : 2024-07-29 04:22:15
- Updated at : 2024-07-30 04:22:15
- Link: https://windows11.techidaily.com/mending-directx-setup-failures-on-pc/
- License: This work is licensed under CC BY-NC-SA 4.0.