
Mastery of Device ID Extraction Techniques for Windows Users

Mastery of Device ID Extraction Techniques for Windows Users
A hardware ID is a unique identification number given to hardware components. It’s associated with the devices that you attach to your PC or the ones already connected to it.
This identification number can be helpful when you want to download the correct device drivers. That’s because if you know the hardware ID, then you can use it to search for a specific driver online.
Let’s discover the various ways to check your hardware IDs on Windows.
1. Use the Device Manager
The Device Manager is a tool that helps you tweak the settings for almost all the devices that are connected to your PC. You can also use this tool to update or reinstall the device drivers.
Now, let’s check out how you can use the Device Manager to search for the hardware IDs:
- PressWin + Run to open the Run command dialog box. Alternatively, check out the various ways to access the Run command dialog box .
- Typedevmgmt.msc and pressEnter to open the Device Manager.
- Expand the category for the device you want to look up. For example, expand theKeyboards category if you want the hardware ID for your keyboard.
- Right-click on the relevant device and selectProperties .
- Navigate to theDetails tab.
- Click theProperty drop-down menu and selectHardware Ids . You should see the hardware ID results in the “Value” box.
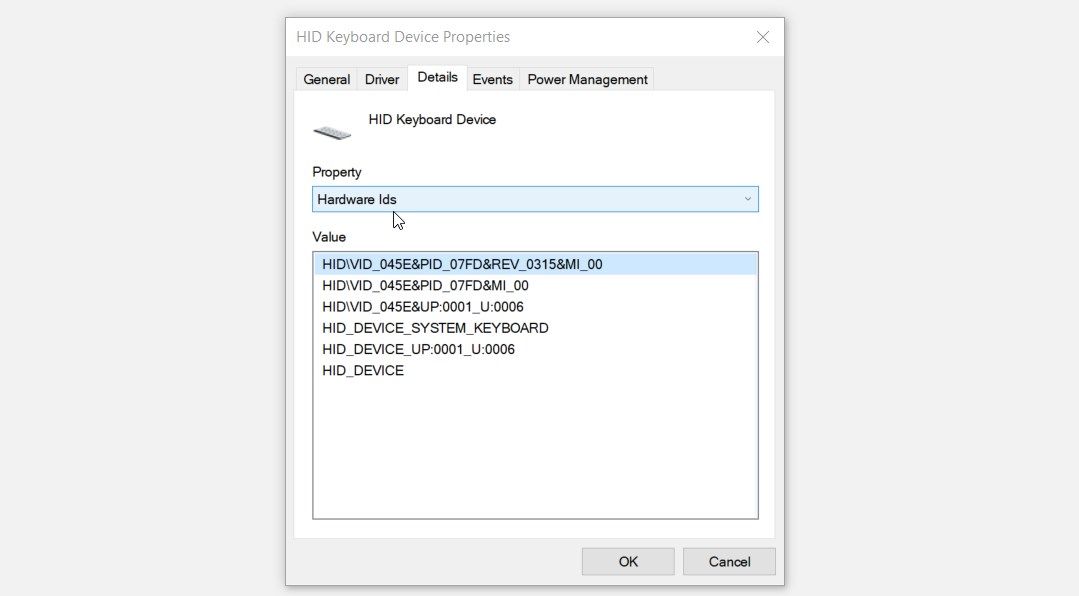
You might often see more than one ID in the “Value” box. In such instances, you should only focus on the hardware ID that appears at the top.
Don’t confuse a hardware ID with a compatible ID. A hardware ID is a unique identification number given to a specific device. Meanwhile, a compatible ID is a generic identification number given to a group of devices.
2. Use the Command Prompt

The Command Prompt is an incredible tool that helps you access most apps, configure system settings, and troubleshoot device issues. You can also perform other tricks with it, such as checking the hardware IDs for your devices.
Let’s check out the steps you need to follow:
- PressWin + R to open the Run command dialog box.
- TypeCMD and pressCtrl + Shift + Enter to open an elevated Command Prompt.
- Type the following command to get a list of all your drivers and devices:
Dism /Online /Get-Drivers /all /Format:Table
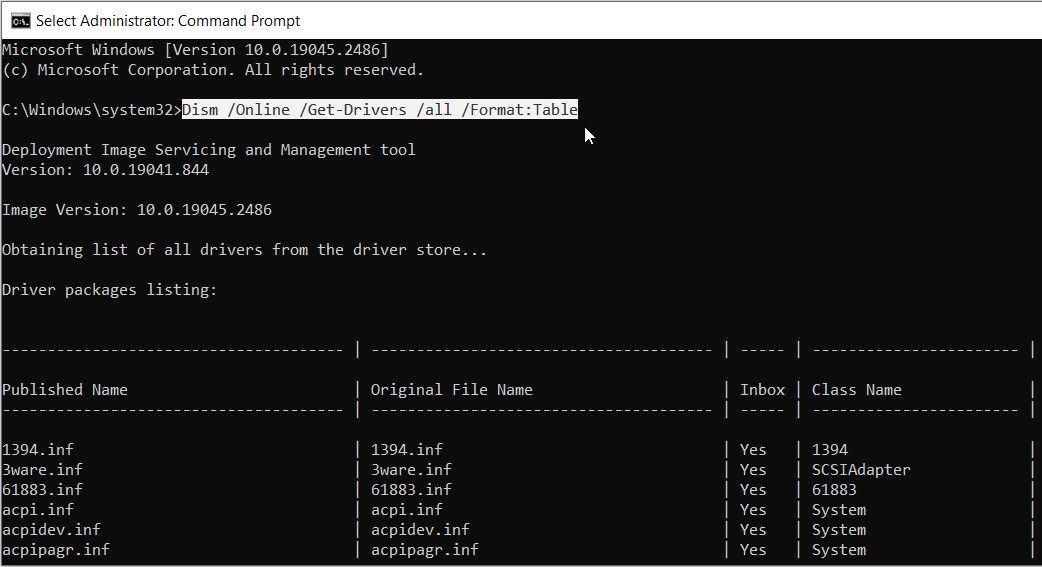
Now, let’s say you want the hardware ID for the mouse. Here’s how you can search for it:
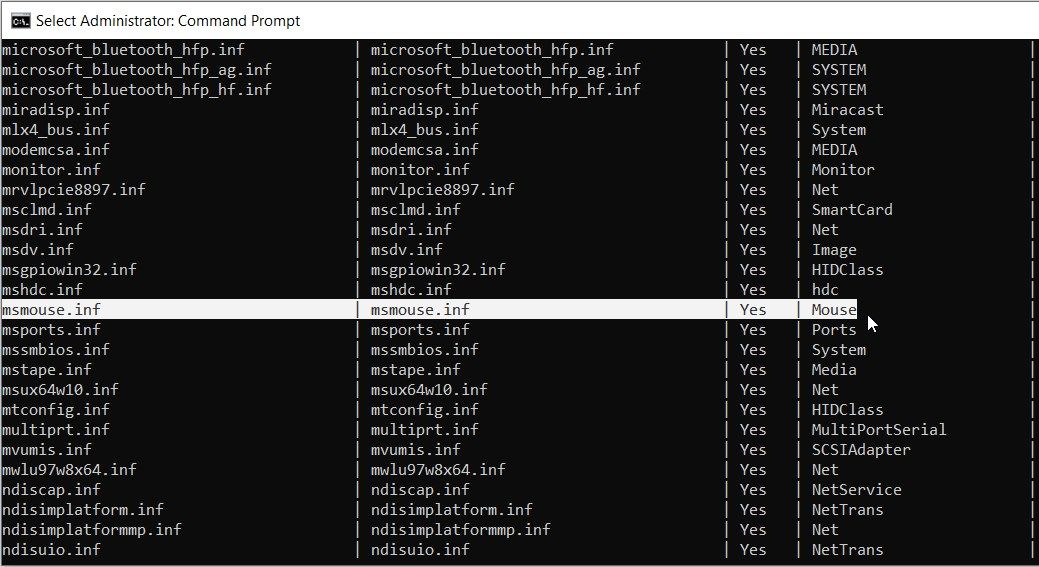
- Scroll down on the Command Prompt results and locateMouse in the “Class Name” category.
- In the same row, check the option that appears in the “Published Name” category.
 SwifDoo PDF Perpetual (2-PC) Free upgrade. No monthly fees ever.
In this case, the option in the “Published Name” category ismsmouse.inf .
Now that you’ve found the “Published Name” result for the mouse, here’s how you can use it to find the hardware ID:
- Open a newCommand Prompt window by following the previous steps.
- Type the following command and replacePublished Name with the relevant command:
Dism /Online /Get-DriverInfo /Driver:Published Name
For example, we discovered earlier that the “Published Name” result for the mouse ismsmouse.inf . If we insert this into the command above, then the result should be as follows:
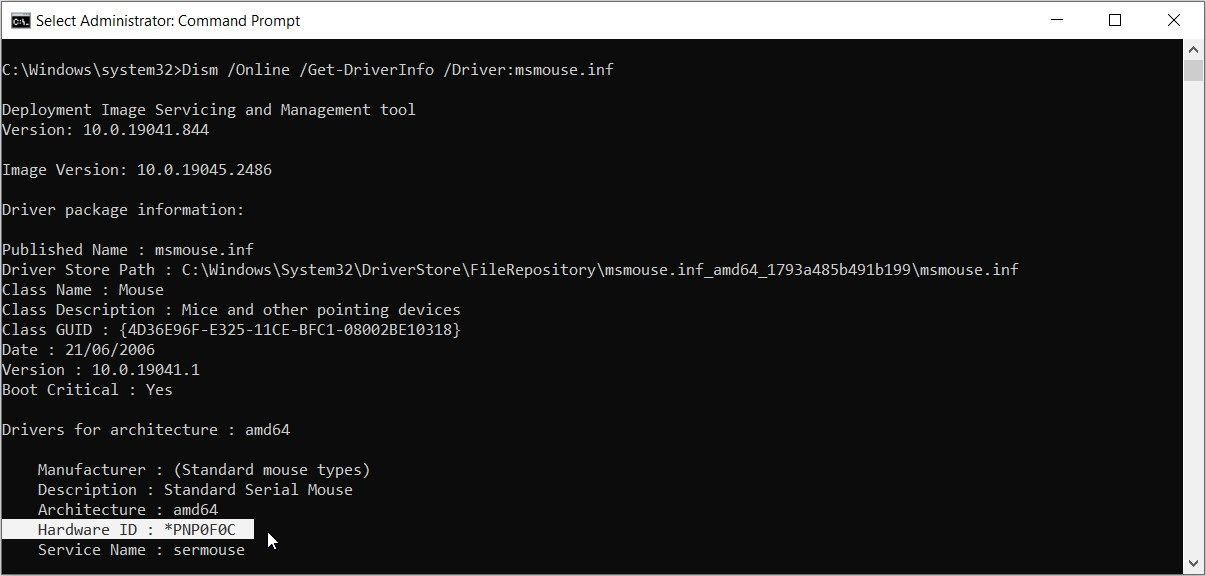
Dism /Online /Get-DriverInfo /Driver:msmouse.inf
Now, pressEnter once you’ve typed in the correct command. From there, locate the “Hardware ID” option from the results.
3. Use PowerShell
Alternatively, you can also check the hardware IDs using Windows PowerShell . It’s another incredible tool that allows you to run various commands.
Let’s explore how you can check the hardware IDs using this tool:
- PressWin + R to open the Run command dialog box.
- TypePowerShell and pressCtrl + Shift + Enter to open the elevated PowerShell window.
- Type the following command to get a list of your drivers and devices:
Get-PnpDevice -PresentOnly | Sort-Object -Property “Class” | Format-Table -AutoSize
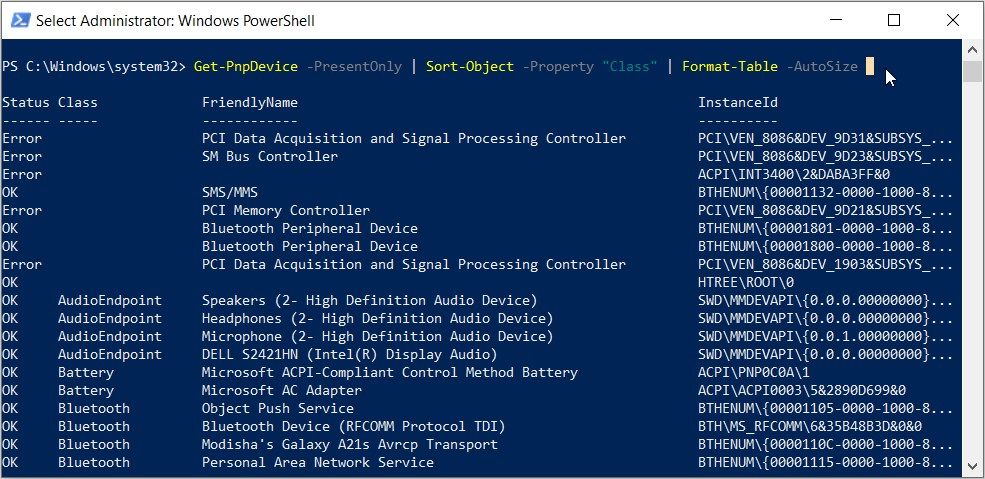
Now, look for your target device under the “FriendlyName” category.
For example, let’s say your target device is the keyboard. In this case, the option that appears in the “FriendlyName” category for the keyboard isStandard PS/2 Keyboard .
After finding your target device, check theInstance ID (the value that appears in the last column).
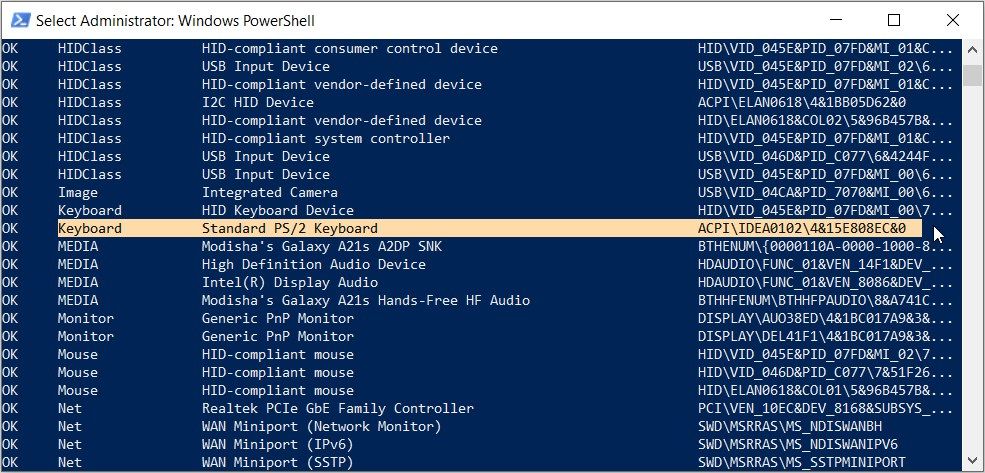
For the keyboard, the Instance ID isACPI\IDEA0102\4&15E808EC&0 .
Now that you’ve found the Instance ID, here’s how you can use it to find the hardware ID:
- Open anelevated PowerShell window as per the previous steps.
- Type the following command and replace theInstance Id command with the relevant option:
Get-PnpDeviceProperty -InstanceId "Instance Id" | Format-Table -AutoSize
If we use the Instance ID for the keyboard (ACPI\IDEA0102\4&15E808EC&0), then the command should be as follows:
Get-PnpDeviceProperty -InstanceId "ACPI\IDEA0102\4&15E808EC&0" | Format-Table -AutoSize
Now, pressEnter to run the command. From there, look for theDEVPKEY_Device_HardwareIds option under theKeyName category.
Next, look for the corresponding value in the “Data” category. The value that appears in this section is the hardware ID.
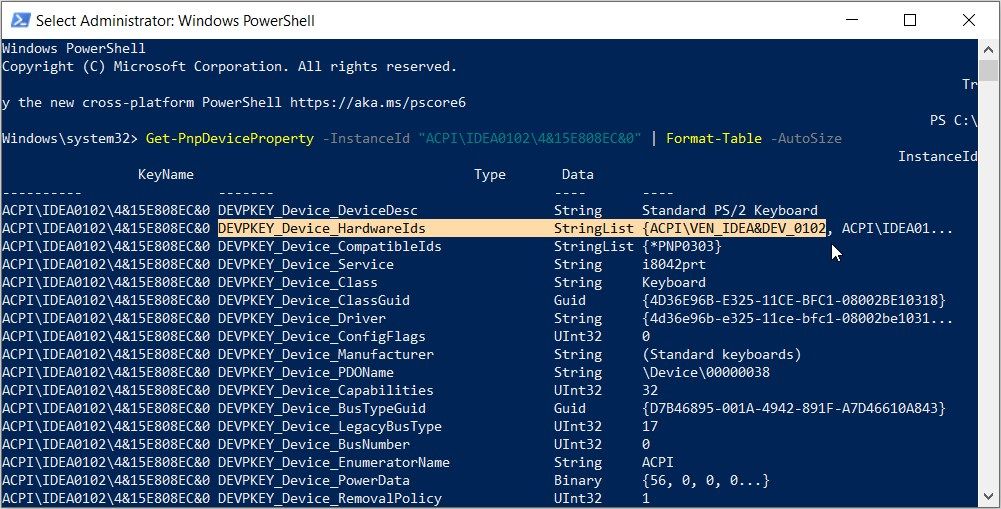
In this case, the hardware ID for the keyboard (which appears in the “Data” category) isACPI\VEN_IDEA&DEV_0102 .
Power Tools add-on for Google Sheets, 12-month subscription
4. Use the Windows Device Console
The Device Console (DevCon) is a feature that shows you detailed information about the devices on your computer. This tool can also help you configure, install, remove, enable, or disable devices.
Interestingly, this tool allows you to view the hardware IDs of multiple apps simultaneously. Unfortunately, the Device Console isn’t built-in on your device. This means you need to download and install it first.
Let’s check out how you can install this tool and use it to check the hardware IDs:
- Download and install the Windows Drivers Kit from the Microsoft website. When you’re on the site, head to theStep 2: Install the WDK section and pick an app that’s compatible with your device.
- Once you’ve installed the tool, openFile Explorer and navigate to This PC > Local Disk (C:) > Program Files (x86) > Windows Kits > 10 > Tools . If you’re using Windows 11, the path should be This PC > Local Disk (C:) > Program Files (x86) > Windows Kits > 11 > Tools .
- Access thex64 (64-bit) folder if you’re using a 64-bit device or thex86 (32-bit) folder if you use a 32-bit PC. If you’re unsure what to pick,check your Windows PC specs first.
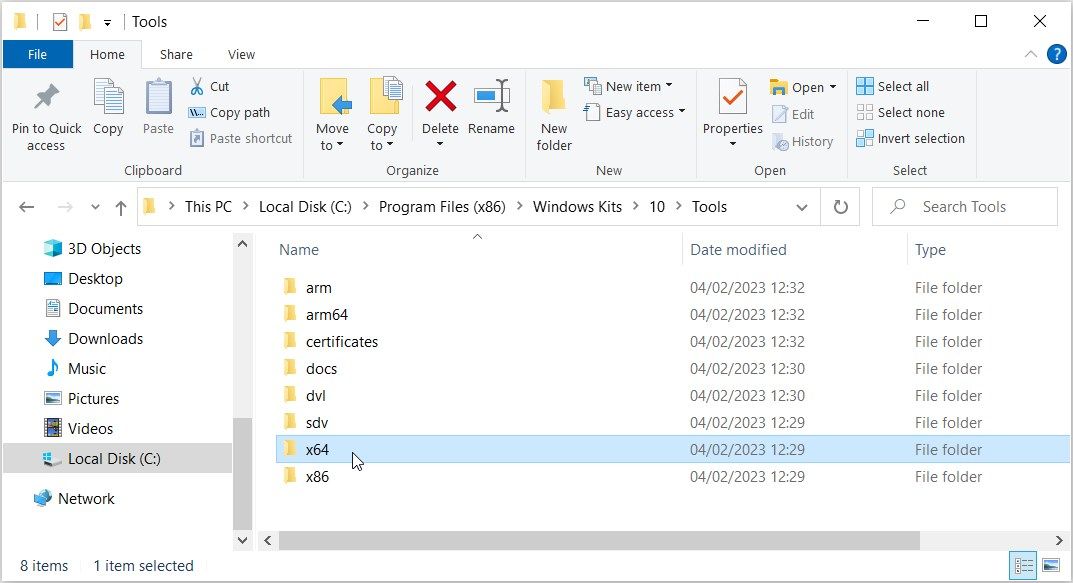
Once you’re in the correct folder, follow these steps:
- Click theFile Explorer address bar .
- TypeCMD and then pressEnter . This will run the Command Prompt within the current folder.
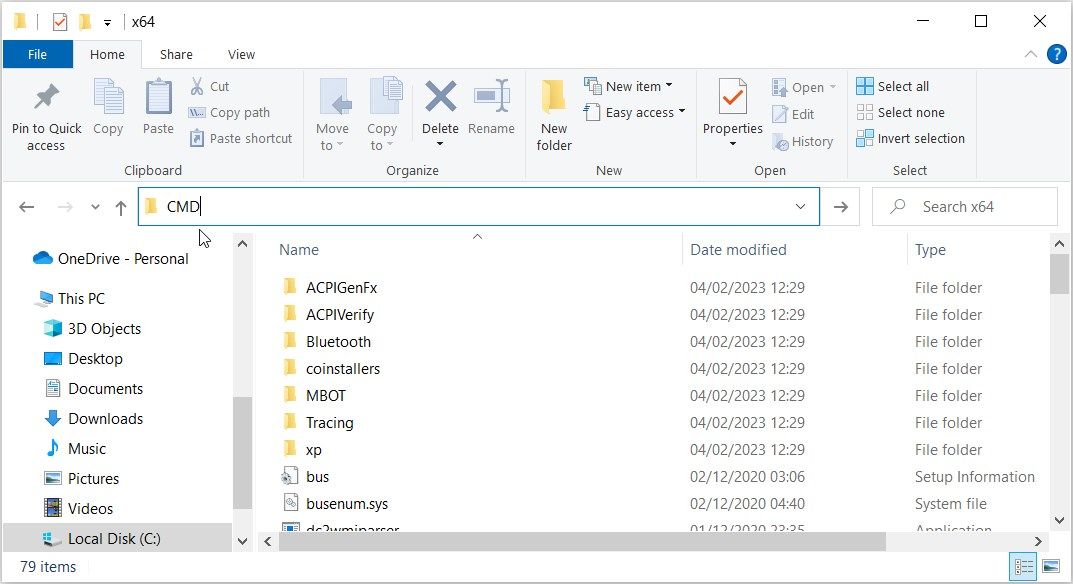
From there, type the following command into the Command Prompt and pressEnter :
devcon hwids *
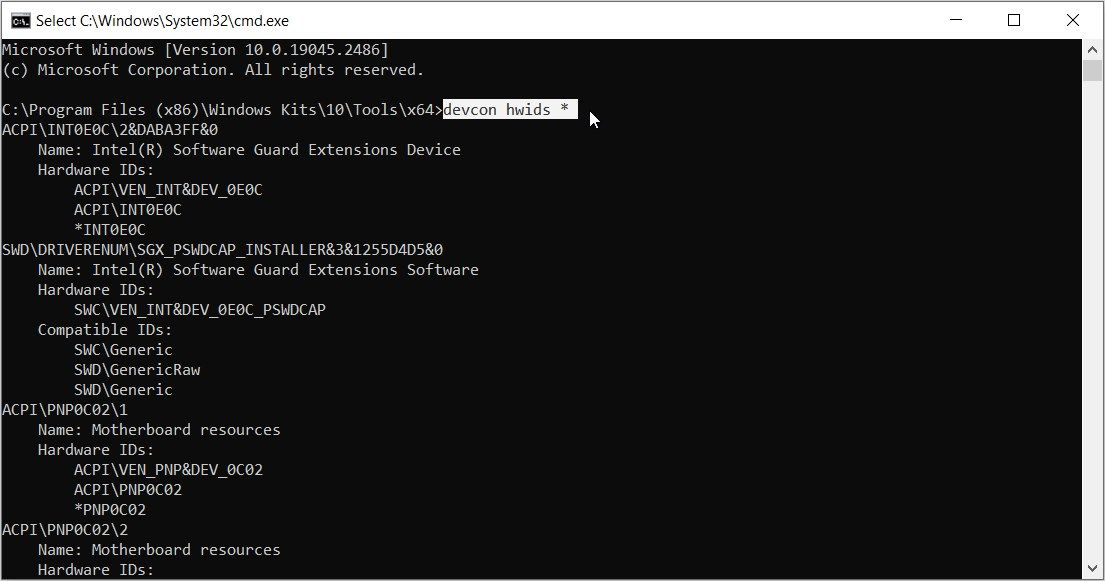
This will show you the details of all the devices on your computer. The results will also contain the hardware IDs.
For example, we’ve highlighted the hardware ID for theStandard PS/2 Keyboard in the image below.
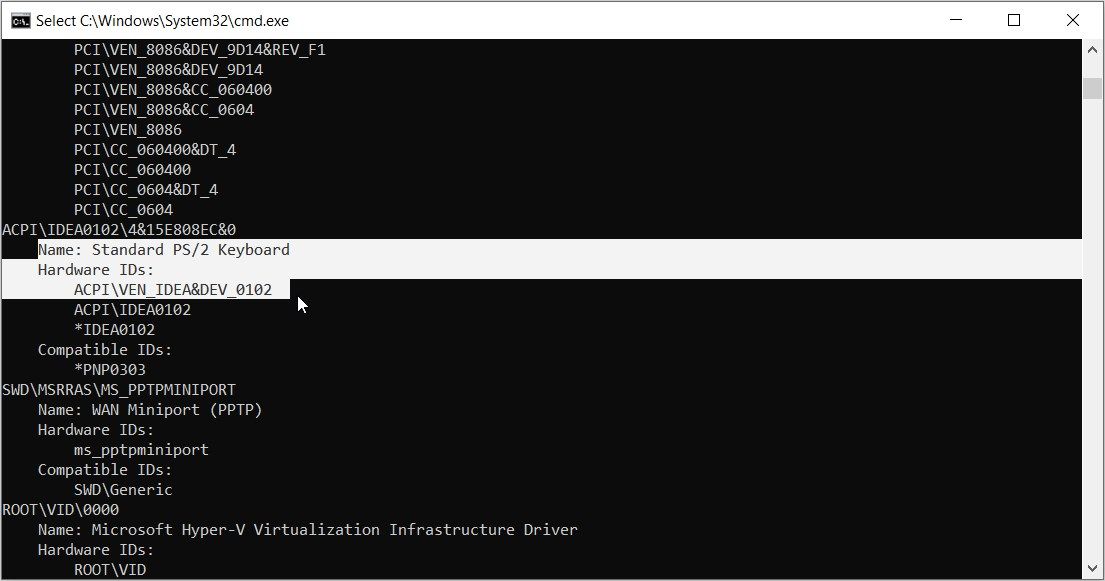
Remember, if there’s more than one hardware ID, always pick the first option. This means the hardware ID for the keyboard, in the example above, isACPI\VEN_IDEA&DEV_0102 .
If you want to explore the Device Console in detail, check out the various ways to use Dev Con on the Microsoft website.
You’ve Successfully Found the Hardware IDs of Your Devices
Hardware IDs make it easy for you to identify all your devices and drivers. The good news is that it’s quite easy to find these IDs.
If you want to check your hardware IDs quickly, try the Device Manager method in this article. Otherwise, any of the other methods we’ve covered should help.
- Title: Mastery of Device ID Extraction Techniques for Windows Users
- Author: Joseph
- Created at : 2024-08-15 15:50:54
- Updated at : 2024-08-16 15:50:54
- Link: https://windows11.techidaily.com/mastery-of-device-id-extraction-techniques-for-windows-users/
- License: This work is licensed under CC BY-NC-SA 4.0.
