Mastering Windows: Delete Temp Files Easily

Mastering Windows: Delete Temp Files Easily
Temporary files, as the name implies, aren’t meant to stick around on your Windows computer forever. Although Windows makes it simple to delete temporary files, there can be times when these files refuse to leave.
While temporary files are typically harmless, you may have your own reasons for deleting them. Here are some useful tips that should help remove any stubborn temporary files on Windows.
1. Use the Disk Cleanup Tool
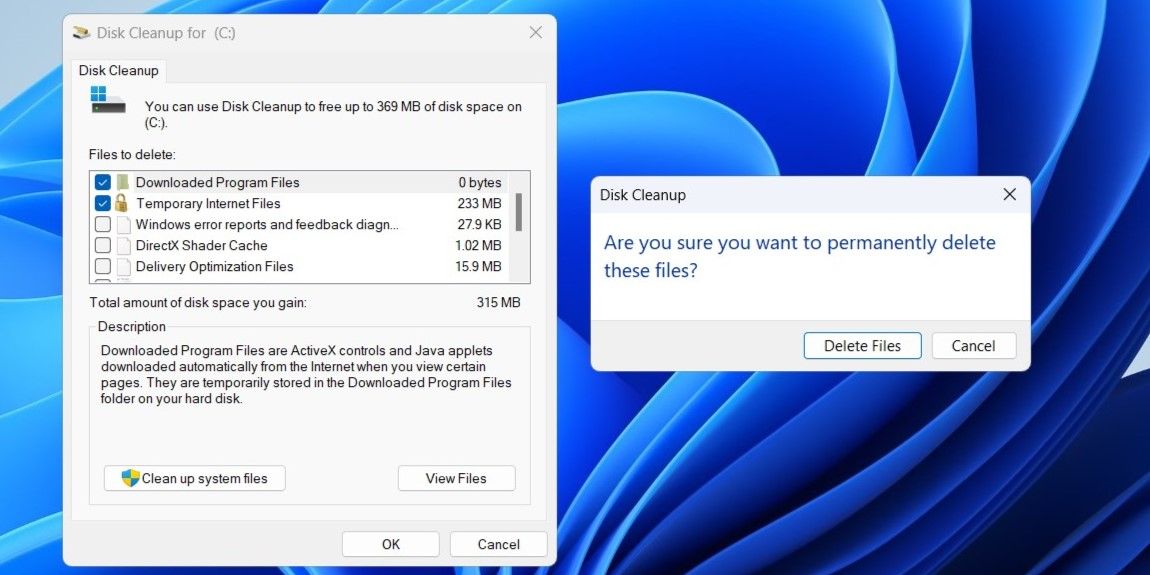
Windows offers several options for clearing temporary files on your PC. If you are unable to delete temporary files via the Settings app or File Explorer, try using the Disk Cleanup tool instead.
Here are the steps you can follow:
- Press Win + S to access the search menu.
- Type disk cleanup in the box and press Enter.
- Use the drop-down menu to select the drive from which you want to clear temporary files.
- Click OK.
- Under Files to delete, use the checkboxes to select the files you want to remove.
- Click OK to proceed.
- Click the Delete Files to confirm.

Wait for a few moments until the Disk Cleanup tool clears all the temporary files.
2. Use Command Prompt
If the Disk Cleanup utility fails to delete some or all of the temporary files on Windows, you can try using the Command Prompt instead. Don’t worry, the process isn’t as complex as it might sound.
Follow these steps to continue:
- Right-click on the Start icon and select Terminal (Admin) from the list.
- Select Yes when the User Account Control (UAC) prompt appears.
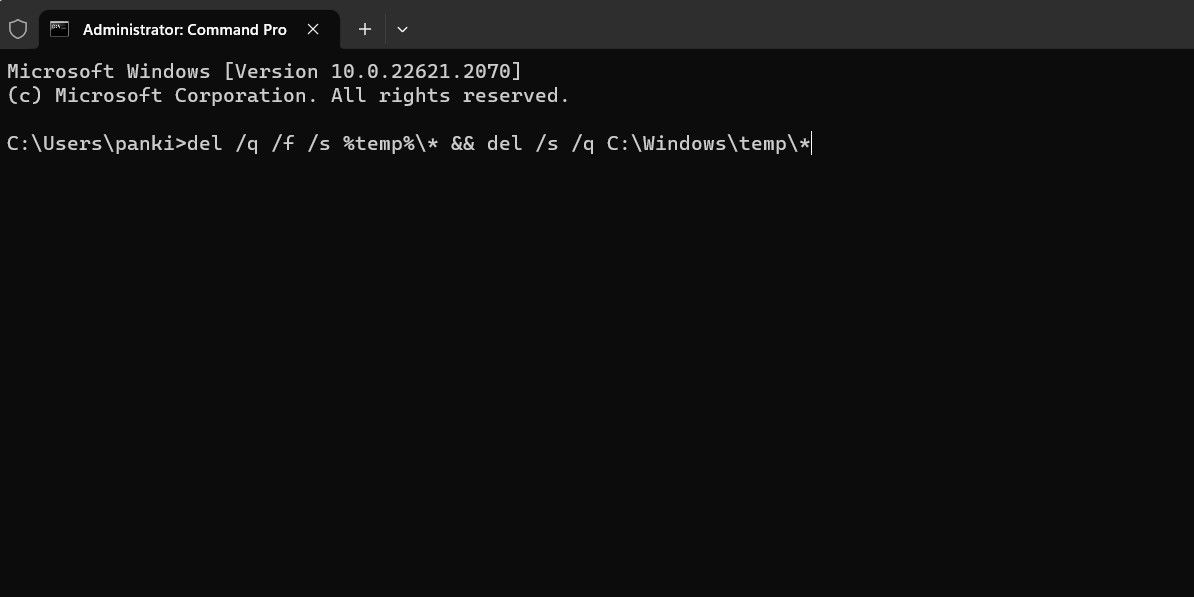
- Copy and paste the following command into the console and hit Enter.
del /q /f /s %temp%* && del /s /q C:\Windows\temp*
Wait for the above command to run and delete the temporary files.
3. Empty the SoftwareDistribution Folder
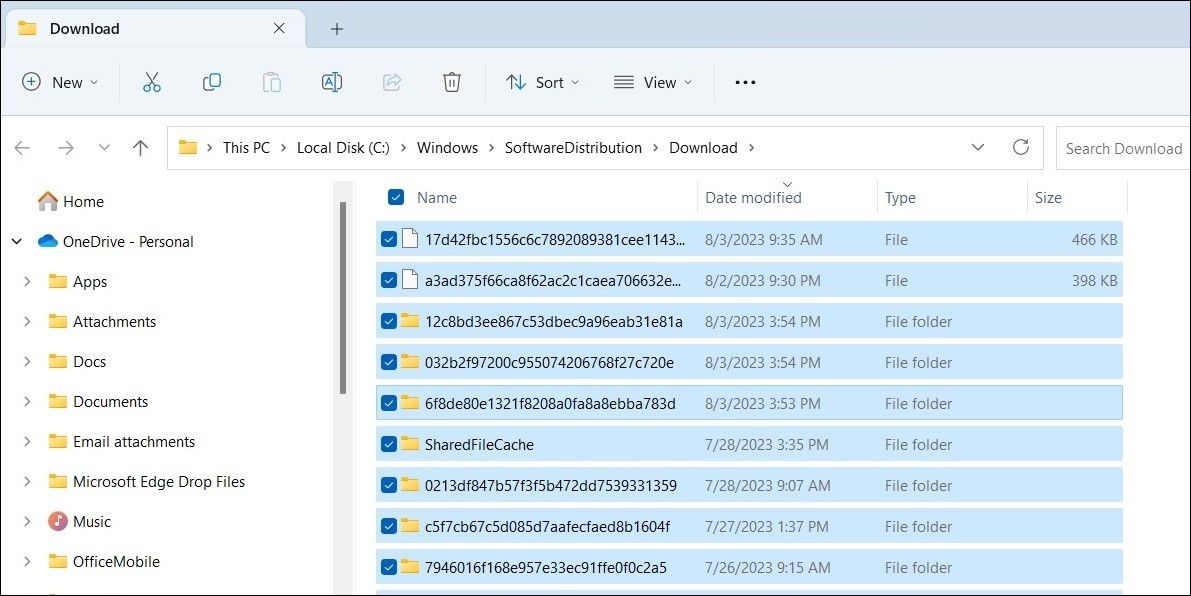
Windows saves all the downloaded update files in the SoftwareDistribution folder before installing them. If a Windows system update gets stuck , the OS will not delete the temporary files associated with it.
To fix this, you can try emptying the SoftwareDistribution folder manually using these steps:
- Press Win + S to open the search menu.
- Type services in the box and press Enter.
- In the Services window, locate the Windows Update service. Right-click on it and select Stop.
- Press Win + R to open the Run dialog box.
- Type the following path in the text field and hit Enter.
C:\Windows\SoftwareDistribution\Download - In the File Explorer window, press Ctrl + A to select all the files and click the trash icon at the top to delete them.
- Return to the Services window, right-click on the Windows Update service, and select Start.

If you run into issues while emptying the SoftwareDistribution folder, you can force delete files in Windows using Command Prompt or a third-party tool.
4. Edit Registry Files
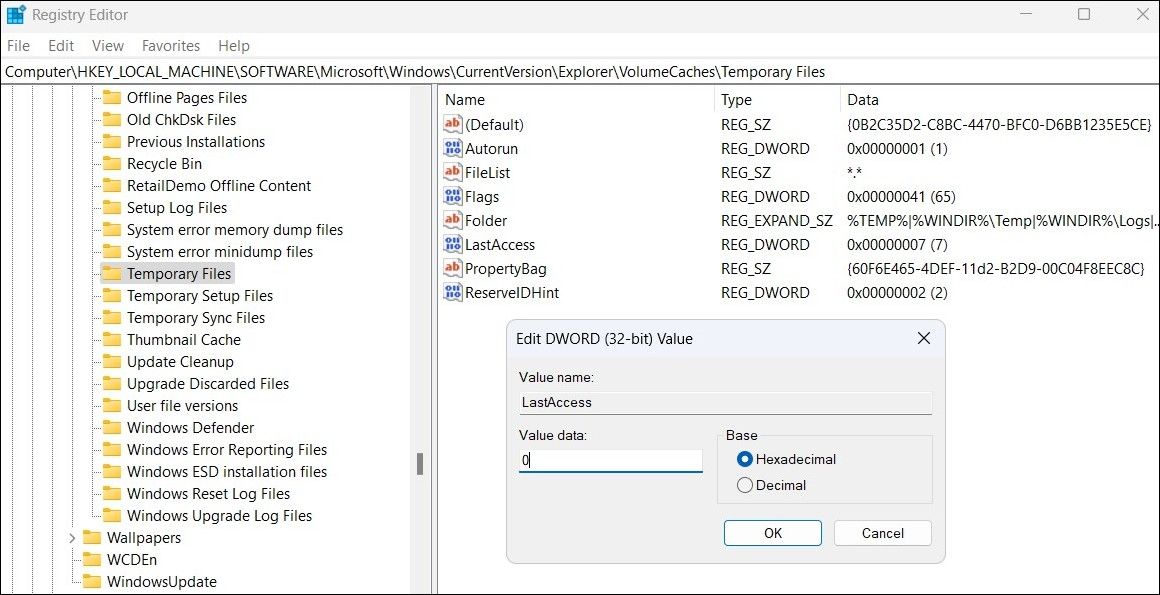
By default, the Disk Cleanup utility does not delete temporary files that are less than seven days old. This is because Windows marks these files as active. However, if you want to delete all the temporary files, regardless of their age, you can make changes to the Windows Registry.
Since editing registry files is slightly risky, make sure to back up all registry files or create a restore point as a precaution. Once done, follow these steps to edit registry files:
- Press Win + R to open the Run dialog box.
- Type regedit in the box and press Enter.
- Select Yes when the User Account Control (UAC) prompt appears.
- Use the left pane to navigate to HKEY_LOCAL_MACHINE > SOFTWARE > Microsoft > Windows > CurrentVersion > Explorer > VolumeCaches > Temporary Files.
- In the right pane, double-click the LastAccess key.
- Enter 0 in the Value data field.
- Click OK.

Restart your PC after this and try to delete temporary files once again.
5. Boot Into Safe Mode
It’s possible that a third-party program or background service is preventing Windows from erasing temporary files on your system. Booting your PC in safe mode can help you avoid any interference, as Windows will only run with essential drivers and services.
Use one of the many ways to boot into safe mode on Windows and try to delete temporary files one more time.
Get Rid of Temporary Files on Windows
Clearing temporary files is a great way to free up storage space without deleting any of your apps or important data.
We hope that one of the above tips was helpful and you were able to delete the temporary files without any problems.
While temporary files are typically harmless, you may have your own reasons for deleting them. Here are some useful tips that should help remove any stubborn temporary files on Windows.
Also read:
- [New] 2024 Approved Unlock Your Live Feed Free Cam Recording & Top Picks
- 2024 Approved Farmers' Fantasy Top 10 Game Simulations Unveiled
- Avoidance Tactics Against Flaky Saving Mechanism in Nvidia GUI
- Combating Writing Denials in Windows 11 Environment
- Comparative Overview of Installation Methods: Exe & Msi Files
- Corrective Measures for XC0351000: Hyprocvisor Not Found
- Creating Custom Volume Control Commands for Windows 11 Users
- Customizing Graphics Output: DPI Adjustment Guide
- Decoding the Complexity of 'WinToys': Your Guide to a Versatile Tool
- Funimate Android Gameplay - APK to Victory Guide
- How to Maximize Your Podcast Earning Potential
- Nvidia GeForce 940MX Graphics Driver Download
- Secure Your GPT-Partitions Auf Einfachere Weise Mit Unserer Kostenlosen Software – Geeignet Für Windows-Versionen Von 11 Bis 7
- Top 8 Free Videography Programs Perfect For Indie Filmmakers
- Which Pokémon can Evolve with a Moon Stone For Vivo S17? | Dr.fone
- Title: Mastering Windows: Delete Temp Files Easily
- Author: Joseph
- Created at : 2024-10-14 21:22:10
- Updated at : 2024-10-19 00:36:14
- Link: https://windows11.techidaily.com/mastering-windows-delete-temp-files-easily/
- License: This work is licensed under CC BY-NC-SA 4.0.
