Illustrating Maximum & Minimum CPU Stages on Windows

Illustrating Maximum & Minimum CPU Stages on Windows
Have you ever tried to tweak the minimum and maximum processor states on your Windows PC, only to find them hidden? Or perhaps you want to hide the options to prevent others from tampering with them?
Whichever you’re trying to do, we’re here to help by showing you how to add or remove them in the Power Options menu.
How to Show or Hide the Minimum or Maximum Processor State Using Command Prompt
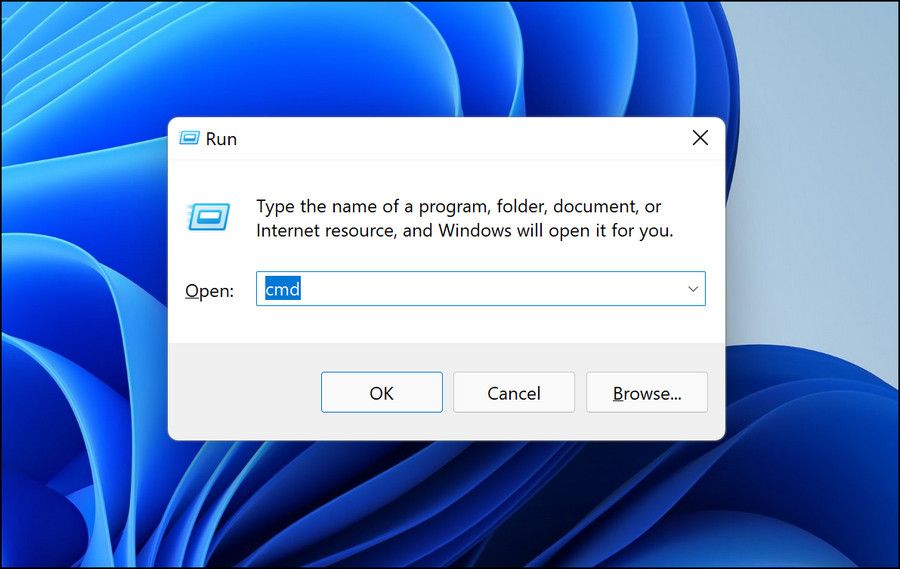
To use Command Prompt to show or hide these power states, pressWin + R to open Windows Run. Then, entercmd in the text box and hit theEnter key on your keyboard. You can also use one of the many ways to open the Command Prompt on Windows .

To show the minimum processor state, enter the below command:
powercfg -attributes SUB_PROCESSOR 893dee8e-2bef-41e0-89c6-b55d0929964c -ATTRIB_HIDE
To hide the minimum processor state, enter the below command:
powercfg -attributes SUB_PROCESSOR 893dee8e-2bef-41e0-89c6-b55d0929964c +ATTRIB_HIDE
To show the maximum processor state, enter the below command:
powercfg -attributes SUB_PROCESSOR bc5038f7-23e0-4960-96da-33abaf5935ec -ATTRIB_HIDE
To hide the maximum processor state, enter the below command:
powercfg -attributes SUB_PROCESSOR bc5038f7-23e0-4960-96da-33abaf5935ec +ATTRIB_HIDE
After you have typed in the command you want in the CMD window, hit theEnter key on your keyboard to run it.
How to Show or Hide the Minimum or Maximum Processor State Using the Registry Editor
You can also show or hide these options using the Registry Editor. However, before you do so, create a restore point as a backup in case you make a mistake and need to return your Windows computer to a previously-working state. Check out how to create a restore point in Command Prompt for more information.
After creating the system restore point, pressWin + R to open the Run dialog box. Then, enterregedit in the text box and hit theEnter key to open the Registry Editor.

On the UAC prompt, clickYes to continue.
To get to the key for the minimum processor state in the Registry editor, copy and paste the following file path into the Registry Editor’s address bar and hitEnter :
HKEY_LOCAL_MACHINE\SYSTEM\CurrentControlSet\Control\Power\PowerSettings\54533251-82be-4824-96c1-47b60b740d00\bc5038f7-23e0-4960-96da-33abaf5935ec
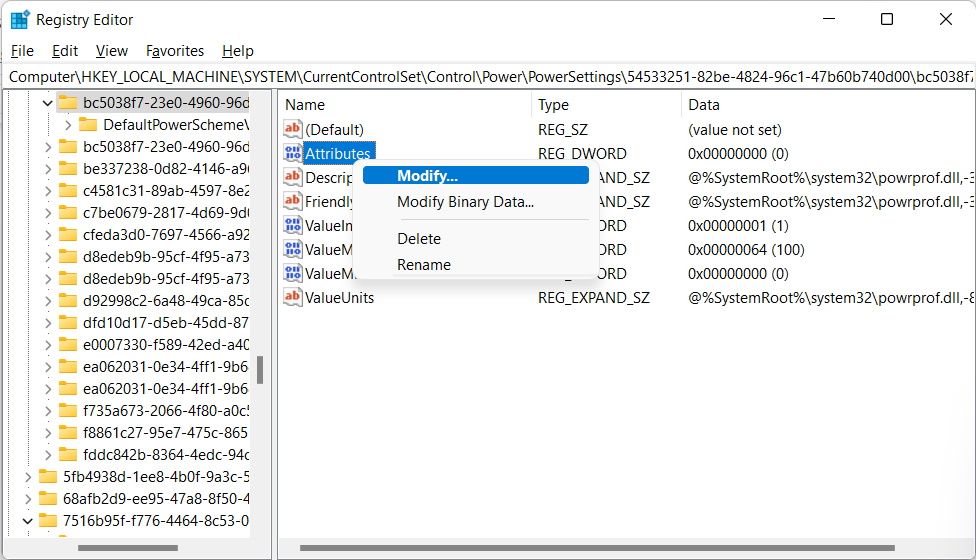
Right-click theAttributes value in the right panel and selectModify .

Then, setValue data to1 to hide the minimum processor state. To show it, setValue data to2 .

For the maximum processor state, enter the below file path in the Registry Editor’s address bar to get to its key:
HKEY_LOCAL_MACHINE\SYSTEM\CurrentControlSet\Control\Power\PowerSettings\54533251-82be-4824-96c1-47b60b740d00\893dee8e-2bef-41e0-89c6-b55d0929964c
Double-click theAttributes entry to modify it, and then changeValue data to1 to hide the maximum processor state or2 to show it.
Add or Remove the Minimum and Maximum Processor States From Power Options
Setting the minimum or maximum processor state on your Windows computer is vital to helping you get the performance you want from it. If you can’t see these options in the Power Options menu, you can easily reveal them with either Command Prompt or the Registry Editor. And after you’re done tweaking the states, you can hide them for their protection.
- Title: Illustrating Maximum & Minimum CPU Stages on Windows
- Author: Joseph
- Created at : 2024-08-15 15:44:29
- Updated at : 2024-08-16 15:44:29
- Link: https://windows11.techidaily.com/illustrating-maximum-and-minimum-cpu-stages-on-windows/
- License: This work is licensed under CC BY-NC-SA 4.0.

 vMix HD - Software based live production. vMix HD includes everything in vMix Basic HD plus 1000 inputs, Video List, 4 Overlay Channels, and 1 vMix Call

 Greeting Card Builder