
How to Resolve Windows 11'S Update Error 0X800f0922
How to Resolve Windows 11’S Update Error 0X800f0922
It’s recommended to regularly update Windows if you want to keep your system bugs-free and enjoy new features by Microsoft. While most updates install without any issue, some of them will throw an error during installation.
The Windows Update error 0x800f0922 is one of the many update errors you might encounter while updating Windows 11. Fortunately, it’s a cakewalk to get rid of this error code. Check out the following fixes for the Windows 11 update error 0x800f0922.
What Is Windows 11 Update Error 0x800f0922?
Windows 11 updates are a contentious problem. Most users love its automation; others abhor how overbearing and demanding they can be. Whatever you prefer, there is always room for issues—namely, Windows 11 update error 0x800f0922.
This error appears when users try to download the 2022-04 Cumulative update for Windows 11. For most users, this error occurs the next moment after initiating the update. For others, it appears after 98% of the update has been downloaded.
The error mainly appears when important Windows update services are not running in the background, or your computer doesn’t have enough space to install the update. Also, corruption in the SoftwareDistribution folder can be a prime reason behind the error.
1. Restart Your Device
Whenever you face any Windows issues, including the update error 0x800f0922, your first port of call should be to restart the computer. Restarting the computer will reset all the memory caches and processes, which might be the reason behind the error.
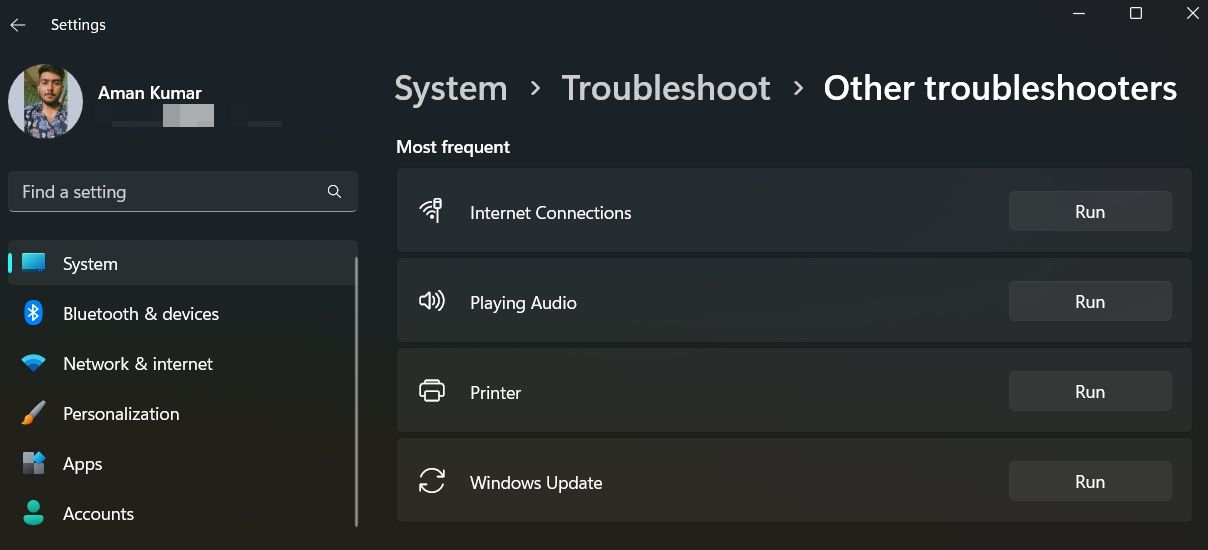
2. Use the Windows Update Troubleshooter
Windows 11 features lots of integrated troubleshooters which come in handy in different scenarios. To get rid of update errors, you can use the Windows Update troubleshooter.
The troubleshooter will clear the Windows Update-related temporary files and repair the corrupt Windows Update components. Here’s how to run the Windows Update troubleshooter on Windows 11:
- Open theSettings menu by pressing theWin + I hotkeys and choose theTroubleshoot option.
- SelectOther troubleshooters.
- Click theRun button next toWindows Update.

The troubleshooter window will appear, and start scanning your computer for available issues. After the scan is complete, the troubleshooter will show the changes made to your computer or ask your permission to apply the fix. Grant it, and check if it resolves your issue.
3. Clean Up Your Disk Drive
Your computer must have enough space to download and install the Windows updates. If this isn’t the case, you will likely face different issues, including the update error 0x800f0922.
The solution, in this case, is to free up disk space in your Windows computer . One way to do that is by cleaning the drive containing the Windows 11 OS, which is C: drive for most users.
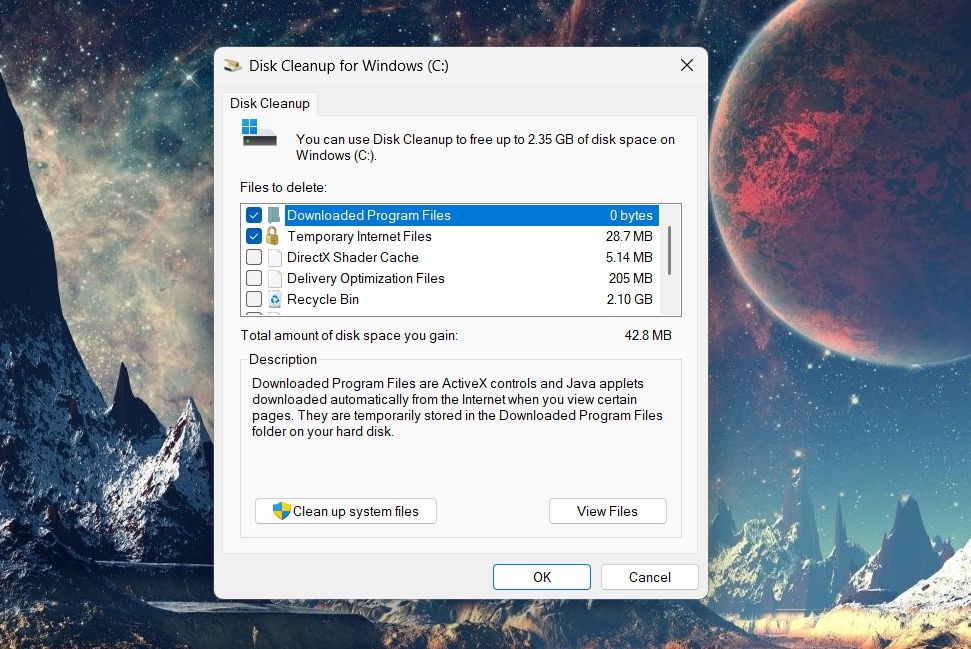
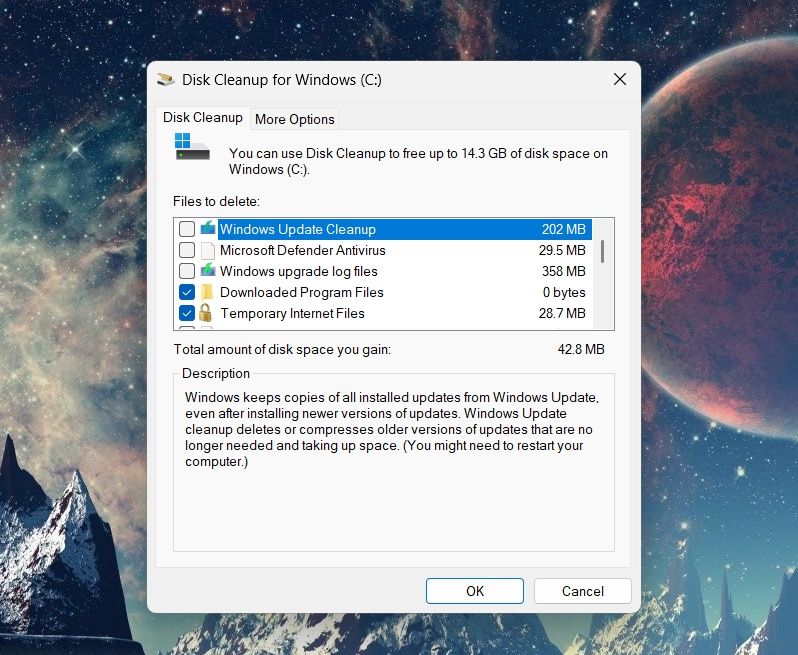
To clean the drive, you can use the Disk Cleanup tool, which removes redundant files to create more space. Here’s how to use it:
- In the Start menu, typeDisk Cleanup and press Enter.
- Click the drop-down icon, select the drive containing Windows 11 OS, and then clickOK.
- Click theClean up system files button.
- Under theFiles to delete section, select the files you want to delete and clickOK.
- Click theDelete Files option in the prompt that crops up.
That’s it. You have gained some space in the OS drive. If you want to create more space, you can remove unnecessary folders from the OS drive.
For instance, you can delete old Windows update files like the Windows.old folder, which contains data of the OS version previously installed on your computer. This folder is automatically created whenever you upgrade from Windows 10 to 11.
There’s no harm in deleting this folder, but make sure you only do it when you have no plans to return to Windows 10.
4. Reset the Windows Update Components
The update errors often result due to corruption in the Windows Update components. To detect and remove the corruption, you will have to reset the Windows Update components. Here’s how:
- In the Start menu, typeCommand Prompt and chooseRun as administrator from the right pane.
- In the console, type these four separate commands and press Enter after each:
net stop bits net stop wuauserv net stop appidsvc net stop cryptsvc - Type the following command and press Enter to rename the SoftwareDistribution folder:
Ren %systemroot%\SoftwareDistribution SoftwareDistribution.old - Then, execute this command to rename the catroot2 folder:
Ren %systemroot%\System32\catroot2 catroot2.old - Now, to restart the services, execute these four commands separately:
net start bits net start wuauserv net start appidsvc net start cryptsvc
After that, restart your computer and check whether you can update Windows 11 again.
5. Change the Status of Important Services
There are certain Windows services that must be running in the background if you want to update Windows. These services areWindows event collector ,App readiness ,App optimization , andGeolocalization .
You’ll have to change the Startup type of these services to Automatic to fix the problem. Here’s how to do it:
- In the Run dialog box, typeServices.msc and clickOK.
- Search for and double-click on theWindows Event Collector service.
- Click the drop-down icon next to theStartup type and chooseAutomatic from the list.
- Click theStart button under theService status option.
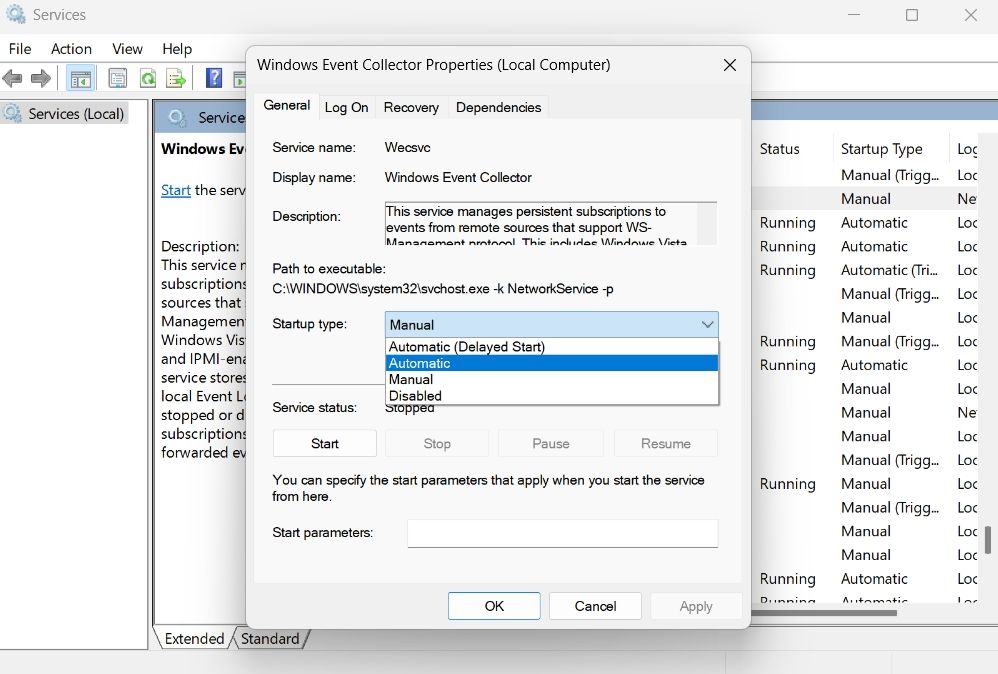
- ClickApply >OK to save the changes.
Next, repeat the above steps for other mentioned services as well.
6. Manually Download and Install Updates
If updating Windows through the Settings app is throwing an error, you can download and install updates using the Microsoft update catalog . You can do it by following the below instructions:
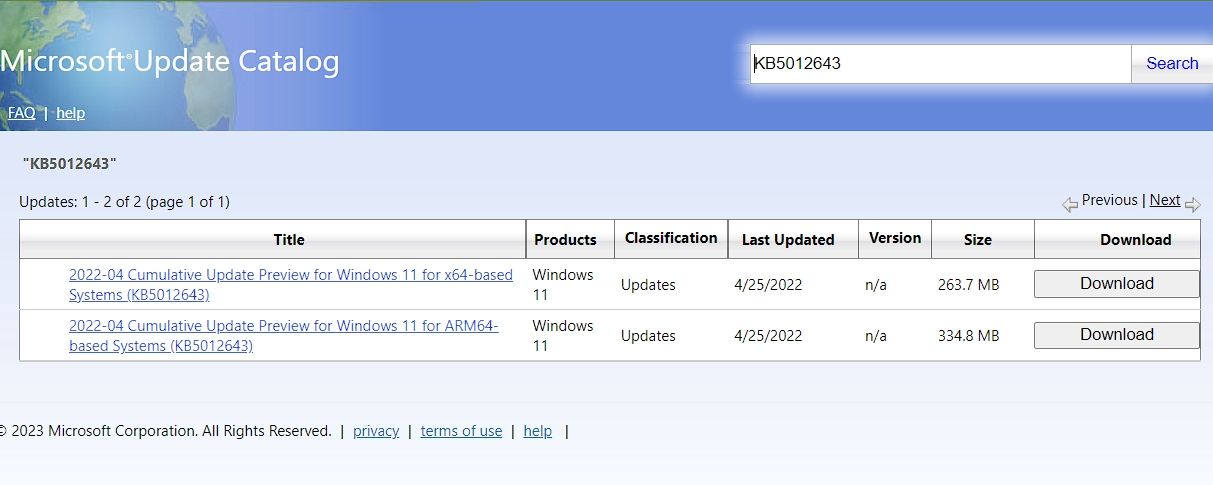
- Open the Microsoft Update Catalog on your browser.
- In the search bar, type theKB number of the update you want to install. In this case, it’sKB5012643.
- ClickSearch.
- In the result window, you’ll get two options –ARM64 andx64. Click theDownload button next to the system type you’re using.
- A new window will appear, right-click on the download link, choose theSave link as, and select the folder where you want to download the update package.
Next, open the location where you have downloaded the update package and double-click on it to begin the installation.
Update Windows 11 Again With Ease
Update errors are very common and appear when an important update file is damaged or missing. You must quickly address and fix the update errors, as they can lead to serious issues if left unattended.
The update error 0x800f0922 mainly appears when you try to update Windows 11 to KB5012643. Luckily, you can quickly troubleshoot this error by following the solutions above.
Also read:
- [Updated] 2024 Approved Speeding Up TikToks Simple Techniques for Faster Videos
- [Updated] Achieve High Rankings on YouTube with Top SEO Tips (1-11)
- Advanced OCR Technology Amplifies Workflow at Premier Construction Data Company
- Adventure Awaits in These Top 5 Samsung Gear VR Titles for 2024
- Discover the Ease of Bouncie Connect for Your Vehicles: Comprehensive Product Analysis
- Fixing Error 2E to Enable Windows Update
- How to Fix the “Requested Operation Requires Elevation” Error 740 on Windows 11 & 11
- In 2024, The Ultimate Collection of 10 Advanced FCP Tools
- No Apps Needed: Windows 11 Note Hacks
- Resolving DirectX Install Failures on PCs
- Restoring Accuracy: Fixed Discord Games Status Errors (Windows)
- Tackling Invisible Additional Screen
- Ultimate Racing Game Anthology The Top Five for 2024
- Updated 2024 Approved Mastering Audio Recording and Integrating Narration Into Video Projects
- Witcher 3 Will Not Start? Expert Tips For Repairing And Restarting Successfully
- Title: How to Resolve Windows 11'S Update Error 0X800f0922
- Author: Joseph
- Created at : 2025-01-28 07:25:22
- Updated at : 2025-01-30 05:59:28
- Link: https://windows11.techidaily.com/how-to-resolve-windows-11s-update-error-0x800f0922/
- License: This work is licensed under CC BY-NC-SA 4.0.