
How to Remove the Show More Options Entry From the Context Menu on Windows 11
How to Remove the Show More Options Entry From the Context Menu on Windows 11
Windows 11 comes with a fresh new look and has mainly got a positive response for its new interface. However, there are a couple of features that are not being welcomed by the users. For instance, the addition of the “show more options” entry to the right-click context menu.
Although it was introduced to simplify things, many users still prefer the old context menu from Windows 10. Fortunately, you can remove Show more options from the context menu on Windows 11 by following the below methods.
1. How to Remove “Show More Options” From the Context Menu With Folder Options
The Windows Folder Options in File Explorer is the go-to place to view and manage File Explorer settings. You can use it to enable compact view in File Explorer on Windows 11 , manage file thumbnails, remove the “show more options” entry, and much more.
Here’s how to use the folder option to remove the “show more options” entry from the context menu:
- Press theWin + E hotkey to open theFile Explorer.
- Click the three horizontal dots at the top bar and chooseOptions.
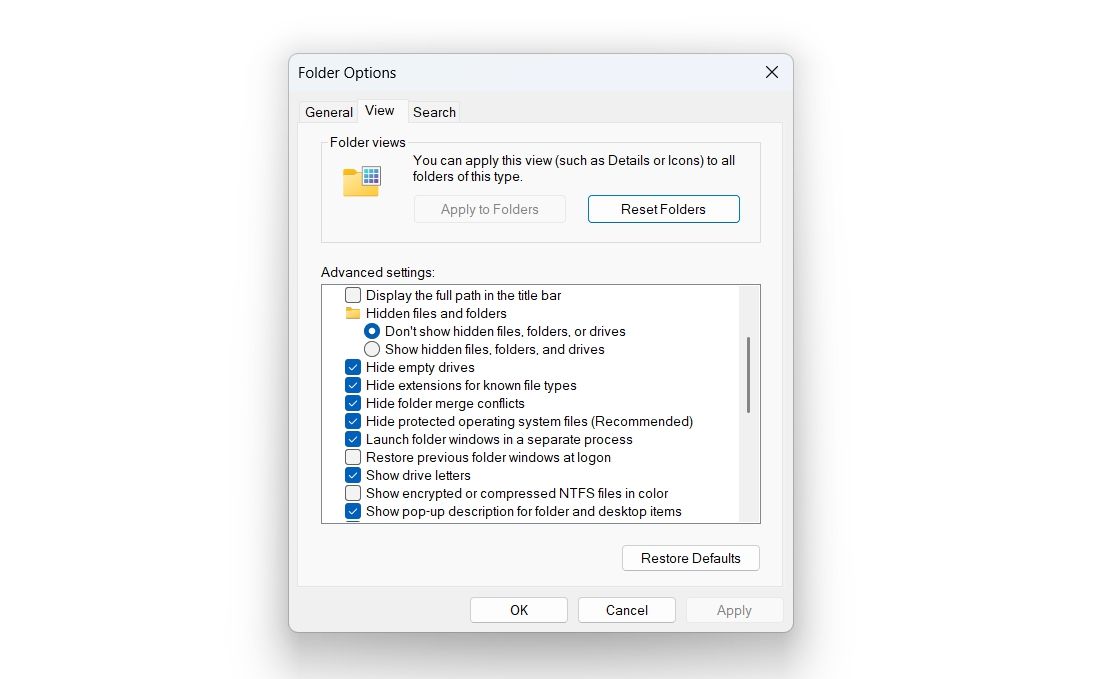
- In theFolder Options, switch to theView tab.
- Check theLaunch folder windows in a separate process box.

- ClickApply >OK to save the changes.
Next, restart your computer for the changes to take effect.
2. Remove Show More Options From the Context Menu Using the Command Prompt
If you’re a power user, you can use Command Prompt to remove the “show more options” entry from the context menu. Here’s how:
- Open theStart Menu by pressing theWin key.
- In the search bar, typeCommand Prompt and chooseRun as administrator from the right pane.
- ClickYes to the UAC that crops up.
- In the elevated Command Prompt window, type the following command and pressEnter :
reg add "HKCU\Software\Classes\CLSID\{86ca1aa0-34aa-4e8b-a509-50c905bae2a2}\InprocServer32" /f /ve
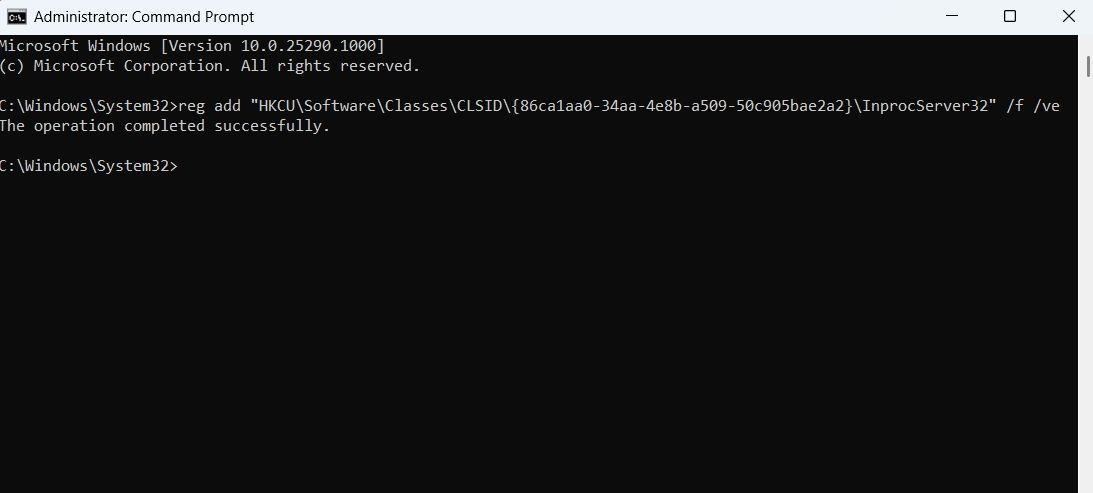
After executing the command, you’ll see the “The operation completed successfully” message to confirm that it went through.
Now, you will have to restart Windows Explorer to see the changes. To do that, open theTask Manager (see how to launch the Task Manager ), right-click onWindows Explorer, and chooseRestart.
Check if you can see the changes. If not, then you will have to restart your computer for the changes to take effect.
In the future, if you want to add the “show more options” entry to the context menu, then open Command Prompt with admin rights and run the following command:
reg delete "HKEY_CURRENT_USER\Software\Classes\CLSID\{86ca1aa0-34aa-4e8b-a509-50c905bae2a2}" /f
3. Remove Show More Options From the Context Menu Using the Registry Editor
Another quick way to remove the “show more options” entry is through the Registry Editor. Here’s what you need to do:
Before making any changes to the registry, ensure you’ve created a restore point or back up the registry . This will ensure your system settings and files are secure, and you can quickly access them if something goes wrong.
- Open the Start Menu, typeRegistry Editor in the search bar, and press Enter.
- In the Registry Editor, navigate to the following location:
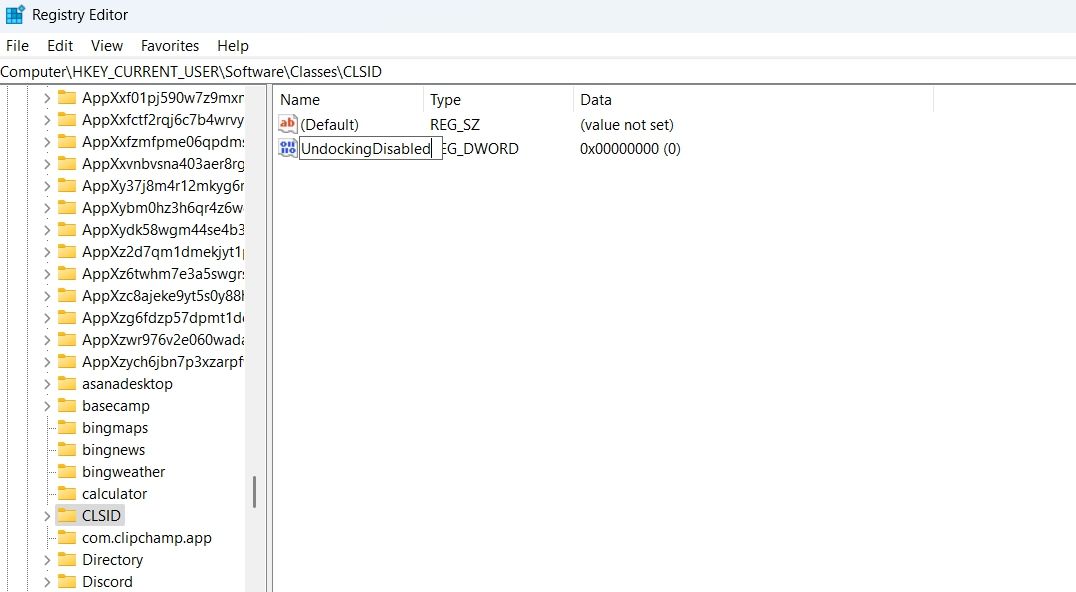
HKEY_CURRENT_USER\Software\Classes\CLSID - Right-click on the empty space on the right pane, clickNew, and then selectDWORD (32-bit) Value from the context menu.
- Name the value as**”UndockingDisabled”** and pressEnter .
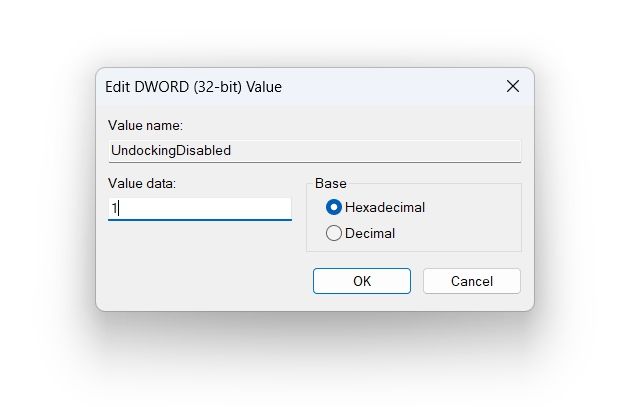
- Double-click on the UndockingDisabled key, type1 in theValue data, and clickOK to save the changes.
4. Remove the “Show More Options” Entry From the Context Menu Using Winaero Tweaker
There are plenty of third-party tools using which you can customize the look of your Windows 11 computer. For this guide, we will use Winaero Tweaker.
Here’s how to download Winaero Tweaker and use it to remove the “show more options” entry from the context menu:
- Download the Winaero Tweaker zip file on your computer.
- Unzip the file, open the executable, and then follow the on-screen instructions to install it on your computer.
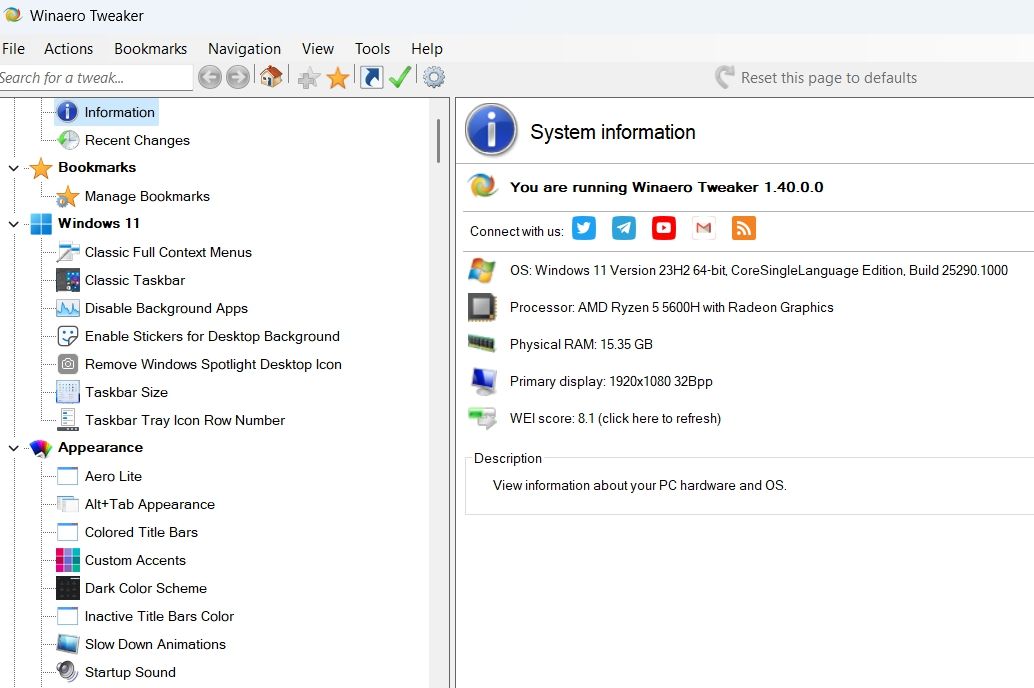
- Launch Winaero Tweaker and choose theClassic Full Context Menus option from the left sidebar.
- Check theEnable classic full context menus box.
- Click theRestart Explorer button that appears.

Enjoy an Old School Context Menu on Windows 11
The desktop context menu lets you quickly access areas like the personalization menu, display settings, and much more. In Windows 11, you get the new “Show more options” entry in the context menu. But if you prefer the old design, you can quickly disable the “Show more options” entry from the context using either of the above methods.
Also read:
- [New] In 2024, Best Practices for Advanced AE Plug-Ins
- [New] Pivot and Merge Videos with Ease on Android Gadgets
- [Updated] 2024 Approved Quick Fix for Background Removal in Figma Projects
- 27 French Sayings And Idioms To Make Your French Sound Authentic
- Altering Meeting Screens in Microsoft Teams
- Configuring ChatGPT on Your Windows PC
- Eliminating 'Empty Folder' Warning in Windows 11
- Fixing Nvidia Connect Failure on Windows 11 Systems
- Guides to Mastering Your Fax Interface with W11's Tools
- In 2024, Can I use iTools gpx file to catch the rare Pokemon On Poco C51 | Dr.fone
- In 2024, How to get the dragon scale and evolution-enabled pokemon On Vivo V30 Lite 5G? | Dr.fone
- In 2024, Top-Grossing YouTube Titans
- Mastering the Art of Correctly Installing Apps From MS Store
- Navigate Through Faulty Shift in Windows
- Overcoming Wi-Fi Connectivity Hurdles: Clearing Action Shortcomings
- Shaping Windows 11: Square It Off
- The Ultimate Password Creation Companion for Windows Users
- Tranformation Gratuite De Fichiers M4A en Format SWF : Guide Complet - Movavi
- Unlock 10 Passport Images at No Cost – Desktop/Web
- Title: How to Remove the Show More Options Entry From the Context Menu on Windows 11
- Author: Joseph
- Created at : 2025-02-10 01:12:41
- Updated at : 2025-02-10 19:16:18
- Link: https://windows11.techidaily.com/how-to-remove-the-show-more-options-entry-from-the-context-menu-on-windows-11/
- License: This work is licensed under CC BY-NC-SA 4.0.