
How to Fix the NVIDIA Control Panel Not Opening in Windows 11
How to Fix the NVIDIA Control Panel Not Opening in Windows 11
The NVIDIA Control Panel is an important app for managing your NVIDIA GPU, but sometimes it won’t open. In many such reported cases, nothing happens when users select to open the NVIDIA Control Panel; however, sometimes an error message will pop up.
If the NVIDIA Control Panel is not opening in Windows 11, don’t fret. Here’s how to get it working again.
1. Run the NVIDIA Control Panel With Admin Rights
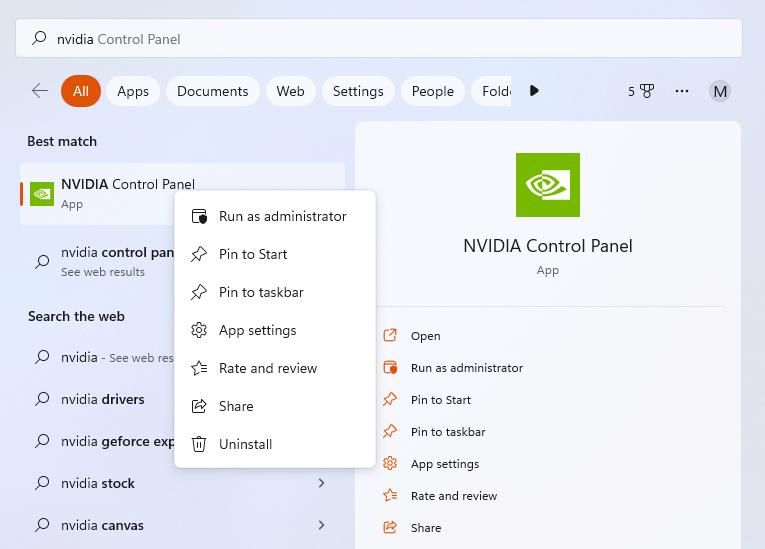
Most users usually select to open the NVIDIA Control Panel from Windows 11’s desktop context menu. However, you can select to run that app as an administrator in the following steps:
- Right-click your taskbar’s Start menu button and select theSearch shortcut.
- TypeNVIDIA Control Panel in the search box.
- Right-click theNVIDIA Control Panel result to select aRun as administrator on that app’s context menu.

Setting NVIDIA Control Panel to always run as administrator is tricky because that UWP app is installed within a restricted access folder. You’ll need to take ownership of the WindowsApps folder to open that directory. Then select the “Run as administrator” option for the nvcplui.exe file. The default path for the file is:
C:\Program Files\WindowsApps\NVIDIACorp.NVIDIAControlPanel_8.1.963.0_x64__56jybvy8sckqj\nvcplui.exe
2. End NVIDIA Background Processes
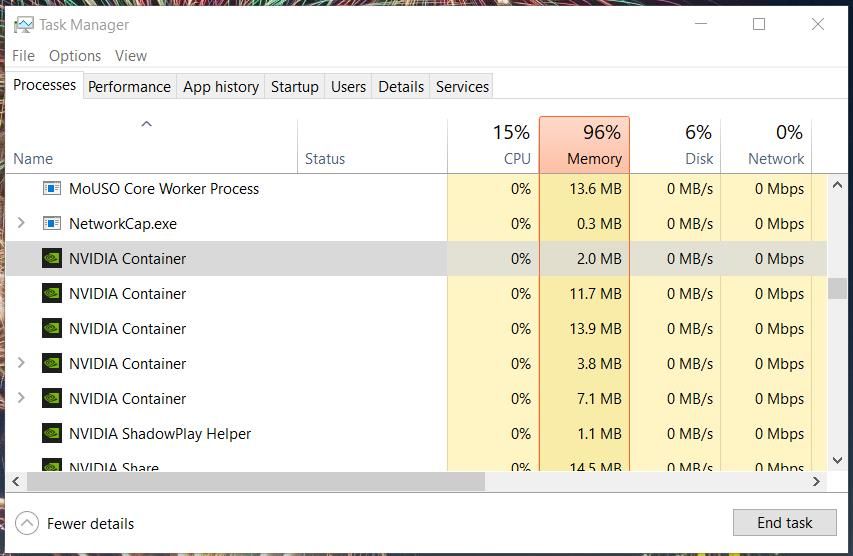
Sometimes you can’t see NVIDIA Control Panel when multiple instances of it are already running. Ending NVIDIA background processes will enable you to restart the app. This is how you terminate background NVIDIA background processes:
- Bring up theTask Manager tool (pressingCtrl +Shift +Esc) is the quickest method for opening it).
- SelectProcesses if a different tab opens with Task Manager.
- Next, scroll down theProcesses tab to find NVIDIA processes.
- Select all NVIDIA processes and click theirEnd task buttons.
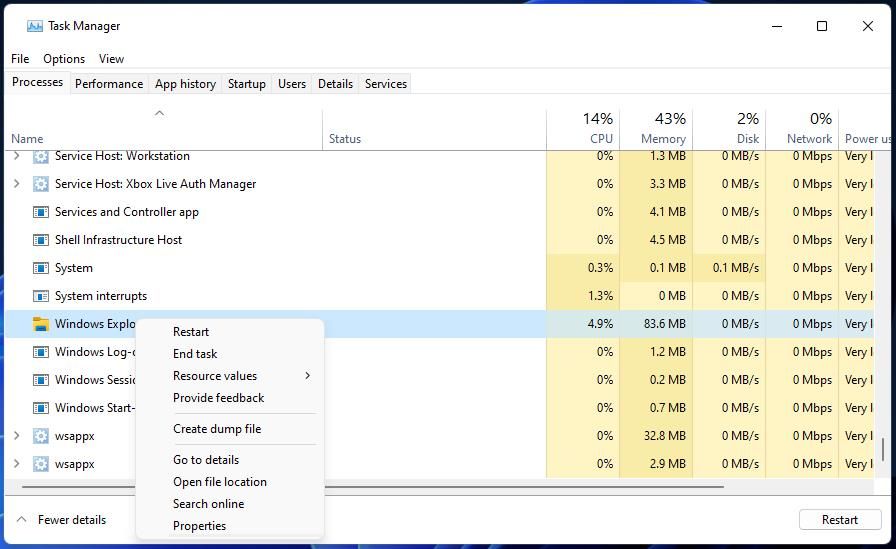
- Click the Windows Explorer process with the right mouse button and selectRestart .
- Try opening the NVIDIA Control Panel again.

3. Start (or Restart) the NVIDIA Display Container Service
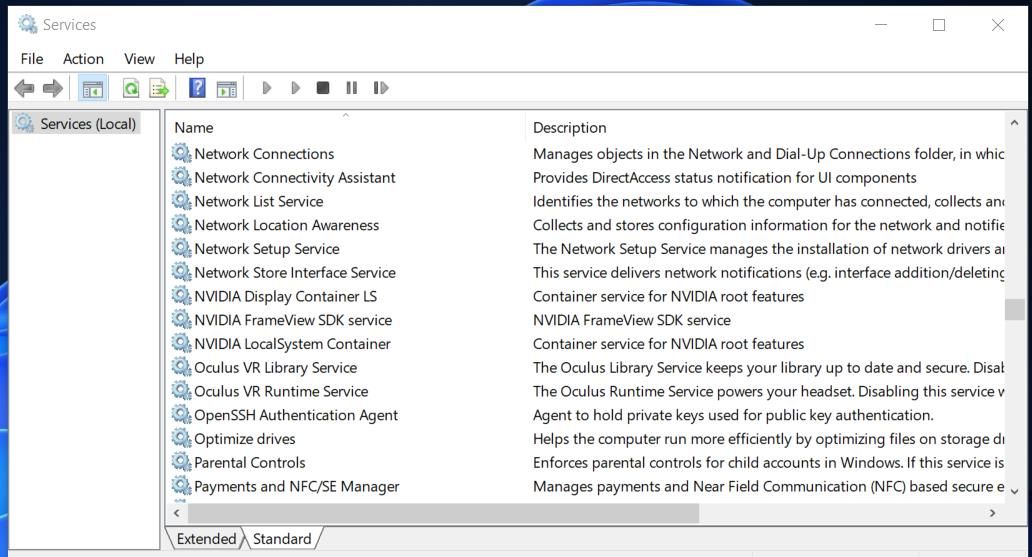
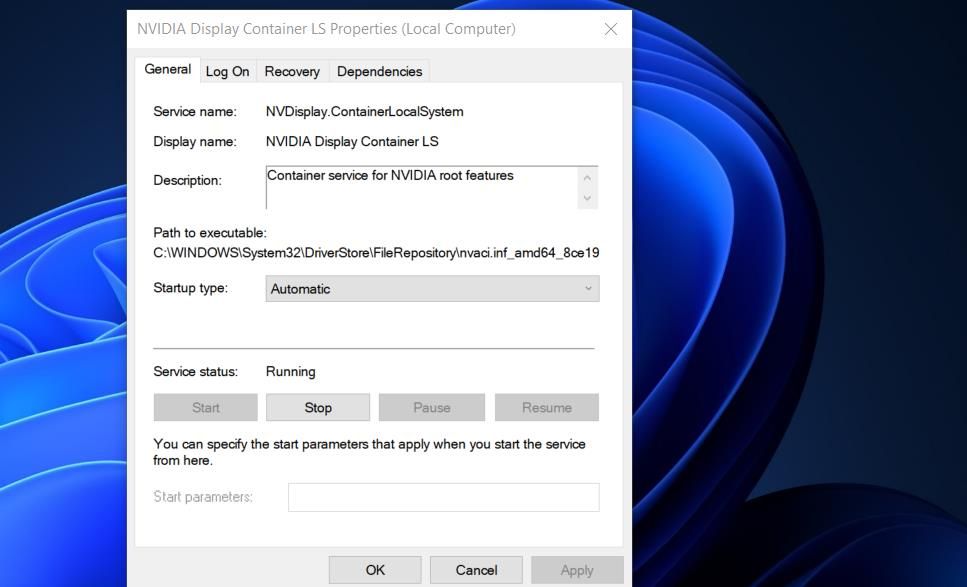
A common reason for the NVIDIA Control Panel not opening is a disabled NVIDIA Display Container service. Other NVIDIA services also need to be enabled for the app to work right. So, you should check that service and others are enabled and running like this:
- Bring up Windows 11’s file search utility.
- TypeServices into the file search box and select to run that app from there.
- Scroll to and double-clickNVIDIA Display Container LS .
- Next, select theAutomatic option if theStartup menu setting is set to anything else.
WonderFox DVD Ripper Pro
- SelectStart (in the properties window) to run the service if it’s stopped.
- Make sure you clickApply for saving the settings.
- SelectOK to exit the NVIDIA Display Container LS Properties window.
- Repeat steps three to seven for the NVIDIA LocalSystem and NetworkService Container services.
 WonderFox DVD Ripper Pro
4. Repair the NVIDIA Control Panel App
Windows 11’s standardRepair andReset app options are available for NVIDIA Control Panel. So, those troubleshooting options might help you fix that app not opening. You can select theReset andRepair options in the same place within the NVIDIA Control Panel settings. Our guide on about resetting Windows 11s apps includes step-by-step instructions for how to apply do this.
 Forex Robotron Basic Package
5. Update Your PC’s NVIDIA Graphics Driver
Updating the NVIDIA graphics driver on your PC will also update the control panel app for it. So, that’s a potential solution worth trying if your graphics card’s driver is outdated. You can apply this potential fix by following the instructions within our guide to updating NVIDIA GPUs .
6. Install Missing Visual C++ Redistribute Packages
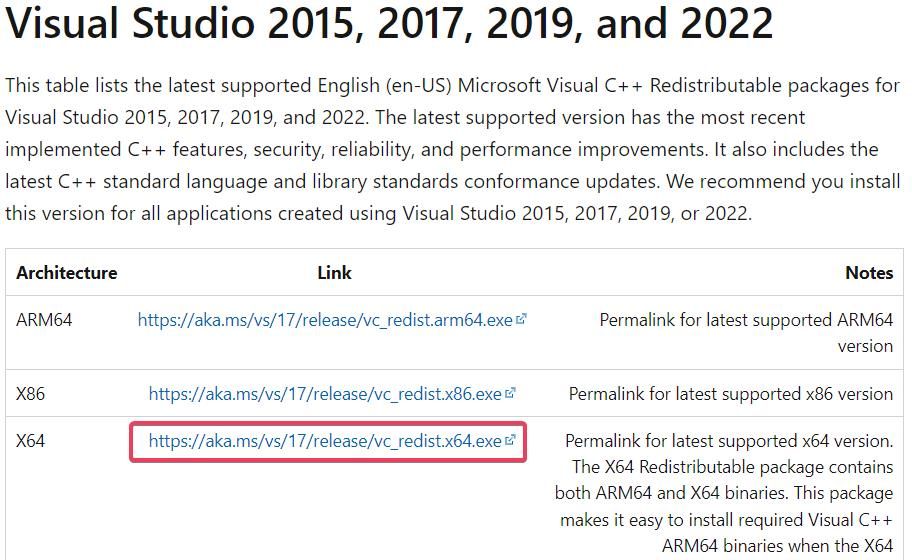
Another possibility is that the NVIDIA Control Panel doesn’t open because your PC is missing a required Visual C++ Redistributable package to run it. You can eliminate this possible cause by updating Visual C++ packages on your PC if needed. This is how to install a missing Visual C++ Redistributable in Windows:
- Open up the Microsoft Visual C++ download page in your browser software.
- Click the X64 link for the latest Visual Studio 2015, 2017, 2019, and 2022 packs.
Simple and intuitive video editing
🎬 Nero Video:
The powerful video editing program for your Windows PC - Double-click theVC_redist.arm64.exe (Visual C++ installer) file once it’s downloaded.
- Go through the install process.
 Simple and intuitive video editing
7. Edit the Windows Registry
This Windows Registry tweak creates a new context menu option for opening the NVIDIA Control Panel. As this solution involves deleting a key, we recommend you learn how to back up the Windows Registry before proceeding.
To apply this fix, edit the Registry as follows:
Open Registry Editor by pressing theWin + R keyboard shortcut, typingregedit in the Run dialog, and clickingOK .
Input this key location in the registry address bar and pressReturn :
Computer\HKEY_LOCAL_MACHINE\SOFTWARE\Classes\Directory\background\shellex\ContextMenuHandlersClick theNvCplDesktopContext subkey with the right mouse button and selectDelete .
SelectYes to confirm that you’re sure about deleting theNvCplDesktopContext key.
Erase the path currently in the registry bar, and input this different location:
Computer\HKEY_CLASSES_ROOT\Directory\Background\shellNext, right-clickShell and selectNew .
ClickKey to add a new subkey toShell .
TypeNvidia Control Panel to be the new key’s name.
Then right-click theNvidia Control Panel subkey and select itsNew andKey context menu options.
Inputcommand for the subkey’s title.
Selectcommand and double-click its**(Default)** string.
Next, input the following path in theValue data box:
C:\Windows\System32\nvcplui.exeSelectOK to save the string value.
Now select to reboot your Windows 11/10 PC.
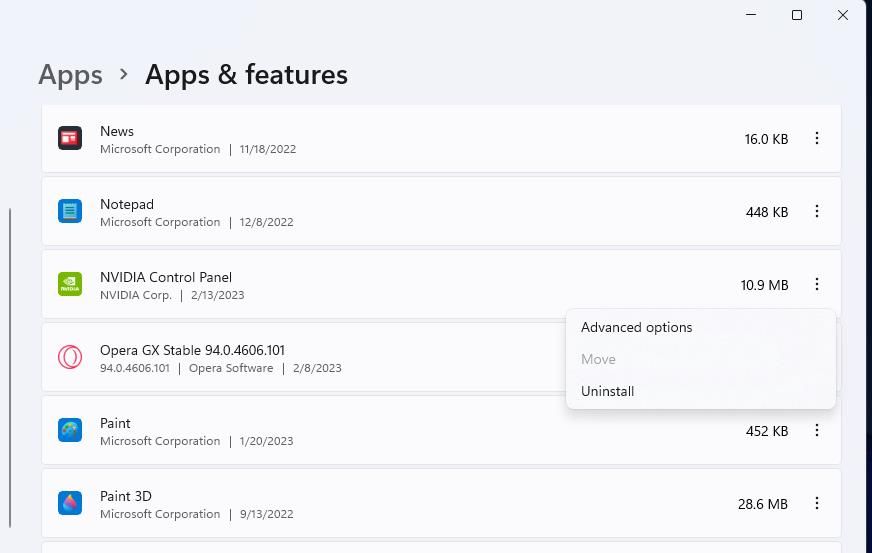
8. Reinstall the NVIDIA Control Panel
The NVIDIA Control Panel is a UWP app you can uninstall, download, and reinstall. If none of the other fixes in this guide work for you, that app might have corrupted or missing files. To do so, remove the NVIDIA Control Panel in Settings, as outlined in our guide for how to uninstall apps on Windows .
When you’ve uninstalled NVIDIA Control Panel, restart your PC. Then clickGet in Store app on the NVIDIA Control Panel Microsoft Store page . SelectOpen Microsoft Store , and clickGet to reinstall the app.
Tweak Graphics Settings in the NVIDIA Control Panel Again
Those potential solutions will usually fix the NVIDIA Control Panel not opening in Windows. However, there are many potential causes for the NVIDIA Control Panel not opening; and it is not guaranteed those resolutions will resolve that issue in all scenarios. If you need any more resolutions for fixing that app not starting, consider submitting a help ticket on the NVIDIA support page .
- Title: How to Fix the NVIDIA Control Panel Not Opening in Windows 11
- Author: Joseph
- Created at : 2024-08-15 15:38:26
- Updated at : 2024-08-16 15:38:26
- Link: https://windows11.techidaily.com/how-to-fix-the-nvidia-control-panel-not-opening-in-windows-11/
- License: This work is licensed under CC BY-NC-SA 4.0.