
Guide to Fixing Non-Working Display Driver on Windows 11
Guide to Fixing Non-Working Display Driver on Windows 11
The “display driver failed to start” error message usually appears when you try to launch a game on Windows. The error message appears in the form of a Windows notification above the system tray area. When this error occurs, it causes your screen to go completely black. Sometimes it will recover, but sometimes it will require a hard reset.
When this error is at its worst, it can prevent you from playing your favorite games. As such, here is how you can fix the “display driver failed to start” error on a Windows 10 or 11 PC.
1. Perform Some Display Driver-Related Fixes
The error message points to your display driver as the main culprit. As such, before you try anything else, you can try these display driver-related fixes to see if they do the job.
Roll Back the Latest Graphics Driver Update
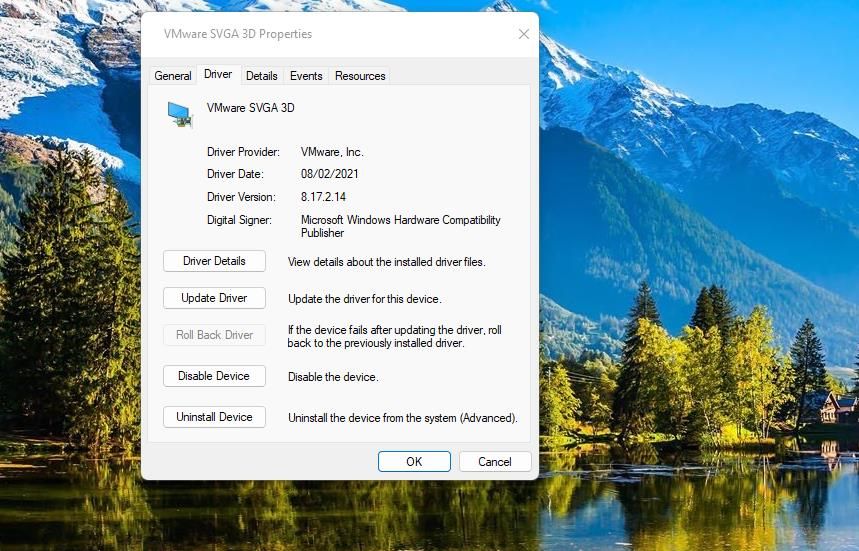
If your graphics card’s driver has recently been updated, try rolling back to the old GPU driver. A Roll Back Driver option is usually only available for a short time (typically a few days) after updating a driver. Check out our guide to rolling back drivers in Windows for further details about how to apply this potential resolution.
Install the Latest Driver for Your PC’s Graphics Card
People plagued with this error message have confirmed that updating your graphics drivers is a good solution for the “display driver failed to start” error. And while Windows usually handles driver updates through Windows Update, it sometimes won’t update NVIDIA and AMD GPU drivers.
You can update your graphics card’s driver yourself with the methods discussed in our guide to updating GPU drivers on Windows .
Reinstall Your Graphics Driver
If your PC’s GPU already has the newest graphics driver available, consider reinstalling the graphics driver. It’s best to do a clean install to ensure your GPU’s driver is back to its factory defaults.
Check out how to cleanly install and reinstall GPU drivers on Windows for more information.
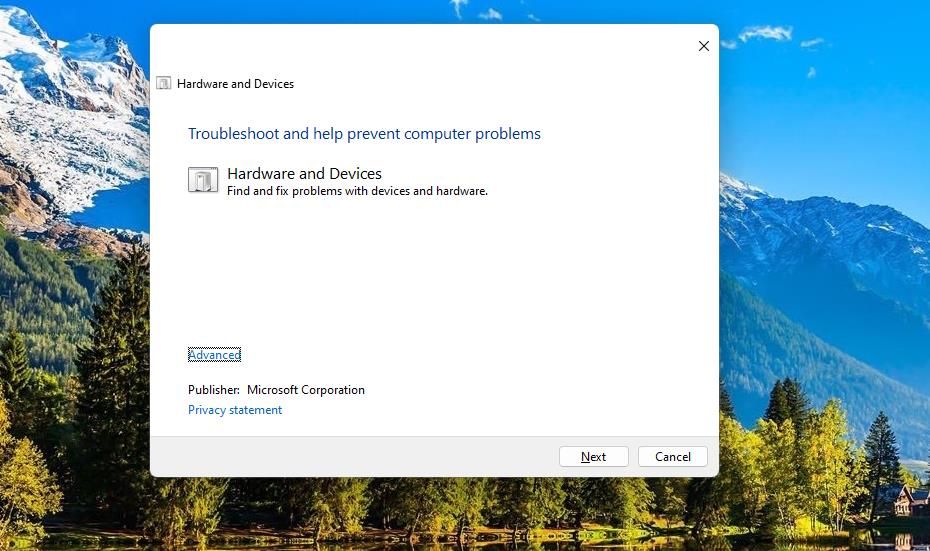
2. Utilize the Hardware and Devices Troubleshooter
Windows has a Hardware and Devices troubleshooter that can help resolve the “display driver failed to start” error. This troubleshooting tool is no longer available within Settings or Control Panel, but it is still accessible via Command Prompt.
You can access and run the Hardware and Devices troubleshooting utility like this:
- First, locate the Command Prompt by pressing Win + S, typing “cmd,” and clicking on Command Prompt.
- Enter and execute the Hardware and Devices command:
msdt.exe -id DeviceDiagnostic - Click Next to start the troubleshooting.

- Select Apply this fix to rectify any issues Windows finds.
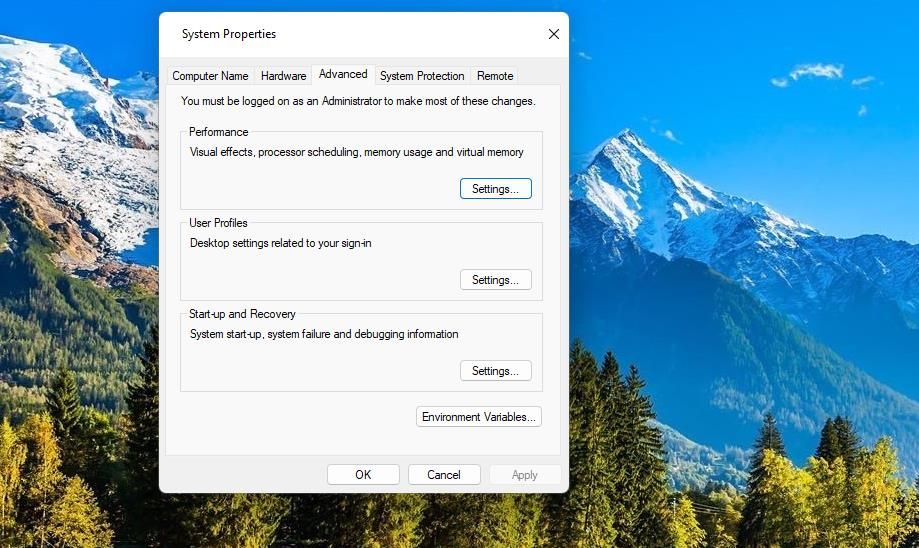
3. Lower the Windows Visual Effect Settings
Windows has various visual effect settings that can affect performance. Having too many visual effects enabled can potentially cause issues on PCs with more limited GPUs.
So, it’s recommended to select the “adjust for best performance” mode in the visual effect settings like this:
- Right-click Start, select Search, and input “advanced system settings” in the text box.
- Press the Settings button in the Performance category.
- Click the Adjust for best performance radio button, which will deselect most if not all of the effect checkboxes.
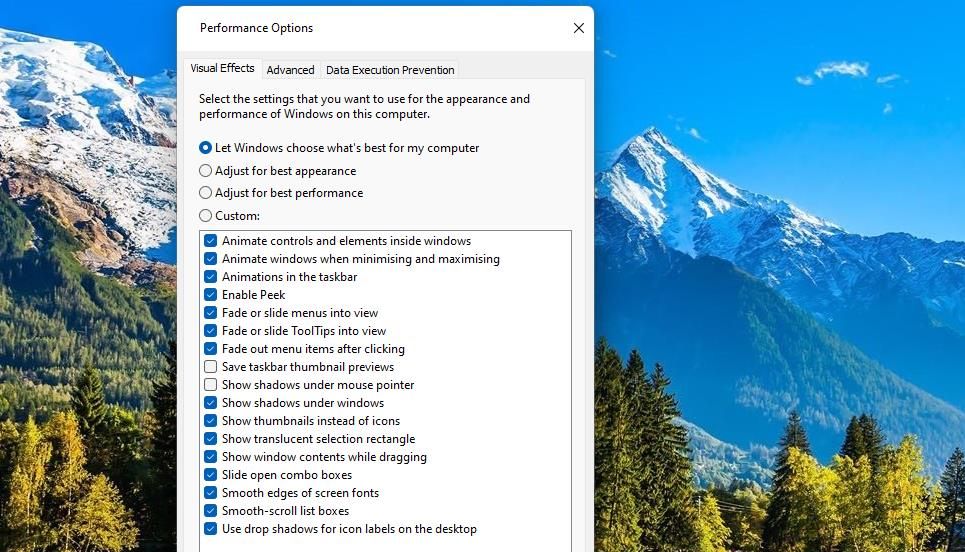
4. Select Apply to set the new performance settings.
5. Click the Performance Options window’s OK button.
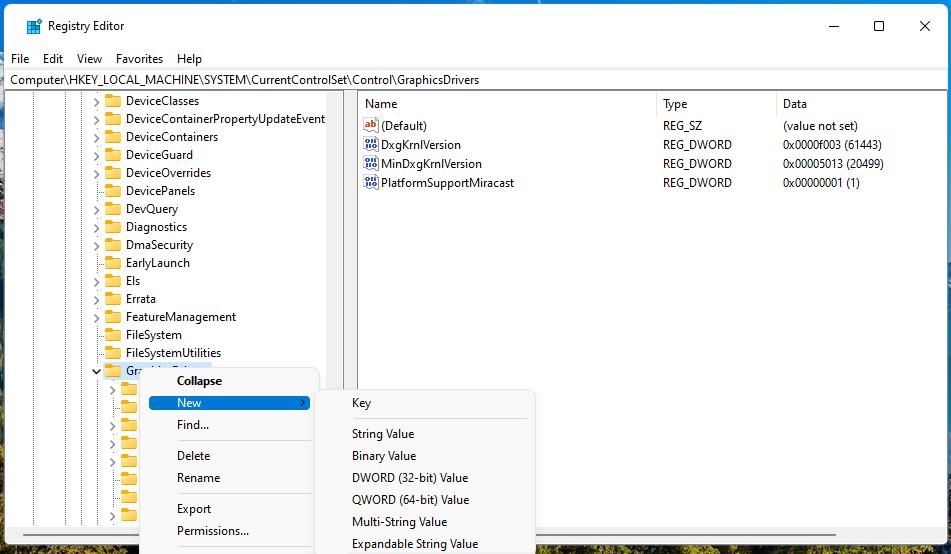
4. Edit the GraphicsDrivers Registry Key
Some users have got the “display driver failed to start” error fixed by editing the GraphicsDriver registry key. This tweaking involves adding a new TdrDelay DWORD value to that key for extending Timeout Detection Delay.
You can edit the GraphicsDriver registry key like this:
- Open the Run dialog with Win + R and enter “regedit”.
- Click OK or press Enter to open the Registry Editor window.
- Then enter this GraphicsDrivers key location inside the registry address bar:
HKEY_LOCAL_MACHINE\SYSTEM\CurrentControlSet\Control\GraphicsDrivers - Right-click GraphicsDrivers and select the New context menu option.
- Select DWORD (32-bit) Value to add a new entry.
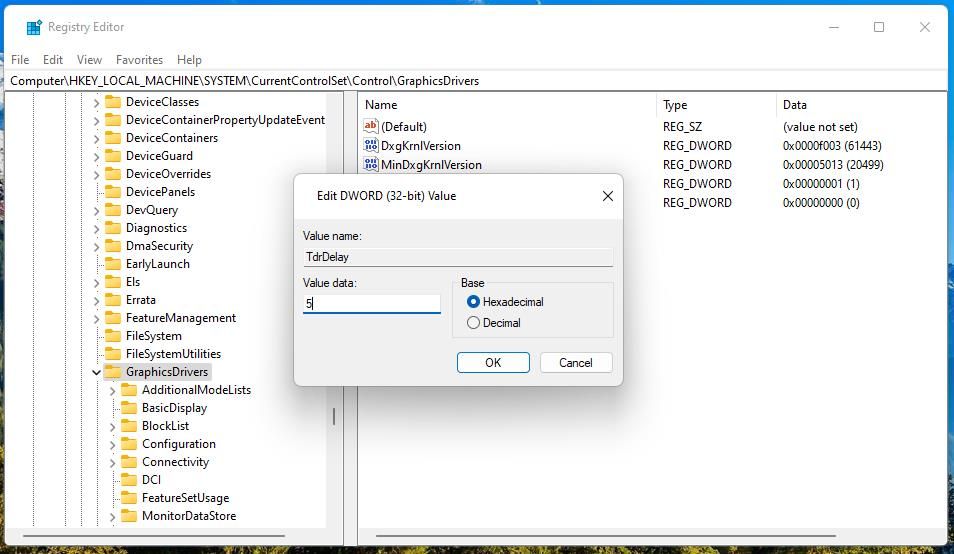
- Type TdrDelay within the new DWORD’s text box.
- Double-click the TdrDelay DWORD.
- Input a value of 5 in the data box and select OK.
- Now close the Registry Editor and reboot your PC.
5. Roll Back Windows to a Previous Restore Point
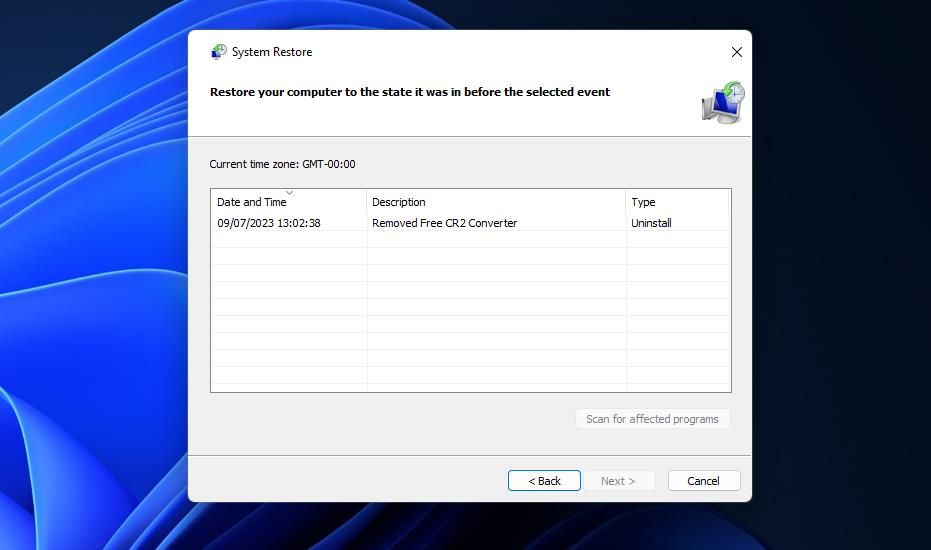
If you have System Restore enabled, restoring Windows to an earlier date is worth a try if nothing else has worked so far. Rolling back Windows will undo every system change made after a selected date.
As such, you can use System Restore to put your PC “back in time” to a moment when the error didn’t occur. It does mean you may lose some apps or data, so be sure to back up anything you want to keep.
Our guide to utilizing System Restore on Windows provides step-by-step instructions for how to roll back Windows 10 and 11. Select a restore point date created before you needed to fix the “display driver failed to start” error.
If this fixes the problem, be careful when re-installing the apps and drivers that got wiped during the restore. If you do, keep tabs on what you reinstalled and when. If the “display driver failed to start” error resurfaces, uninstall everything you recently reinstalled.
6. Perform a Windows Factory Reset
If System Restore is not an option or it doesn’t resolve the issue, you can try a factory reset as the last resort. Performing a factory reset will likely fix the “display driver failed to start” error. However, factory resetting a PC deletes all the apps that weren’t pre-installed with Windows. So, be prepared to reinstall all third-party apps you installed yourself.
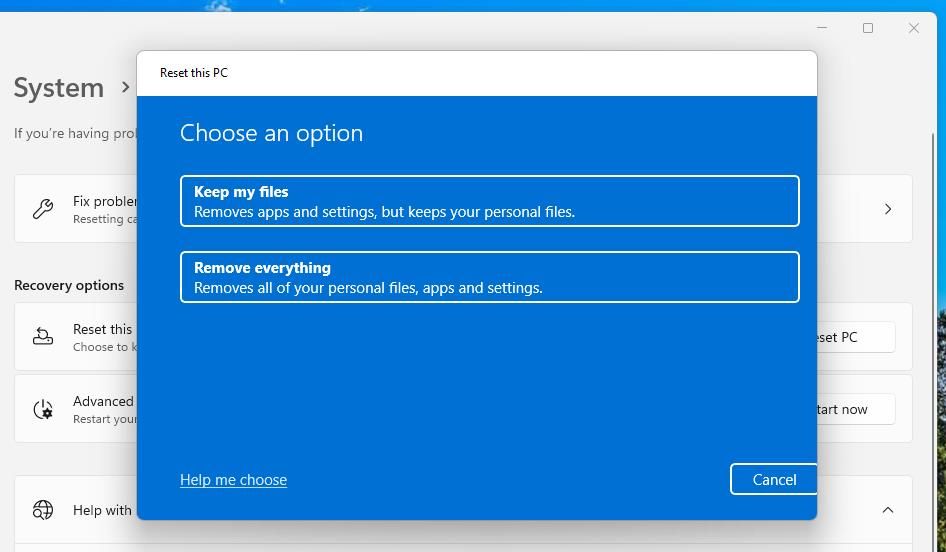
You can apply a factory reset with the Reset this PC utility. That tool includes a Keep my files option you can select to keep files in your user folders (Documents, Pictures, Videos, etc). Our guide for factory resetting Windows 10 and 11 provides details on how to access and utilize that tool.
Enjoy Your Windows Gaming Again
Applying those potential solutions will almost certainly be enough to fix the “display driver failed to start” error in most cases. However, you may need to try applying more than one of them to find one that works on your PC. Then you can get back to playing all your favorite Windows games again without further issues.
When this error is at its worst, it can prevent you from playing your favorite games. As such, here is how you can fix the “display driver failed to start” error on a Windows 10 or 11 PC.
Also read:
- [New] In 2024, Unveiling the Power of Images in Instagram Movies
- [Updated] The Ultimate Guide to Basic HDR Imaging for 2024
- Dissecting Differences: How Exe Files Function Compared to Msi
- Effective Utilization
- Excellence on Screen The Year's Best Camcorders Reviewed for 2024
- In 2024, How to Make the Most of Your Apple iPhone SE Lock Screen with Notifications? | Dr.fone
- Instructional Guide for End Task Enabling on Windows 11
- Rectifying System Limitations: Intel HD Graphics Compatibility Fixes
- Swift Solutions to the Windows Too Many Requests Challenge
- Tips for a Swift Submission Into Apple Catalog for 2024
- Understanding Windows Device Drivers: Troubleshooting & Solutions
- Title: Guide to Fixing Non-Working Display Driver on Windows 11
- Author: Joseph
- Created at : 2025-02-09 17:28:10
- Updated at : 2025-02-10 16:18:36
- Link: https://windows11.techidaily.com/guide-to-fixing-non-working-display-driver-on-windows-11/
- License: This work is licensed under CC BY-NC-SA 4.0.