Fixing Unidentified Component in Lsass of Windows OS

Fixing Unidentified Component in Lsass of Windows OS
The “lsass.exe - Unable to Locate Component” error means that Windows cannot find or load a file that it needs to run the lsass.exe process. This process is important for managing security policies and user authentication on your device.
The file that is missing or corrupted could be a system file or a DLL (Dynamic Link Library) file. The lsass.exe process depends on these files to function properly. In this guide, we will show you how to troubleshoot the lsass.exe unable to locate component error in Windows for good.
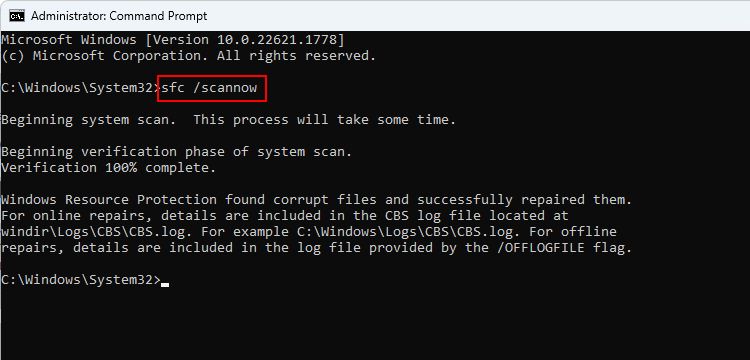
1. Perform an SFC Scan

As we mentioned above, the “lsass.exe unable to locate component” error can occur due to the corruption or absence of a specific file that the lsass.exe process relies upon.
Such issues can be fixed by performing a system scan using the System File Checker (SFC) , which is developed by Microsoft to check the system for inconsistencies and corruption errors.
If a problem is identified, the SFC utility will fix it without requiring any significant input from your side. If the problem was being caused by a corruption issue, this should fix it. In case you are using a third-party security program on your computer, we also recommend that you run a full system scan using your antivirus and check if that makes any difference.
2. Replace the oleaut32.dll File
As per multiple reports, this particular issue can also pop up because the oleaut32.dll file required to launch the application is missing. You can fix this by replacing the file with a healthy one from a reliable source.
To do this, you will need to create a bootable installation CD or USB drive that has the same version of Windows as your device. This way, you can get a verified and healthy copy of the file from the installation media. You will also avoid any errors or conflicts that might happen if you try to replace the file while Windows is running. We do, however, recommend creating a backup of your system before moving forward, just to be safe.
Once you have created a bootable drive and a backup, follow these steps to proceed:
- Insert the bootable installation CD or USB drive into your computer and perform a reboot.
- During the boot process, you may need to access the BIOS or UEFI firmware settings to change the boot order and prioritize booting from the CD or USB drive. The best way to do this is by referring to your computer manual or looking for instructions online on the manufacturer’s website.
- Follow the on-screen instructions to proceed and when your computer boots from the bootable installation CD or USB drive, press R to be presented with the Windows Recovery Control options.
- Choose your preferred installation.
- Now, access the Command Prompt with administrator privileges and execute the command below. This will change the directory to where the oleaut32.dll file is located:
cd c:\windows\system32 - Now, execute this command to rename the existing file to oleaut32.old:
ren oleaut32.dll oleaut32.old - Next, copy files from the installation media to your device using the following command. You may need to change the drive letter d: to match your installation media.
copy d:\windows\system32\oleaut32.dll c:\windows\system32 - Finally, type “exit” in the Command Prompt and close the utility.
- Once done, remove the bootable installation CD or USB and restart your computer. Upon reboot, you can now check if the problem is fixed.
3. Perform a System Restore

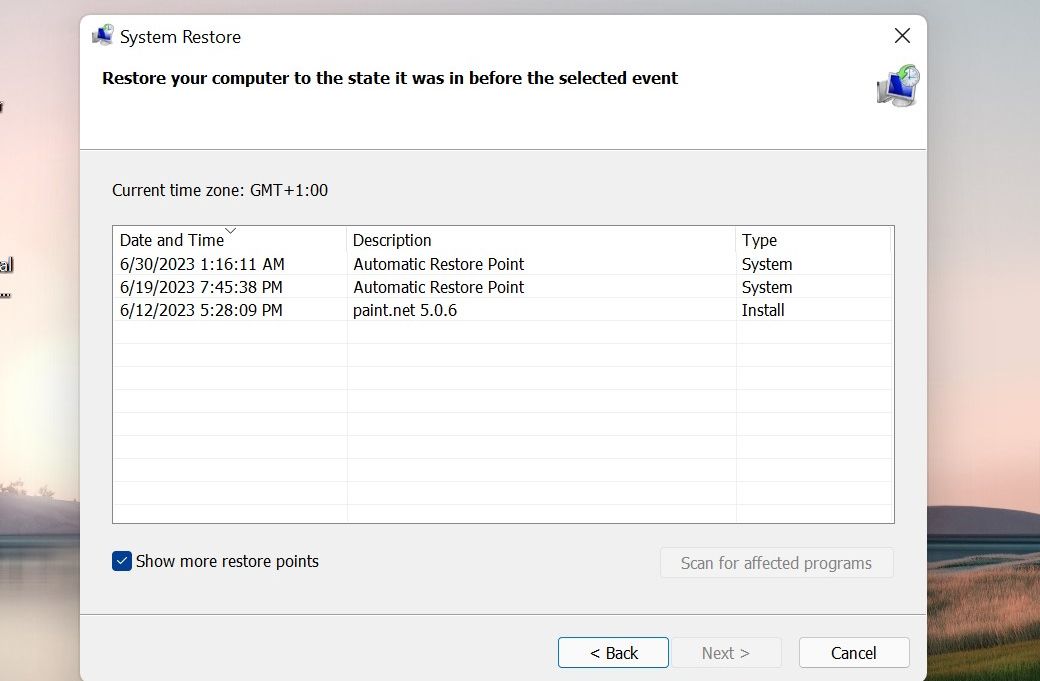
You can also restore your system to a point where the error under consideration was not present.
This can be done using the System Restore feature, which works by creating restore points on your computer, usually before performing any critical operations. When you choose a restore point, your system will go back to the state it was when the restore point was created, resolving the error in the process.
4. Install the Latest Updates
If you have pending updates available in the system, we also suggest taking your time to install them. This is because Microsoft regularly releases updates that include bug fixes for known issues, and when you update your Windows system to the latest version , you might resolve the problem you are facing in no time.
If this does not help, you can perform an in-place upgrade , which will reinstall Windows while keeping your files and applications intact. You will need a Windows installation media (USB or DVD) to perform the repair installation.
The lsass.exe Error on Windows, Resolved
Isass.exe error can be frustrating, but the steps above should be able to restore your device to normal and avoid further issues. However, if none of the solutions work for you, it is best to contact the official Microsoft support team and report the problem to them.
The file that is missing or corrupted could be a system file or a DLL (Dynamic Link Library) file. The lsass.exe process depends on these files to function properly. In this guide, we will show you how to troubleshoot the lsass.exe unable to locate component error in Windows for good.
Also read:
- [New] Low-Cost Cameras That Don't Compromise Quality
- [Updated] Becoming a Snapshot Wizard Top Positions for iPhone Photos
- 3 Simple Methods for Identifying Windows RAM
- Download Canon Printer Driver Software for Windows 10, 8 & 7 - Get Latest Support
- Ideal Online Journey Discovering Custom Ringtones
- Nifty Steps to Generate Timely Captions and Text for FB Video Uploads
- Optimizing Desktop Spaces: Preset Program Dimensions on Win11
- Rising as a Digital Trendsetter
- The 9 Best Features in the Windows 11 February 2023 Update
- Three Steps for Ditching Microsoft's Store
- Unraveling the Mystery of Window's LAW Filter Mechanics and Output
- Title: Fixing Unidentified Component in Lsass of Windows OS
- Author: Joseph
- Created at : 2024-12-06 16:10:29
- Updated at : 2024-12-10 16:35:52
- Link: https://windows11.techidaily.com/fixing-unidentified-component-in-lsass-of-windows-os/
- License: This work is licensed under CC BY-NC-SA 4.0.