
Fixing Non-Starting Windows Speech to Text Feature

Fixing Non-Starting Windows Speech to Text Feature
Speech recognition enables features like voice-to-text, text-to-speech, and even voice access on your computer. However, issues sometimes arise when speech recognition fails to work, which leads to your computer displaying a popup saying, “speech recognition could not start.”
Don’t worry; we’ll list some troubleshooting methods to help you fix the speech recognition error on Windows.
Why Does the “Speech Recognition Could Not Start” Error Occur?
Several reasons might prevent you from using speech recognition features on your computer. Here are some common causes for an overview:
- Incorrect microphone settings
- Outdated audio drivers
- Wrong speech recognition settings
- Some required Windows services may not be running
Let’s explore the troubleshooting methods to fix this error and get your speech recognition up and running.
1. Start With Some Basic Fixes
If you’re experiencing issues with speech recognition on Windows, the following tips may offer a quick fix:
- Ensure your microphone is correctly connected.
- Change the default microphone and use the voice-to-text feature once.
- Check your system’s sound settings to ensure everything is set to default.
- Try updating the audio drivers using any free driver updater for Windows .
- If you’re still on an older version of Windows, refer to how to update your Windows device for instructions on how to update.
If the issue persists after this quick troubleshooting, try the more advanced fixes outlined below.
2. Troubleshoot Your Microphone
One of the most common causes of the “speech recognition could not start” error is a faulty or improperly set up microphone. To fix this, check your microphone for any physical damage and ensure it is selected as the default device.
If your microphone is connected but not visible in the device’s settings, see how to fix Windows not detecting a microphone . On the other hand, If your microphone is connected properly, follow our microphone troubleshooting guide for more help.
3. Modify the Speech Properties
Another solution is to modify the speech recognition settings from Windows Speech Properties. Here’s how to do that on your computer:
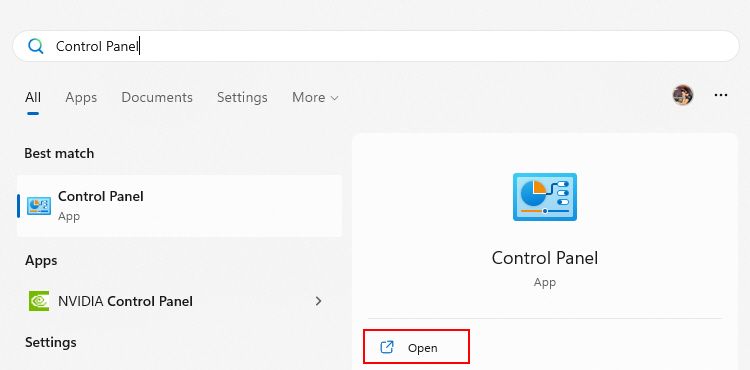
- Click the Windows key and type Control Panel on the search bar.

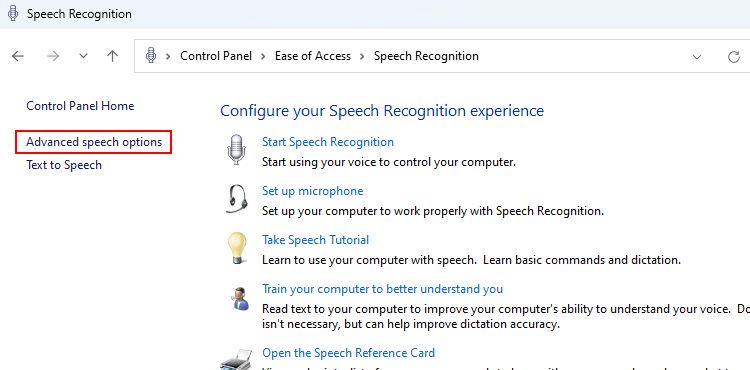
- Click Open to launch it. Once you’re on the Control Panel window, go to Ease of Access > Speech Recognition > Advanced speech options.

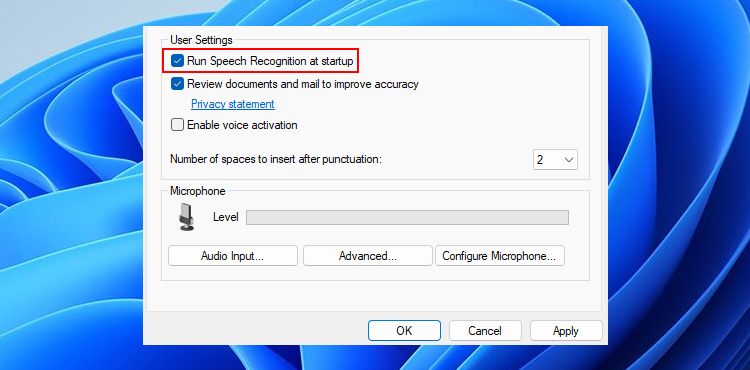
- On the Speech Properties screen, choose Run Speech Recognition at startup to enable it.

 Take advantage of PREMIUM features.
Create your texts / logos without any limitation.
No attribution required when downloading.
No advertising on the website.
TextStudio.com PREMIUM - Monthly Membership - Under Recognition Profiles, click the New button and then OK.
- Follow the steps to create a new profile and restart your computer.
Once you’re back on the desktop, you should be able to use all the speech recognition features.
4. Restart Required Windows Services
Windows services always operate in the background and can stop (in rare situations), leading to speech recognition errors. It’s easy to fix via the Windows Services app.
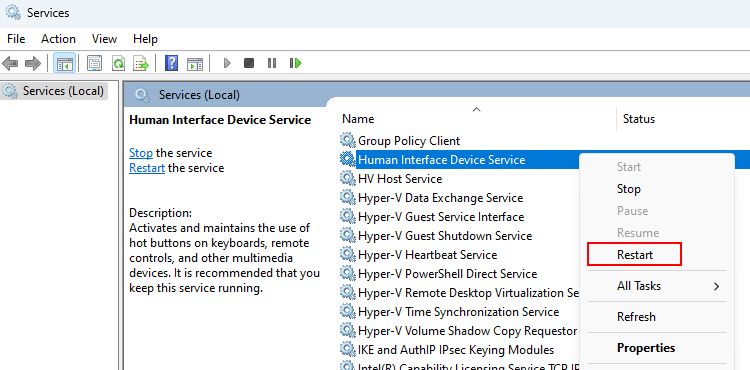
Here’s how to restart the required Windows Services for speech recognition:
- Press Win + R and type services.msc into the field.
- Press Enter to launch the Services window.
- Locate the services related to speech recognition: Human Interface Device Service, Windows Audio, and Windows Audio Endpoint Builder.
- To restart the above services, right-click on them individually and select Restart.

- Finally, restart your computer once and again check for the speech recognition problem.
If you’re using a Bluetooth microphone, please restart the Bluetooth Support Service and Bluetooth Audio Gateway Service with the mentioned services.
5. Set Up Speech Recognition
Sometimes, the initial setup for speech recognition may create issues for you. For example, you can’t use the voice-to-text feature if you selected the wrong device type during the setup.
To fix this problem, we recommend setting up speech recognition again on your device. You can type Windows Speech Recognition in Windows search and open it. This will open the Speech Recognition Set Up screen.
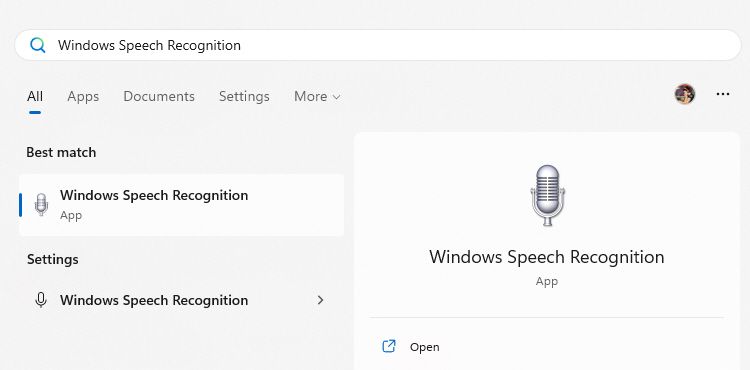
Follow the setup prompts one after the other, and once done, reconnect your microphone. This should quickly fix your speech recognition-related issues. If you cannot open the setup, access it from Control Panel > Ease of Access > Speech Recognition > Set up microphone.
We’ve also covered other similar topics, such as the Speech Diagnostic Calibrate error , that may provide additional help.
All Set to Use Speech Recognition on Windows Again
Speech Recognition can significantly enhance your productivity, especially if you prefer speaking over typing. Though the “speech recognition could not start” error can be frustrating.
But once you fix the error, there’s so much to do with speech recognition features. For instance, you can use it to dictate your emails or control your computer with only your voice, to name a few possibilities.
Don’t worry; we’ll list some troubleshooting methods to help you fix the speech recognition error on Windows.
- Title: Fixing Non-Starting Windows Speech to Text Feature
- Author: Joseph
- Created at : 2024-08-15 15:59:59
- Updated at : 2024-08-16 15:59:59
- Link: https://windows11.techidaily.com/fixing-non-starting-windows-speech-to-text-feature/
- License: This work is licensed under CC BY-NC-SA 4.0.


 Simple and intuitive video editing