
Fixing Inactive Windows Headset's Communication Line
Fixing Inactive Windows Headset’s Communication Line
Is your headset’s microphone not picking up your voice? This is one of the most common problems headset users encounter.
Several factors can cause a headset microphone to stop working; you may have muted it, plugged it into the wrong jacks, set it up incorrectly when connecting it to your device, forgot to make it the default microphone device, restricted the app’s access to the microphone, or set the audio device preferences incorrectly in the game or application.
If you want to fix the underlying issue and get your headset microphone working, here are a few steps you can take.
1. Perform Some Preliminary Checks
Start the troubleshooting process by applying the following preliminary fixes, as they may resolve the issue immediately:
- Disconnect your headset once and reconnect it again; this will rule out temporary problems with it.
- If you have problems with your USB headset, connect it to a different port on your device to ensure the port is not faulty .
- If you use a wireless headset, ensure the headset and receiver are free of interference.
- If you have more than one audio input device connected to your device, disconnect all of them except the headset.
- Run the Recording Audio troubleshooter to let Windows identify and fix the microphone issues automatically. Refer to our guide on how to run a troubleshooter in Windows for instructions.
If none of the above checks and fixes work, apply the remaining fixes.
2. Ensure That the Microphone Isn’t Muted
There is usually a button on most headsets that allows you to muffle the microphone. This control enables users to mute themselves when not participating in a conversation. If your headset also has one, make sure you haven’t muted it by mistake.
Besides that, make sure your microphone isn’t muted on your device. You can check that in several ways, but here’s the simplest:
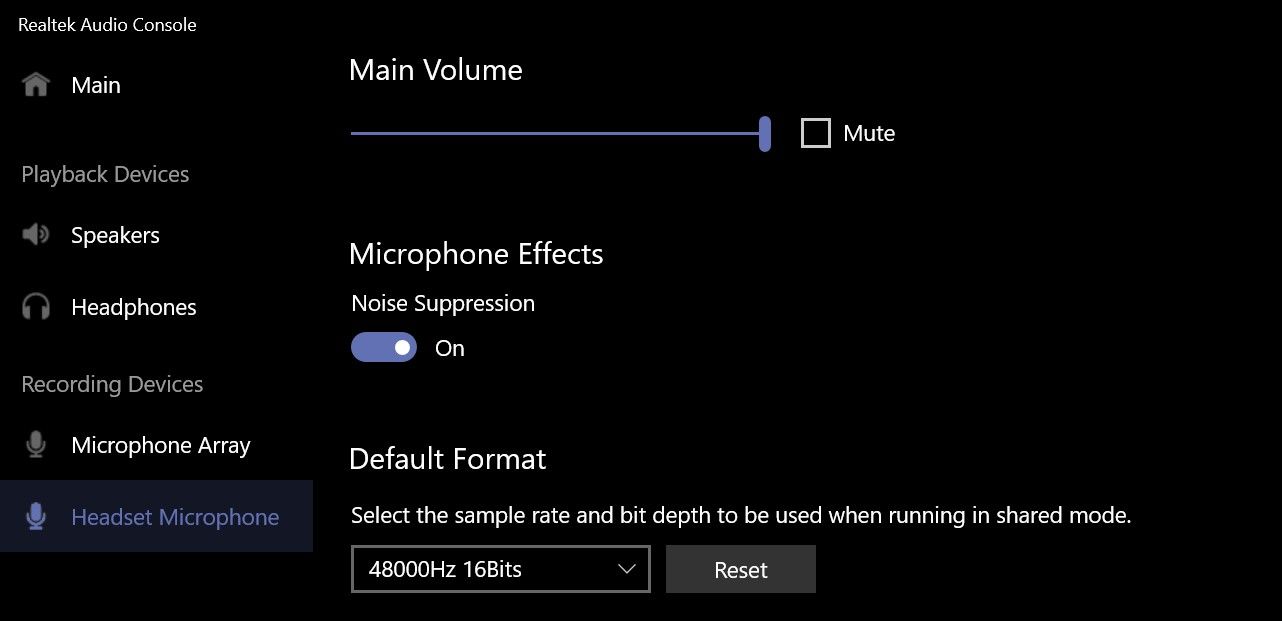
- Open the Realtek Audio Console (or Realtek Audio Control) app by searching for it in Windows Search.
- Then, click on Headset Microphone under Recording Devices.
- Make sure the box beside Mute is not checked. If it is, uncheck it by clicking on it.
- Also, if the Main Volume is too low, increase it to close to 100.

If you don’t have the Realtek audio console installed on your device, you can download it from the Microsoft Store .
3. Ensure That the Microphone Is Properly Plugged In
If your headset has a 3.5mm audio cable, plug it into the microphone jack. When plugging it in, you may also need to select the microphone and speaker options from the pop-ups on your desktop. So, be careful when you do that.
If your headset uses a two-pin cable, you’ll need to plug them carefully into the microphone and speaker jacks. You may also have to select the type of device you plugged in first and second from the popups on your desktop.
You may not see any popups when connecting the headset to a laptop; just ensure you have plugged your headset correctly.
4. Make Sure Your Headset Microphone Isn’t Faulty
Is your headset already unmuted and correctly plugged in? If that is the case, ensure your microphone is not faulty, which could be why it isn’t picking up your voice. The easiest way to find that out is to connect your headset to a different device (assuming you have one) and see if it works there.
If your headset mic also doesn’t work on your other device, it could be faulty. If that is the case, you should have your hardware inspected by a nearby technician. However, if the other device detects the microphone, your hardware isn’t faulty; probably misconfigured OS settings are to blame.
5. Select the Right Microphone and Test It
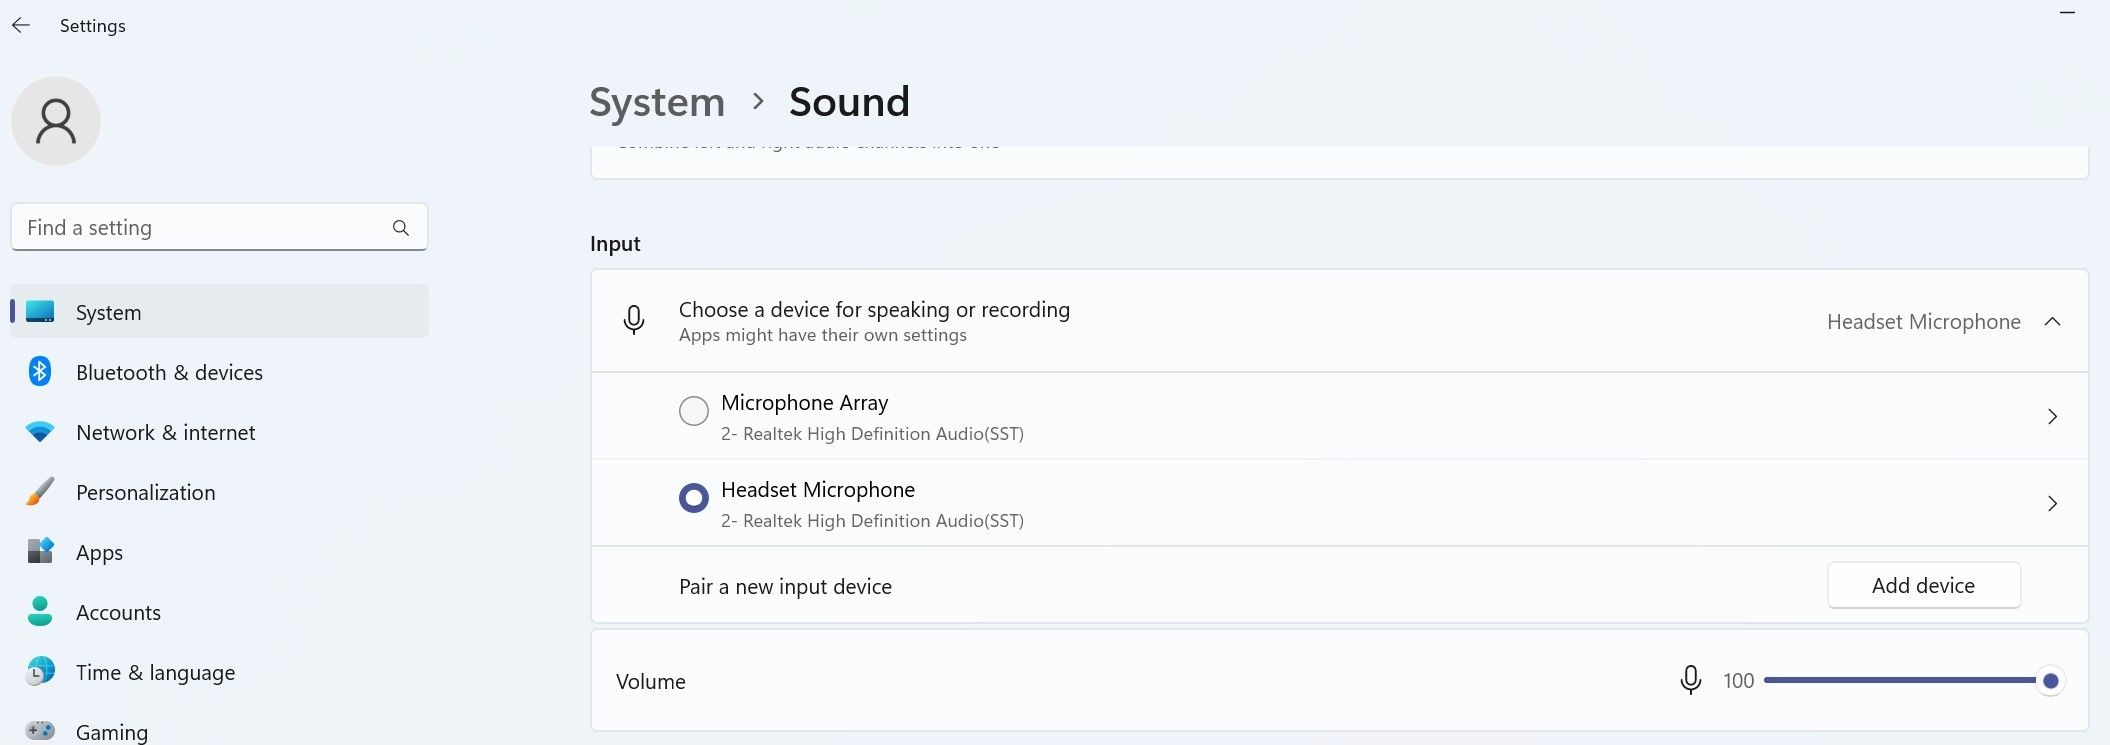
To use your headset microphone as your primary audio input device, you must properly select it in the sound settings. Therefore, make sure the headset microphone is selected there, especially if you have more than one audio input device connected to your device.
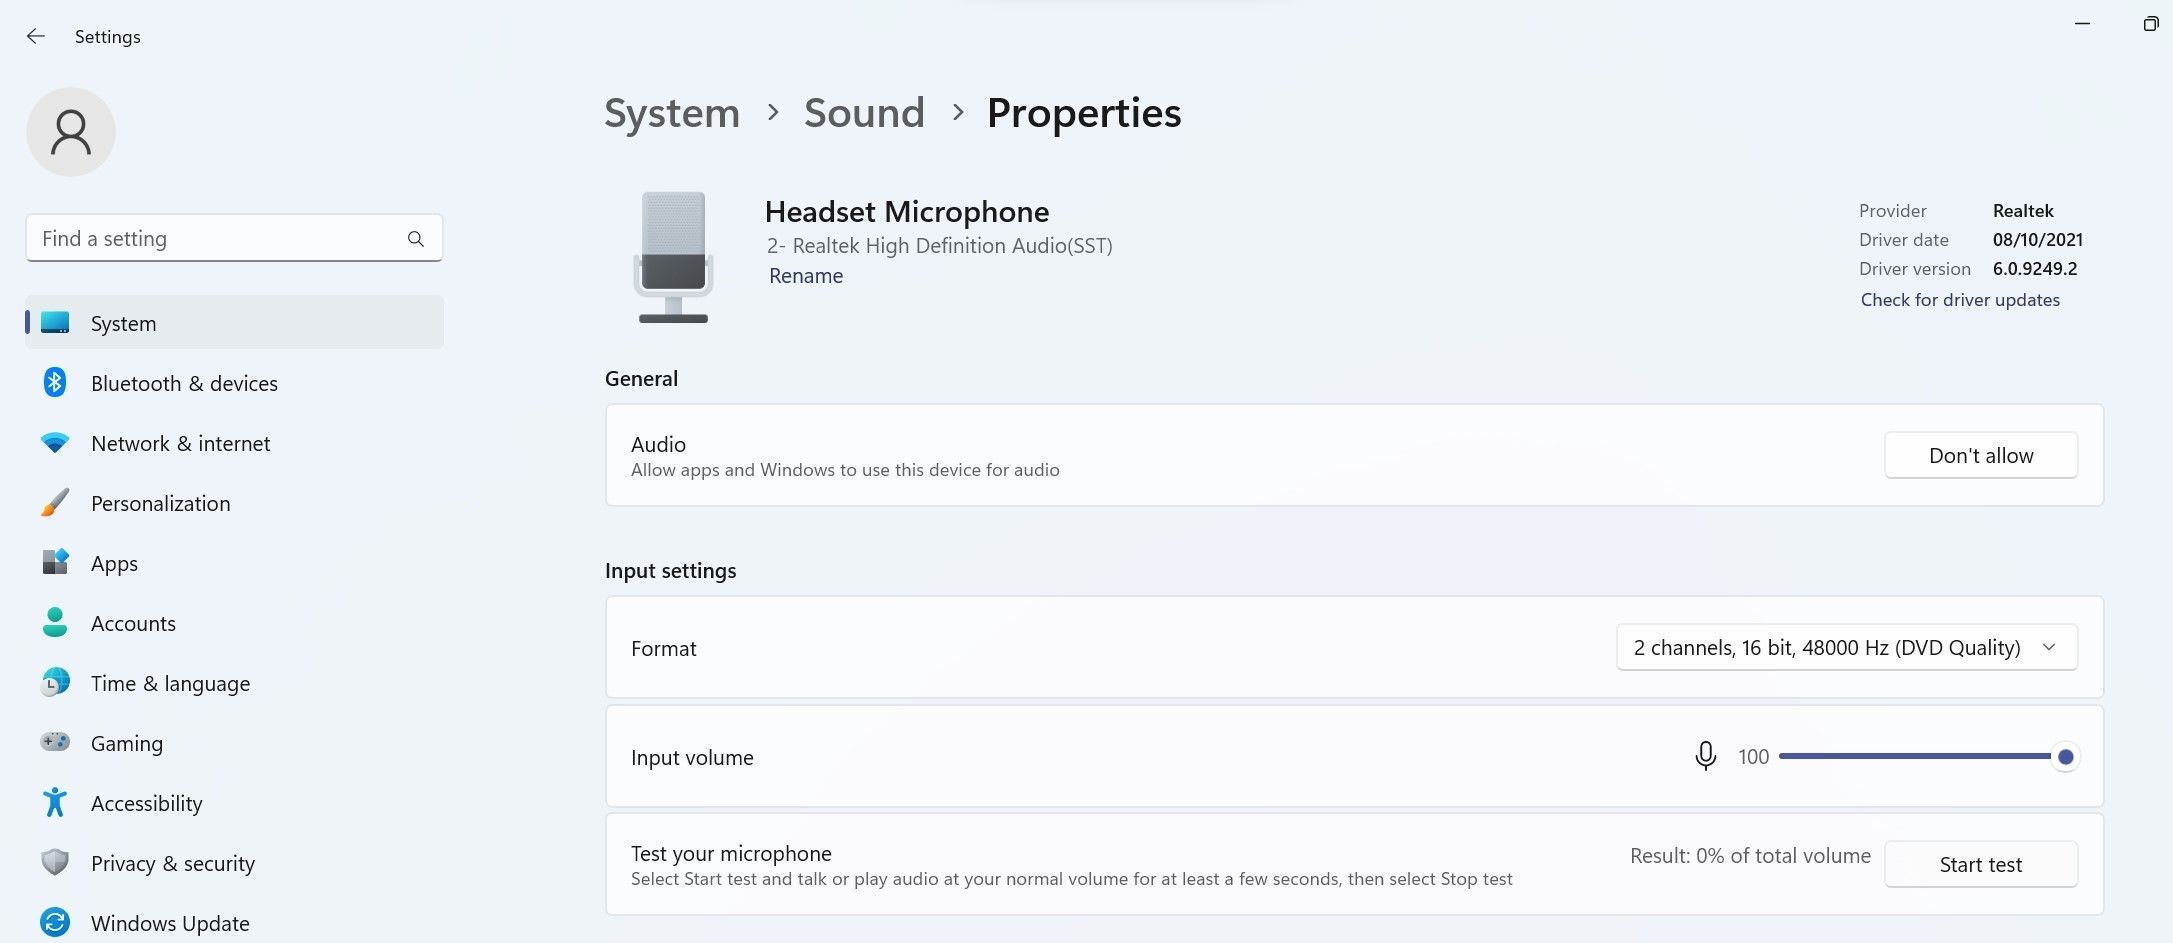
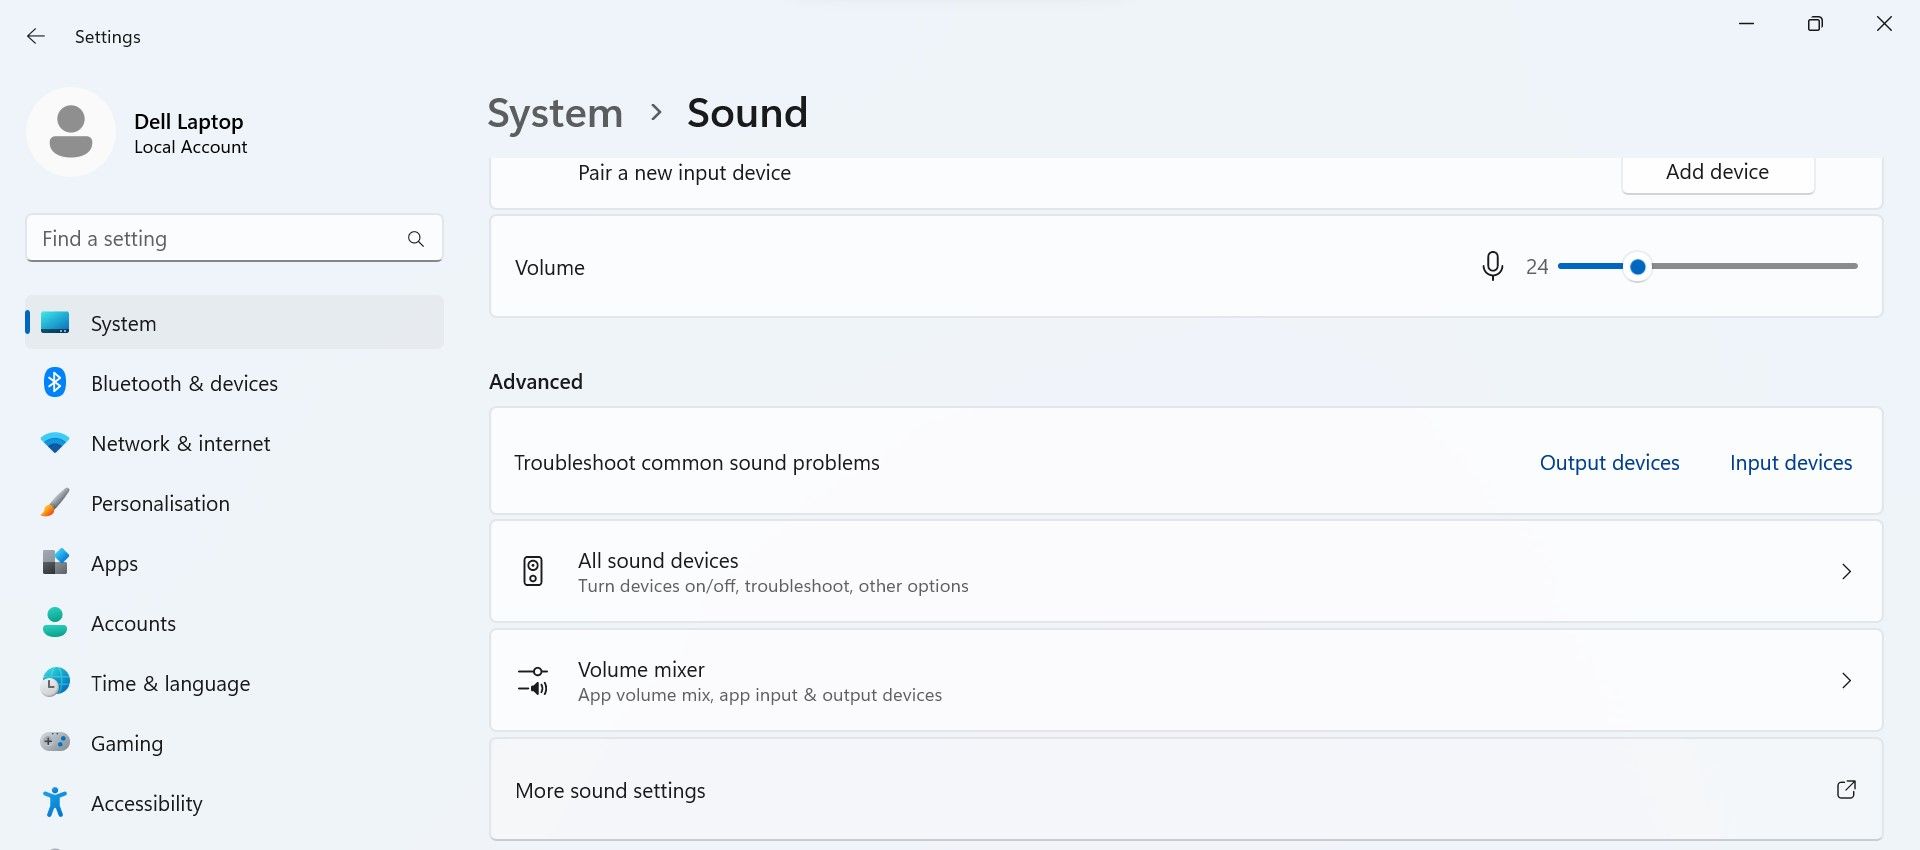
To find out which microphone you’re using, open the Settings app and navigate to System > Sound. Here, select the headset microphone and click on it to open its settings.
After that, test the microphone by clicking the Start test button. If your microphone successfully records the sound, the headset is now configured correctly.
6. Make the Headset Microphone Your Default Audio Input Device
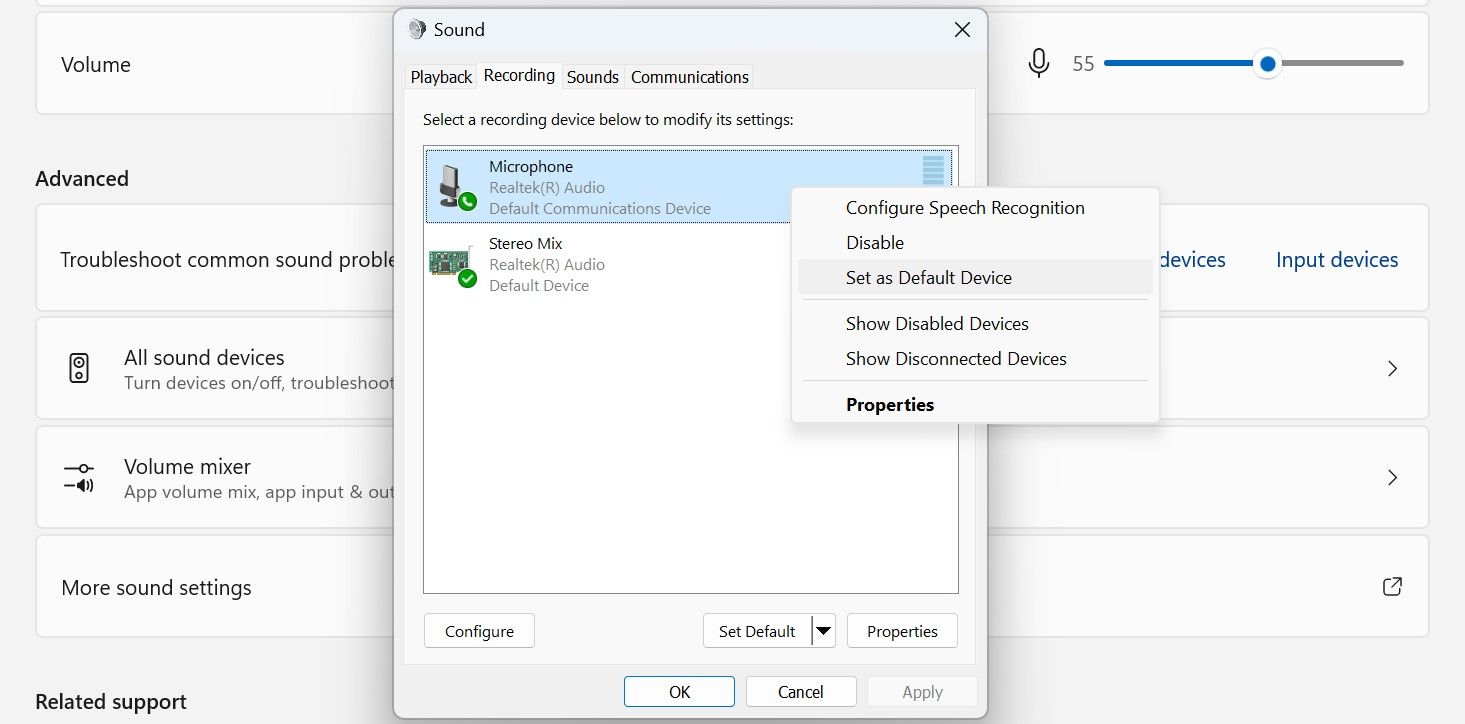
To set your headset microphone as the default audio input device, navigate to Settings > System > Sound and click on More sound settings.
In the sound settings, go to the Recording tab, right-click on your headset microphone, and select Set as Default Device.
If you don’t see the headset microphone in the list of recording devices, it could be disabled. In such a case, right-click anywhere in the Recording tab and select Show Disabled Devices.
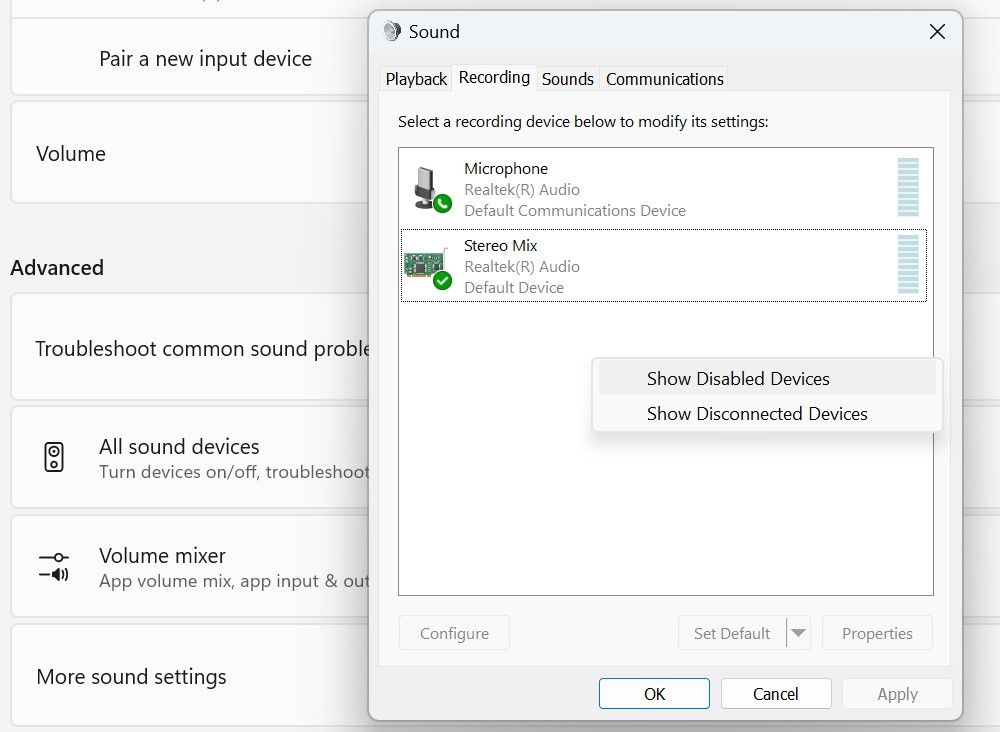
After that, set your headset microphone as the default audio input device.
7. Change the App Permissions for the Microphone
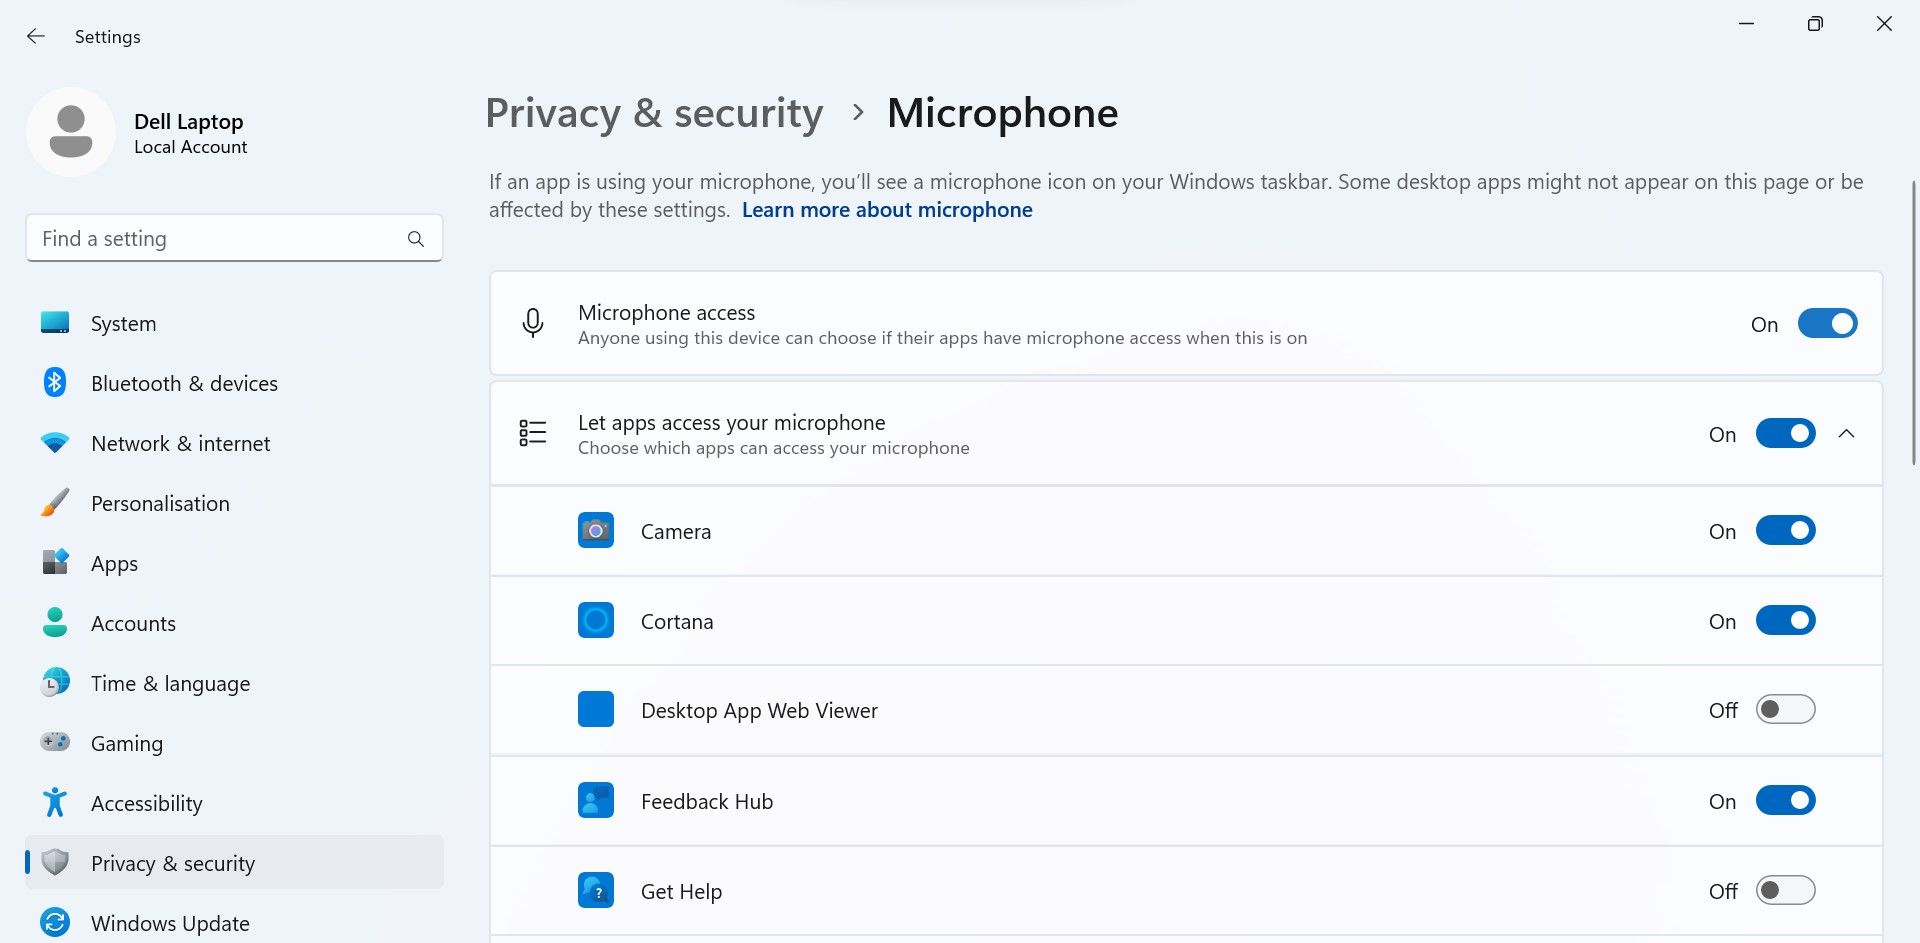
If your headset microphone is already set as default but isn’t working in a certain app, check that the app has permission to access the microphone. Follow these steps to check that:
- Open the Settings app.
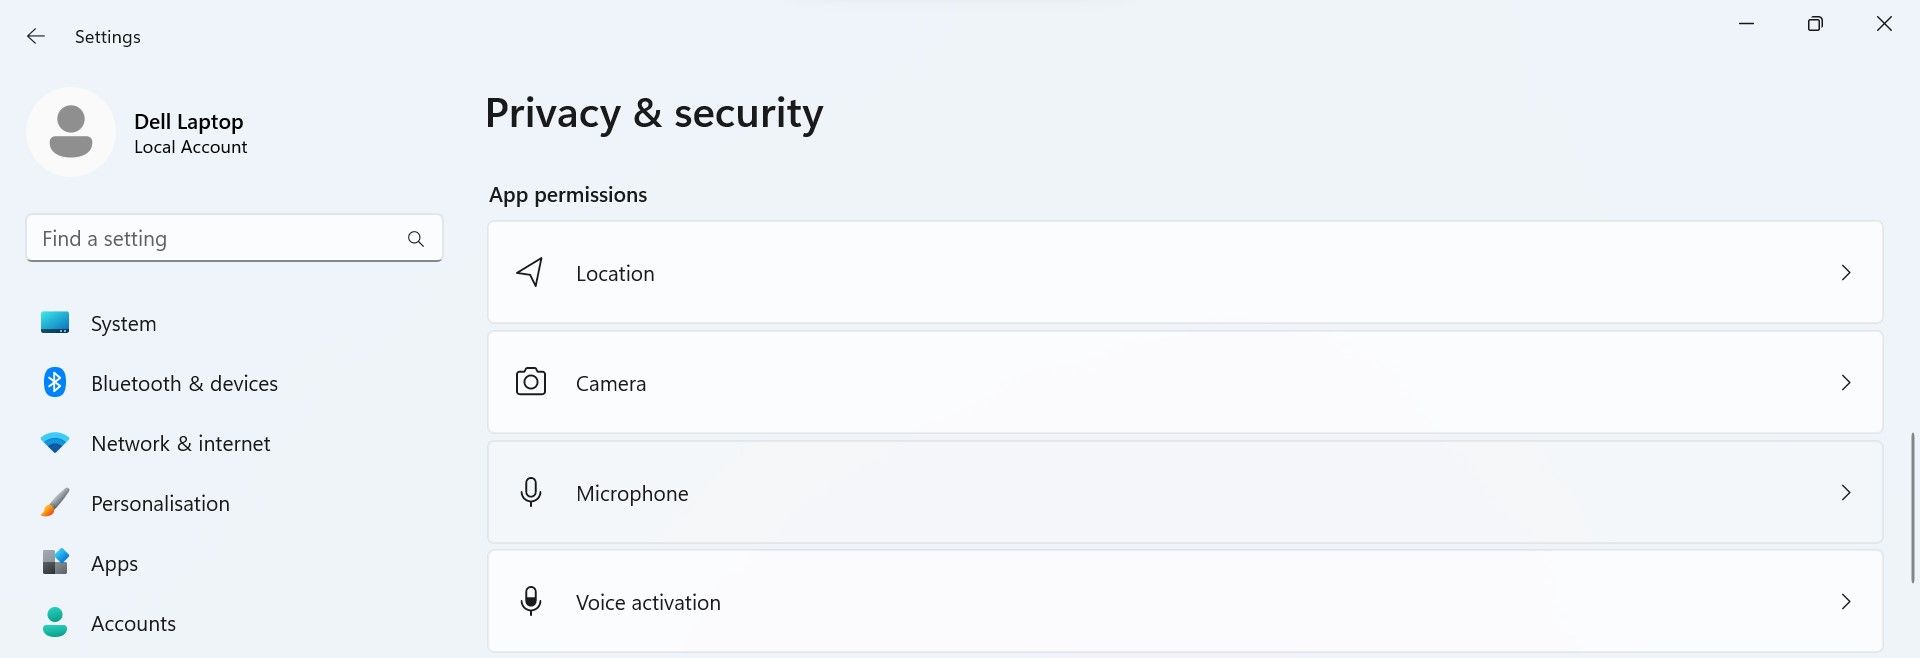
- Navigate to the Privacy and security tab in the left sidebar.
- Click on Microphone under App permissions.
- Turn on the toggle next to Microphone access.
- After that, locate the app where the headset microphone isn’t working and turn on the toggle next to it.
8. Select the Correct Microphone in the App’s Settings
If the headset microphone still does not work after following the steps above, likely, the app where the microphone does not work doesn’t have the correct microphone selected in its settings.
Therefore, ensure the headset microphone is selected as the primary audio input device in the app’s settings. Also, check that the microphone isn’t muted there and its volume isn’t too low.
Get Your Headset Microphone Working Again
A headset microphone that does not pick up your voice can hinder your gameplay or business meetings. Hopefully, you now better understand what causes the headset microphone to malfunction. Furthermore, if you correctly apply the above fixes, you will be able to troubleshoot and resolve the problem with the headset.
If you want to fix the underlying issue and get your headset microphone working, here are a few steps you can take.
Also read:
- [New] 2024 Approved The Ultimate Handbook OBS+Zoom Collaboration
- [New] In 2024, Unlimited Screen Capture Tool
- [Updated] Breakdown of the Top 9 Free Branding Platforms for YouTube Channels
- Discover 6 Free Image Editors That Can Replace Photoshop Effectively
- Efficient Resource Scheduling for Android on Windows WSL
- Fix Your Windows OneDrive Hurdles Now
- Fixing Missing DLL: MSVCR71 Reinstated
- Fixing Windows 11/10: How to Stop Double-Click Folders From Closing
- HP Laptop Speaker Failure? Here's How to Restore Audio Output
- Master Android Flip Digital Content Sequence
- Navigating Interactions Between Devices and PC Slumber
- Resolving 'GeForce Experience' Setting Retrieval Failure on Windows 11/11
- Steps to Start Driver Verifier Manager
- Updated How to Use Emojis on Windows 10 and Windows 11?
- Title: Fixing Inactive Windows Headset's Communication Line
- Author: Joseph
- Created at : 2025-02-07 04:27:43
- Updated at : 2025-02-10 20:47:01
- Link: https://windows11.techidaily.com/fixing-inactive-windows-headsets-communication-line/
- License: This work is licensed under CC BY-NC-SA 4.0.