
Fine-Tuning Windows Filename Metadata
Fine-Tuning Windows Filename Metadata
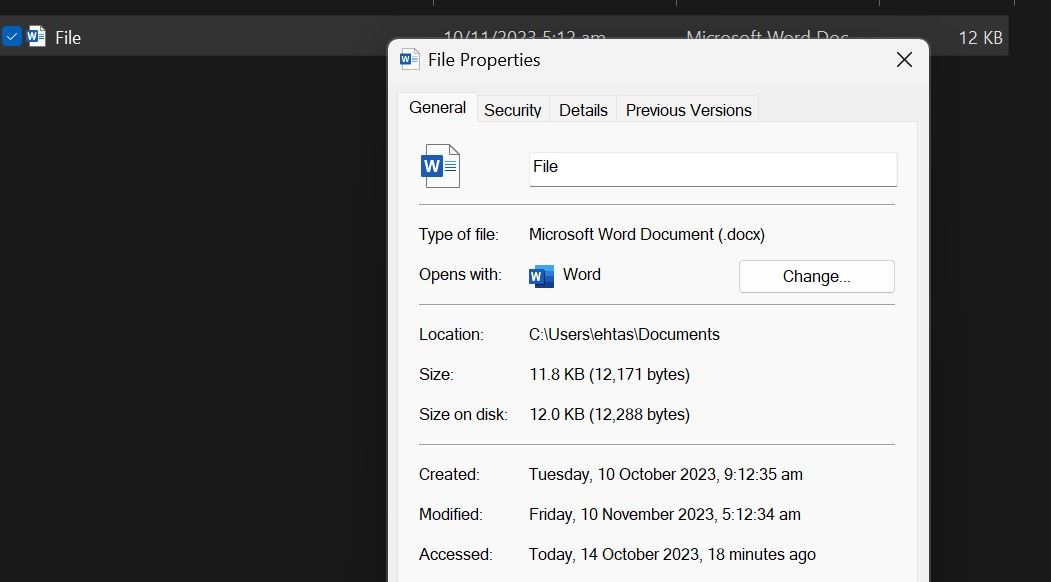
Windows keeps a record of when a file was created, who authored it, and when it was last modified. This information is known as file attributes and can be used to sort files by date, author name, and other parameters.
The problem is that sharing a file with your teacher or supervisor at work entails sharing all of this information, putting your job or grades at risk. To prevent this, you can modify these attributes.
If you don’t want the receiver to know the actual file attributes, here’s how to remove or modify them.
How to Change the Date Created, Date Accessed, and Date Modified Attributes Using PowerShell
File Explorer doesn’t allow changing critical attributes, such as the date a document was created, accessed, or modified. With PowerShell, a command-line interface utility built into Windows , you can modify them.
However, the process to change the attributes with PowerShell is a bit complex. If you don’t have any experience using PowerShell, you can use a third-party app, Attribute Changer, to change the attributes, as explained in the next section.
If running a few commands in PowerShell isn’t a big deal (for instance, you already know the best PowerShell commands ), follow the steps outlined below to change the created, modified, or accessed dates.
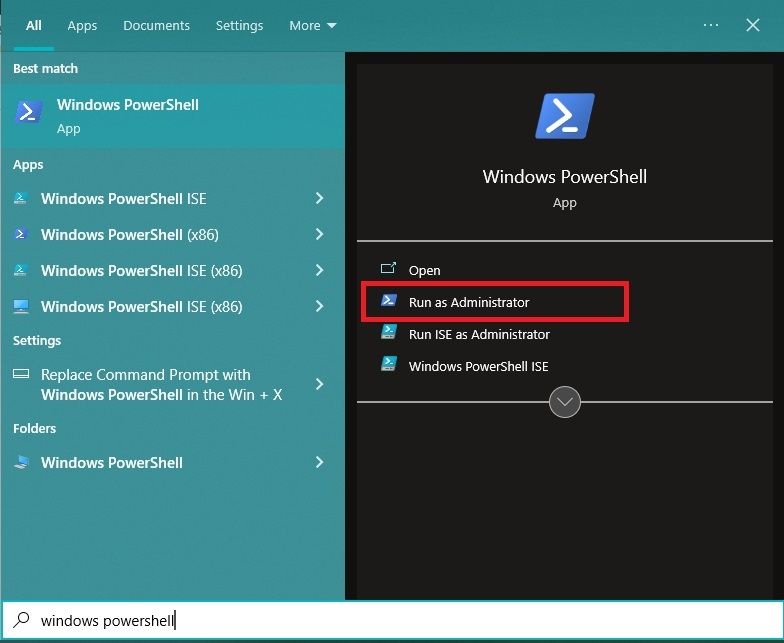
First, type “PowerShell” in Windows Search, right-click on PowerShell, and select Run as administrator. This gives the utility administrative access to make the desired changes without any restriction.
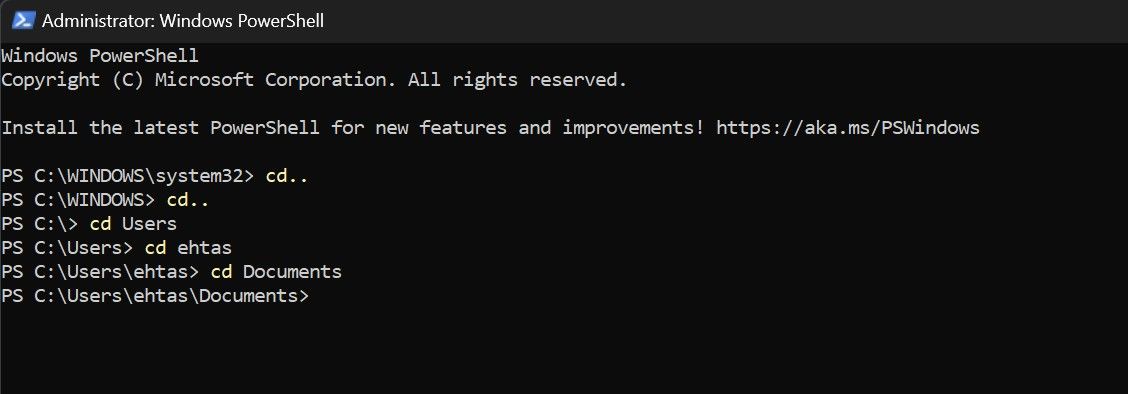
Then, navigate to the directory where the file or folder you want to change the attributes of is located. Type cd.. to move back one folder in the given path, and cd folder_name to move to the next folder.
For example, our desired folder is located at the following location:
C:\Users\ehtas\Documents\Files
However, in PowerShell, we were in the “System 32” subfolder of the main folder “Windows.“ Therefore, to return to the main directory “C,“ we’ve executed cd.. twice. Then, we used the cd folder_name command three times to get to the directory where we wanted to be.
Therefore, use both commands to reach the folder you want to modify attributes for. After landing in your desired directory, type the following command after inserting the file name and your preferred date of creation:
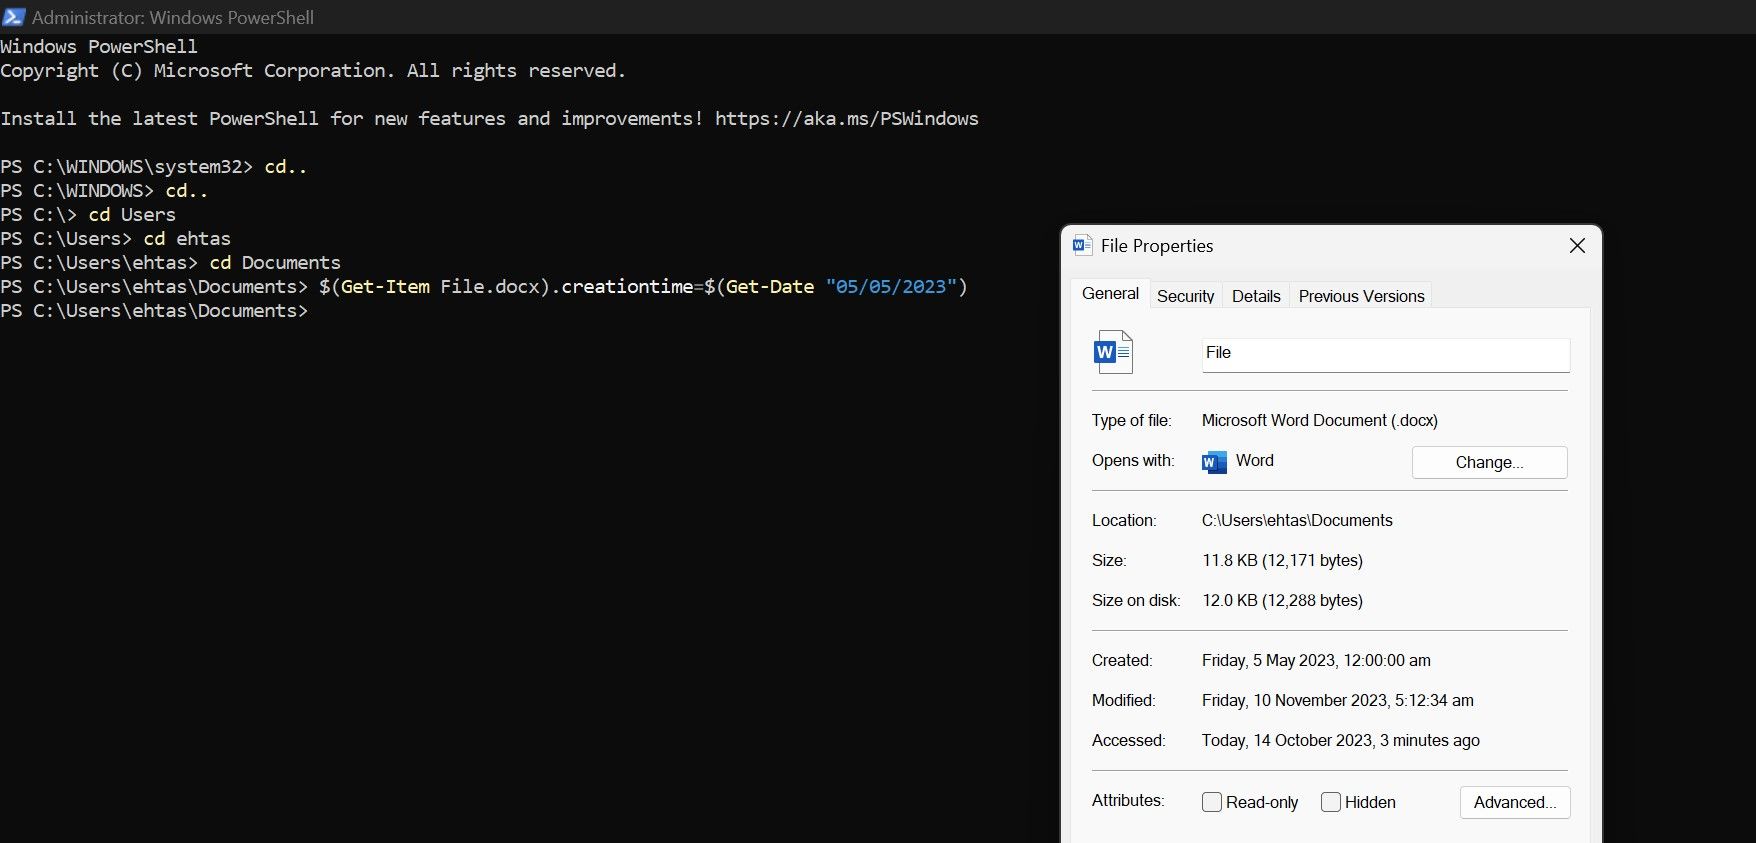
$(Get-Item File-name).creationtime=$(Get-Date "mm/dd/yyyy")
If PowerShell doesn’t present any errors and takes you to the same directory again, that confirms that the attributes have been successfully changed.
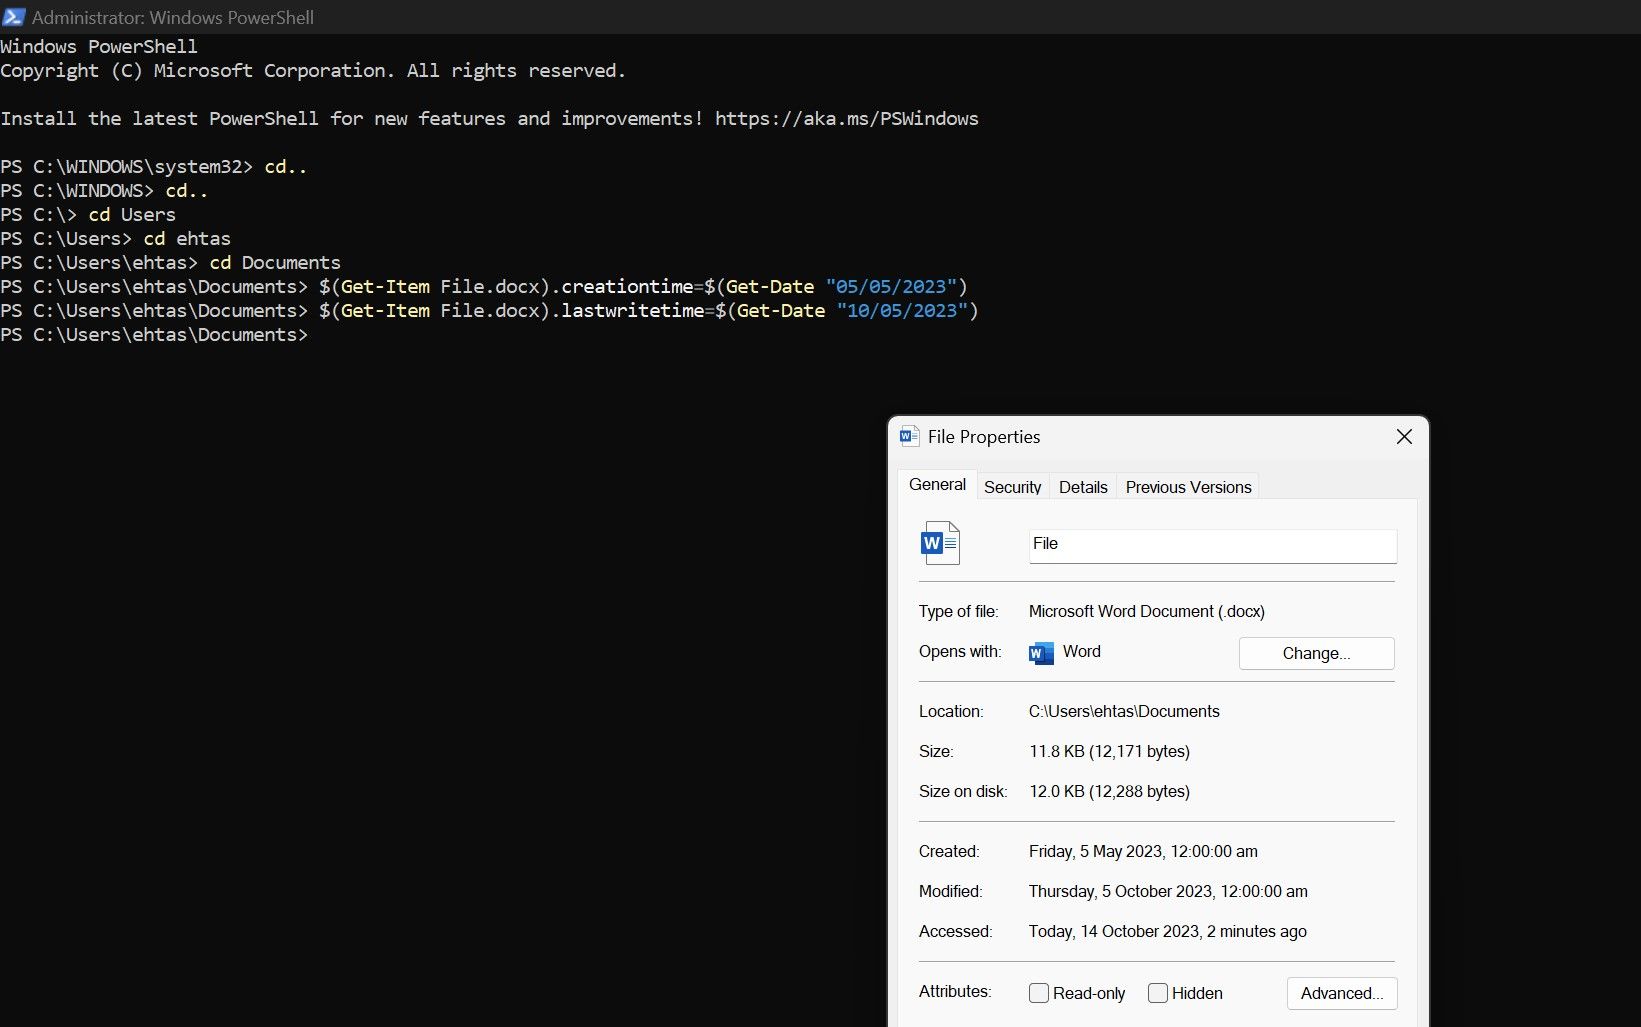
Likewise, you can change the date modified and the date accessed by typing the following two commands:
$(Get-Item File-Name).lastaccesstime=$(Get-Date "mm/dd/yyyy") $(Get-Item File-Name).lastwritetime=$(Get-Date "mm/dd/yyyy")
Before changing the attributes, here is how a file’s created, modified, and accessed dates looked:
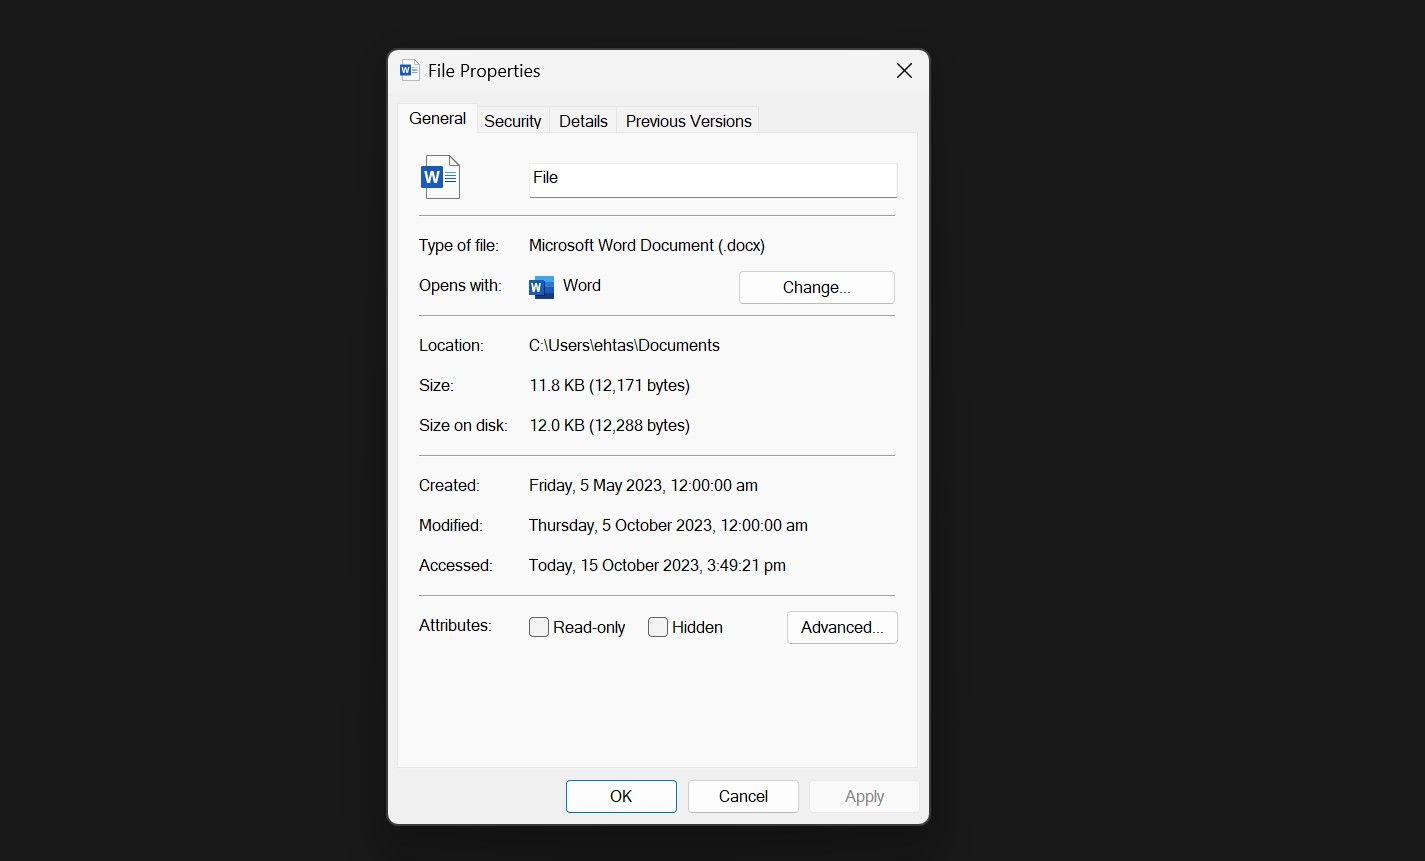
After changing them with PowerShell, here are the updated dates:
Windows makes real-time changes to attributes. Therefore, don’t modify or access the file after making changes since it will change the modified and accessed dates again.

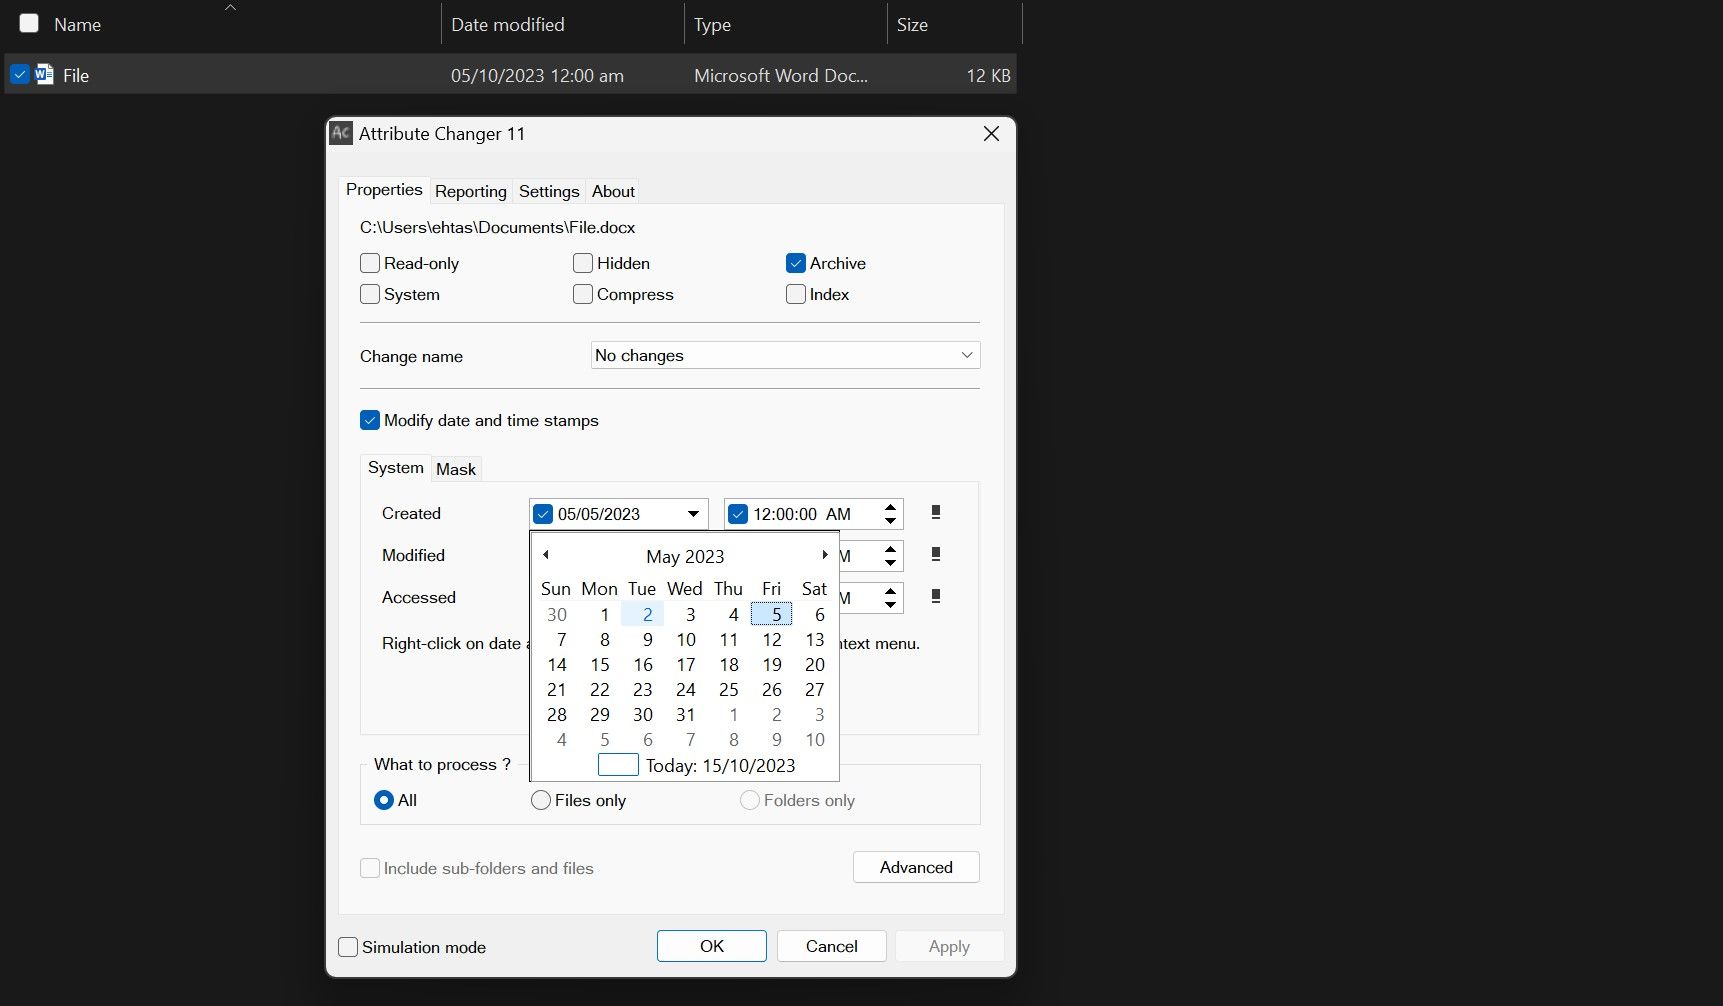
How to Modify the Date Created, Date Accessed, and Date Modified Using Attribute Changer
The Attribute Changer app is one of the third-party attribute changer apps that lets users change file attributes, including when a file was created, modified, or accessed. If changing the file attributes using PowerShell is challenging for you, here are the steps to modify them using this third-party app:
Go to the official PETGES website .
Download the full setup of Attribute Changer; do not download the portable version, as it may not function properly.
Once the software has been downloaded, run the setup file and follow the onscreen instructions to install it.
Restart your device if the software asks you to; otherwise, there’s no need.
Navigate to the folder containing the file whose attributes you wish to modify.
Right-click the file and select Change Attribute from the context menu to open the software. If you’re using Windows 11, you may need to click Show more options to reveal this option in the context menu.
Once the application opens, check the box beside Modify date and time stamps to make the date field editable.
Change the date and time when a file was first created and the last time you accessed or modified it according to your preference.
Once you’ve made your changes, click Apply to make them permanent.
Click Yes in the confirmation pop-up, and the file attributes will be changed successfully.

In the same way that we changed the attributes of a file, you can also change the attributes of a folder using Attribute Changer.
Using third-party tools to modify attributes requires you to grant apps permission to access the file. Therefore, if the documents you want to modify the dates for are confidential, don’t use third-party apps to change the attributes; instead, use the official methods offered by Windows.
 PDF application, powered by AI-based OCR, for unified workflows with both digital and scanned documents.
 How to Remove Other File Attributes Using File Explorer
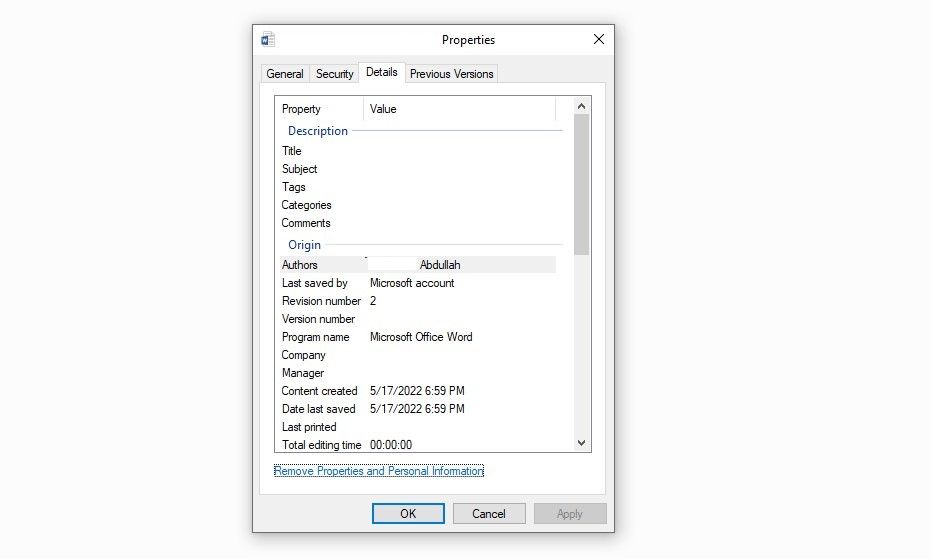
While File Explorer does not permit modifying critical attributes such as Date Created, Date Modified, and Date Accessed, it does permit users to remove specific attributes such as the author, copyright information, revision number, etc. To remove attributes that are possibly removable using File Explorer, follow the below steps:
- Navigate to the folder where you want to change the attributes.
- Right-click on it and select Properties from the context menu.
- Navigate to the Details tab at the top of the window.
- Click the Remove Properties and Personal Information link.
- To remove all possible properties automatically, check the circle beside Create a copy with all possible properties removed. This will create a duplicate of the file at the exact location after deleting all possible attributes.
- To remove selected properties, check the circle beside Remove the following properties from this file, select the attributes you want to remove, and click OK.


Power Tools add-on for Google Sheets, 12-month subscription
Modify Your File’s Attributes With Ease
Modifying file attributes is a great way to hide author information, revision numbers, and other details, such as when a file was created, modified, or accessed. Hopefully, you now better understand the different ways to modify file attributes. Using PowerShell is the easiest and most recommended method to change them.
If you find it complicated or want more control over how the attributes are changed, you can use the Attribute Changer. If you take this route, be aware of the privacy risks involved.
The problem is that sharing a file with your teacher or supervisor at work entails sharing all of this information, putting your job or grades at risk. To prevent this, you can modify these attributes.
If you don’t want the receiver to know the actual file attributes, here’s how to remove or modify them.
- Title: Fine-Tuning Windows Filename Metadata
- Author: Joseph
- Created at : 2024-08-15 16:10:14
- Updated at : 2024-08-16 16:10:14
- Link: https://windows11.techidaily.com/fine-tuning-windows-filename-metadata/
- License: This work is licensed under CC BY-NC-SA 4.0.