Finding the Ideal Spot: Rearrange OneDrive on Win 11

Finding the Ideal Spot: Rearrange OneDrive on Win 11
If you don’t already know, OneDrive is Microsoft’s online storage service that you can use with your Microsoft account. You can save your files to the cloud and access them on any PC, tablet or phone by signing in to your Microsoft account. By default, your OneDrive folder is found in your user folder, but you can change where it is located. However, it isn’t a simple cut-and-paste operation; you have to make sure the new location syncs to the cloud. Here’s how to move your OneDrive folder to a new location.
How to Change the Location of Your OneDrive Folder
When you change where your OneDrive folder is located, you’ll also have to set it to sync with your files on the cloud. You’ll have to unlink your OneDrive folder on your PC first, then move the folder to a new location, and finally re-link your PC to your Microsoft account. These steps will help you set that up.
If you’re new to the concept, check out our articles onwhat OneDrive is andwhy you should use it .
1. Unlinking OneDrive
The first thing to do is tounlink your OneDrive folder from your Microsoft account so that files on the cloud no longer sync to their current location.
Your OneDrive files on your PC will no longer synchronize to the cloud. Don’t worry; a little later you’ll be re-linking your OneDrive folder to your Microsoft account.
Once you’ve done this, you will be presented with a window to set up OneDrive. Leave this open for the moment. You will need to revisit it once you’ve moved your OneDrive folder to a different location on your PC.
2. Moving Your OneDrive Folder
With that done, you can now relocate your OneDrive folder.
- Navigate to where your OneDrive folder is currently located. It should be in your user files by default.
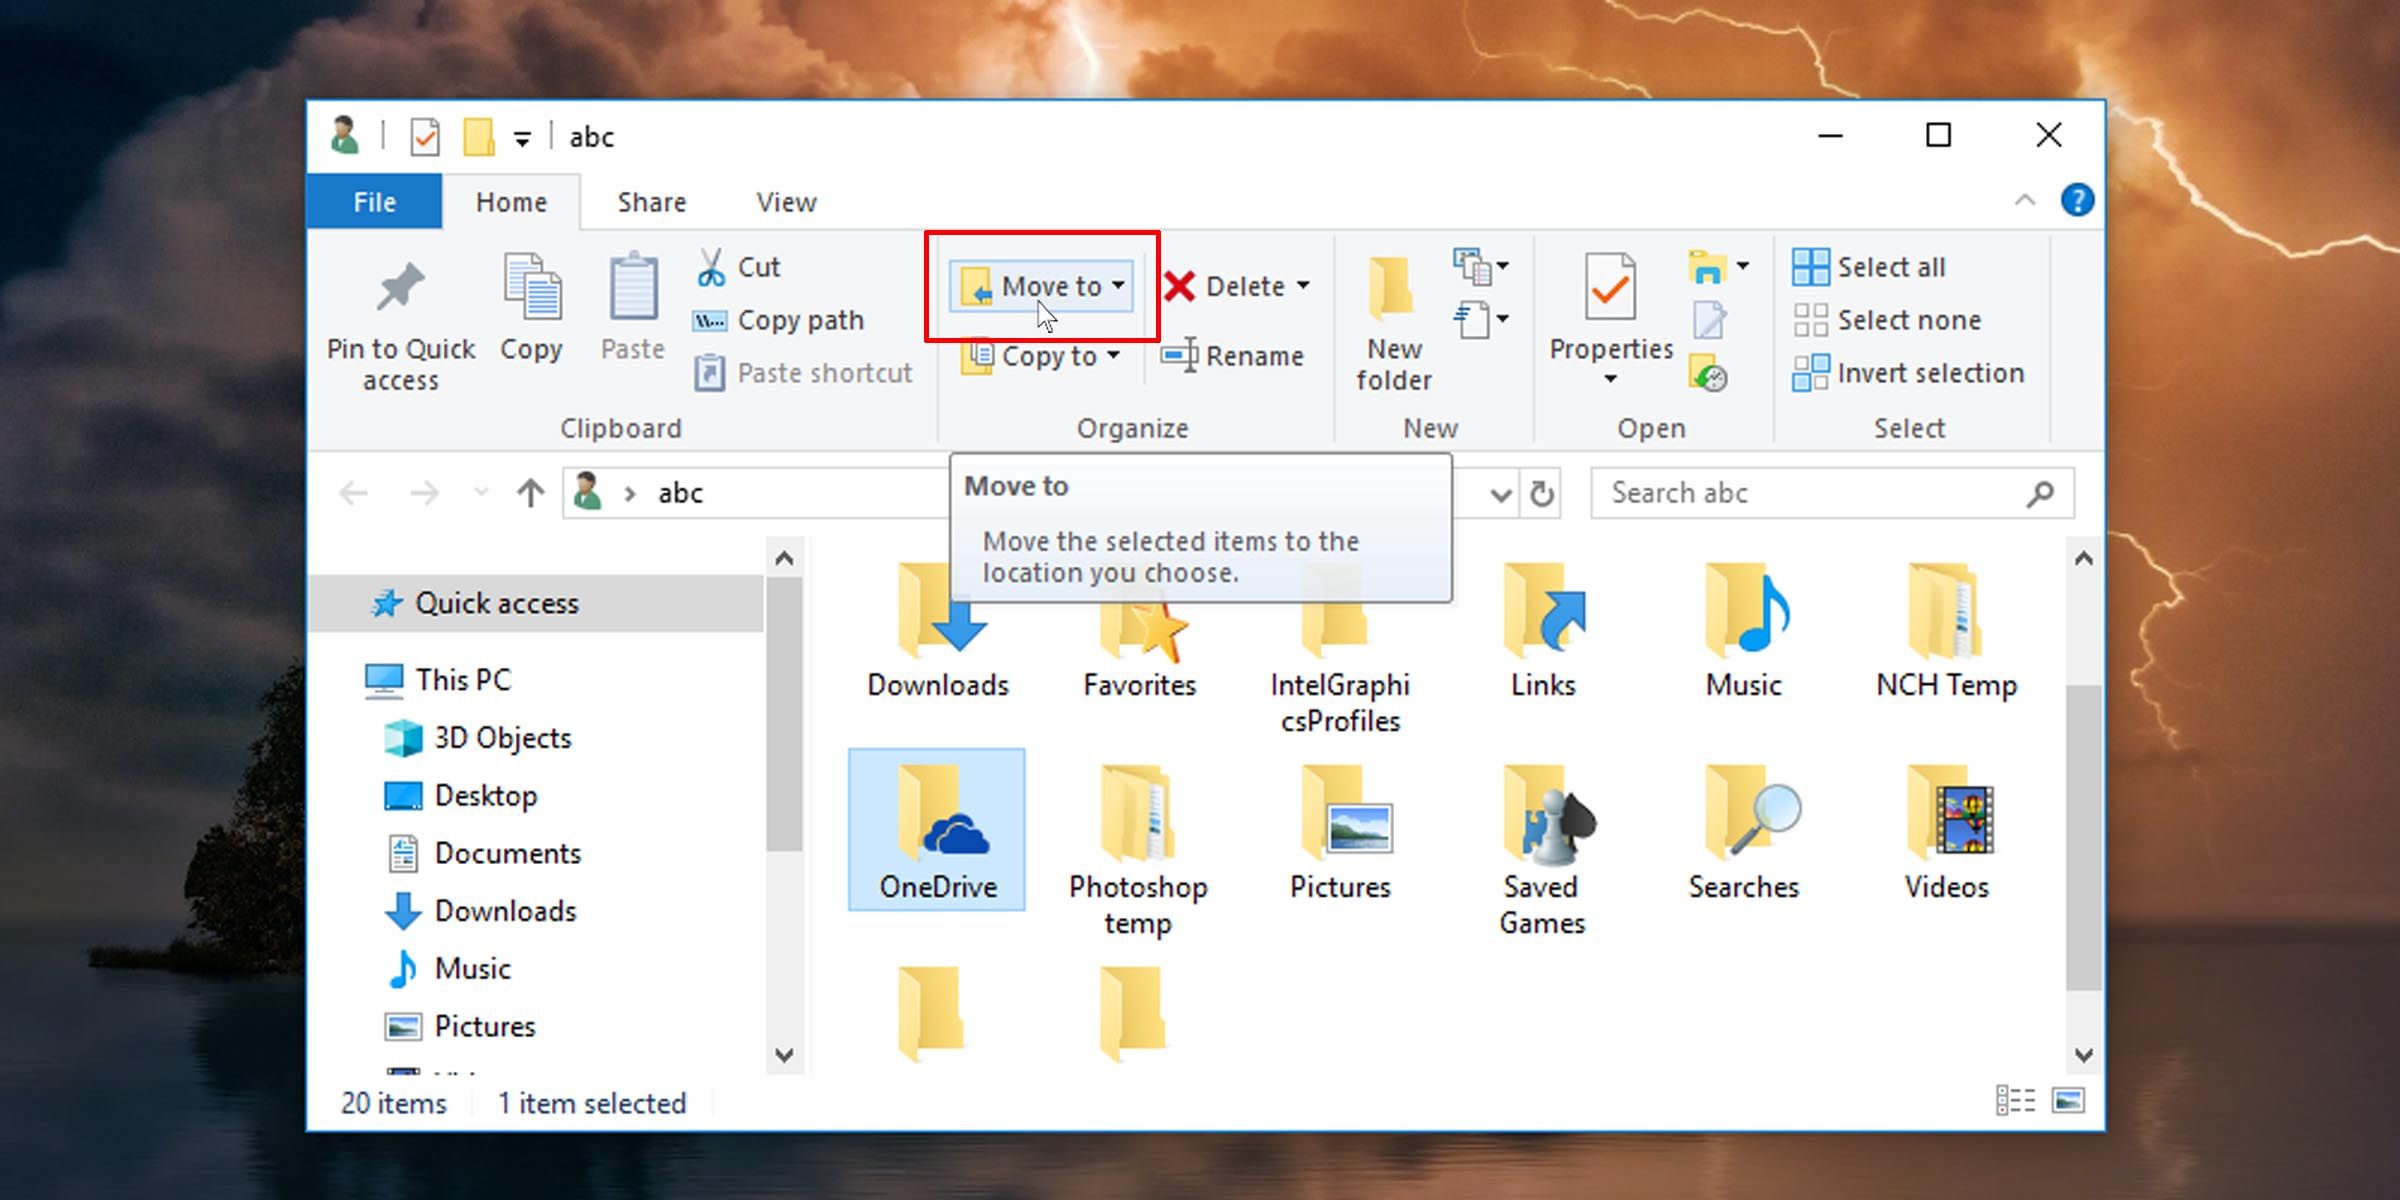
- Click on theHome tab on the File Explorer ribbon.
- Select your OneDrive folder and in the ribbon click on theMove to button.

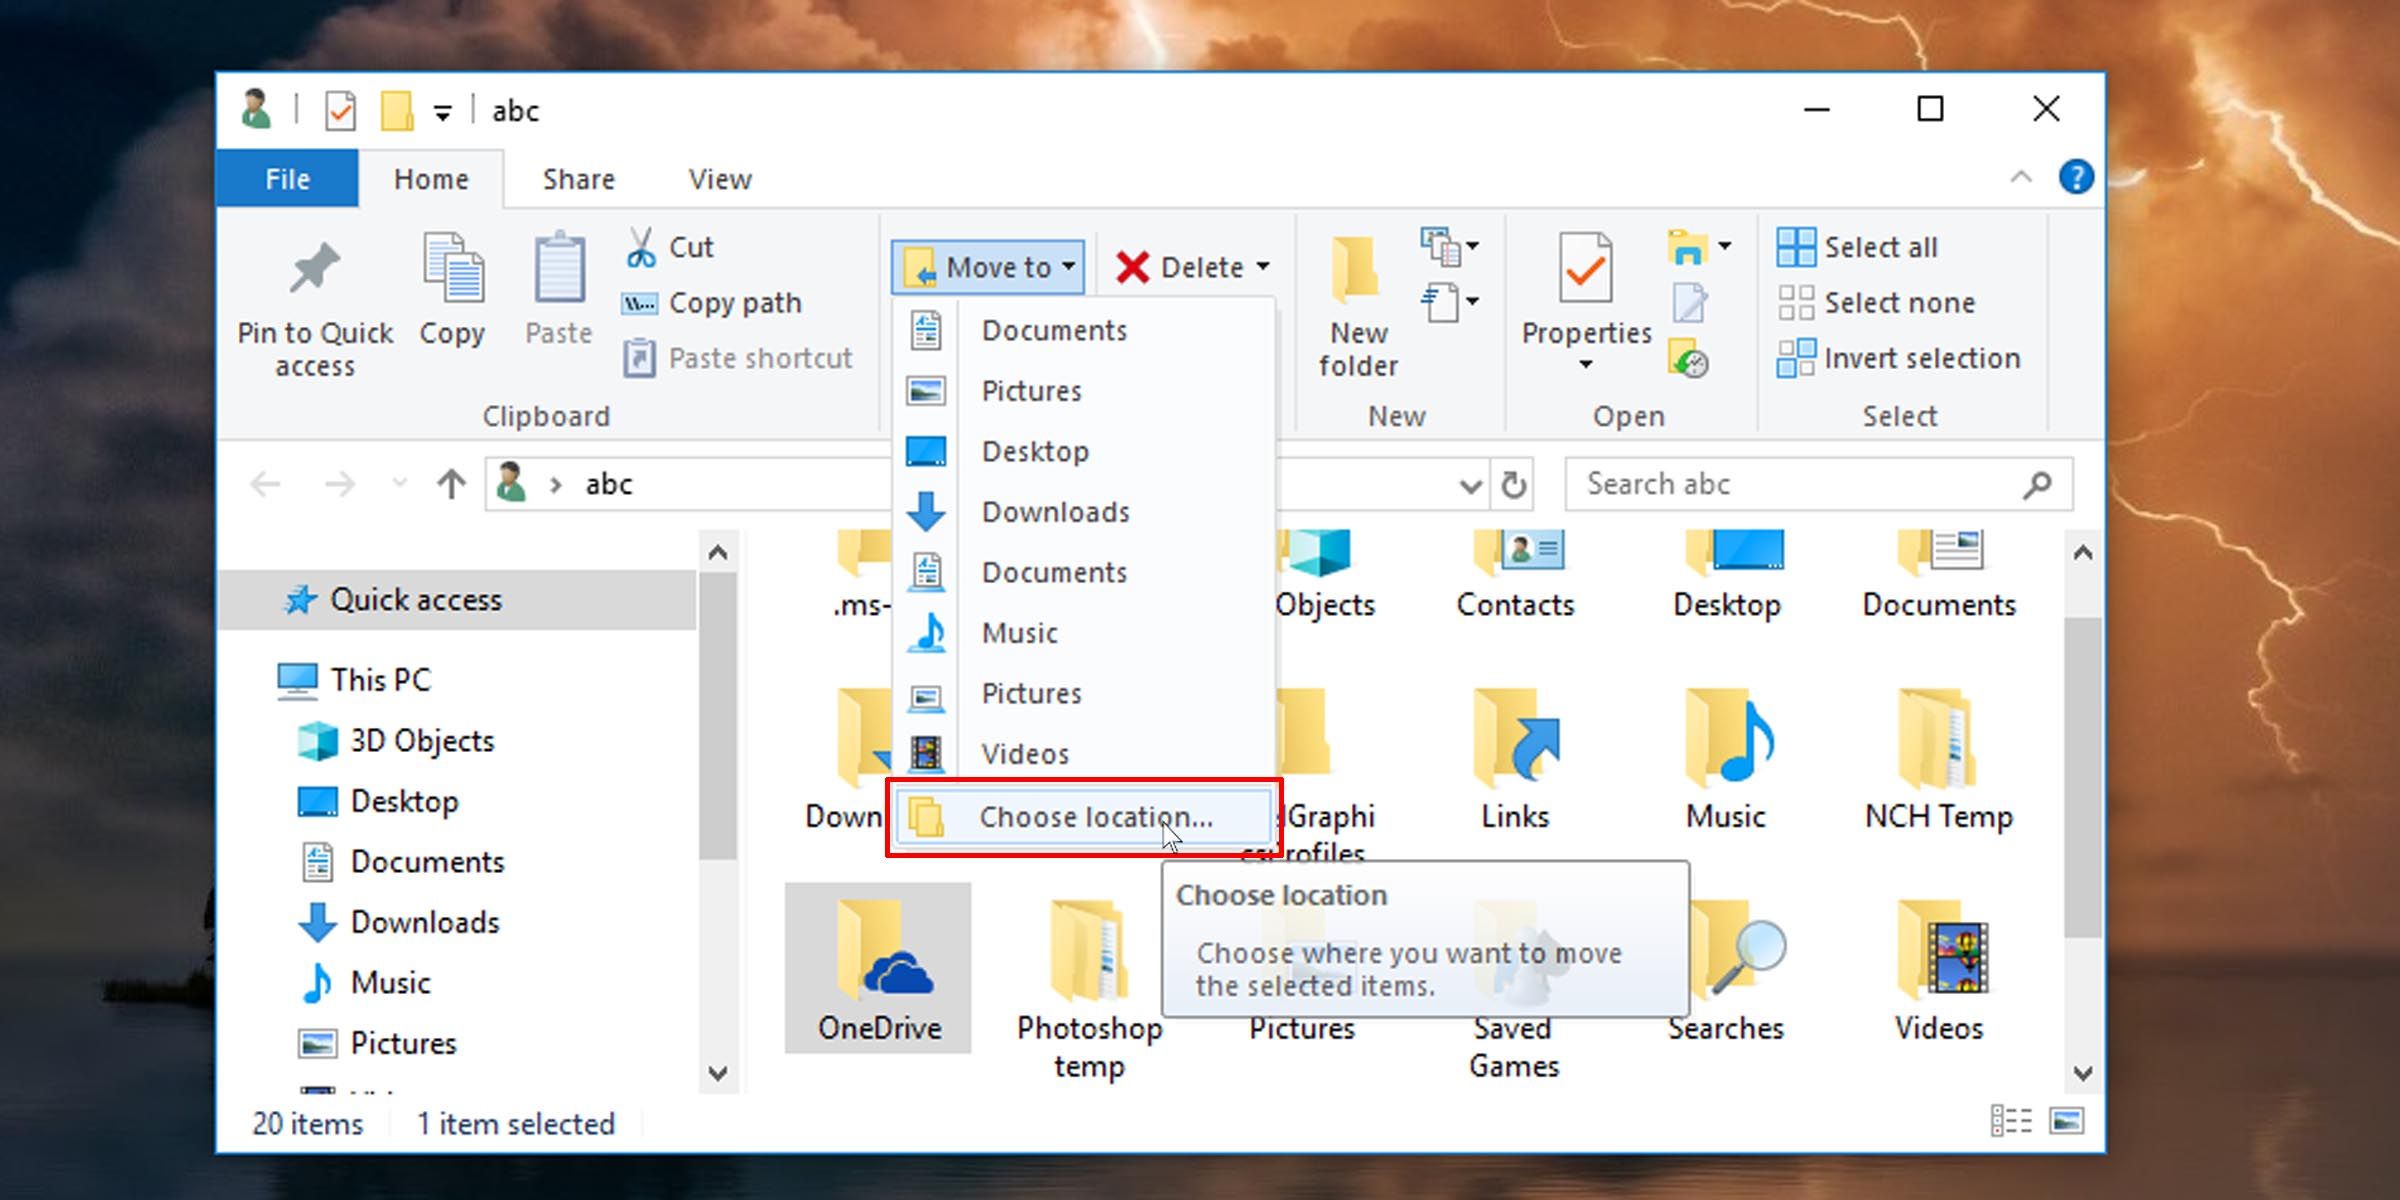
- From the drop-down that appears, click on theChoose location option.

- A pop-up will appear. Browse to the location you want your new OneDrive folder to reside, and click on theMove button on the bottom of the pop-up.
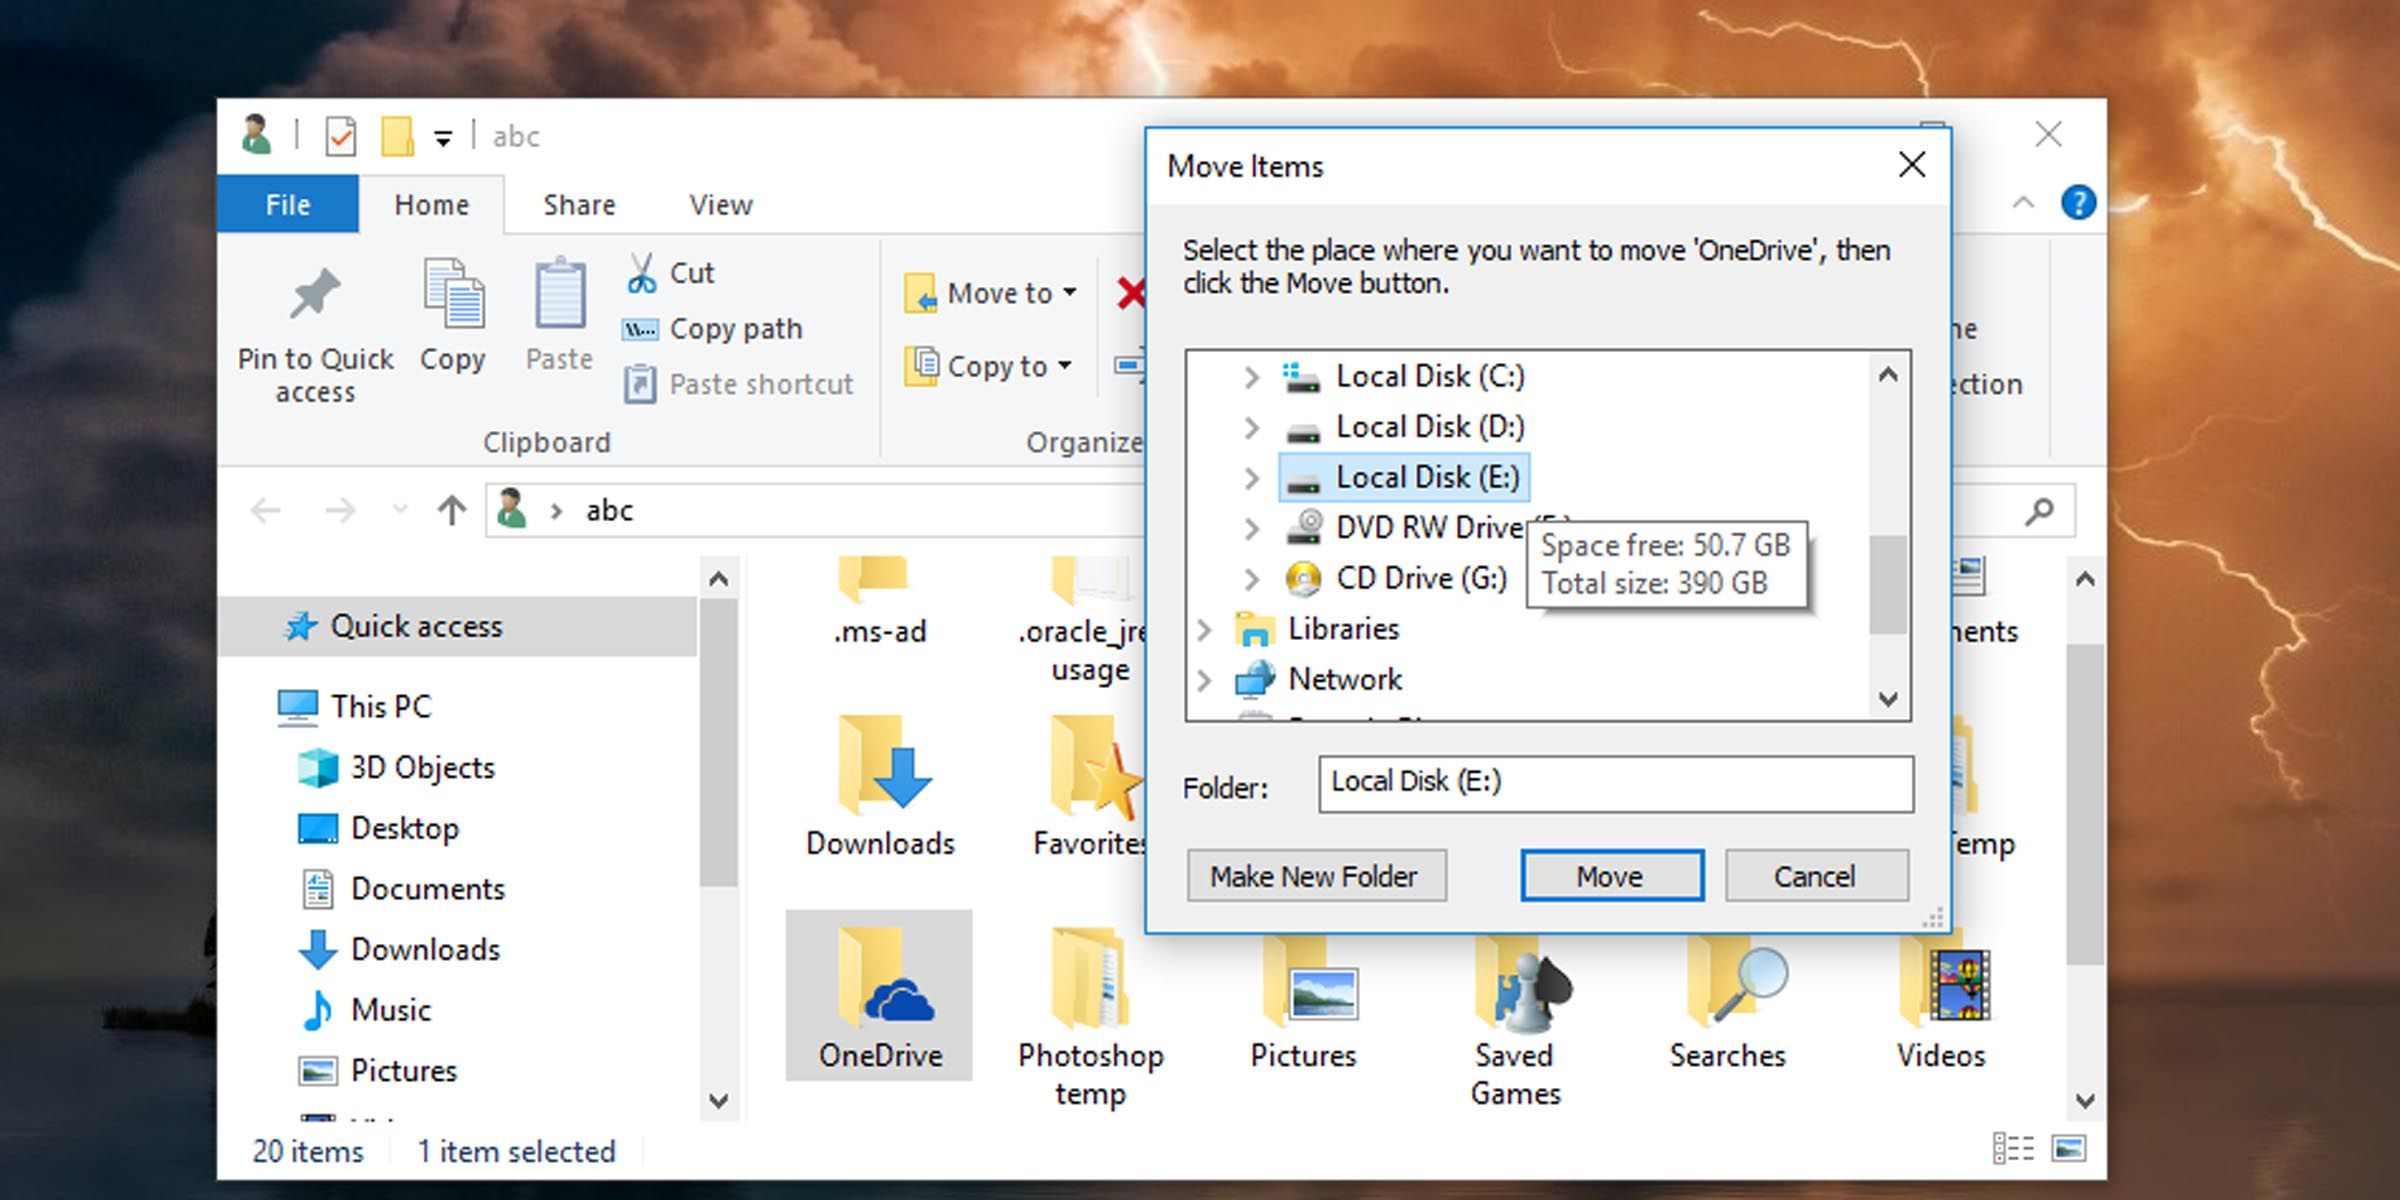
6. Windows will start to move your OneDrive folder and all of its contents to the new location you’ve selected. This may take a while depending on the size of the folder.
That’s it! You’ve moved your OneDrive folder to a new location on your Windows PC.
3. Re-Linking OneDrive
Now all that’s left is to re-link your Microsoft account with OneDrive on your PC, this time pointing to the new location. Follow the steps below to do that.
- Return to theSet up OneDrive window you left open earlier. (If you didn’t leave it open, or it got shut, you can pull it up again by opening the OneDrive application.) This is how you’llre-link your OneDrive account to your PC .
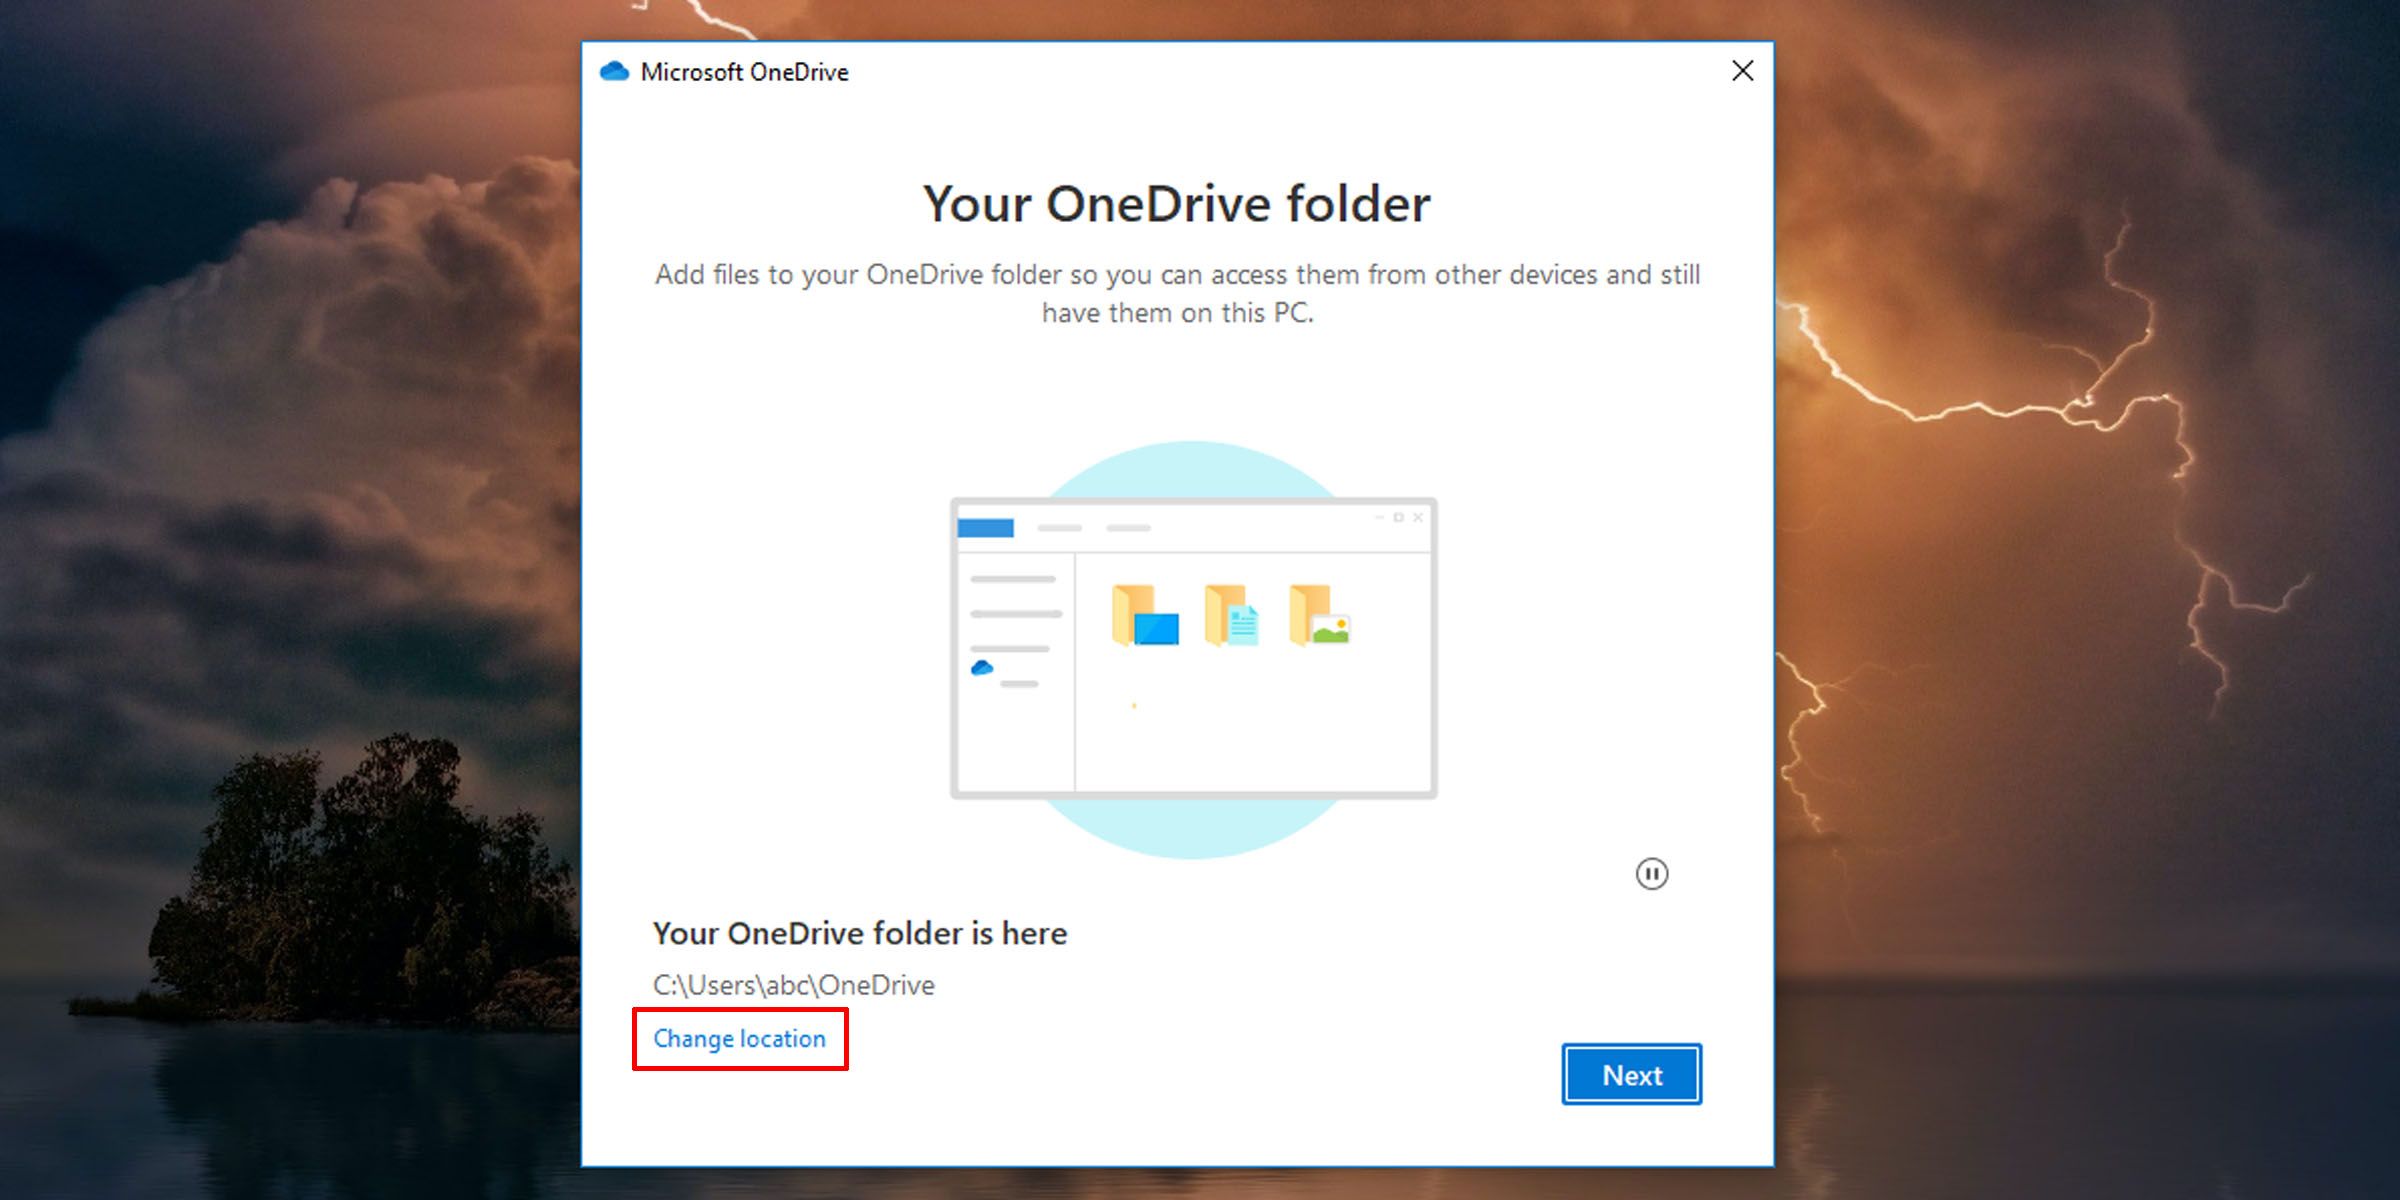
- Once you’re signed in, you are presented with a screen that shows where Windows will set up your OneDrive folder. (By default, the system selects your user folder.)
- Click on theChange location link.

- Then browse to the new location where you moved your OneDrive folder on your PC, and click on theSelect Folder button.
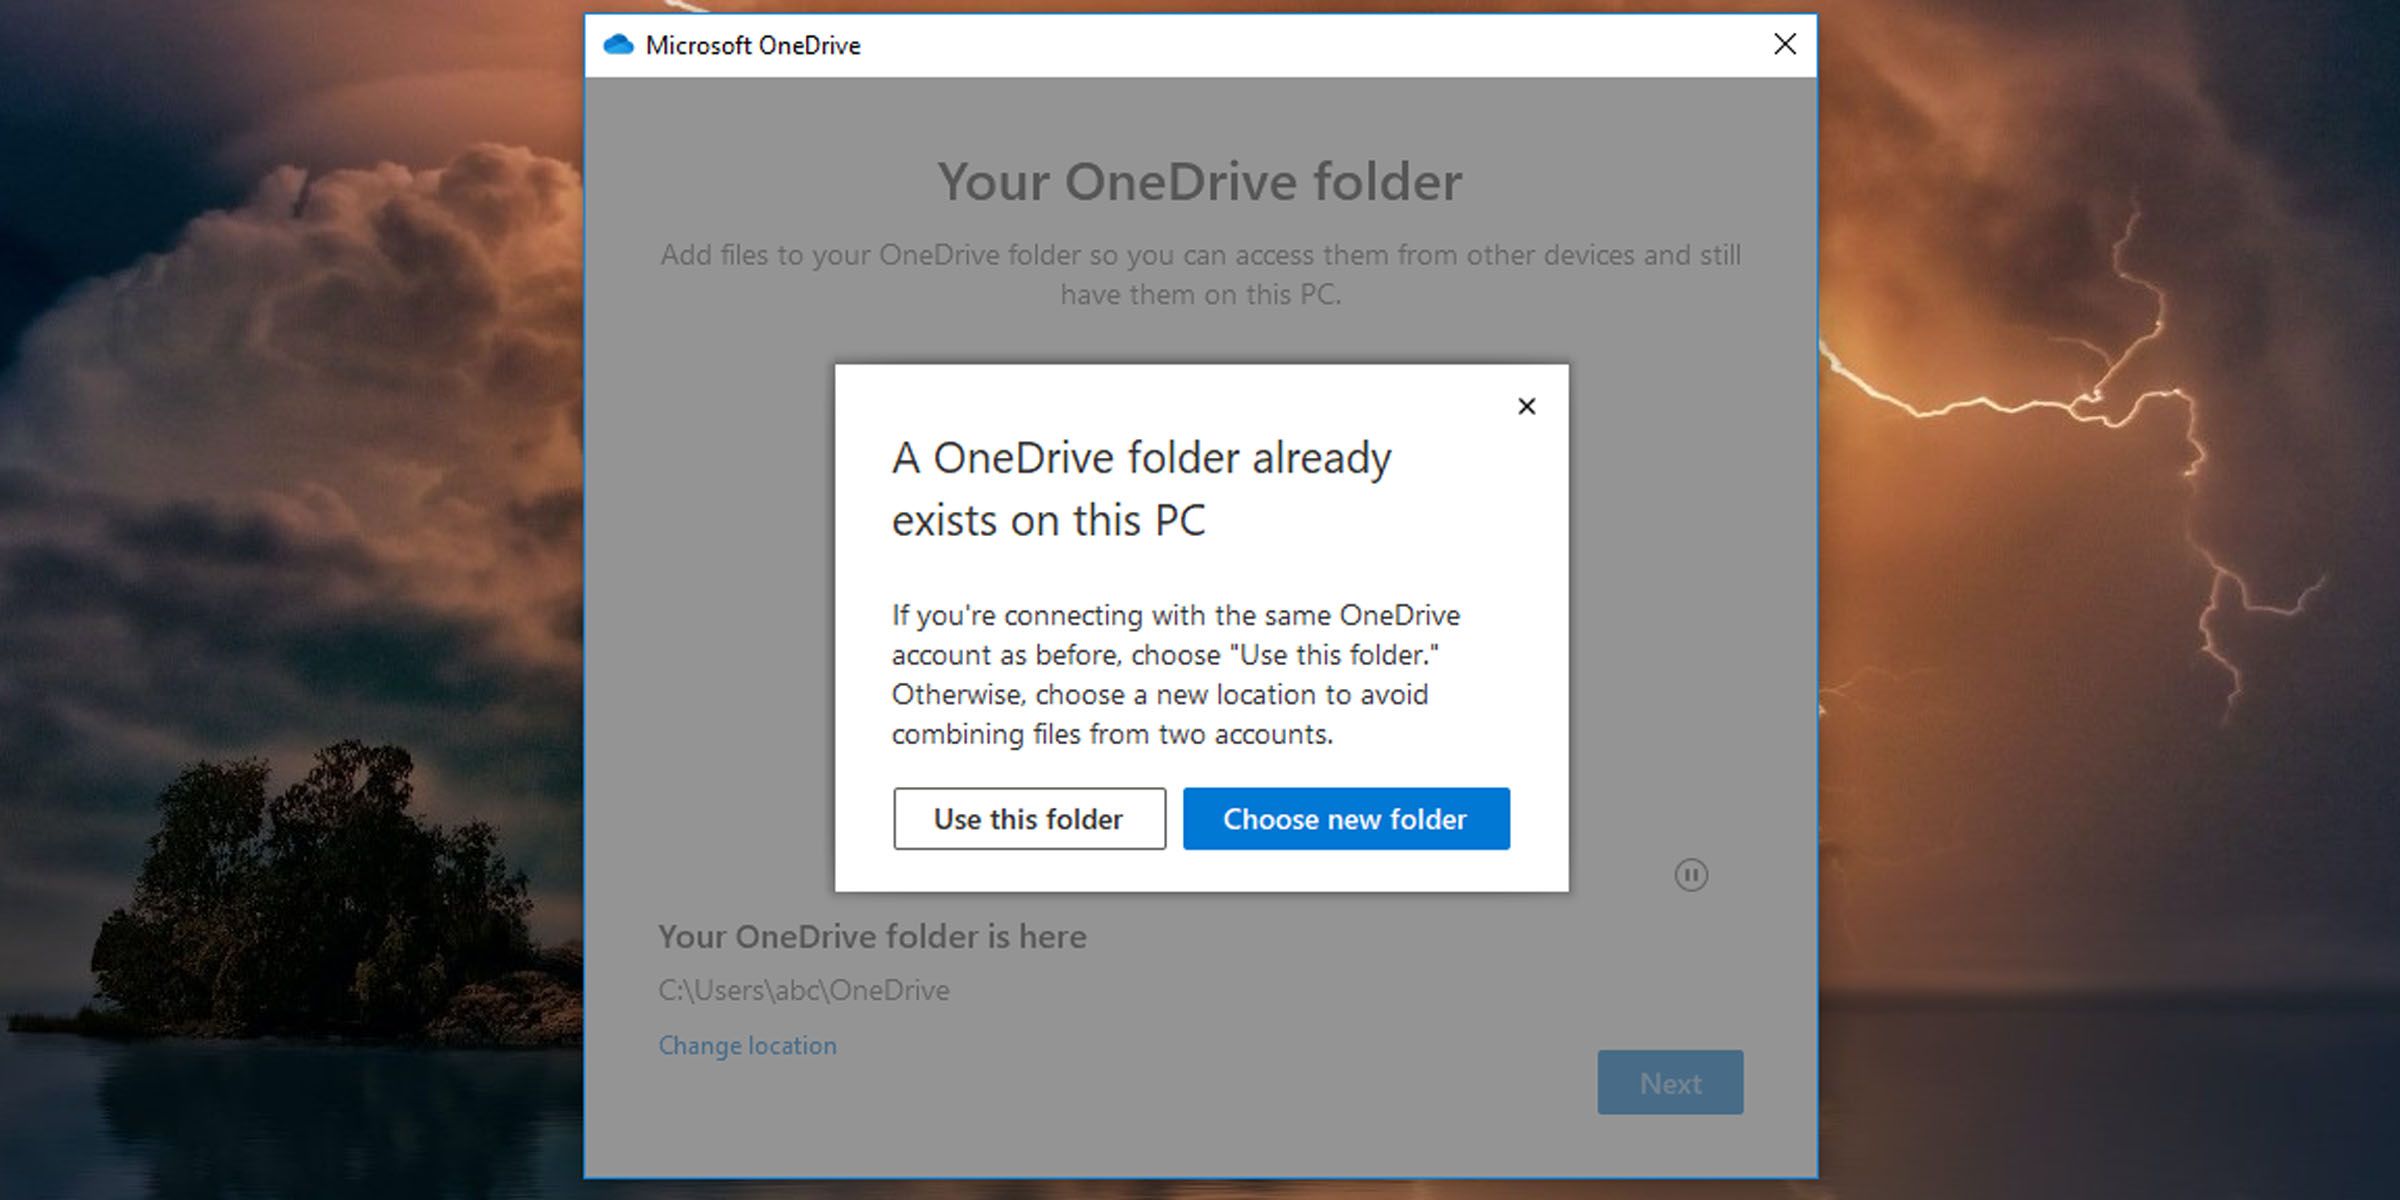
- You’ll be presented with a warning screen, telling you that files already exist in this folder. Click on theUse this folder button.

- Verify that the location you’ve selected is the correct one, and click onNext .
- You’ll be presented with a welcome screen. Scroll through it and close the setup window.
Your OneDrive folder has been moved, and any files you add, or existing ones you modify, will be synced to the cloud from this new OneDrive location on your PC.
Additionally, there are manyways to control how OneDrive syncs files on your PC , from pausing automatic sync on metered networks to stopping specific folders from syncing.
Free Up PC Storage by Moving Your OneDrive Folder
Files on your OneDrive can take up a lot of disk space. You don’t have to settle for your OneDrive folder’s default location. You can free up space on your root drive by moving it to a different location, perhaps even on a different drive.
Also read:
- [New] Utilizing In-Device Recording on Huawei Mate Series Phones (Mate 10, Mate 20) & P Series (P20, P10). For 2024
- [Updated] Advanced 5 Cloud View Recorder
- [Updated] In 2024, VR's Role in Shaping Future Films
- 2024 Approved Churning Up Channels Top Gear List
- 画質改善:Winxvideo AIで動画アップスケールする具体的な方法
- Cómo Convertir Archivos MP4 a Formato MOV Sin Coste Con Movavi
- Comprehensive Guide to Creating DVD Copies and ISO Images with WinX DVD Copy Tool
- Disabling Windows 11 Camera App Error 0xA00F425D Fixes
- Discover ViVeTool: Your Ticket to Access Latest Windows Innovations
- In 2024, How to Flawlessly Merge Streamlabs & OBS on Mac
- Numerical Methods Like Finite Difference and Finite Element Are Often Used to Solve Complex Transient Heat Transfer Problems.
- Overcoming Win OS Extract Issues: Saving Time with Error 1152 Solution
- Quick Shift Script: Moving Windows 11 Selected Files
- Step-by-Step to Become a Win 11 Insider
- Steps for Resolving Installation Issues with Microsoft Store Apps
- The Ultimate Guide to the Finest Free Car Performance Fixes
- Unveiling Windows 11: Entry Into the Insider Trials
- Title: Finding the Ideal Spot: Rearrange OneDrive on Win 11
- Author: Joseph
- Created at : 2024-10-20 17:10:08
- Updated at : 2024-10-24 16:10:35
- Link: https://windows11.techidaily.com/finding-the-ideal-spot-rearrange-onedrive-on-win-11/
- License: This work is licensed under CC BY-NC-SA 4.0.
