
Expert Tips for Correcting Windows Update Problems (0X30017)

Expert Tips for Correcting Windows Update Problems (0X30017)
The update error 0xC1900101 – 0x30017 pops up when the users try to either install a system update or upgrade to the latest Windows version. There can be a number of reasons behind this issue, such as insufficient space for the update, antivirus installation, and corruption issues within the system.
The following sections discuss the possible causes and troubleshooting methods for this error. Select the troubleshooting method that is most appropriate for your situation and proceed with it.
What Causes the 0xC1900101 – 0x30017 Error?
Here are some common reasons behind the update error under consideration:
- Insufficient space - You must have at least 16 GB of free space to upgrade to the latest version of Windows. If you have insufficient space on your computer, you can try removing the unnecessary, junk files to make space for the upgrade.
- Antivirus interruption - Your third-party antivirus program or Windows Defender might be blocking the update as a result of a false alarm. If this scenario is applicable, you can try disabling or uninstalling the program to fix the problem.
- Corrupt system files - The essential system or update files can be facing a corruption issue, which is leading to the update installation failure. Later in this guide, we discuss a couple of methods you can try to resolve these bugs and generic corruption errors.
- Outdated drivers - All the installed drivers should be up-to-date for the system to successfully upgrade. It is best to look for outdated drivers in the Device Manager and upgrade them before you attempt to install the updates.
- Outdated BIOS - Your BIOS itself might be outdated, affecting your system’s functioning and causing issues like the update error. In most cases, if your BIOS is outdated or faulty, you will also face common issues like a Blue Screen of Death.
Now that we know about the potential causes of the issue, let’s take a look at the solutions you can try to resolve the problem. Before proceeding, we recommend that you remove any unnecessary external peripherals like USB from your computer.
1. Free Up Storage Space
As we mentioned earlier, you must have at least 16 GB of free space on your system to install new updates. If you do not have storage space, the best way to clear it is by deleting the unnecessary apps and programs you have installed on your computer.
Apart from that, it also will be a good idea to remove the previous installation files from the system. In addition to clearing the space, this will also solve any interruption issues that these previous installation files may cause during the upgrade process. In case you are using two SSDs on your computer, remove one and then try installing the update.
Head over to our guide on different methods of freeing up storage space in Windows for more information.
2. Uninstall Your Antivirus
If you are using a third-party antivirus program on your computer, it may be blocking the system’s process of installing updates. The solution in this case is simple, as all that you need to do is disable or uninstall the security program temporarily.
Below, we have discussed the steps of disabling the antivirus using Avast. The steps for your antivirus program might differ slightly.
Here is how you can do that:
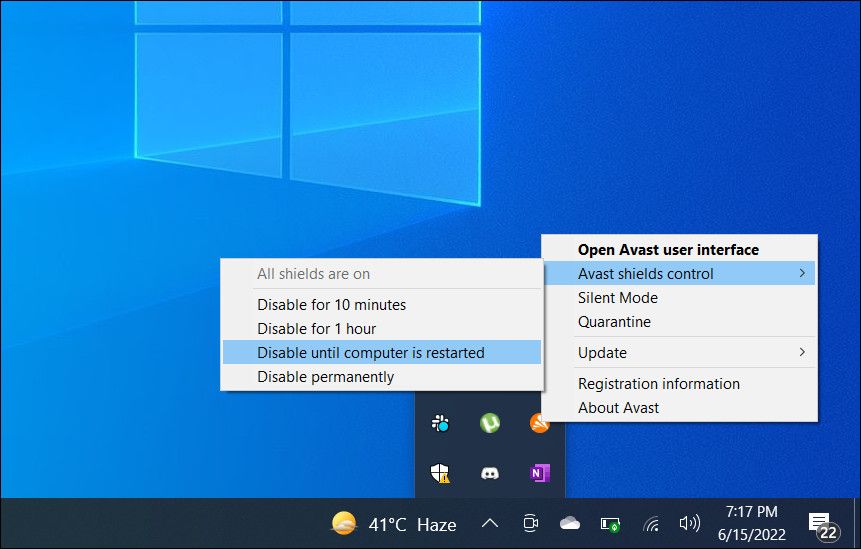
- Right-click on theantivirus program icon in the taskbar.
- ChooseShields control >Disable until the computer is restarted .

If you are not using a third-party security program, you can try disabling Windows Defender as well. However, we highly recommend that you enable it back after installing the update. Keeping it disabled for a long time can expose your system to risks and potential threats.
3. Rule Out Corruption Issues
The next thing that we recommend doing is scanning the system for corruption issues using the built-in troubleshooting utilities in Windows.
To fix this, we will be using the Windows update troubleshooter, System File Checker, and DISM to find potential issues. Additionally, these utilities will resolve most of the problems they find on their own.
3.1 Use the Windows Update Troubleshooter
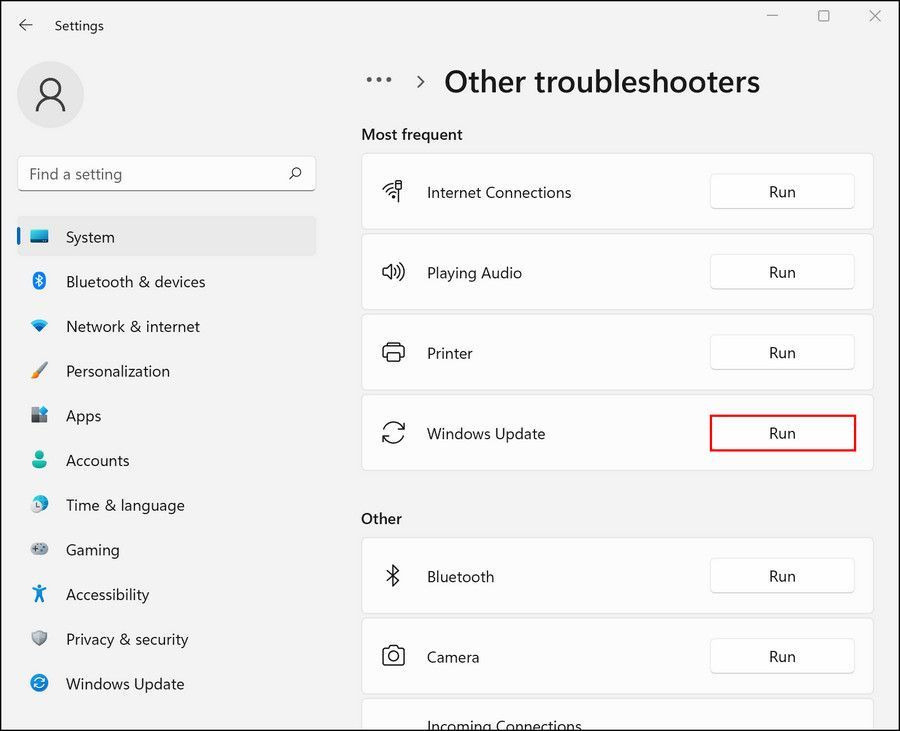
You can run the Windows Update troubleshooter via Windows Settings. Instructions on how to run the troubleshooter can be found in our guide on how to fix Windows Update getting stuck .
Once the troubleshooter has finished scanning, check if any issues are identified. If so, the troubleshooter will recommend fixes that can resolve the issue. Click onApply this fix to proceed. In case the utility fails to identify the issues, click on Close the troubleshooter and move to the next method below.
3.2 Run SFC and DISM Scans
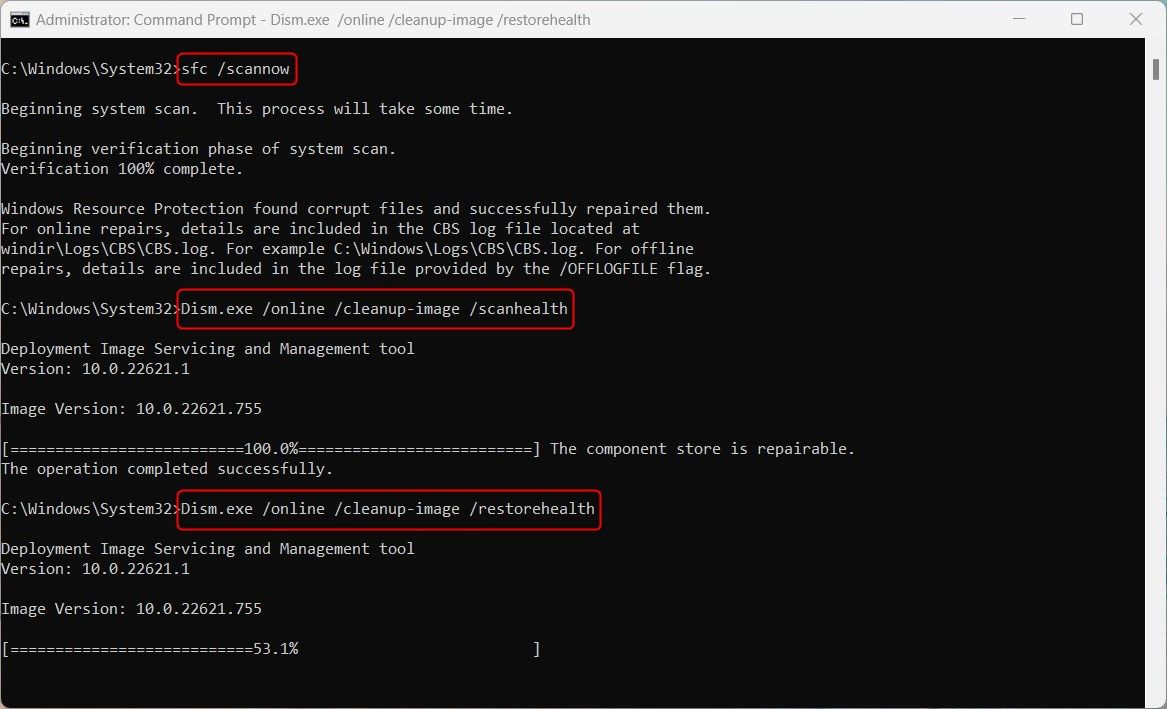
The next thing that you should do is run the SFC and DISM scans via Command Prompt. Check out the difference between CHKDSK, SFC, and DISM scans for more information and instructions for these tools.
As the name suggests, the System File Checker scans the protected system files for problems and replaces the unhealthy file components with their cached counterparts. DISM, on the other hand, is responsible for repairing a corrupt system image.
Hopefully, if the system cannot install updates because of corruption issues, these tools will eliminate the problem.
4. Update Your Drivers
Ideally, your drivers must be kept up-to-date at all times for the system to function smoothly. To check if there are any outdated drivers on your system, head over to the Device Manager utility.
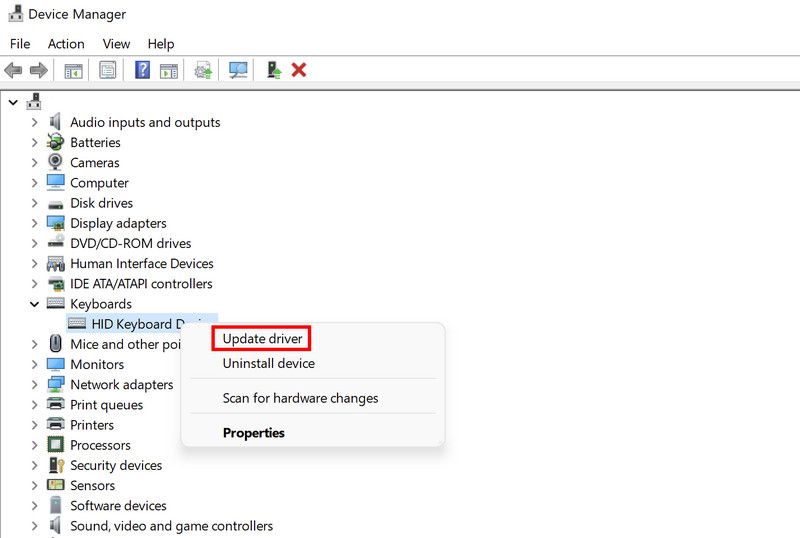
Expand all sections, and look for any drivers with a yellow exclamation mark. This sign indicates that the driver is either outdated or corrupt. Once you have identified a faulty driver, right-click on it and chooseUpdate driver >Search the system for drivers .
Wait for the update process of the driver complete and check if the issue is resolved.
company, user or members of the same household. Action! - screen and game recorder</a>
If you don’t see any exclamation marks, or you don’t think Windows managed to do a good enough job, check out the best free driver updaters for Windows .
5. Update Your BIOS
Finally, the issue can also be caused due to a bug or corruption issues within the BIOS. Fortunately, you can resolve most of these issues by updating the BIOS to the latest available version.
It’s good practice to update your BIOS when a new version comes out. And there are plenty of reasons why you should update your PC’s BIOS , including unlocking additional hardware support.
Different motherboard manufacturers have different instructions for this, so we recommend visiting the manufacturer’s website for more information. Keep in mind, this can be a nerve-wracking and time-consuming process, so only proceed when you have enough time to spare.
Now You Can Upgrade Windows to the Latest Build
By now, you should be able to upgrade your operating system to the latest available version. In case nothing the troubleshooting methods above do not help, we recommend proceeding with a clean installation. This will automatically upgrade the system without any errors during the procedure.
- Title: Expert Tips for Correcting Windows Update Problems (0X30017)
- Author: Joseph
- Created at : 2024-08-15 16:04:14
- Updated at : 2024-08-16 16:04:14
- Link: https://windows11.techidaily.com/expert-tips-for-correcting-windows-update-problems-0x30017/
- License: This work is licensed under CC BY-NC-SA 4.0.


 PDF application, powered by AI-based OCR, for unified workflows with both digital and scanned documents.
