
Expert Guidance: Manual Time Zone Setup for Windows Users
Expert Guidance: Manual Time Zone Setup for Windows Users
Did you ever experience being in a different time zone while working on your Windows computer? You’ve checked Windows time settings and noticed that it’s not set to your current location. Suddenly, you realize that the time zone is greyed out, and you can’t configure it automatically. What do you do next? There are several scenarios where Windows cannot automatically set the time zone, and here’s how to fix them.
1. Restart Your PC
The first step when troubleshooting any Windows-related issue is to restart the computer. It seems obvious, but it often solves the problem. Rebooting flushes out cached data that could cause time zone problems. It also resets various temporary services that may prevent Windows from automatically setting the time zone.
To restart your computer, save all your work and close any running applications. After that, open the Start menu and click Restart. Once your computer restarts, check if that fixes the issue.
2. Turn on Location Services in the Settings
If restarting your computer didn’t fix the issue, check if location services are enabled. Location services allow Windows to automatically detect the time zone and set it accordingly.
To verify location services, follow these steps:
- Press Win + I to open the Settings window.
- From the left navigation panel, click Privacy & security.
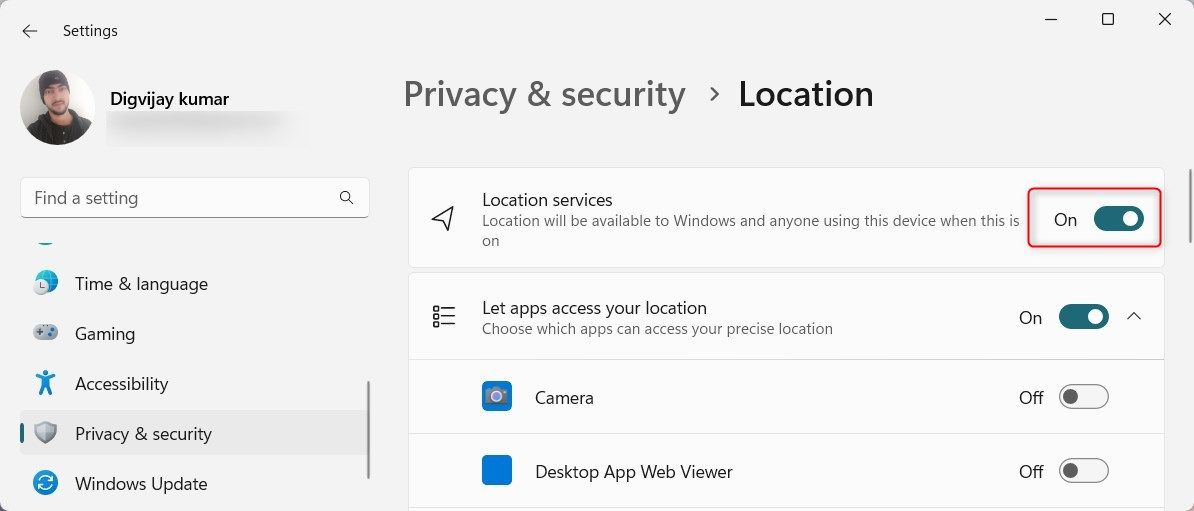
- Under the App permissions section, select Location.
- Make sure the Location services option is enabled. If it’s not, switch the toggle to turn it on.

Now restart your computer and check if Windows can set the time zone automatically.
 Jet Profiler for MySQL, Enterprise Version: Jet Profiler for MySQL is real-time query performance and diagnostics tool for the MySQL database server. Its detailed query information, graphical interface and ease of use makes this a great tool for finding performance bottlenecks in your MySQL databases.
 3. Set the Windows Time Service to Automatic
If the location services are already enabled, but Windows still can’t detect the time zone, the problem may be related to the Windows Time Service. This background service keeps your system clock synchronized with time servers.
Windows won’t detect the time zone if the service is not running. To fix this issue, set Windows Time Service to Automatic.
Here’s how to do that:
- Press Win + R on your keyboard to open the Run window.
- Type services.msc in the text box and press Enter.
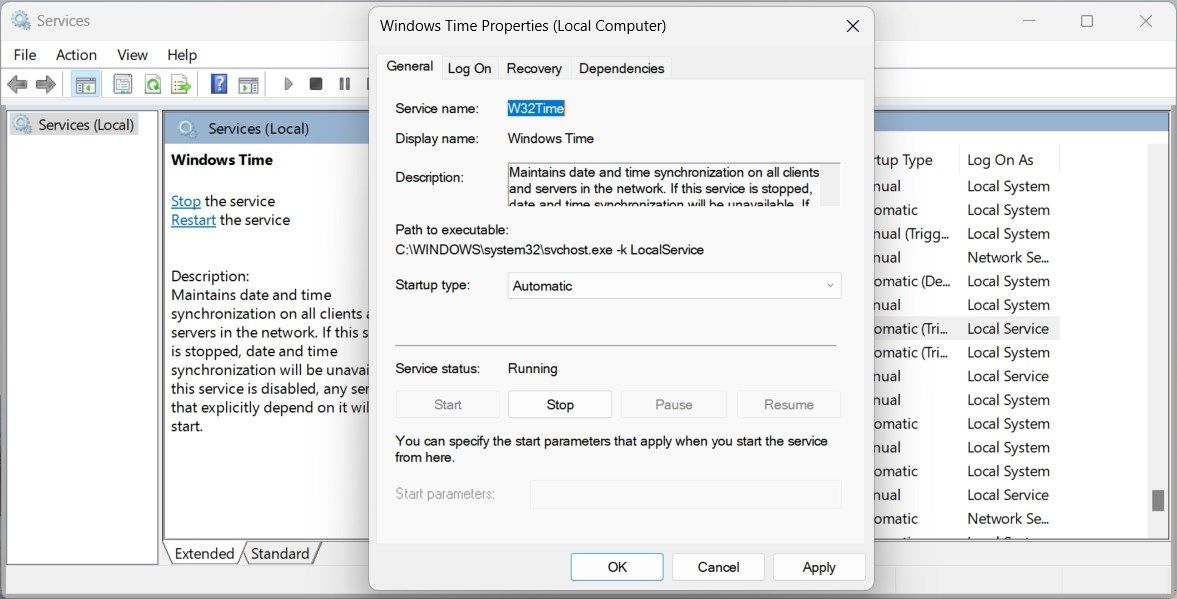
- Scroll down in the Services window and locate the Windows Time service.
- Right-click the service and select Properties.
- In the Properties window, set the Startup type to Automatic.
Power Tools add-on for Google Sheets, 12-month subscription
- Now check the Service status. If it reads Stopped, click the Start button to start the service.
- Click Apply and OK to save the changes.
Once you’ve done this, restart your PC and check the time zone settings.
4. Tweak the Registry Editor
If Windows still fails to detect the time zone or the “Set time zone automatically” option is still grayed out, you may need to tweak your registry. This is a more technical solution and requires registry knowledge. If you’re not good at registry editing, skip this step or ask a professional for help.
Follow these steps to make the changes:
Modifying the registry incorrectly may cause serious problems. Before making any changes, back up your Windows registry .
- Press Win + S on your keyboard to open the Windows Search.
- Type regedit in the search bar and press Enter.
- If the UAC window pops up, click Yes to grant administrative privileges.
- In the Registry Editor window, navigate to the following directory.
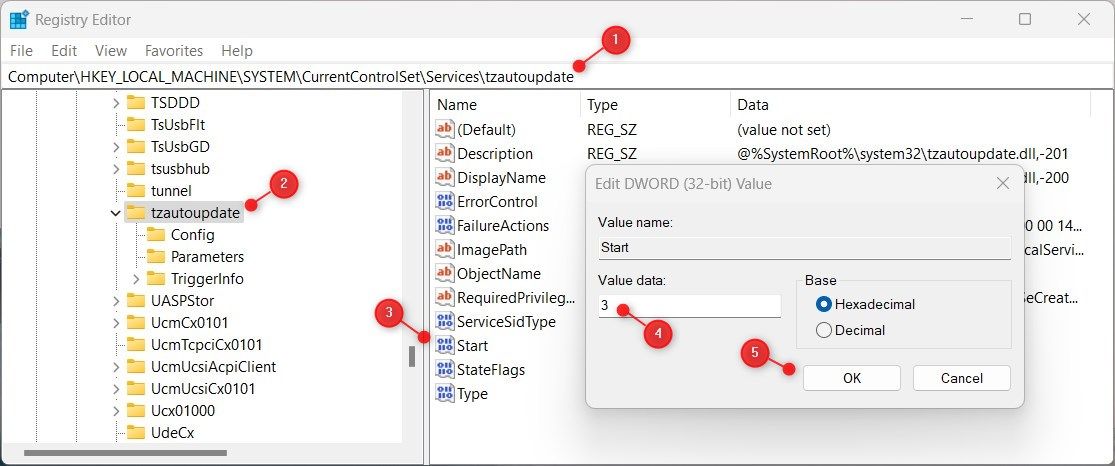
HKEY_LOCAL_MACHINE\SYSTEM\CurrentControlSet\Services\tzautoupdate - In the right pane, double-click the Start (DWORD) value.
- When the Edit DWORD Value window pops up, set the Value data to 3 and click OK.
- After doing this, you must change the location setting. To do this, navigate to the following key:
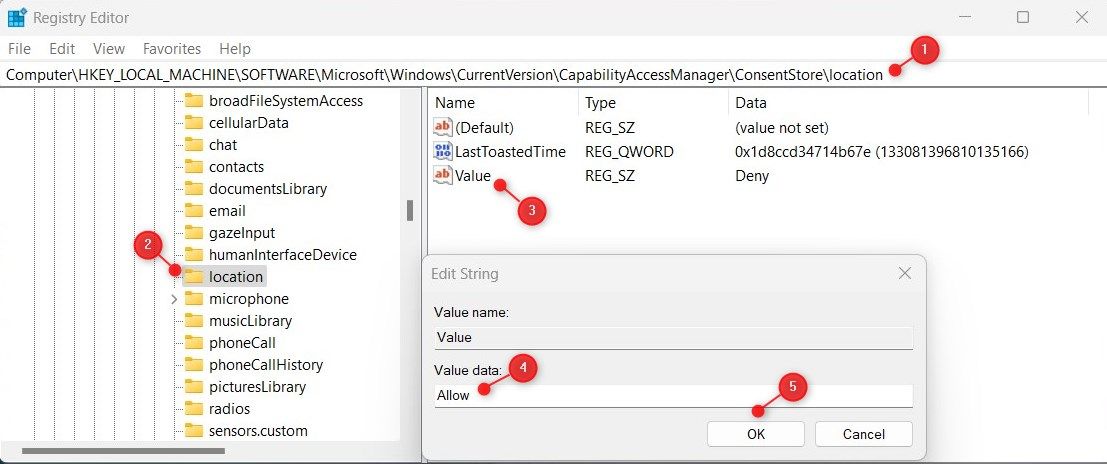
HKEY_LOCAL_MACHINE\SOFTWARE\Microsoft\Windows\CurrentVersion\CapabilityAccessManager\ConsentStore\location
You can also copy and paste the path into the Registry Editor address bar. Now press Enter and this directs you to the Location key. - Move to the right pane and double-click the Value (REG_SZ) value.
- In the Edit String window, type Allow in the Value data field and click OK.

After that, close the Registry Editor and restart your PC. Windows should detect the time zone automatically and set it correctly.
5. Use the Group Policy Editor
If you’re comfortable with registry editing, use the Group Policy Editor instead. However, the tool is only compatible with Windows Pro and Enterprise editions. If you’re not a Pro user, activate the Group Policy for Windows Home , then follow these steps:
- Right-click on Start and select Run.
- Type gpedit.msc in the text field and click OK. The Local Group Policy Editor window will open.
- On the left navigation panel, browse to the following path:
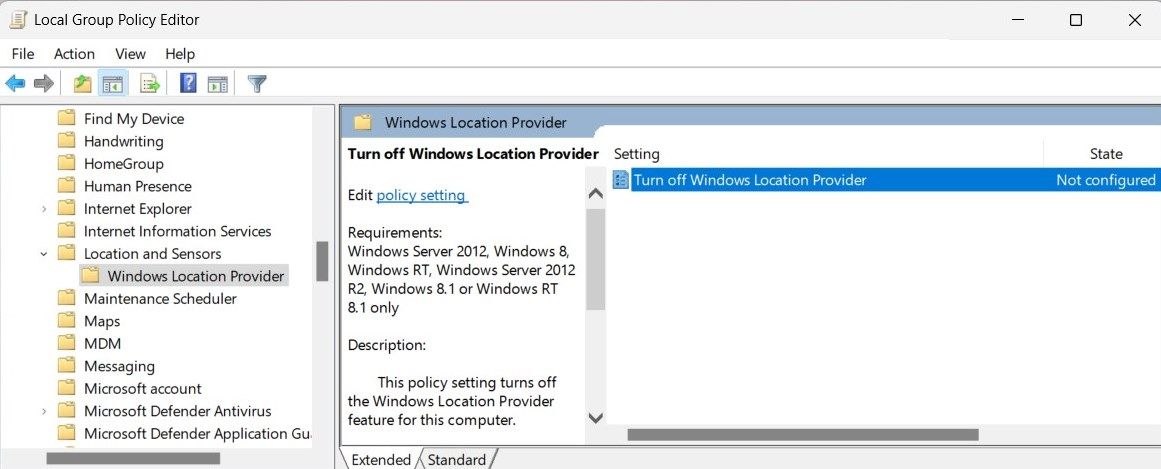
Computer Configuration > Administrative Templates > Windows Components > Location and Sensors > Windows Location Provider - Go to the right pane and double-click on Turn off Windows Location Provider.
- In the pop-up window, check the Not Configured option.
- Click Apply and OK to save the changes.
Now close the Group Policy Editor and restart your PC. After restarts check if your Windows detects the time zone automatically.
 Epubor Audible Converter for Mac: Download and convert Audible AAXC/AA/AAX to MP3 with 100% original quality preserved.
6. Reset the Windows Time Service
This problem may also occur if the Windows Time Service or time synchronization settings become corrupted. In that case, reset the service to its default settings and see if that helps. Here’s how to do it:
- Click on Start and type cmd in the search box.
- Press Ctrl + Shift + Enter on your keyboard simultaneously. This opens the Command Prompt in administrator mode.
- If the pop-up window appears, click Yes to grant permission.
- In the Command Prompt window, type net stop w32time and press Enter. Running this command will stop the Windows Time Service.
- Now, type w32tm /unregister in the Command Prompt window and hit Enter. This unregisters the service.
- Next, type w32tm /register and press Enter. This will re-register the Windows Time Service.
- After that, type net start w32time to restart the Windows Time Service.
Once done, close the Command Prompt and restart your computer to check if it solves the problem.
7. Try Some Generic Windows Fixes
There are also generic fixes you can try:
- Run the System File Checker tool:running System File Checker scans for corrupted system files and replaces them if necessary.
- Perform a Clean Boot: If that didn’t work, try a Windows clean boot . This determines if third-party applications interfere with Windows Time Service.
- Update Windows: Finally, update Windows to the latest version to ensure you have all the latest fixes and security patches.
 KoolReport Pro is an advanced solution for creating data reports and dashboards in PHP. Equipped with all extended packages , KoolReport Pro is able to connect to various datasources, perform advanced data analysis, construct stunning charts and graphs and export your beautiful work to PDF, Excel, JPG or other formats. Plus, it includes powerful built-in reports such as pivot report and drill-down report which will save your time in building ones.
 It will help you to write dynamic data reports easily, to construct intuitive dashboards or to build a whole business intelligence cockpit.
KoolReport Pro package goes with Full Source Code, Royal Free, ONE (1) Year Priority Support, ONE (1) Year Free Upgrade and 30-Days Money Back Guarantee.
Developer License allows Single Developer to create Unlimited Reports, deploy on Unlimited Servers and able deliver the work to Unlimited Clients.
Windows Can Now Automatically Set the Time Zone
We hope the article helped you resolve timing issues on your Windows computer. It may occur due to missing or corrupted system files or incorrect time zone settings. Make sure to try these solutions and perform a System Restore if the problem persists.
- Title: Expert Guidance: Manual Time Zone Setup for Windows Users
- Author: Joseph
- Created at : 2024-08-15 15:42:20
- Updated at : 2024-08-16 15:42:20
- Link: https://windows11.techidaily.com/expert-guidance-manual-time-zone-setup-for-windows-users/
- License: This work is licensed under CC BY-NC-SA 4.0.