
Executing Policies for a Single-User Target in Modern Windows Systems
Executing Policies for a Single-User Target in Modern Windows Systems
When applying a local group policy to your PC, you may not want it to paint over all users. The answer is to apply local group policy to a specific user or set of users. This way you can control which features are accessible to specific user accounts.
It also makes it easy to apply and modify controls and appearances for individual users, and you’ll get a quick glance at which policies apply to which users. Here’s how to apply local group policy to specific user accounts on Windows 10 and 11.
What Is the Local Group Policy?
Group Policy is a Windows feature that gives you more control over the things user accounts are able to do and have access to. Changing Group Policy changes how the system works for different sets of users. We’ve covered what Group Policy is and how you can use it , with examples, in much more detail separately.

How to Apply a Local Group Policy to a Specific User Account
First off, you must have Windows 10 Pro, Enterprise, or Education editions to access the Local Group Policy Editor. Here’s how to set up what’s called a Microsoft Saved Console (MSC) for a specific user.
Press Win + R, type “mmc” into the box, and hit OK. This will open the Microsoft Management Console.
You will be presented with a UAC prompt. Click on Yes.
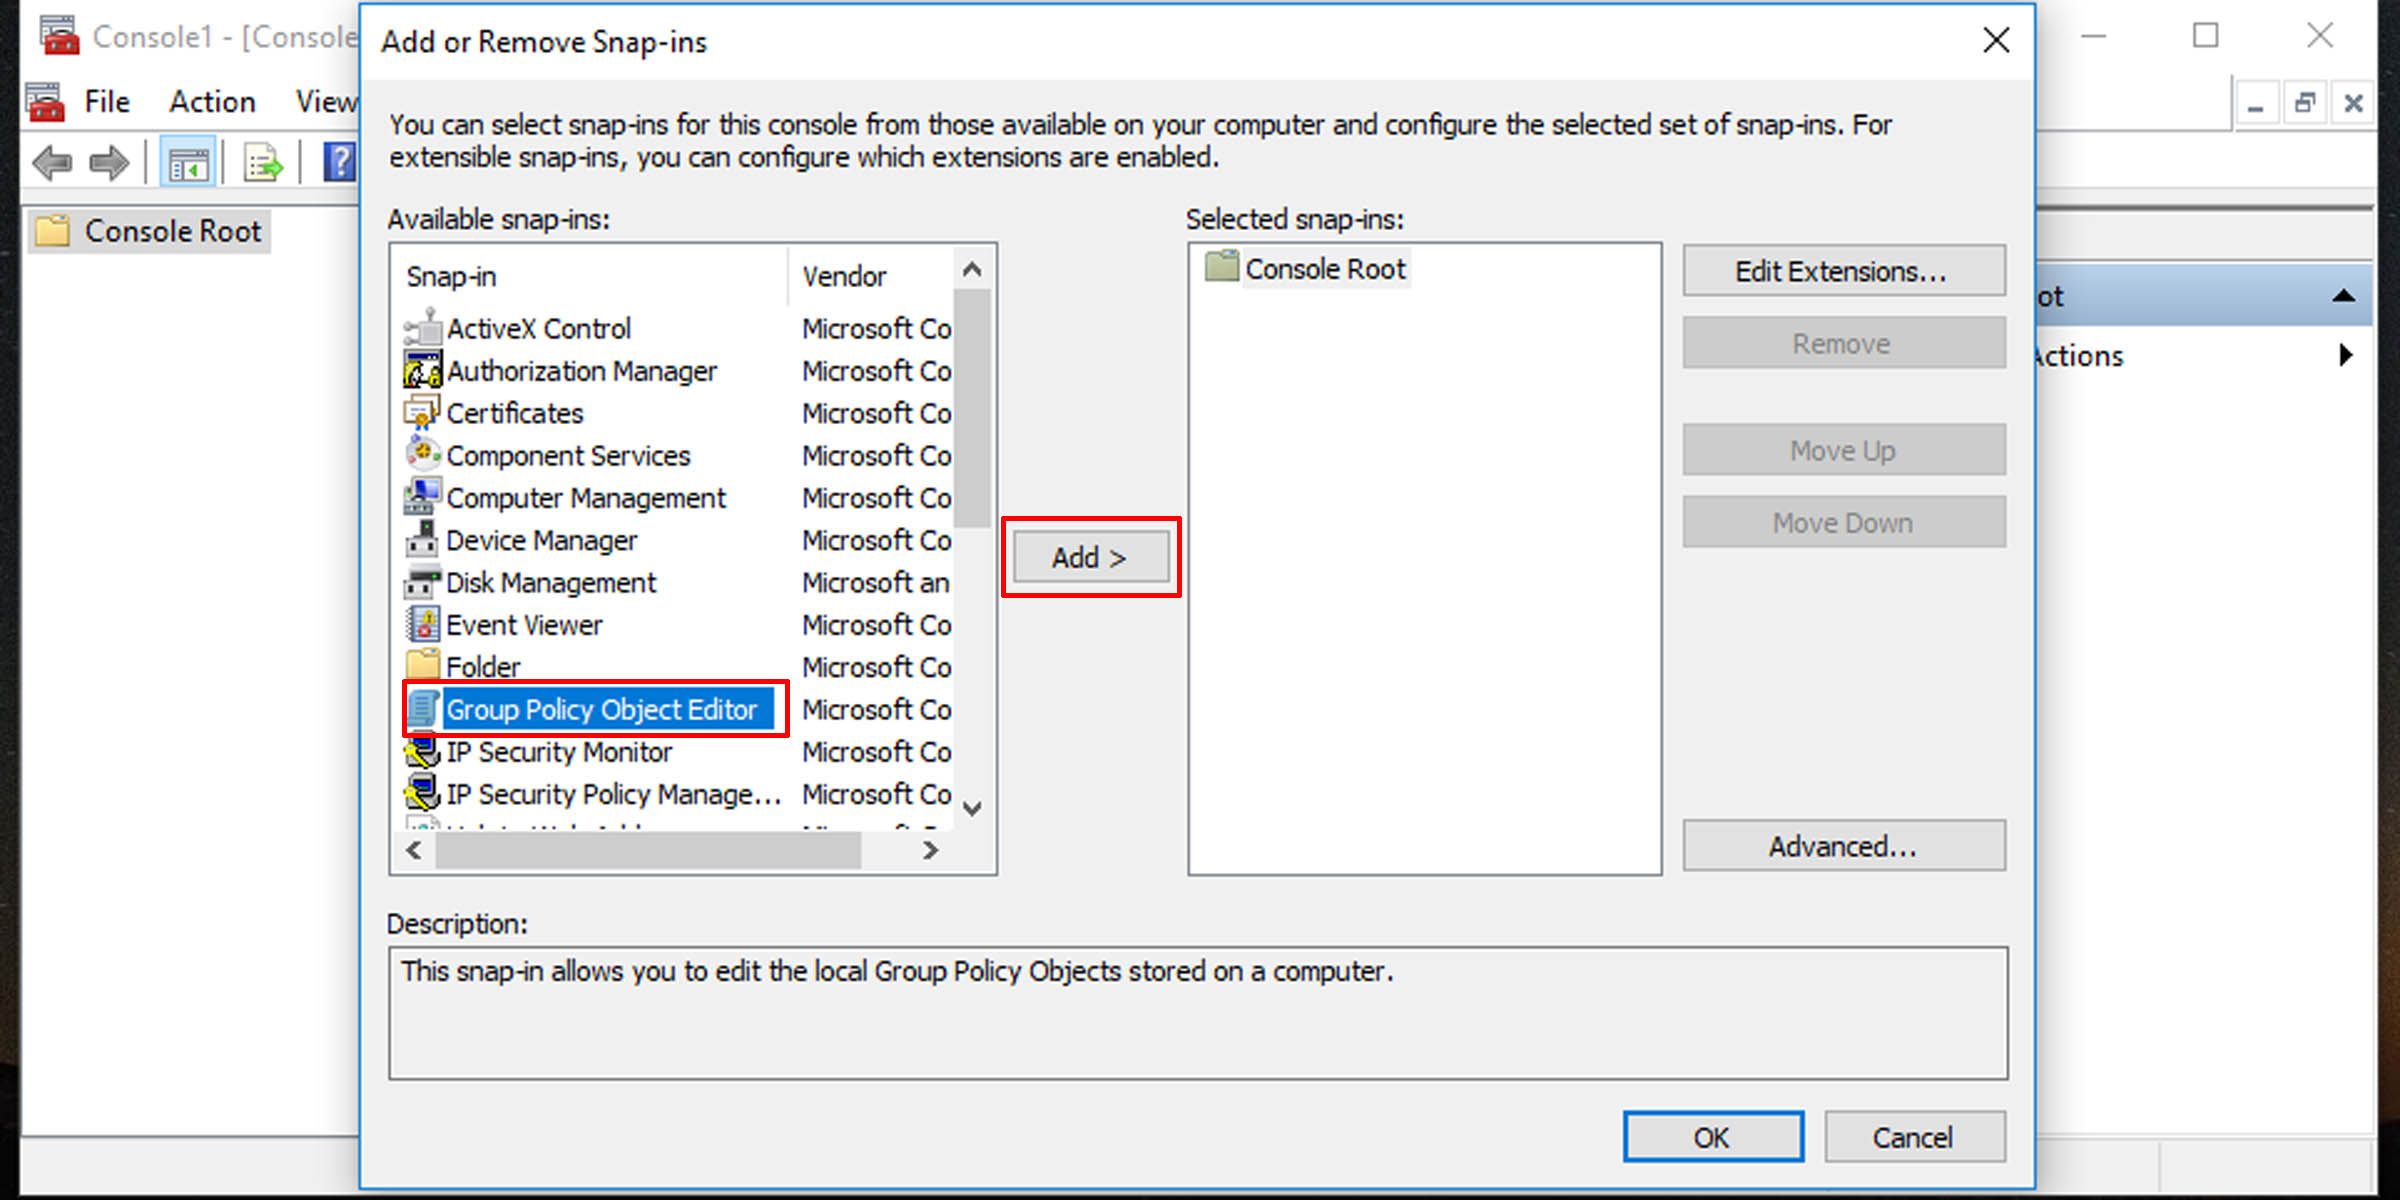
In the Microsoft Management Console window that opens up, go to File > Add/Remove Snap-in.
Look for and select Group Policy Object Editor; click on the Add button to add it to the Selected snap-ins pane; and click OK.
company, user or members of the same household. Action! - screen and game recorder


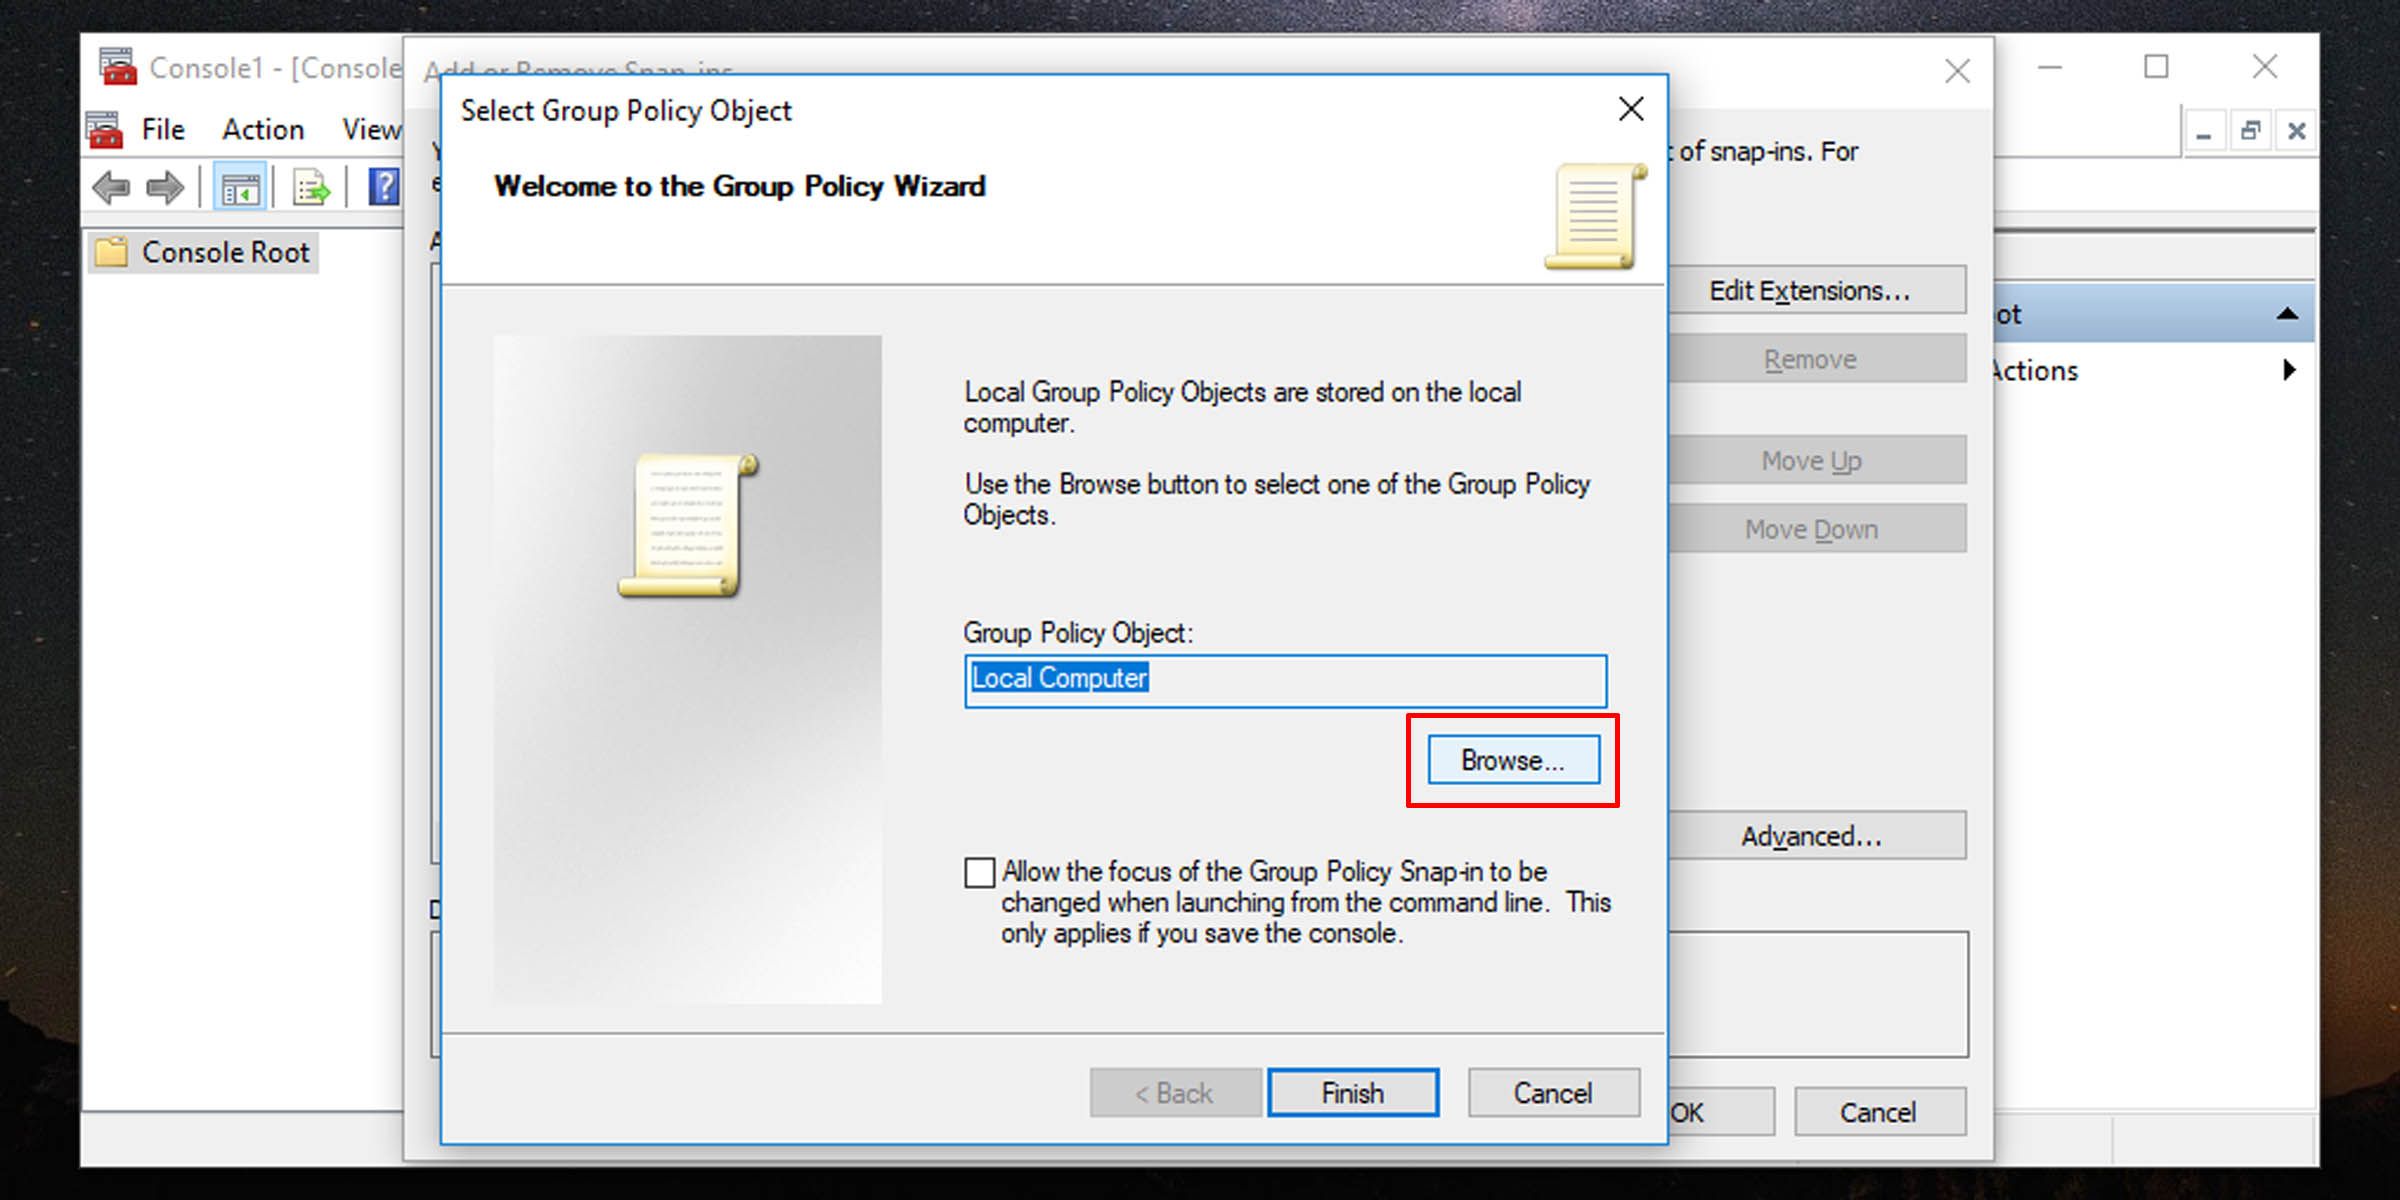
Next you will be asked to select a Group Policy Object. Click on Browse.
Switch to the Users tab in the window that pops up.
Select the user account for which you want to create a custom Local Group Policy, then click OK.
Click on the Finish button, and then on the Add or Remove Snap-ins window, click OK on the bottom right.
The Group Policy for the specific user should appear in the console window.
Go to File > Save As and select a location you want to save the MSC. You can rename it here.
Once you’re done, click on the Save button.
 CalendarBudget - Monthly subscription membership to CalendarBudget via web browser or mobile app. Support included.
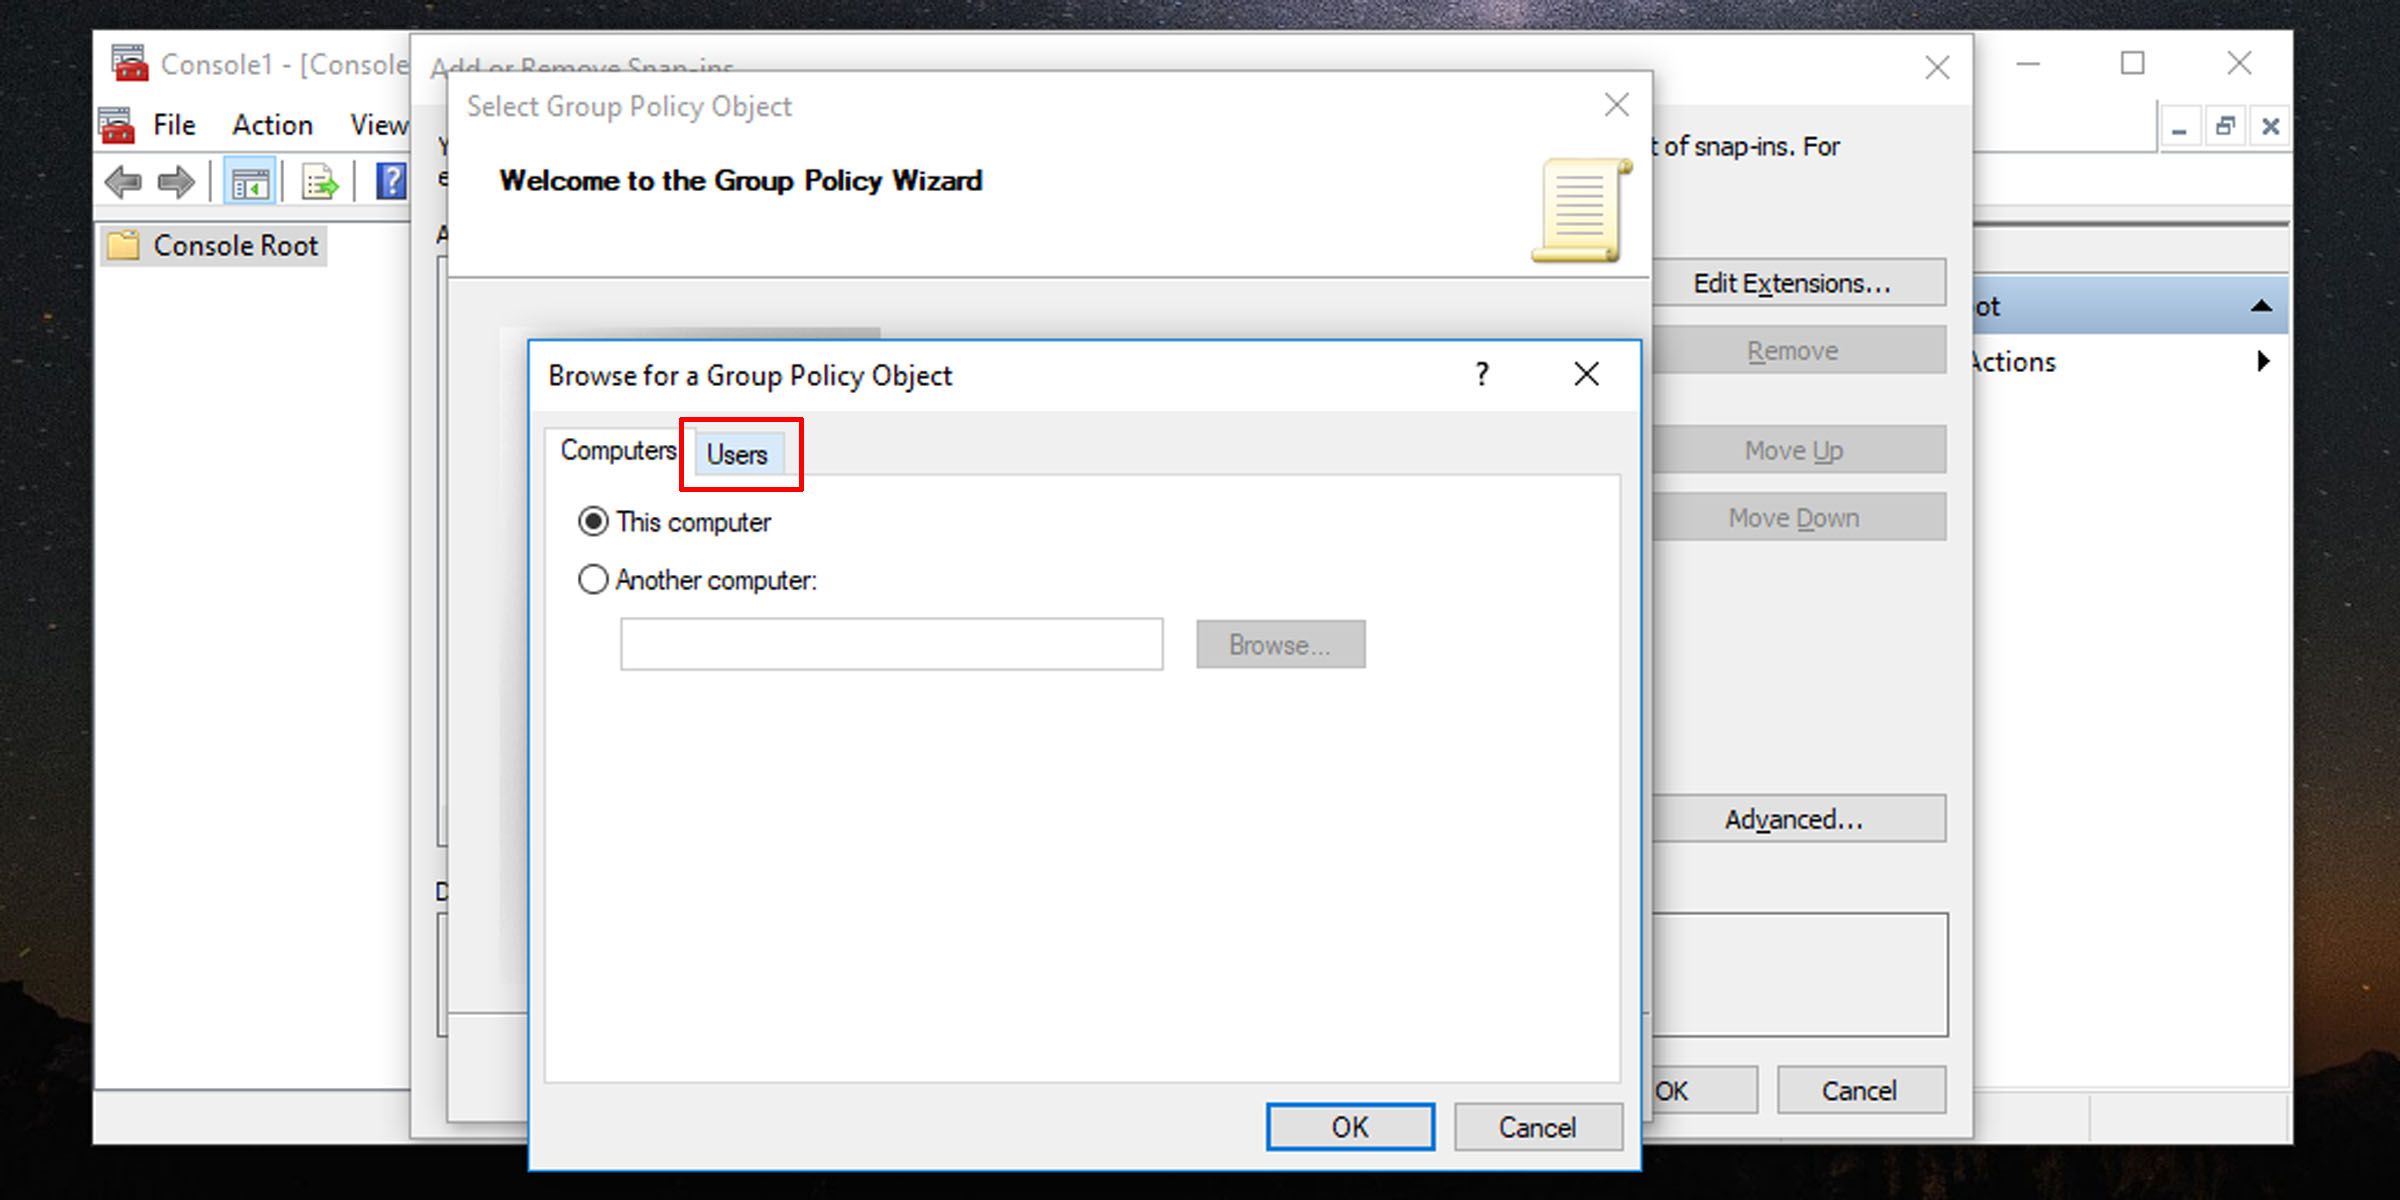

You’ve now created a user-specific Local Group Policy MSC. Whenever you need to configure policy settings that apply just to this specific user, double-click the file you just created and make the policy changes you need. Don’t forget to save the console settings when finished.
Easily Control What Windows Users Have Access To
By utilizing Local Group Policy, you have greater control over what functionality you accord to a specific user or set of users. A simple change at this level can make your job much easier when applying restrictions and granting freedoms to Windows users.
It also makes it easy to apply and modify controls and appearances for individual users, and you’ll get a quick glance at which policies apply to which users. Here’s how to apply local group policy to specific user accounts on Windows 10 and 11.
- Title: Executing Policies for a Single-User Target in Modern Windows Systems
- Author: Joseph
- Created at : 2024-08-15 16:09:17
- Updated at : 2024-08-16 16:09:17
- Link: https://windows11.techidaily.com/executing-policies-for-a-single-user-target-in-modern-windows-systems/
- License: This work is licensed under CC BY-NC-SA 4.0.