
Erase Secure Questions: A Guide to Altering Local Account in Win 11
Erase Secure Questions: A Guide to Altering Local Account in Win 11
Windows operating system provides various security features to protect user accounts, and local account security questions are one such feature. This adds another layer of security as it requires you to answer previously set questions.
If you find these security questions more of a hassle than a safety measure, you can disable them. This guide explains how to disable local account security questions on Windows 11.
How to Disable Local Account Security Questions on Windows
There are three ways to disable local account security questions in Windows 11. You can use the Group Policy Editor, the Registry Editor, or a Reg File. Here we explain each method in detail.
1. Using Group Policy Editor
To disable local account security questions on your computer, use the Group Policy Editor. However, this method applies only to Pro and Enterprise editions. See our guide on how to access the Local Group Policy Editor in Windows Home .
- Press Win + R on your keyboard to open the Run command dialog box.
- Type gpedit.msc in the text box and hit Enter. The Local Group Policy Editor will then appear.
- From the left-side navigation pane, expand to the following path:
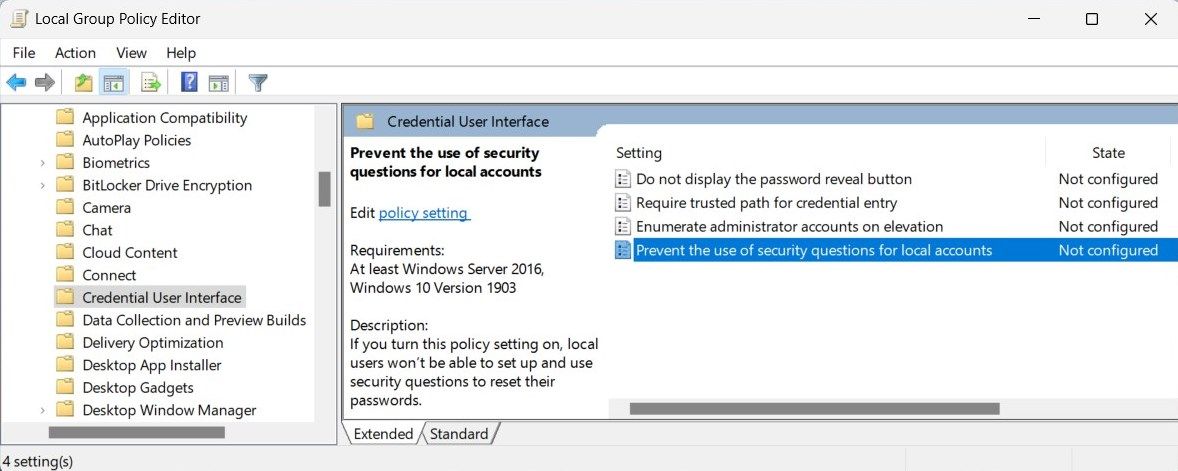
Computer Configuration > Administrative Templates > Windows Components > Credential User Interface - On the right-side panel, double-click on the Prevent the use of security questions for local accounts policy.

- In the Properties window, select the Enabled radio button.
- Then click on Apply > OK to save changes.


This will instantly disable the security questions for the account you are currently logged into. If you have to disable the feature for other accounts, log in as that user and repeat the steps.
To enable the security questions again, navigate to the same policy and select Disabled or Not Configured in the Properties window. This will enable local account security questions for all accounts. That’s how to disable or enable local account security questions in Windows 11.
2. Using Registry Editor
The Registry Editor is another way to disable local account security questions on Windows. It requires you to modify registry values. Here’s how to do it:
- Press Win + Q on your keyboard to open the search panel.
- Type regedit in the text box and hit Enter. This will open the Registry Editor window.
- From the left-side navigation panel, navigate to the following registry key:
Computer\HKEY_LOCAL_MACHINE\SOFTWARE\Policies\Microsoft\Windows\System - If you don’t find the System key, you must create one. For that, right-click on the Windows folder and select New > Key. Name the newly created key System.
- Once you’ve created the System key, right-click on it and select New > DWORD (32-bit) Value.
OtsAV TV Webcaster
- Name the DWORD NoLocalPasswordResetQuestions and double-click on it.
- In the pop-up window, set the Value data to 1 and select Hexadecimal base.
- Click OK to save the changes.
 OtsAV TV Webcaster
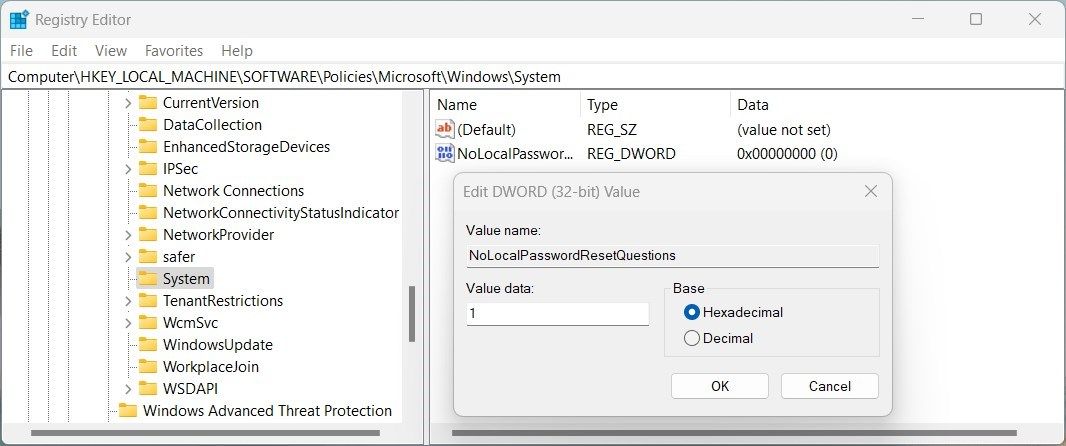
After performing the above actions, close the Registry Editor and restart the computer. This will disable the local account security questions feature on your Windows device.
To enable this feature again, open the Registry Editor window and delete the NoLocalPasswordResetQuestions registry value.
3. Using a Reg File
If you don’t want to edit the registry manually, create a Reg file instead. This is a simple and quick way to disable local account security questions on Windows. It’s especially useful for users without Group Policy Editor access or who prefer not to use Registry Editor.
- Open Notepad (see how to open Notepad for methods).
- Copy and paste the following code into it:
`Windows Registry Editor Version 5.00
[HKEY_LOCAL_MACHINE\SOFTWARE\Policies\Microsoft\Windows\System]
"NoLocalPasswordResetQuestions"=-`
3. Click on File > Save as.
4. Select All Files from the Save as type drop-down menu.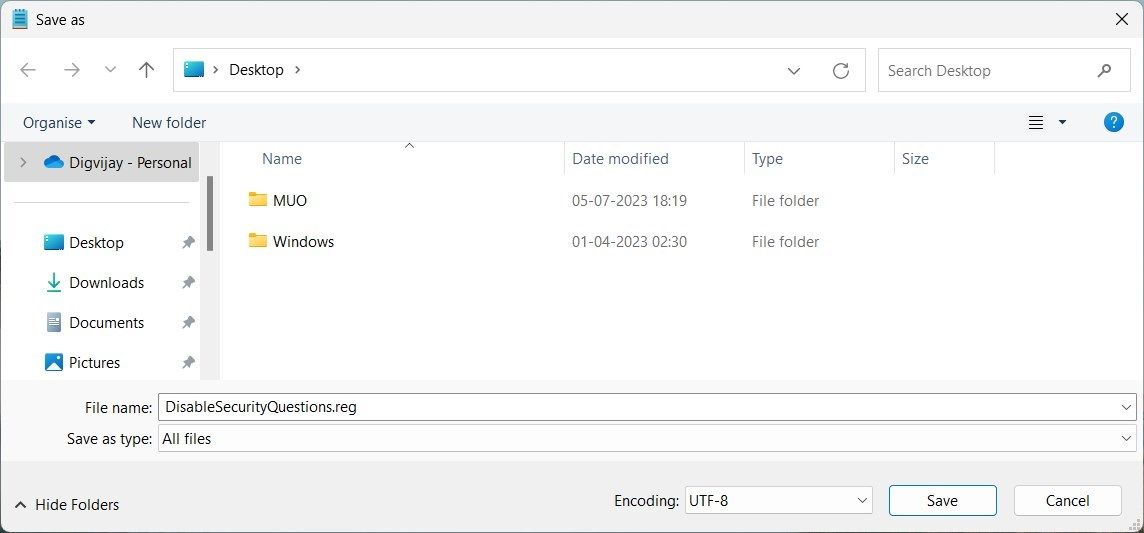
5. Name the file DisableSecurityQuestions.reg and save it to your desktop.
6. Now double-click on the reg file to execute it.
This will create a new registry value in the System key and immediately disable local account security questions in Windows 11. To enable the feature again, delete the DisableSecurityQuestions.reg file from your desktop and restart the computer.
Stop Windows From Asking Security Questions
After disabling the local account security questions, you can easily set up your computer without answering these annoying questions. But remember that this puts your computer in danger of access without permission. if possible, activate two-factor authentication and use a strong password.
If you find these security questions more of a hassle than a safety measure, you can disable them. This guide explains how to disable local account security questions on Windows 11.
- Title: Erase Secure Questions: A Guide to Altering Local Account in Win 11
- Author: Joseph
- Created at : 2024-07-29 04:22:06
- Updated at : 2024-07-30 04:22:06
- Link: https://windows11.techidaily.com/erase-secure-questions-a-guide-to-altering-local-account-in-win-11/
- License: This work is licensed under CC BY-NC-SA 4.0.