Enhance Window's Videography: Leverage Advanced Distributive Transcoding by Tdarr
Enhance Window’s Videography: Leverage Advanced Distributive Transcoding by Tdarr
Transcoding is one of the most demanding tasks for your PC, translating to a time-consuming process for the end user. Encoding a single video can take days, depending on the PC’s specifications, the codec used, and the source video’s characteristics. That’s where multiple PCs and an app like Tdarr can be a lifesaver.
If you have more than one PC in your home network, why not let them lend a helping hand when transcoding media? Tdarr can turn all your PCs into nodes of the same networked transcoder, resulting in much faster audio and video encoding. Let’s see how.
What Is Tdarr?
Sonarr, Radarr, and their “siblings” were created to assist with media piracy. However, unlike the other apps in the pirate-y “…arr” family, Tdarr differs in two crucial ways, justifying why we’ve decided to use it for this guide:
- It doesn’t specialize in “granting access to illegal content” like (most of) its siblings, but in modifying the media files you already own.
- It trivializes the creation of mass-video-encoding networks. In the past, few, apart from professionals in the field, like Netflix, could pull this off successfully.
After setting it up, Tdarr can help you “unify” your media collection, whose files are spread on various devices. You can always compress videos to reduce their file size yourself, but why not completely delegate the task to Tdarr?
- You can configure Tdarr to “pull” your media files from all your devices.
- It can then re-encode them to formats appropriate for each of them.
- Finally, it can store the results in a shared folder or “push” them to each device on your local network.
Best of all, after you set it up, it works automatically while taking advantage of the hardware capabilities of the “nodes” in your network: Windows desktop PCs, Linux servers, ARM-based Chromebooks, or your shiny new Mac.
For this article, we’ll see how you can set it up and use it on two Windows-based PCs on the same home network.
How to Install Tdarr
Despite being a relatively complicated collection of separate scripts and tools, Tdarr’s installation is straightforward.
- Start by downloading the appropriate version of the application for your platform from Tdarr’s official GitHub page .
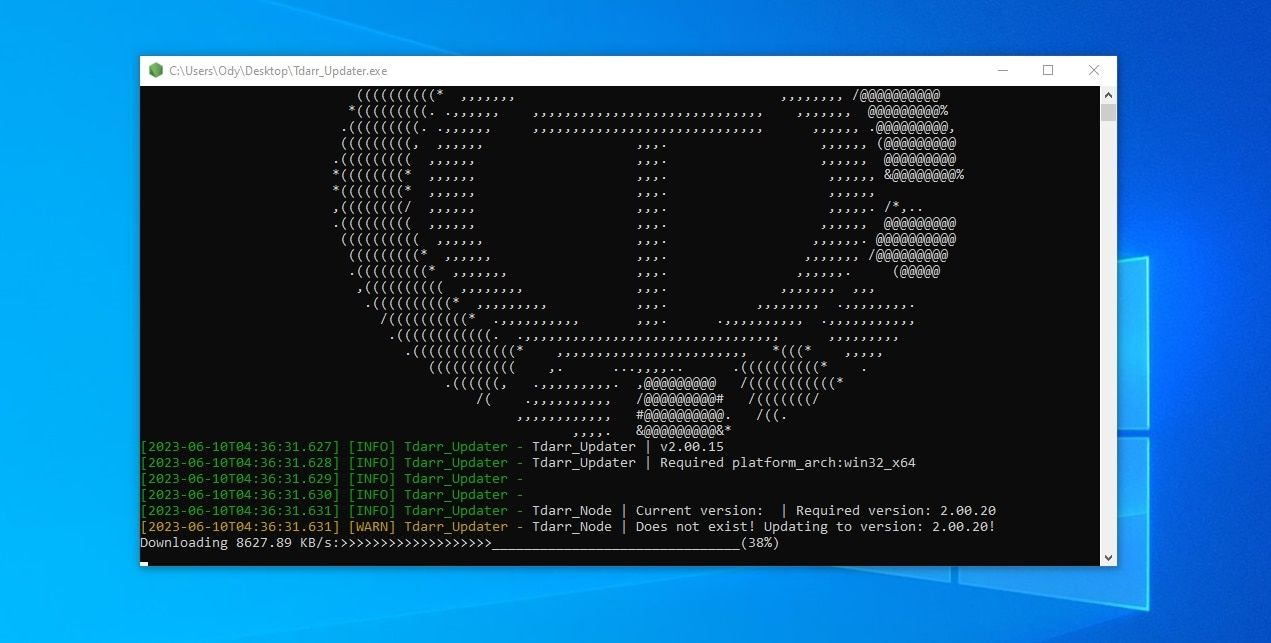
- Extract the downloaded zip archive and run the Tdarr updater app.
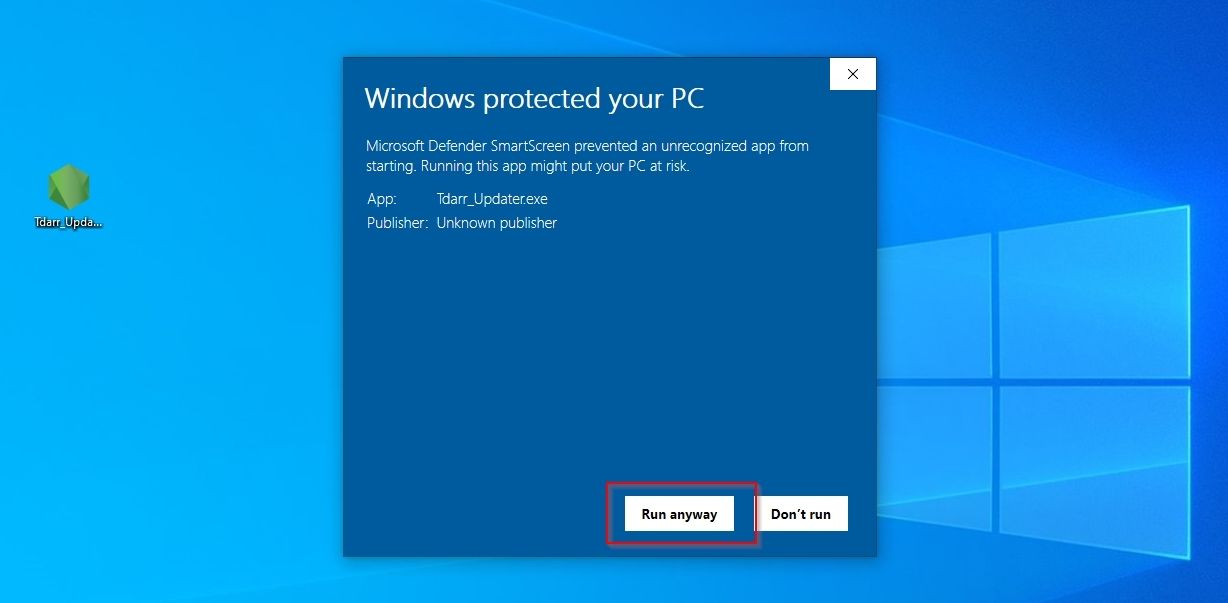
- Windows protection might warn you that you are trying to run an unrecognized application. Click on More info to allow the app to run.
- Click on Run anyway to acknowledge that you want to run an application created “by an unknown publisher”.

- Allow the Tdarr updater to download everything needed by the application. If you see any mention that a connection failed, grant the Tdarr updater access to the Internet through your firewall.


Tdarr’s Hardware Requirements
You can run the Tdarr server and the node software on any PC and access its interface through almost any browser. However, your hardware’s performance and features can significantly affect encoding speeds.
For example, a node running on a modern AMD Ryzen CPU will encode the same video in a blink compared to a ten-year-old Intel Celeron.
Another node, using Nvidia’s NVEnc hardware encoder for transcoding, will, in turn, be much faster than the AMD Ryzen CPU, but will also produce lower quality or larger files.
So, if you find Tdarr’s encoding too slow, you have two options:
- Try a less demanding codec or one that’s “hardware accelerated” by your hardware.
- Upgrade to better hardware.
Apart from that, you can run Tdarr even on a ten-year-old laptop if you can tolerate slow encoding speeds.

Key features:
• Import from any devices and cams, including GoPro and drones. All formats supported. Сurrently the only free video editor that allows users to export in a new H265/HEVC codec, something essential for those working with 4K and HD.
• Everything for hassle-free basic editing: cut, crop and merge files, add titles and favorite music
• Visual effects, advanced color correction and trendy Instagram-like filters
• All multimedia processing done from one app: video editing capabilities reinforced by a video converter, a screen capture, a video capture, a disc burner and a YouTube uploader
• Non-linear editing: edit several files with simultaneously
• Easy export to social networks: special profiles for YouTube, Facebook, Vimeo, Twitter and Instagram
• High quality export – no conversion quality loss, double export speed even of HD files due to hardware acceleration
• Stabilization tool will turn shaky or jittery footage into a more stable video automatically.
• Essential toolset for professional video editing: blending modes, Mask tool, advanced multiple-color Chroma Key
What About Tdarr’s Codecs?
We won’t go into detail about what codecs are and how they work. However, we must mention that the codecs and encoders you choose are the most important factor for Tdarr’s encoding performance and quality of produced results.
- Newer Codecs come with better quality-to-bitrate ratios but also higher hardware requirements.
- Hardware encoders can dramatically boost performance but also produce lower quality/larger files than software encoders (when using similar settings).
With the above in mind, here’s a list of the codecs worth using with Tdarr for re-encoding your media files. The closer a codec is to the top, the better the output quality, the higher its requirements, and the slower the encoding time.
- AV1
- H.265/HEVC
- VP9
- H.264/AVC
- AV1/H.265 GPU-assisted Encoding
- H.264 GPU-Assisted Encoding
- MPEG4, DivX, Xvid
- MPEG2
How to Configure Tdarr
Tdarr’s core is its server, which provides a browser-accessible interface for the app, manages media, and orchestrates encoding among various nodes. The server doesn’t do any encoding on its own. For that, it needs at least one node.
Each node can have its own configuration and run locally on your PC or another computer on the same network. Nodes are responsible for media analysis, health checks, re-encoding, etc.
The server controls all nodes, how they act on media, and manages files.
Tdarr’s nodes come pre-configured for running on the “local” PC without requiring a network. Thus, if you only plan to use Tdarr on a single PC, you only have to configure its server (apart from minor node tweaks).
Configuring Your Tdarr Server
For this article, we’ll see how you can configure Tdarr Server from scratch without importing an existing media collection. Have you got a media library set up? You can modify the paths we’ll use to point to your existing folders to have Tdarr process and re-encode them.
To configure Tdarr for a single computer, enter the Tdarr Server folder created by Tdarr’s updater and run the Tdarr Server app.
As with the updater, you will probably have to allow it access through your firewall.
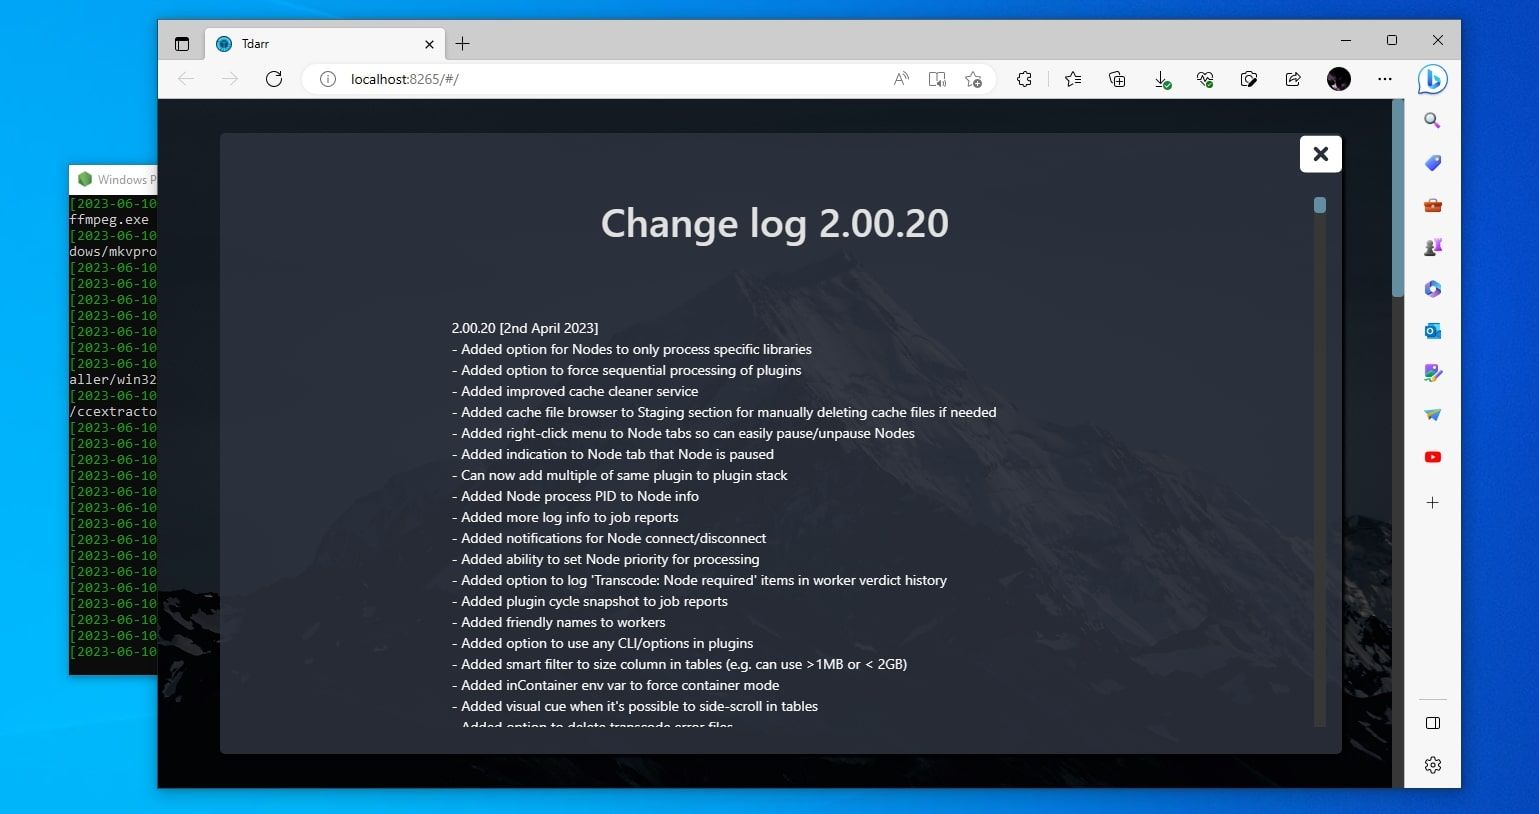
Tdarr’s page didn’t open automatically in your default browser? Enter the following in your browser’s address bar: “localhost:8265/“, and press Enter to visit Tdarr’s web-based GUI. We suggest you bookmark it for easier access in the future.
Parental Control Software
If you don’t like how Tdarr’s page looks, you can change its theme from the Options page.
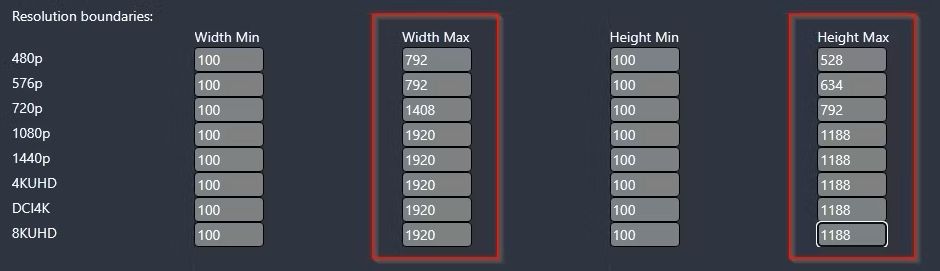
Scrolling down on the same page, you’ll find a series of Resolution boundaries fields. Those allow you to set custom resolutions for your media.
For example, since I only have access to Full HD screens, I’ve set “1920“ as the width in the Width Max field of all resolutions above 1080p and their height as “1188“ in their respective Height Max fields. This way, Tdarr will never re-encode media at a higher resolution than the native Full HD (1920 x 1080) of my monitors, producing much smaller files more quickly than if it had to deal with higher resolutions.
You need at least one library for your media, so visit the Libraries page and click the Library + button to create one.
Type any name you wish in the field stating “Library Name“.
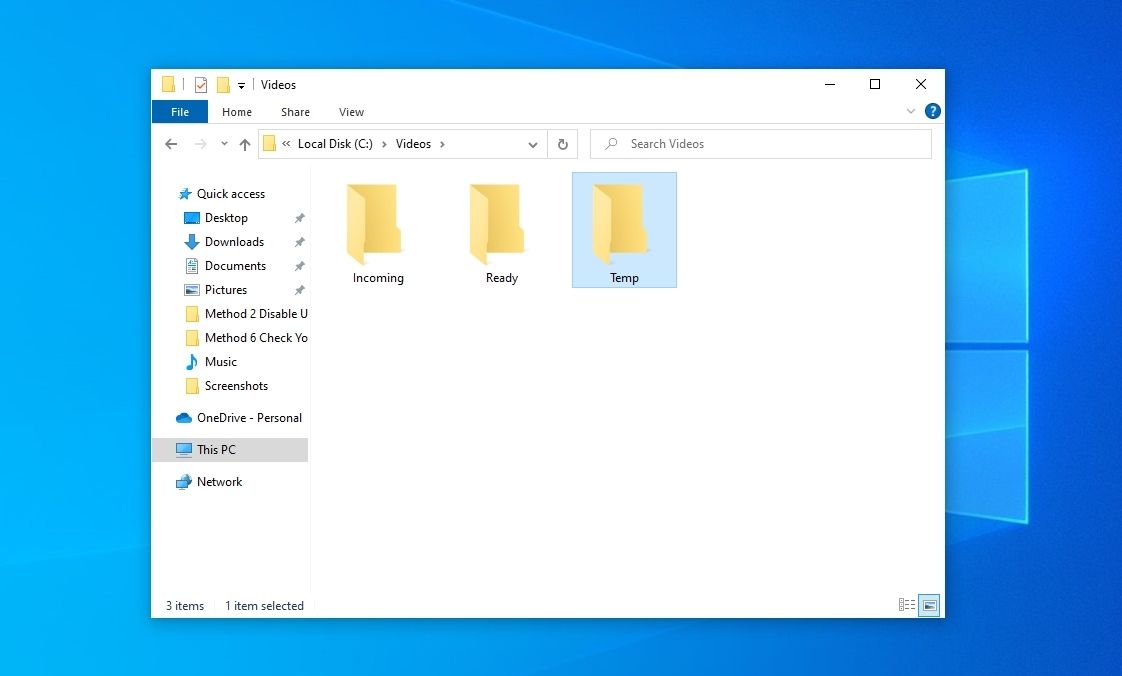
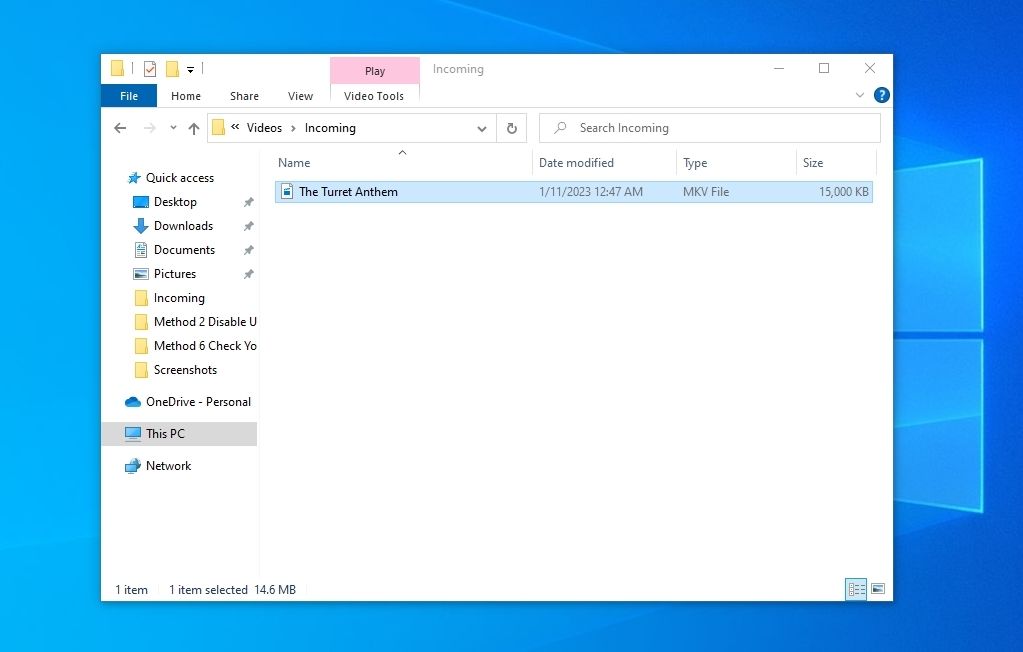
Fire up your favorite file explorer. Choose where you want to keep your media and create a folder. For this article, we used a folder named “Videos“ at the root of the system “C” drive.
Create three subfolders inside that folder. For ease of use, we’ve named them “Incoming“, “Ready“, and “Temporary“. “Incoming” is where we will drop any unprocessed files for Tdarr to check out. “Temporary” is the folder Tdarr will use while processing files. “Ready” is where Tdarr will output processed files.
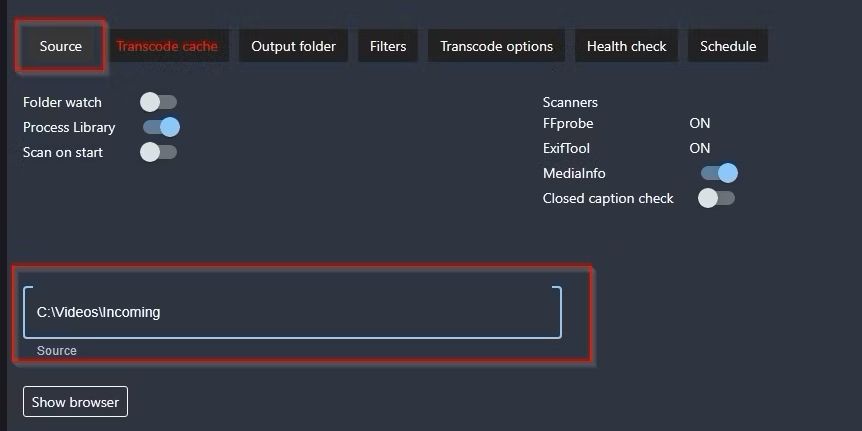
Go back to Tdarr’s interface, move to the Libraries page, select your library, and if not visible on your screen, scroll down to find the Source tab. Click on it and enter the full path to your Incoming folder in the Source field below.
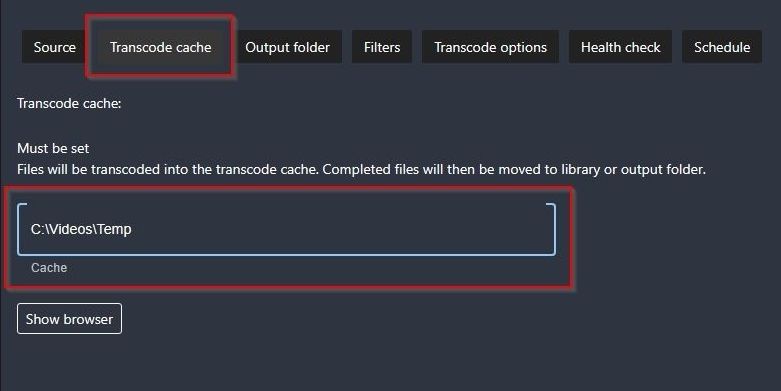
Move to the Transcode cache tab and enter the full path to your “Temporary” folder in the Cache field.
Glarysoft File Recovery Pro - Helps to recover your lost file/data, even permanently deleted data. Finally, move to the Output folder, and as you might have guessed, enter the full path to your “Ready” folder in the Output field.
Click the switch next to Output Folder on that tab to have Tdarr use the Incoming and Ready folders as Input and Output. If you don’t do that, Tdarr will store everything in the Incoming folder. If you’ve got many media files, that can quickly get messy.

 Glarysoft File Recovery Pro - Helps to recover your lost file/data, even permanently deleted data.
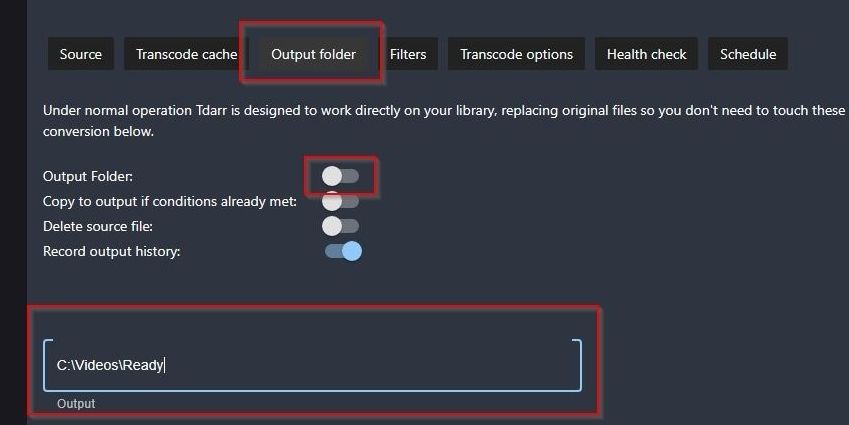
If you wish, you can control the rate at which Tdarr scans the Incoming folder for new files. To do that, move to your library’s Source tab, scroll down a bit, and change the number in the Folder watch scan interval field under Folder watch settings.
Similarly, right below, you can tell it to run an hourly scan and define how many File scanner threads that will use. If you store your media on NVMe or SSD drives, increasing the number of File scanner threads can boost performance.
Older mechanical HDDs, though, take a significant hit in performance when trying to access files in parallel, so it’s best not to exceed the default value of “2“ for those. You can also enable the option to Hold files after scanning and define how long (in seconds) those files will remain locked to ensure other apps won’t interfere with them.
Your library’s Filters tab lets you define resolutions and codecs you’d prefer to skip. If, for example, you want Tdarr only to downscale videos, you can enter all the popular lower resolutions up to your monitor’s native resolution (like “360p”, “720p”, and “1080p”), separated by commas in the Resolutions to skip field.
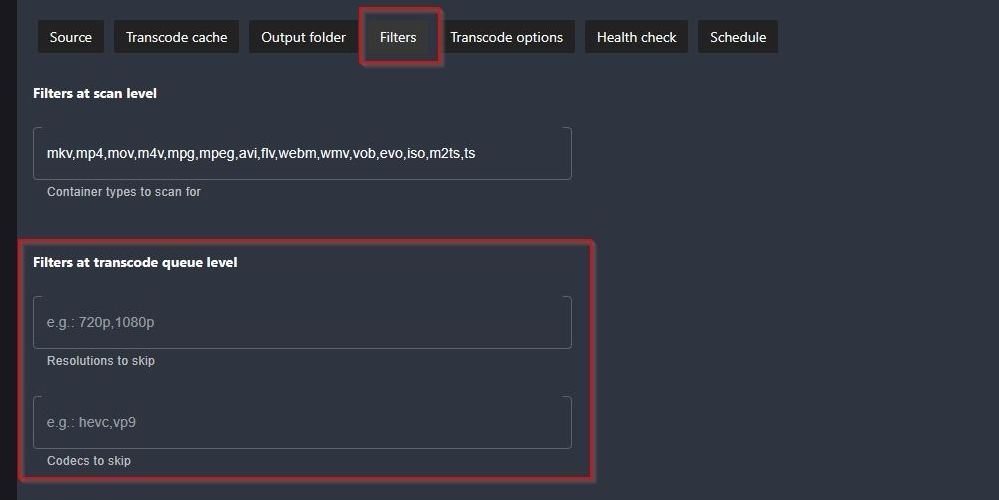
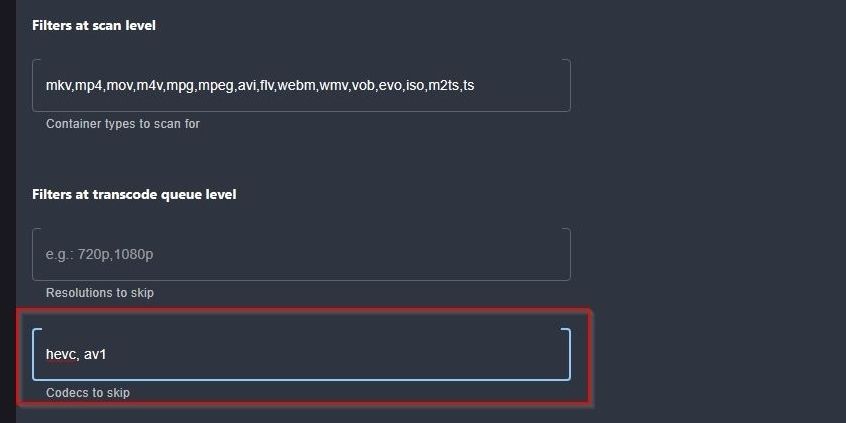
The Codecs to skip field works similarly. For example, if you type “AV1, HEVC“ in that field, Tdarr won’t try re-encoding video files already compressed with those codecs.
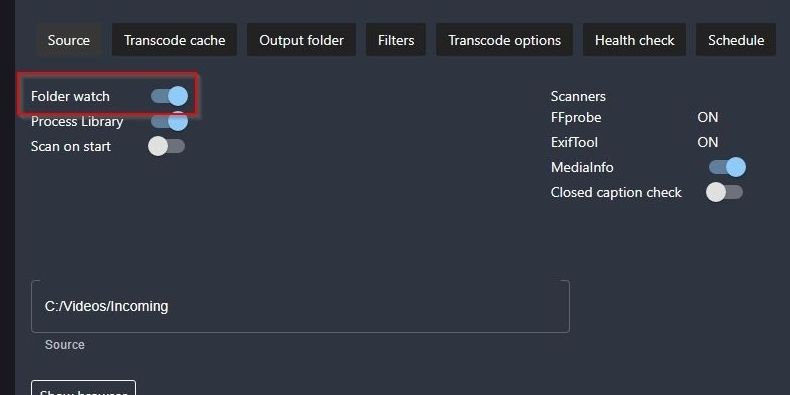
To have Tdarr process your files, it will have to watch the incoming folder to detect changes (AKA: new files). For that, visit your library’s Source tab and flick the switch next to Folder watch to the right.

Customizing Tdarr’s Nodes & Encoding
Tdarr requires at least one active node to act on your media, so it’s time to turn our attention to them.
With your Tdarr server still active, to add a node to it, enter the Tdarr node folder created by the Tdarr updater and run the Tdarr node app you’ll find within it.
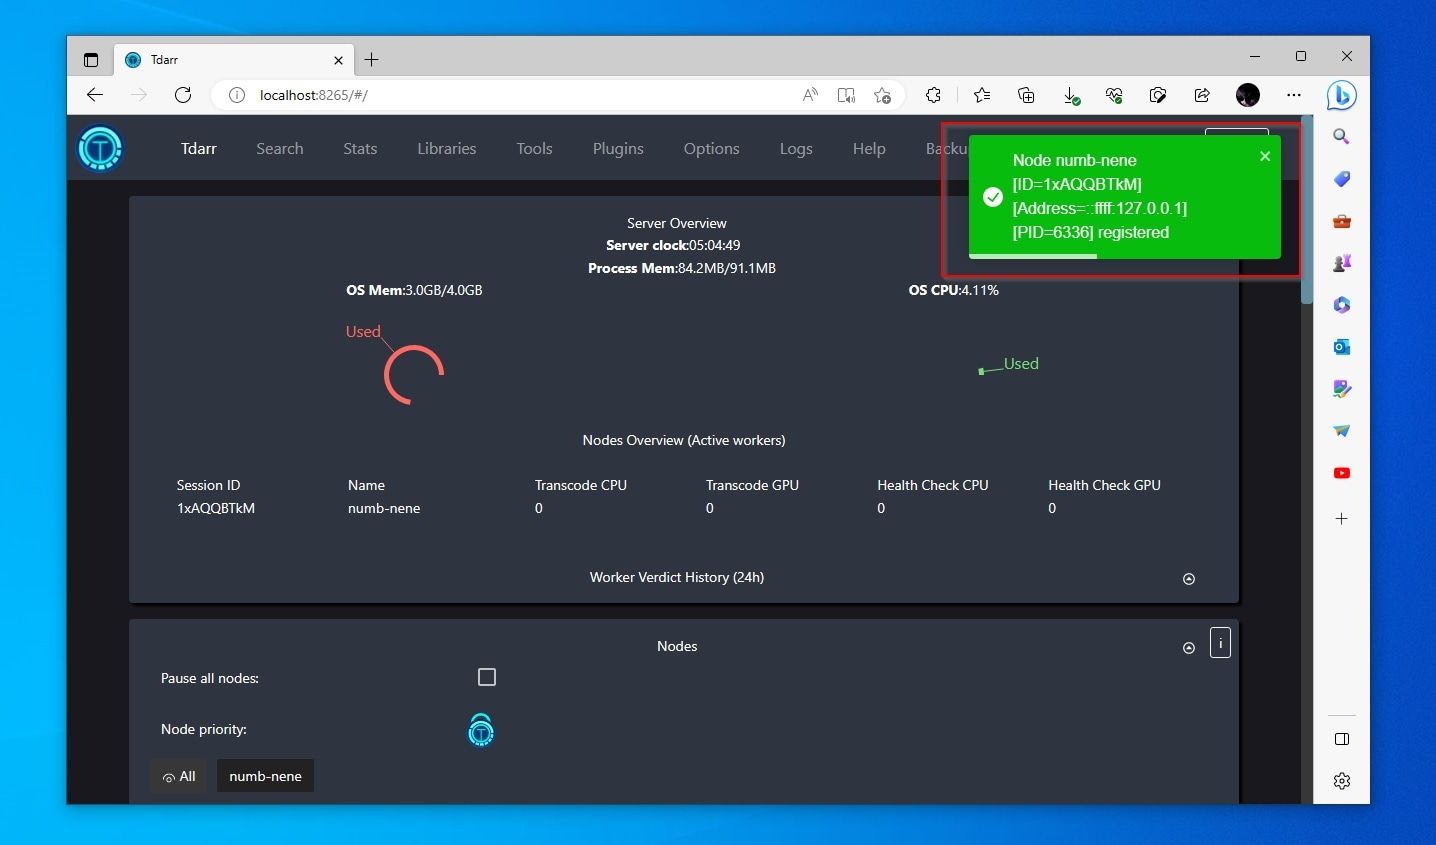
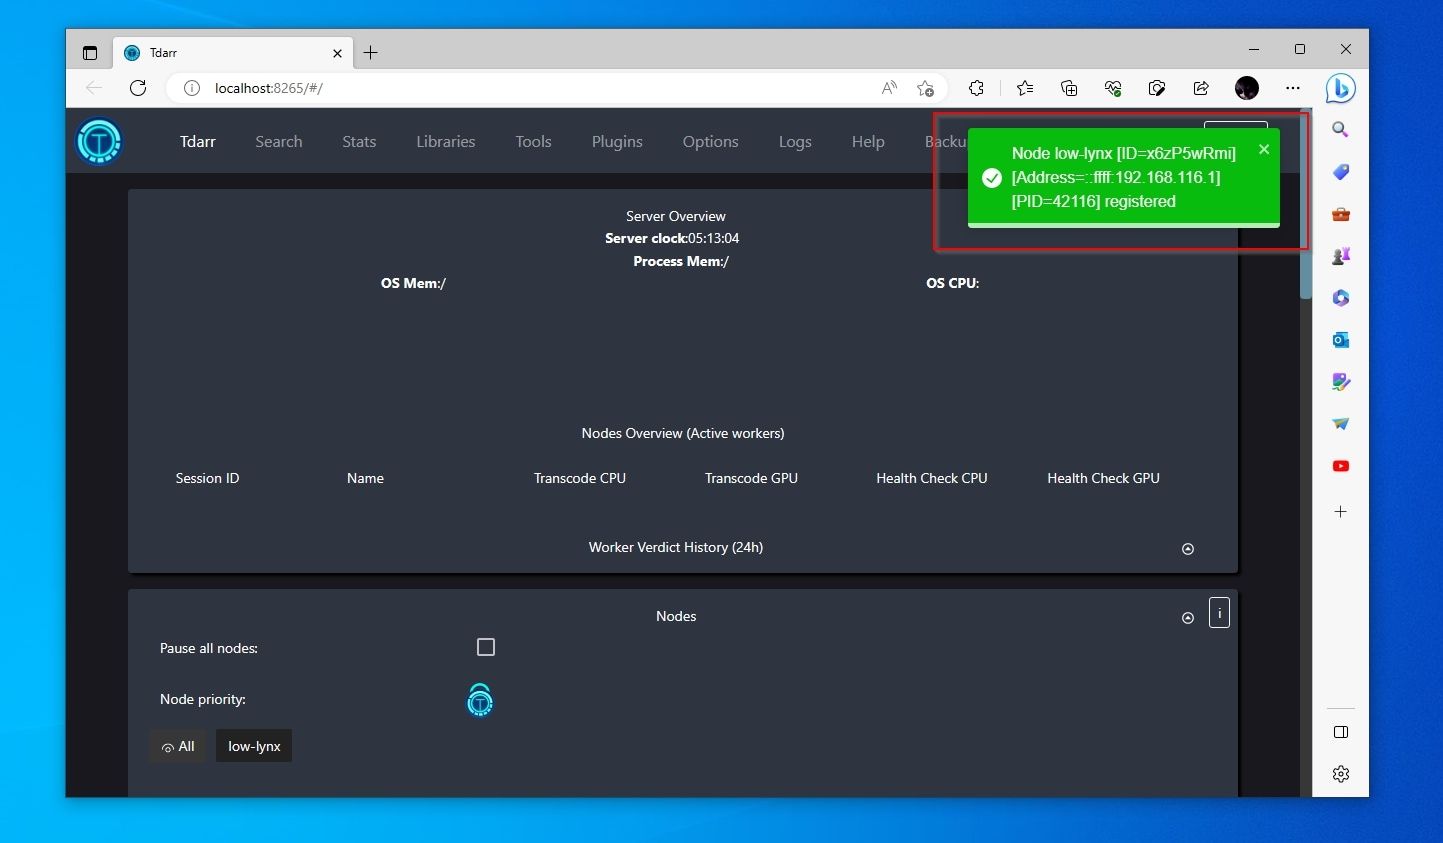
You will see a notification on Tdarr’s interface web interface page that a node was registered.
To test things out, place a media file in your incoming folder.
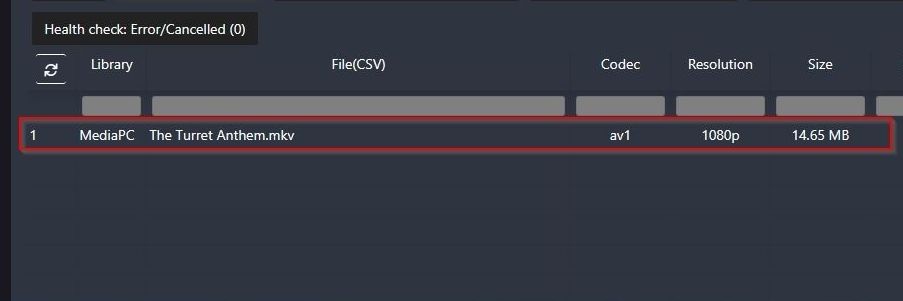
Move to Tdarr’s main page (named “Tdarr”) and scroll to the bottom, under Status, to find your library. Soon you will see the file you added to your Incoming folder appear there.
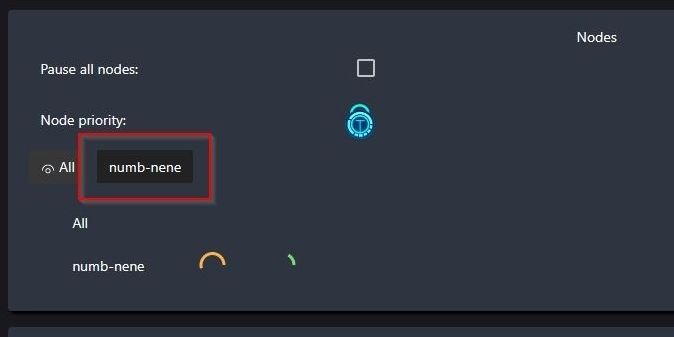
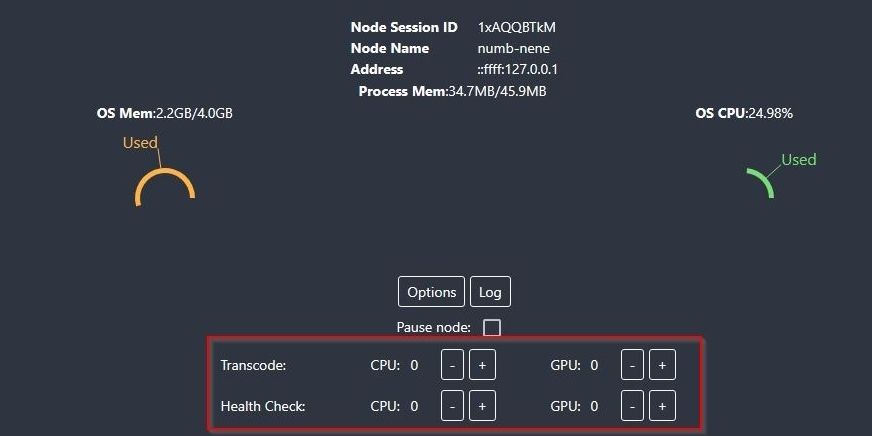
Nothing will happen because your node needs to be configured to act on it. For that, scroll up to find the Nodes panel and click on your node name.
You will see more details about the selected node, and you can use the plus and minus buttons next to Transcode and Health Check to assign to the node CPU and GPU threads for each task. This way, you control which node does what, which is especially useful in a multi-computer environment.
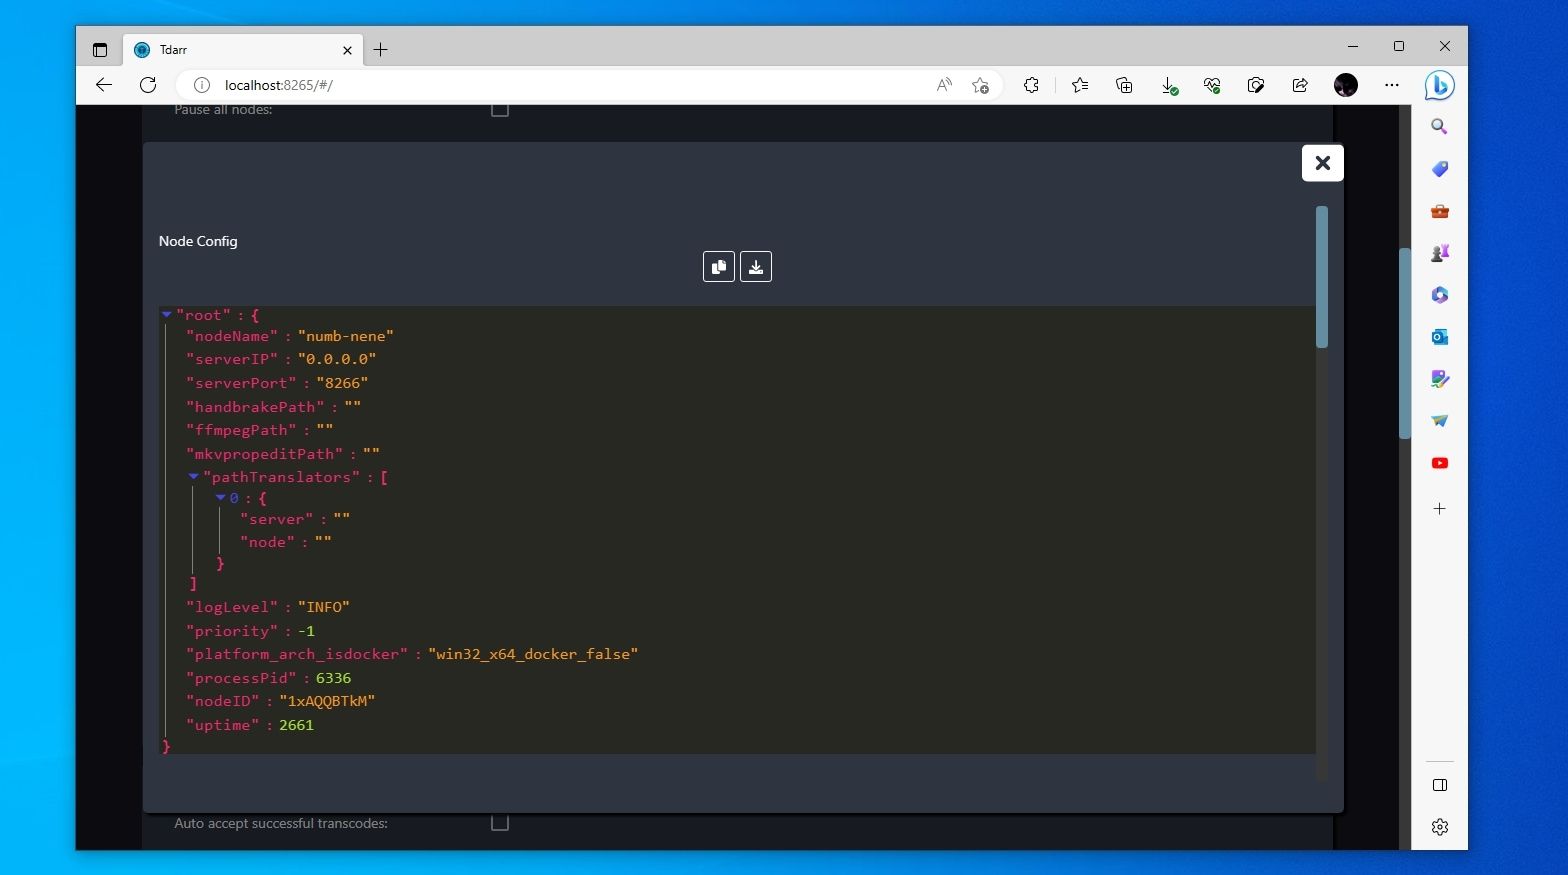
Click on your node’s Options button to access its more advanced options.
You can manually edit the node’s configuration from here. Still, it’s best to leave it as is and only manipulate it using external applications like Notepad.
Scroll down and use the drop-down menu to select which type of GPU acceleration you want the node to use (if available on your hardware).
If you want to use the PC on which the node runs for other tasks while encoding, flick the switch under Low FFMPEG/HandBrake Process Priority to have the node consume fewer resources and avoid choking your PC. Alternatively, use an app like Process Lasso to take control of your CPU threads and ensure it won’t start crawling while encoding.
For even more control, you can scroll down further and create a Node schedule, stating which hours of the day a node will be allowed to perform health-checking or transcoding tasks using the CPU or GPU.
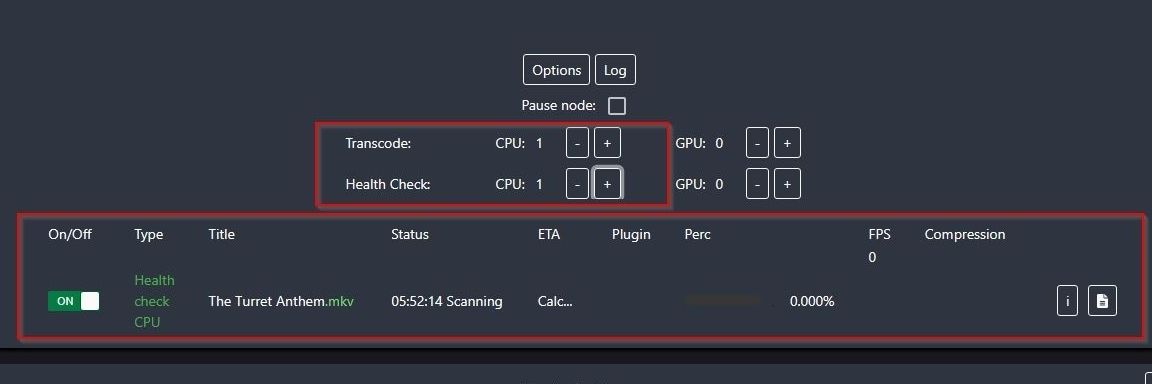
When you return to the Nodes panel with at least one CPU or GPU assigned for transcoding and health checks, you will see that your node has started working on your incoming file.
After an initial check and if the incoming file doesn’t match your filter, Tdarr will start transcoding it.


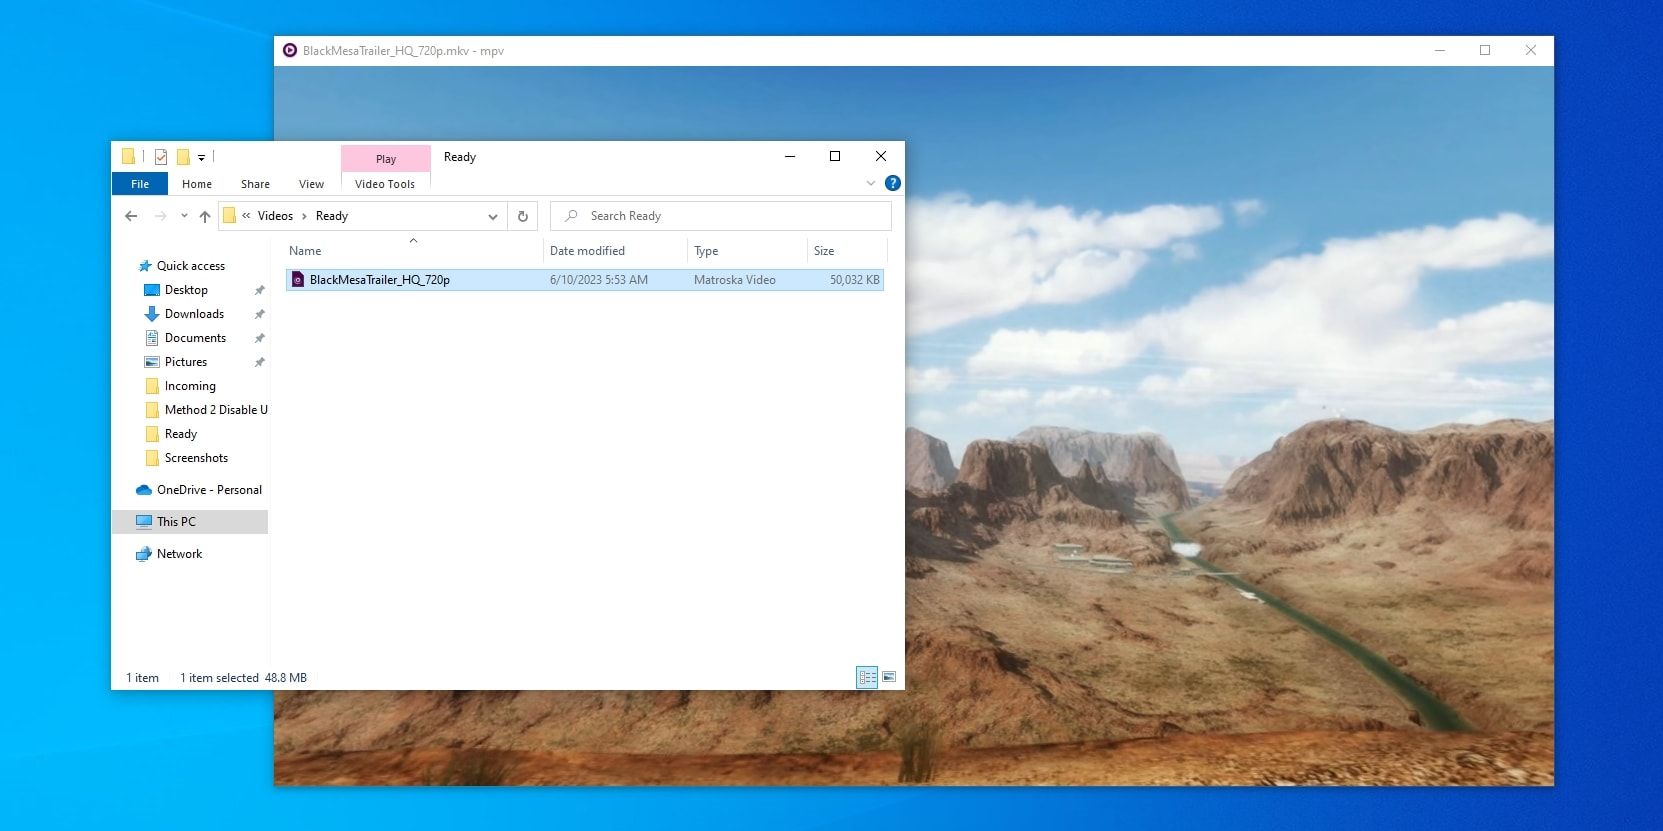
You can see the result when it’s done if you scroll to the Staging section where, in our case, the status of our file was “Transcode Success“, and its size was down to around 49 MB. The Handling field on the right offers three buttons for controlling the entries of this list.
Using those, you can requeue, skip, or accept an encode. You can find the re-encoded version of your file inside the “Ready” folder.
Network & Hardware-Accelerated Encoding
Tdarr is best when using all the CPU and GPU power of all PCs on your local network for re-encoding your files. However, that’s a bit more complicated to set up.
For this part of our guide, we take for granted that you have more than one PC, and they can “see” each other through your local network. You’ve got the PCs but haven’t “networked them” yet? Choose a networking approach from our collection of diagrams on which to base your home network for full connectivity , and then follow our guide on how to set up a secure home network .
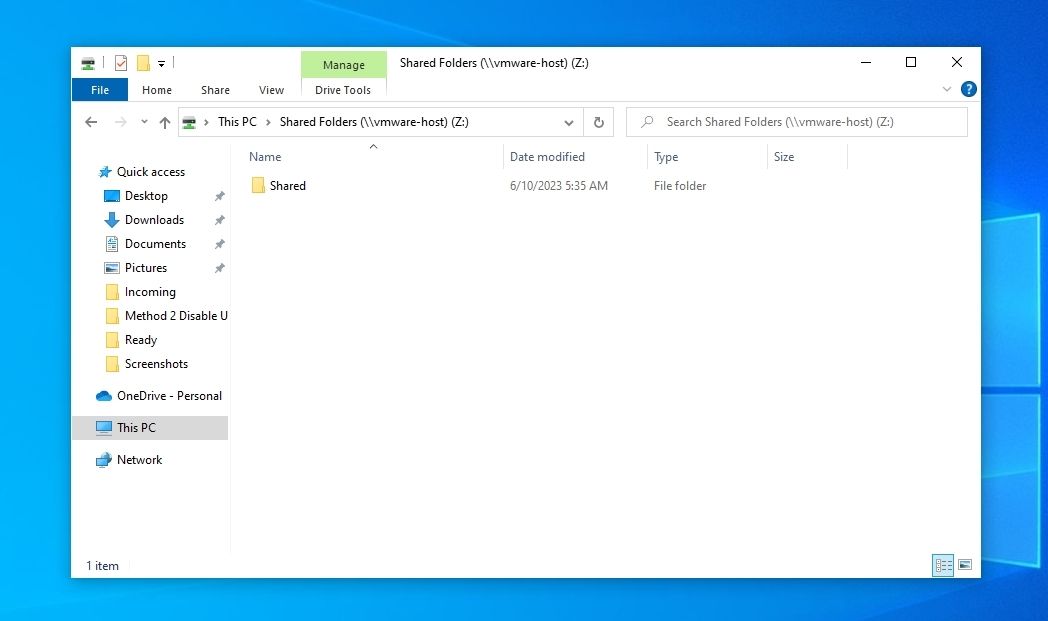
Since all the PCs that will become nodes in Tdarr’s network will require access to the same media files, you should keep them in a network-accessible shared folder. It’s better to use a dedicated network drive for that. Still, we shared the same “Videos” folder we created earlier, but with “shared“ as its network alias.
Update the Source, Transcode cache, and Output folder paths of your library to point to the respective subfolders within your “Shared” folder.
Install Tdarr on the other PCs in your local network. Use your file manager to enter the “configs“ folder in Tdarr’s installation directory.
Make a copy of the “Tdarr_Node_Config.json“ file, then open the original with a text editor (like Notepad).
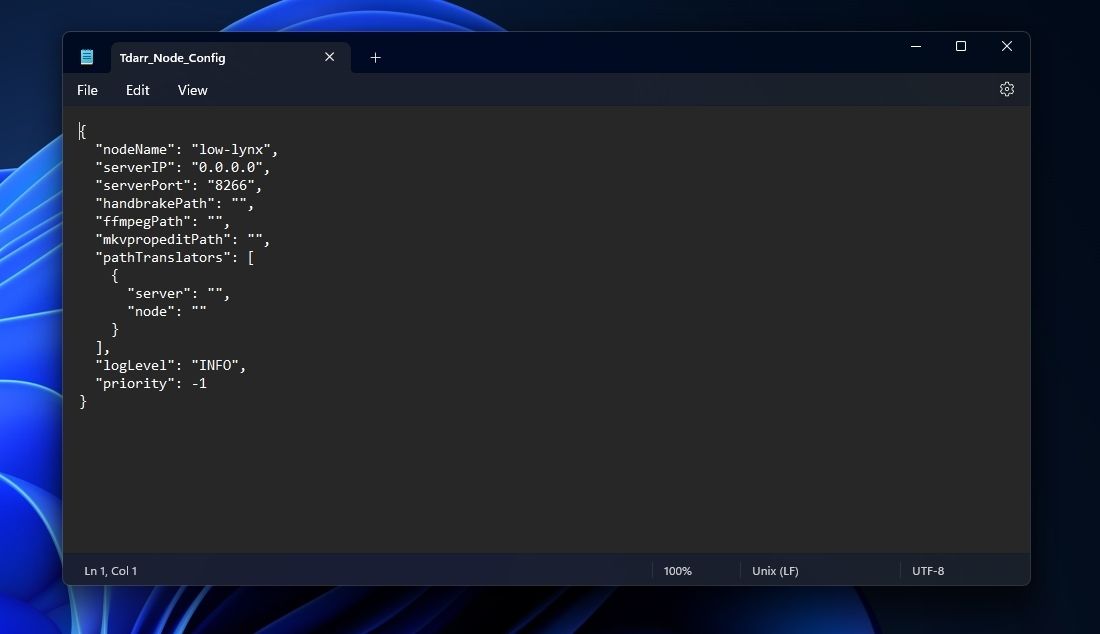
You can change the value next to “nodeName“ to assign the node any name you wish, like “my_laptop”, to make it easier to recognize and manage what runs where. Next to “serverIP“, enter the IP of the PC on which you run the Tdarr server. As the “serverPort“, enter “8266“.
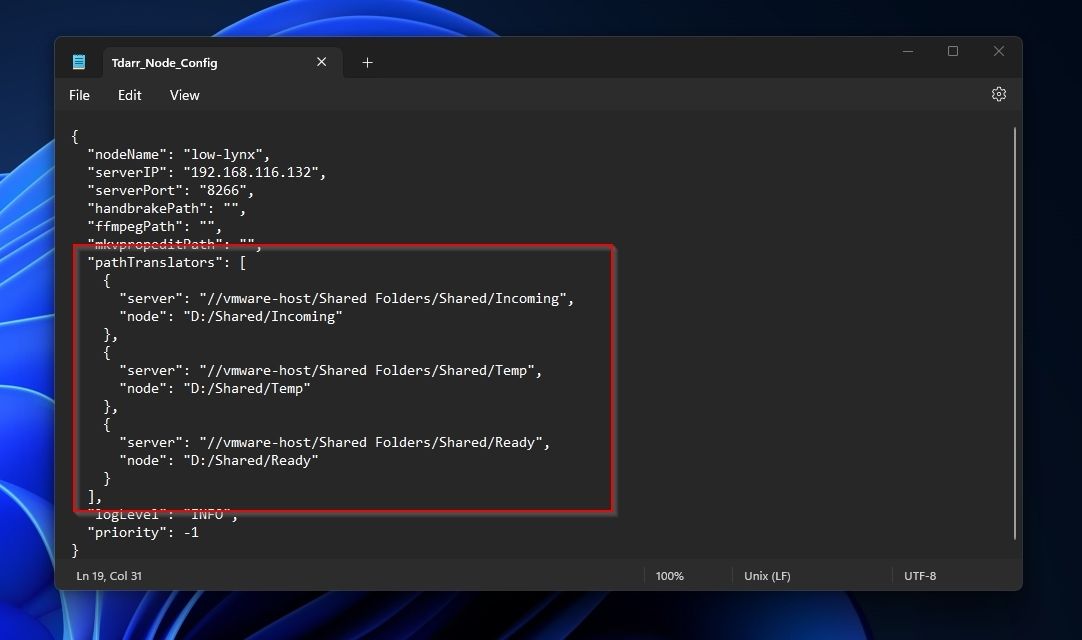
Next, you have to configure the “pathTranslators“. This section is the most complicated to grasp since it needs you to define pairs of paths. Next to “server“, you must enter the path from which the Tdarr server can access a particular folder.
Next to “node“, you must enter the equivalent path from which a node can access the same folder through the network. So, the actual path to our incoming folder on the Tdarr server PC was //vmware-host/Shared Folders/Shared/Incoming, but the path to the same folder on our node PC was through the mapped network drive “D:” and the folders /Shared/Incoming.
You have to define a path translator for each of the folders you’ve specified in Tdarr’s interface for your “Incoming”, “Temporary”, and “Output” folders. The goal is to have both the Tdarr server and its nodes able to find the same files through their respective paths.
Run the node software on your second PC and ensure both its firewall and the one on your main Tdarr server PC allow connections between them. Our guide on how to allow apps through Windows firewall can help with that. You should see the remote node popup in your Tdarr server interface if everything works correctly.
 ZoneAlarm Extreme Security NextGen
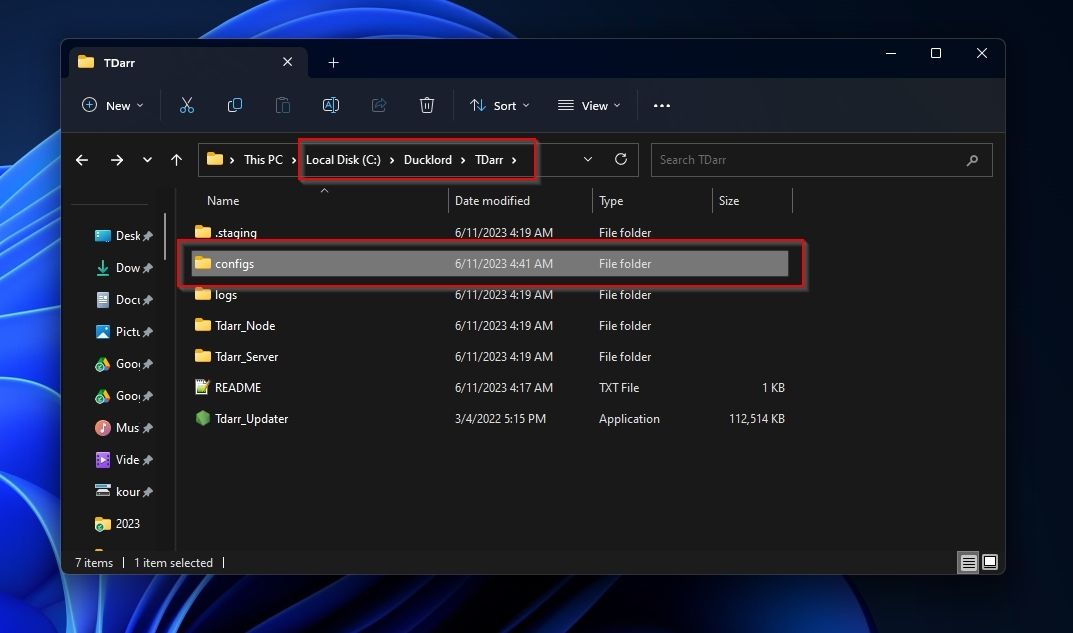


- Next to its address, you will see its IP address and be able to control its CPU and GPU threads and options as if it were a local node.
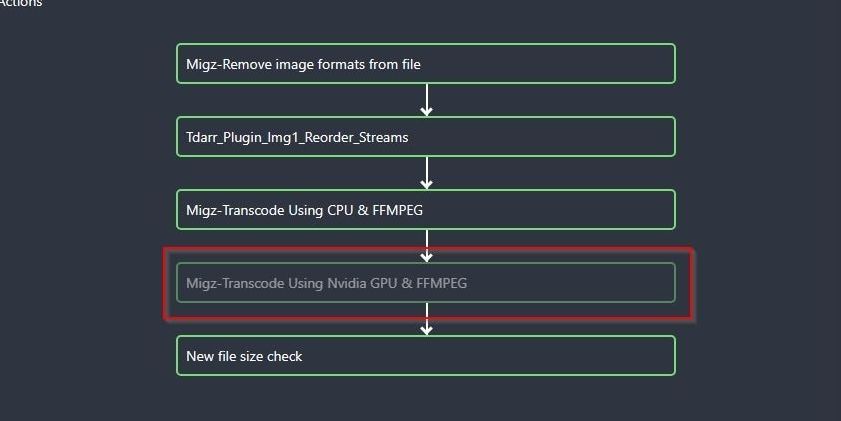
- If GPU encoding doesn’t work for you, it’s probably because the appropriate plugin is disabled. For that, move back to the Libraries page, scroll down to find its tabs, and click on Transcode options.
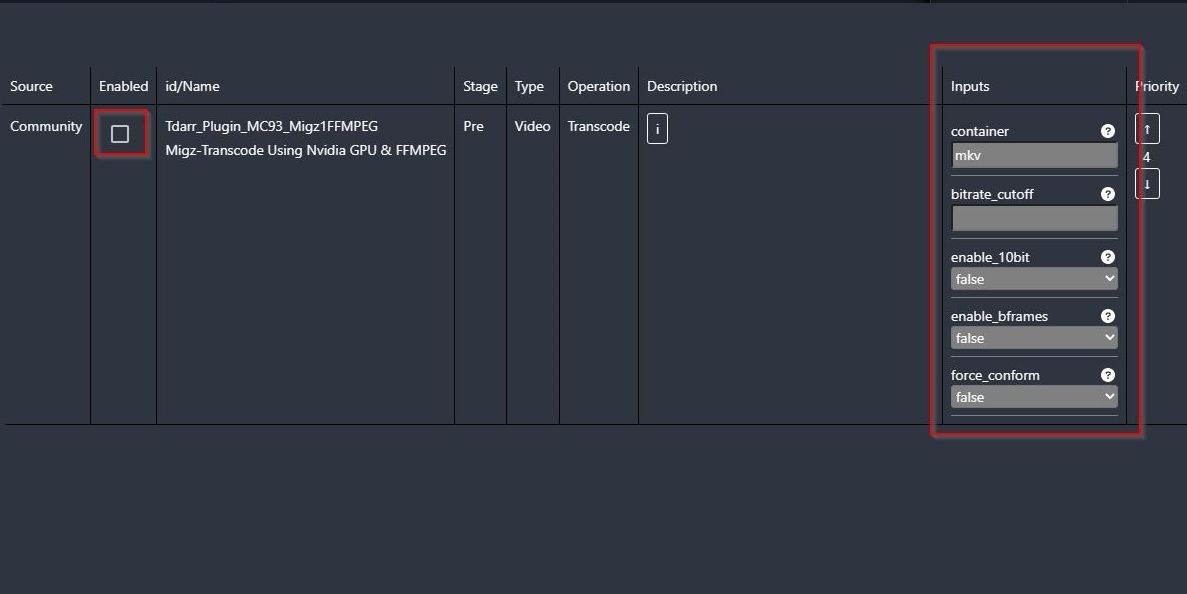
- There, enable the “Migz-Transcode Using Nvidia GPU & FFMPEG“ plugin. You must also prioritize it over CPU encoding by left-clicking, dragging, and dropping it above the “Migz-Transcode Using CPU & FFMPEG“ plugin.
- From the same spot, if you click on a plugin, you can configure some options about how it will work. However, we won’t dive into those, for they’re outside the scope of this article.
- When you return to the Nodes panel, your nodes (for which you’ve enabled that) should be using their GPUs for transcoding.
 NeoDownloader - Fast and fully automatic image/video/music downloader.
Set Up Your Auto-Multi-Hyper-Encoder With Tdarr
Setting up complicated automation software like Tdarr can take a while and occasionally make you wonder why something doesn’t work as intended. When you set it up, though, Tdarr feels like magic.
Add its server and nodes to your computers’ auto-startup sequences, and hey presto, your media will always be re-encoded to high-quality, smaller files, using the optimal resolutions and formats for every single “machine” in your network. All while taking advantage of all available CPUs and GPUs in your PCs without you having to lift a finger.
If you have more than one PC in your home network, why not let them lend a helping hand when transcoding media? Tdarr can turn all your PCs into nodes of the same networked transcoder, resulting in much faster audio and video encoding. Let’s see how.
- Title: Enhance Window's Videography: Leverage Advanced Distributive Transcoding by Tdarr
- Author: Joseph
- Created at : 2024-08-15 15:47:29
- Updated at : 2024-08-16 15:47:29
- Link: https://windows11.techidaily.com/enhance-windows-videography-leverage-advanced-distributive-transcoding-by-tdarr/
- License: This work is licensed under CC BY-NC-SA 4.0.