Enhance Productivity: Setting Up Windows to Delete Files Automatically

Enhance Productivity: Setting Up Windows to Delete Files Automatically
We all know how easy it is to delete files and send them to the Recycle Bin. But wouldn’t it be great if Windows automatically emptied the bin for us? Fortunately, you can configure your system to do just that.
Let’s look at the different ways to auto-empty the Recycle Bin on Windows.
1. How to Automate the Recycle Bin Using the System Settings
It’s easy to configure Windows to empty the recycle bin automatically. All you need to do is open System settings, fiddle with a few things, and you’re done.
However, this feature applies only to the current user account. Other users on the same computer won’t have their Recycle Bin emptied automatically until they adjust this setting. In other words, if you’re using a shared computer, it won’t affect anyone else.
Here’s how to do it:
- Open the Settings window .
- From the left panel, select the System tab.
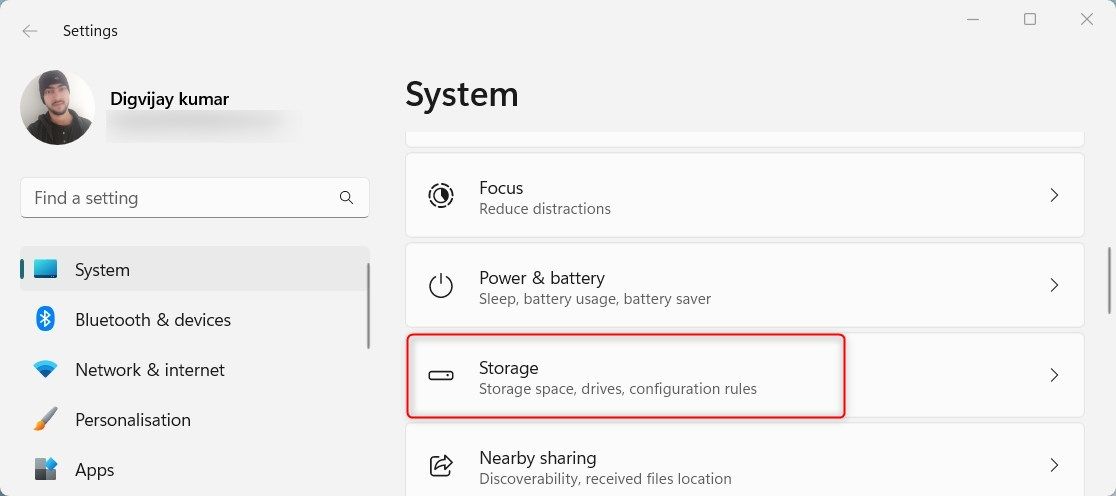
- Scroll down and click on Storage on the right-hand side. Here, you will find various computer data storage and management options.

- Now, you will see a toggle switch under Storage Sense. If it’s turned off, click to switch it on. This feature enables Windows to delete no longer needed files automatically.
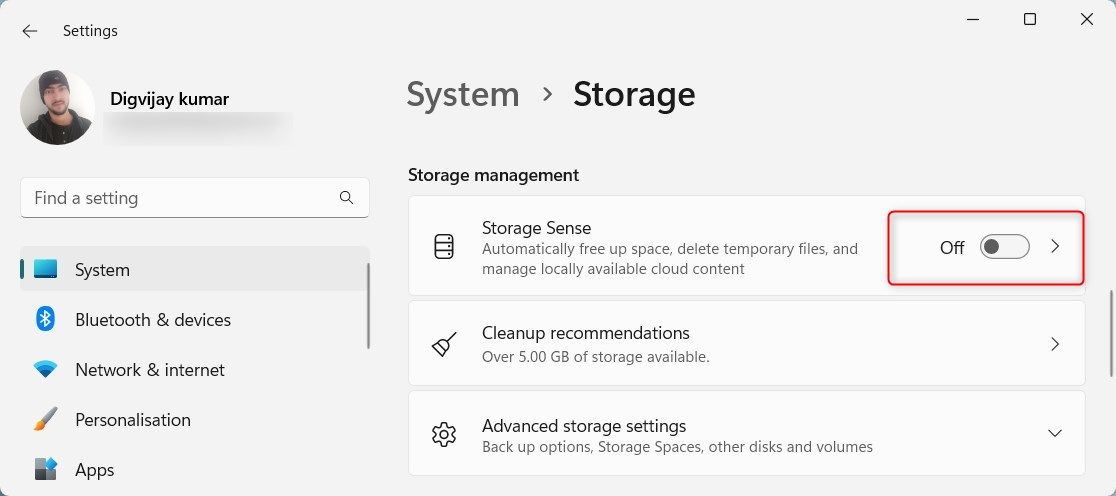
5. Once Storage Sense is active, click the tiny arrow next to it to expand the options.
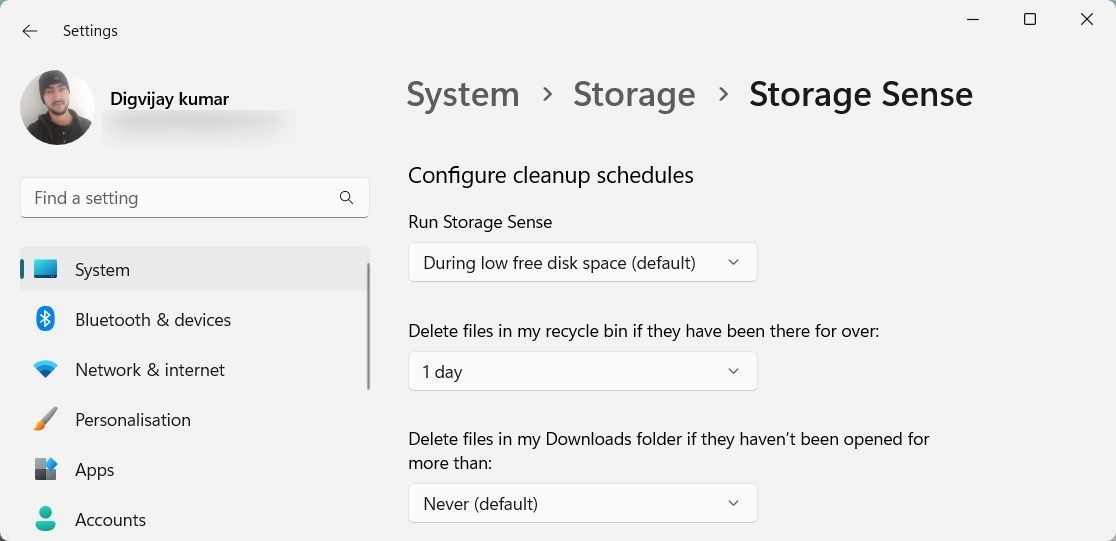
- On the next screen, you’ll find an option that says, Delete files in my recycle bin if they have been there for over. Click the drop-down menu beside this and select the duration, after which Windows should empty the recycle bin automatically.
- Select 1 day if you want Windows to delete these items daily. Or choose another option that suits your needs better.

- You can also configure the system to delete downloaded files that haven’t been used for several days. To do so, click the Delete files in my Downloaded folder if they haven’t been opened for more than drop-down menu and select the desired option.
Once you’re done, close the Settings window. Windows will automatically empty your Recycle Bin from now on.
2. How to Automate the Recycle Bin Using the Task Scheduler
If you want more control over the process, you can use Windows Task Scheduler to empty your Recycle Bin. Here’s how:
Press Win + R on your keyboard to open the Run window.
Type taskschd.msc and hit Enter or click OK. Doing this opens the Task Scheduler program .
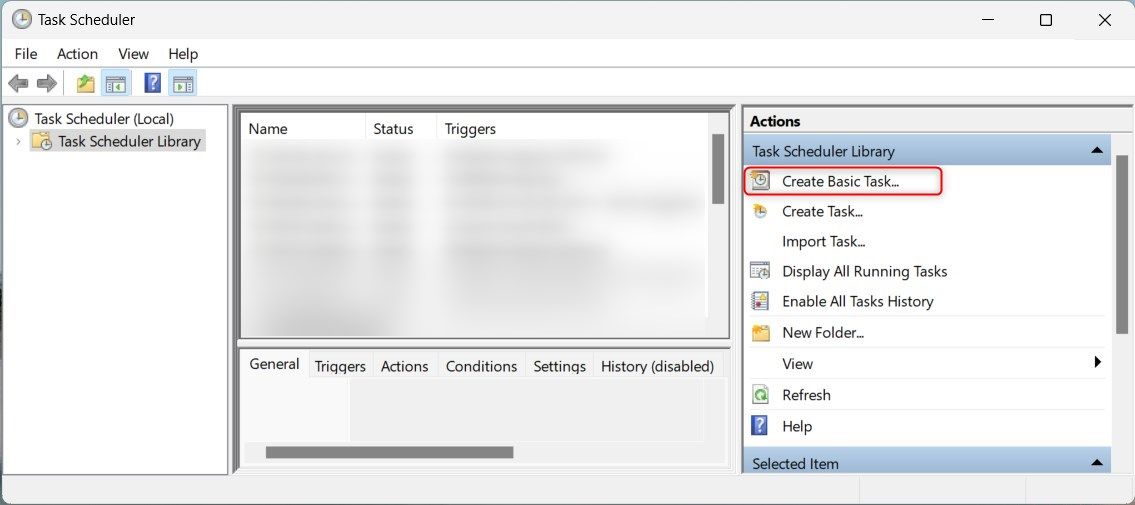
On the left-hand side of the window, select Task Scheduler Library.
Now, click Create Basic Task from the right-hand panel. It will open another window where you can configure your task settings.

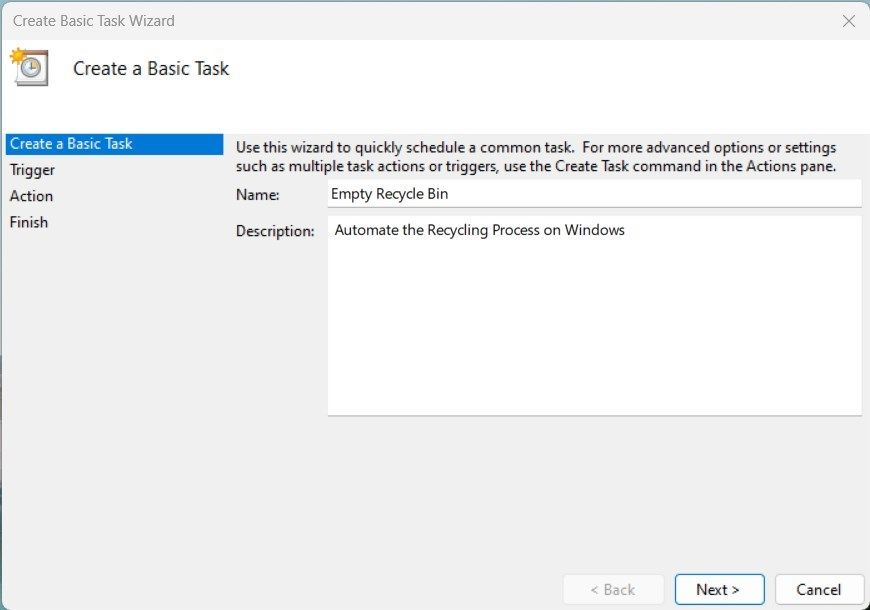
Enter a name for your task (e.g., Empty Recycle Bin) and a brief description if you want. Then, click the Next button.
The following window will ask you to select the frequency when Windows should empty your Recycle Bin. You can choose Daily, Weekly, Monthly, or One time only. Once you’ve chosen your preferred frequency, click Next.

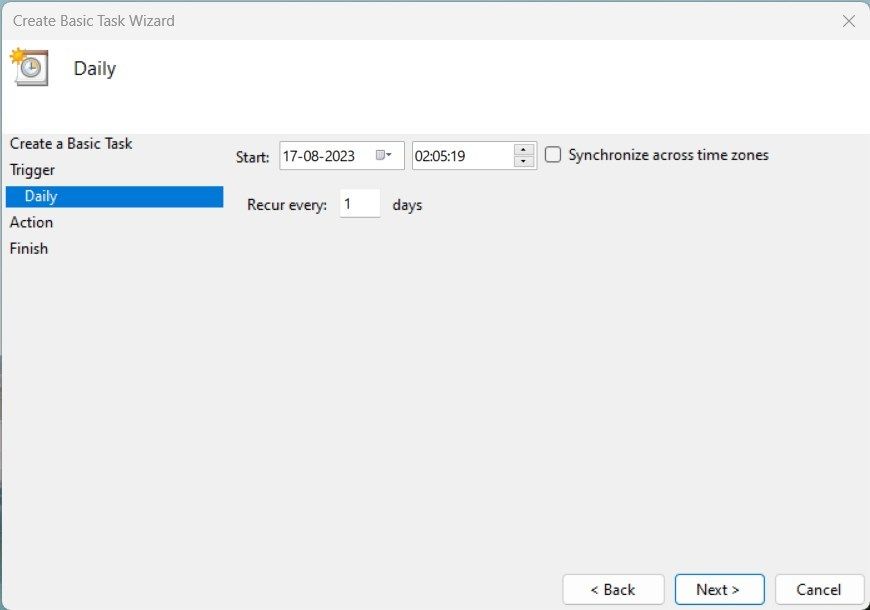
After that, set the start date and time for your task. Also, select Recur every to specify the total duration of each cleaning session. Then, click Next.

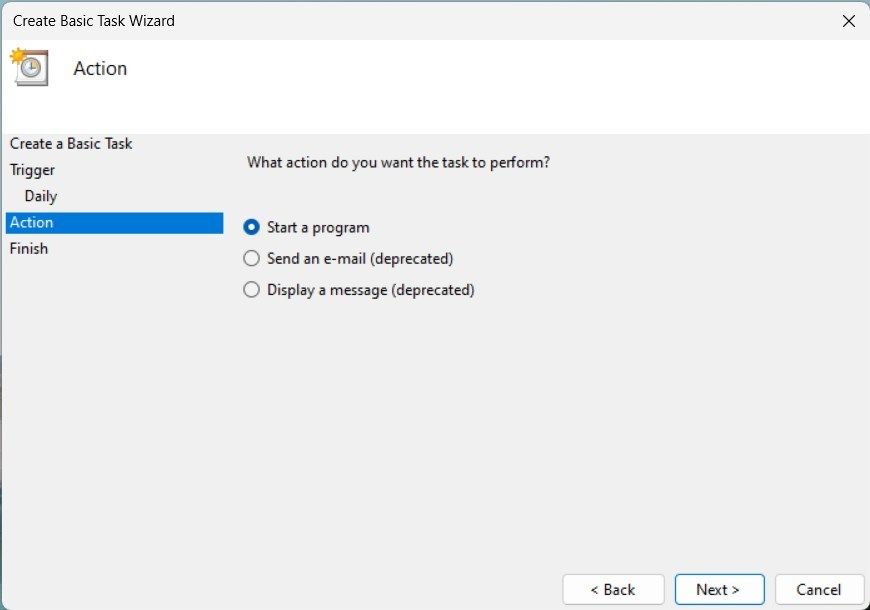
You must specify what action Windows should perform when this task runs. Click on the Start a program option and click Next again.

In the Program/script box, type C:\Windows\System32\cmd.exe. Then, in the Add arguments (optional) field, type the following command:
/c “echo Y|PowerShell.exe -NoProfile -Command Clear-RecycleBin”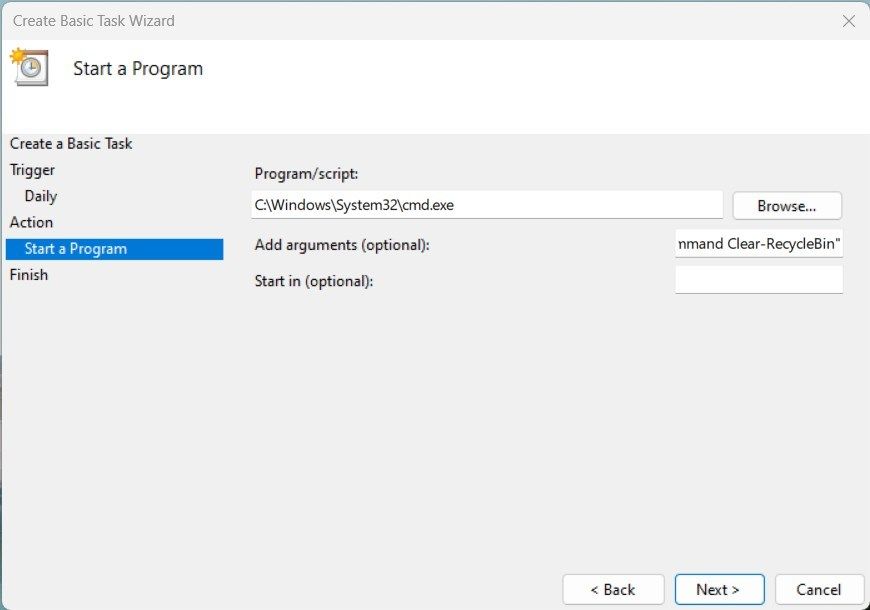
5. Running this command will delete your Recycle Bin content. Click Next to continue.
6. Now, you can review your settings and tick Open the Properties dialog for this task when I click Finish if you want to make any changes. When done, hit the Finish button.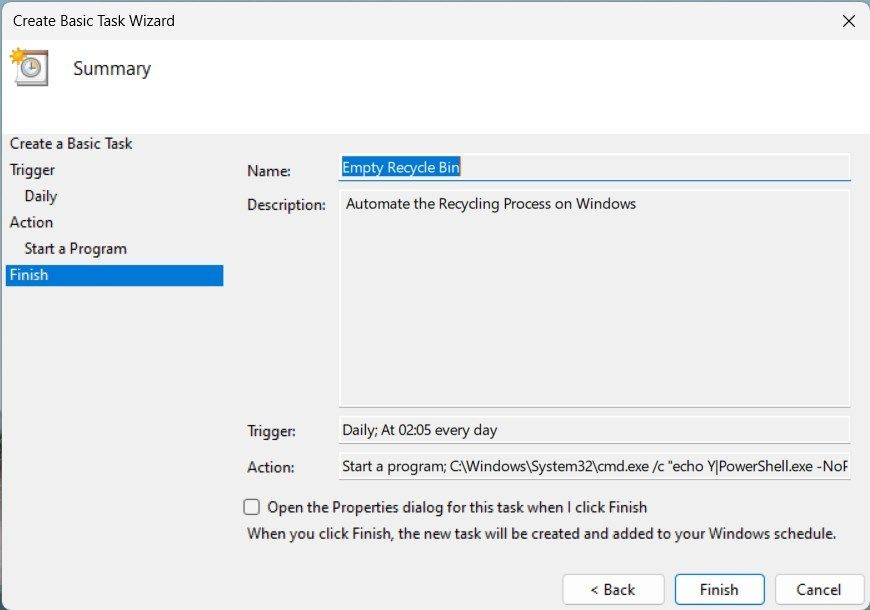
Once you’re done, close the Task Scheduler window. From now on, Windows will empty your Recycle Bin according to your specified frequency.
Automate the Recycling Process on Windows
To keep your computer running smoothly, you must empty your Recycle Bin regularly. However, the process can be tedious and time-consuming. Fortunately, Windows provides some easy ways to automate this task, either through Windows Settings or Task Scheduler.
Let’s look at the different ways to auto-empty the Recycle Bin on Windows.
Also read:
- [New] Thriving on Instagram Strategies for Powerful Video Marketing for 2024
- [Updated] Top Five Excellent Cameras for High Fidelity Movies
- Correcting Failed Application Launches: Windows 11'S Error 0XC000003E Explained
- Fixing the Flaws in Your Social Media Setup
- How to Fake Snapchat Location on Lava Yuva 2 | Dr.fone
- Key Applications that Bridge the Mac and Windows Divide
- Optimizing Latency for Real-Time OBS Viewing
- Preserve Dormant Google ID Numbers: Avoid Next Month's Account Vanishing Act with Expert Strategies - ZDNet Guide
- Say Goodbye to Lag: How to Fix Warhammer 40K Delays on Your PC
- Simplifying App Installations in Windows 11 Using Winstall
- Solving the Dilemma: Boosting Your iPhone's Incoming Call Audio Level
- Swiftly Overcoming Windows Access Denied Blunders
- Unseen Windows Firewall Protection Sectors Demystified
- Title: Enhance Productivity: Setting Up Windows to Delete Files Automatically
- Author: Joseph
- Created at : 2024-12-28 03:00:06
- Updated at : 2025-01-04 01:34:09
- Link: https://windows11.techidaily.com/enhance-productivity-setting-up-windows-to-delete-files-automatically/
- License: This work is licensed under CC BY-NC-SA 4.0.
