Deciphering and Disabling Read-Only Properties in Win11

Deciphering and Disabling Read-Only Properties in Win11
Do folders on your computer periodically revert to read-only mode, making it impossible to make changes? It can be frustrating, especially when you have to make final edits to your submission and the deadline is fast approaching.
In this article, we’ll explain why your folders revert to read-only mode and what you can do to prevent it.
Why Are Your Folders Reverting to Read-Only Mode?
Your folders revert to read-only mode for various reasons, including restrictions imposed by your administrator, an issue with a recent Windows update, or changes you make to Windows Defender or your antivirus settings. It can also happen due to possible restrictions from the security software you use to lock your folders.
As you now understand why folders in your computer are reverting to read-only mode, let’s look at some ways to fix it.
1. Turn Off Folder Protection
Do you use folder lock software to protect your data, but some of those protected folders become read-only at random? If so, the restrictions are likely imposed by the folder lock software. Thus, by turning off the security limitations for those folders, you might be able to fix the problem right away.
If you don’t use any folder lock software or turning off the protection doesn’t help, move on to the next solution.
2. Rule Out a Folder-Specific Issue
Is only one folder reverting to read-only mode? If so, follow the below steps to remove the read-only attribute manually for that folder:
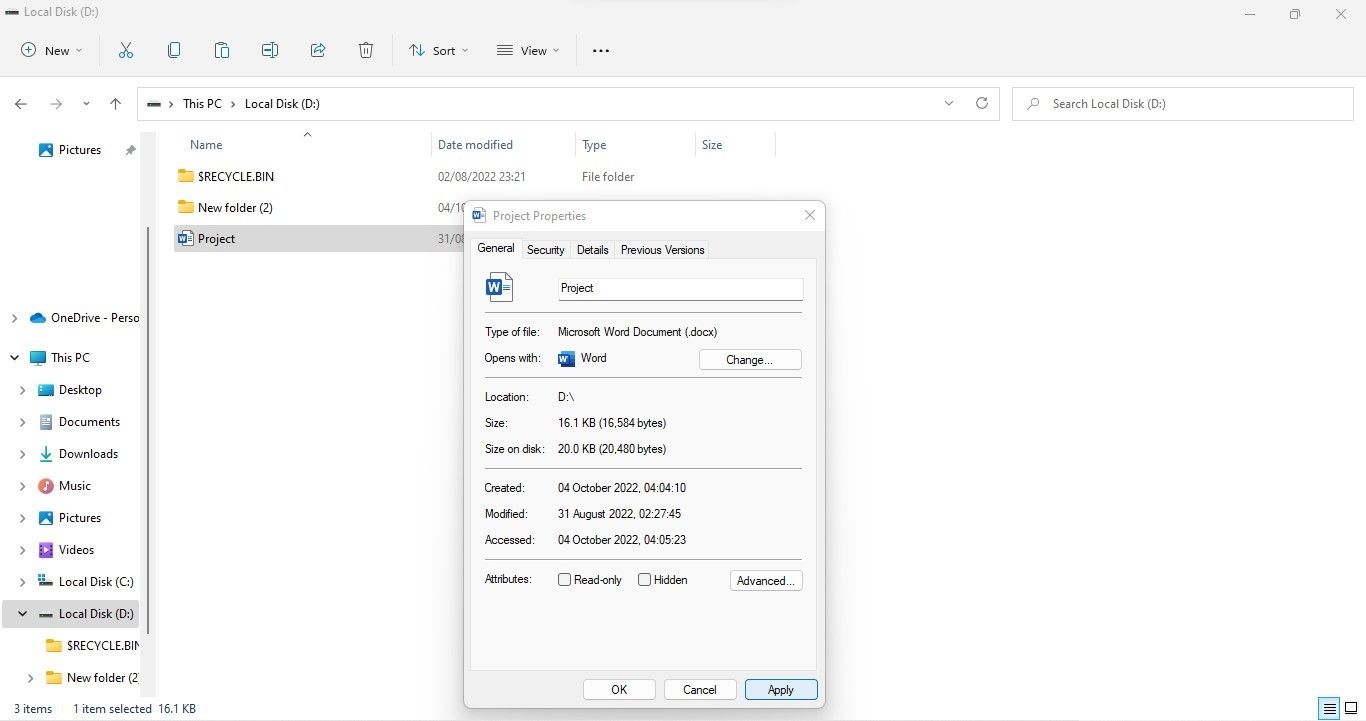
- Go to the folder that is going read-only.
- Right-click on it and select Properties.
- In the General tab, uncheck the box for Read-only.
- Click Apply and hit OK.

If removing the attribute this way does not solve the problem, or if the problem involves multiple files, keep applying the remaining fixes.
If you have encountered the issue on a work computer, you may not be able to apply a few fixes mentioned below. Thus, if you encounter an error saying you don’t have permission to make any changes, it’s best to let your IT admin handle it.
3. Ensure an Administrator Hasn’t Imposed Any Restrictions
In Windows, administrators can restrict access to confidential data for specific users working on the same computer. If you see some files and folders in read-only mode, verify the administrator hasn’t changed their permissions. Here’s how you can find out:
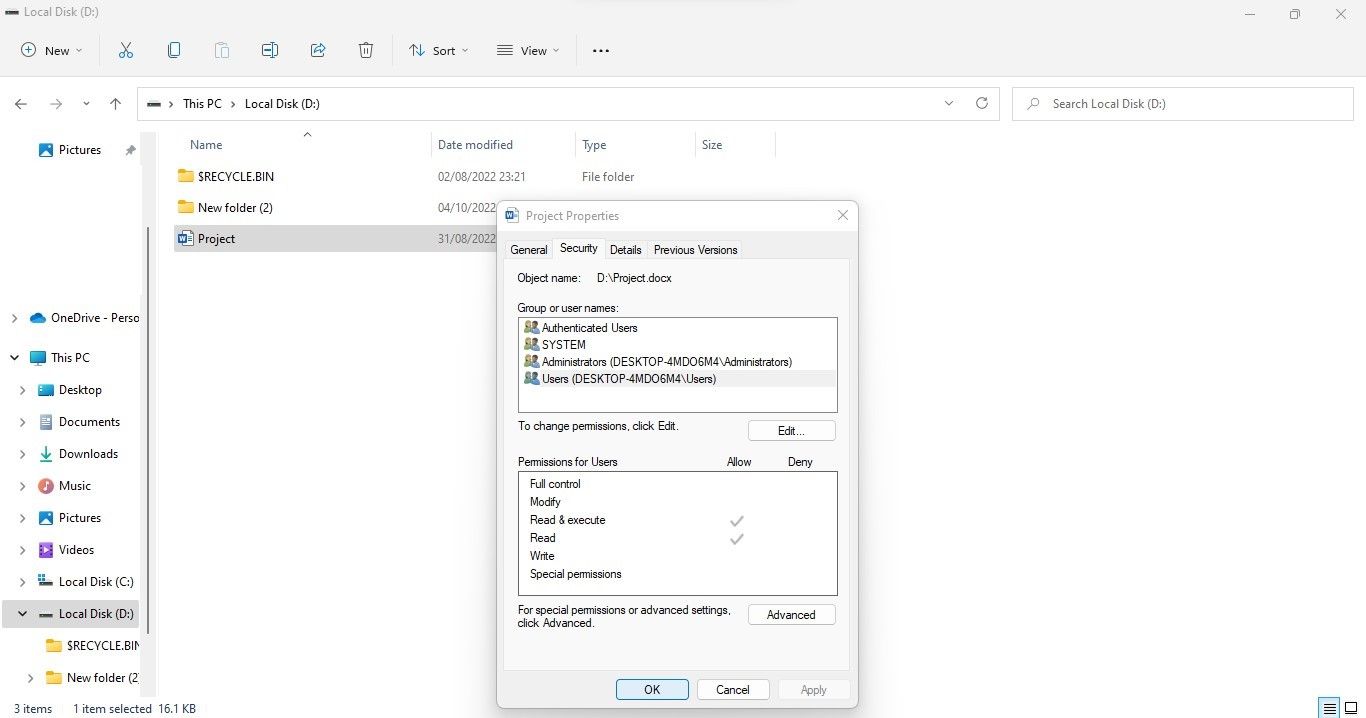
- Right-click the file or folder you see in read-only mode and select Properties.
- In the Properties window, click the Security tab.
- Choose your username from the available options.
- Check the Permissions for Users section after selecting your account.

You can’t make changes to the files if you only have read-only permissions. If you believe the access was restricted by mistake, ask the administrator to grant you access.
If you’re an administrator, here’s how you can change the access permissions of other users:
- Log in with your administrator account.
- Right-click the file or folder you see in read-only mode and select Properties.
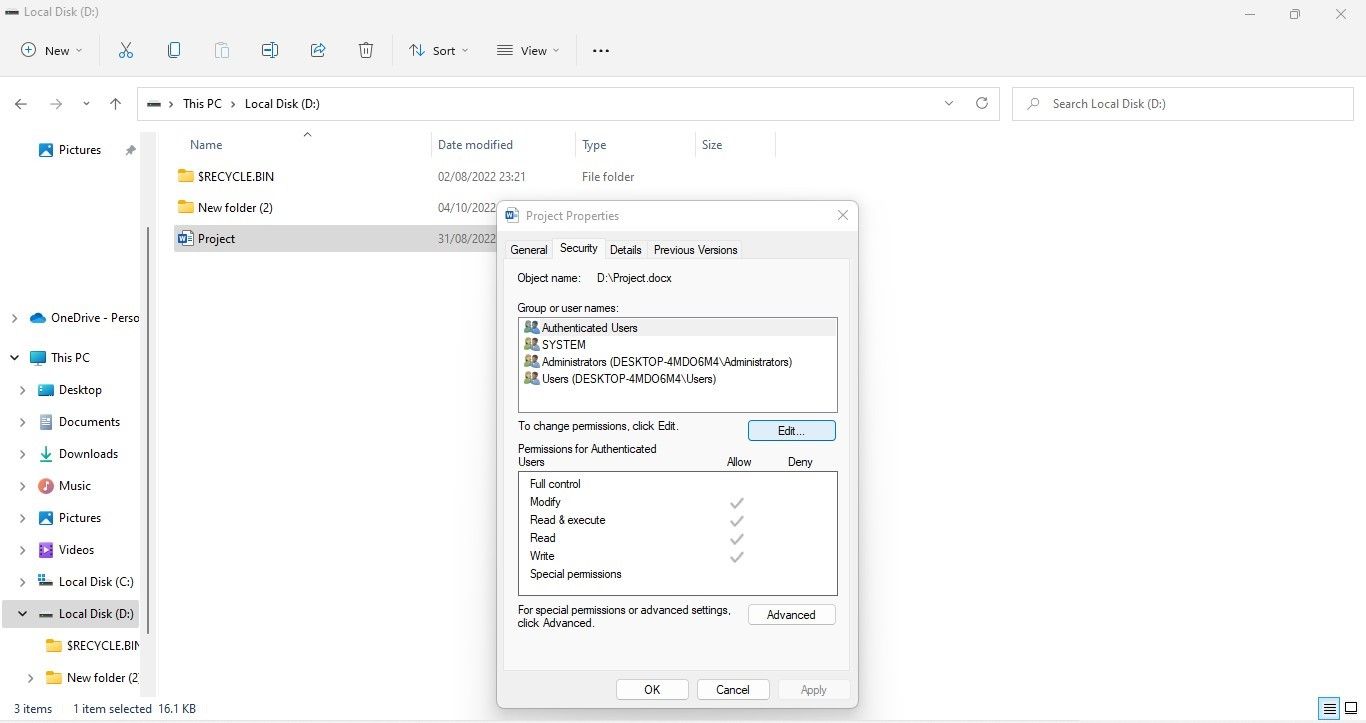
- In the Properties window, go to the Security tab.
- Click the Edit button.

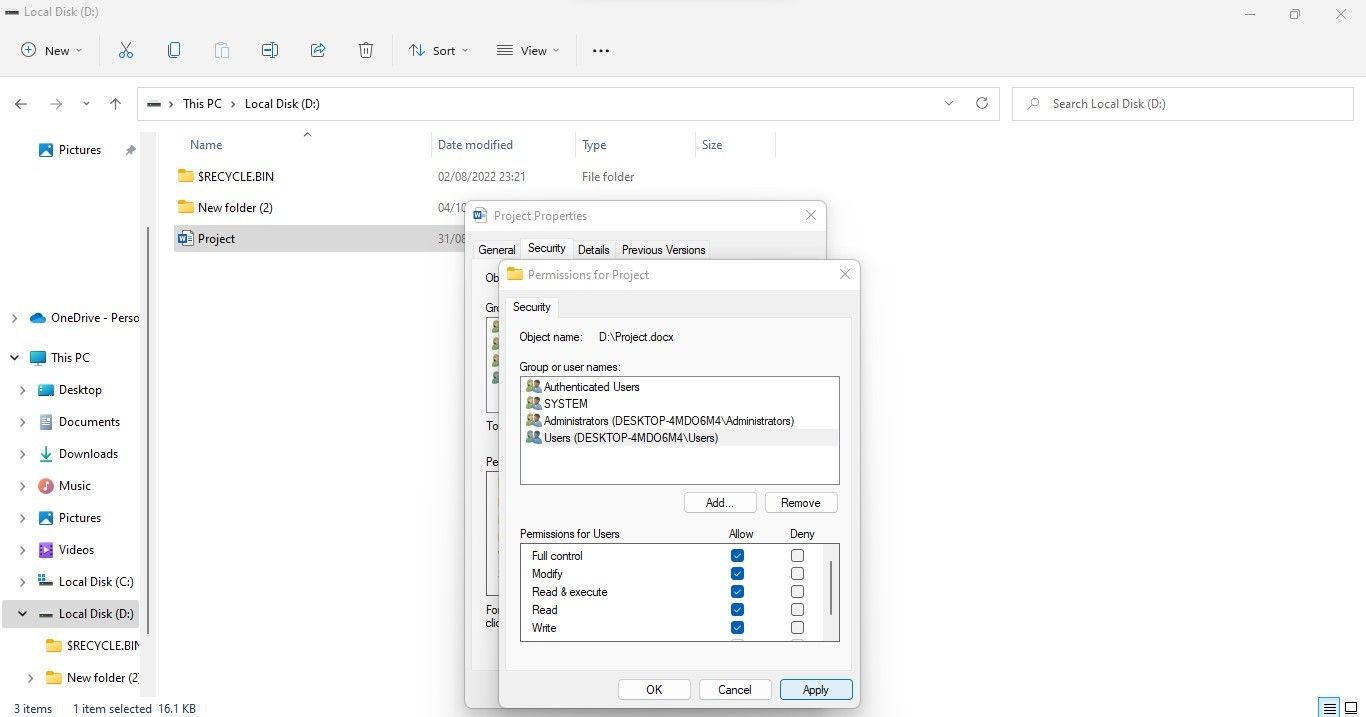
- Choose the user you want to grant access to.
- In the Permissions for Users window, check the box next to Full control under Allow column.

- After clicking Apply, hit OK.
If you have multiple personal accounts on your computer, you can change permissions for each account using the administrator account similarly.
4. Disable Ransomware Protection in the Windows Security Settings
To combat ransomware threats and safeguard users’ data, Microsoft has introduced a ransomware protection feature. By using this feature, users can prevent third-party apps from changing their files and folders without their permission.
Although it’s handy, it has a history of messing up file permissions. Therefore, if you’ve encountered the issue under discussion after enabling this feature, disabling it may help you fix it. The following steps will help you do that:
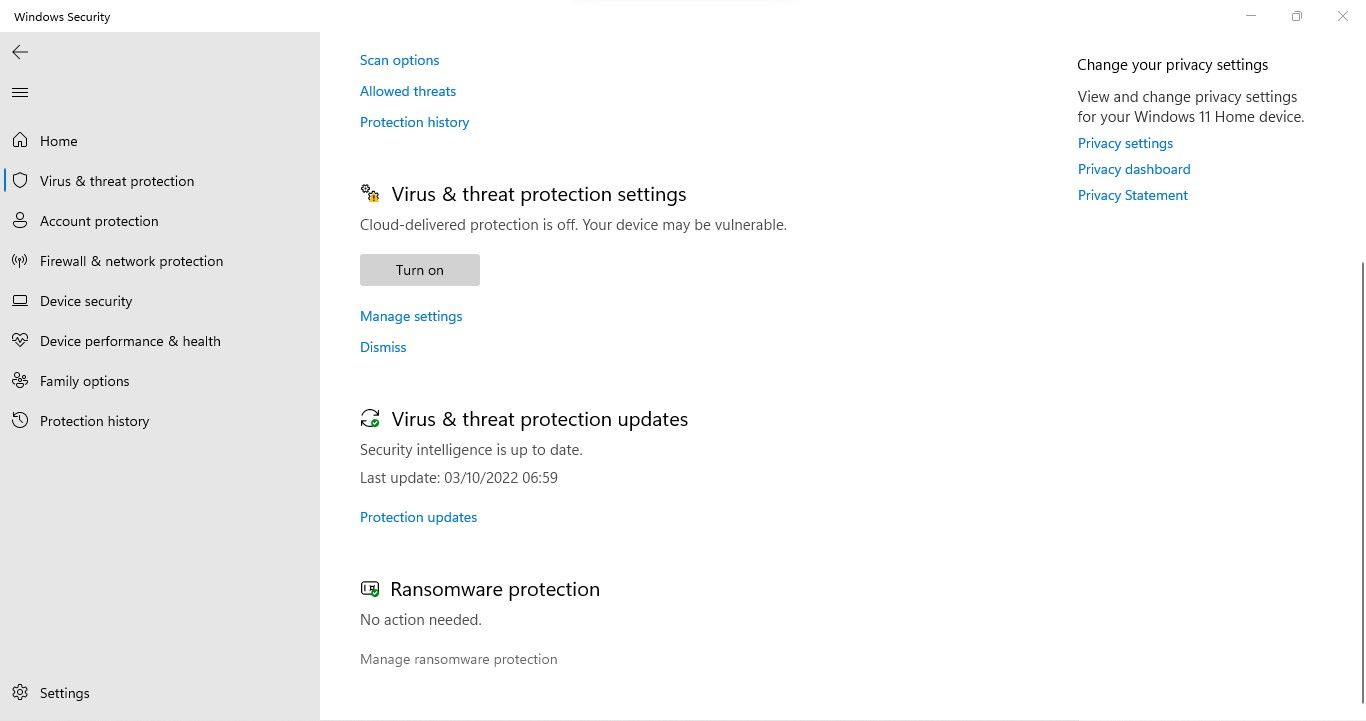
- Open the Windows Security app by searching for “Windows Security” in Windows Search.
- Go to Virus and threat protection.
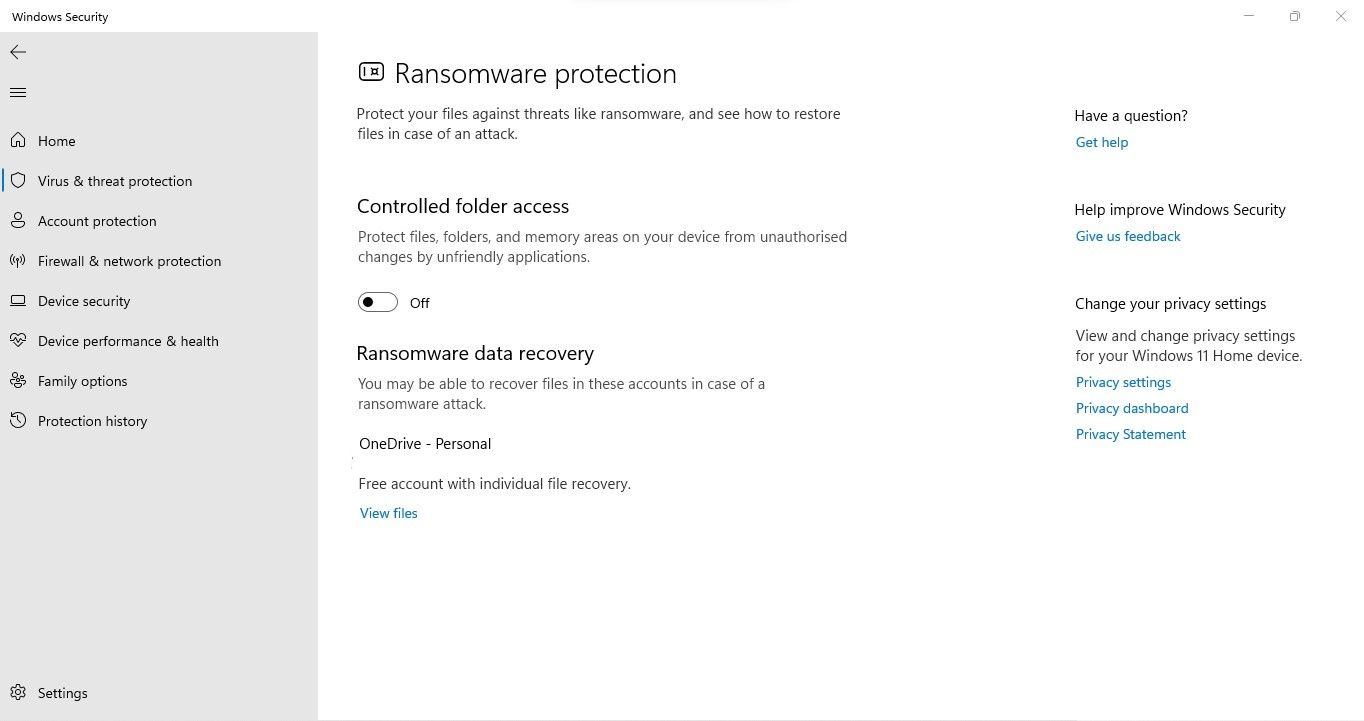
- Click on Manage ransomware protection.

- Turn off the toggle under Controlled folder access.

If disabling this feature doesn’t resolve the problem, you may need to reset the entire Windows Defender Firewall settings.
5. Reset the Windows Defender Firewall Settings
Have you recently made changes to your Windows Defender Firewall settings and encountered this problem? If so, there’s a good chance you’ve done something wrong. Therefore, resetting them may help you resolve the issue. Follow the below steps to reset Windows Defender Firewall settings:
- Open the Control Panel app by searching for “Control Panel” in Windows Search.
- Click System and Security.
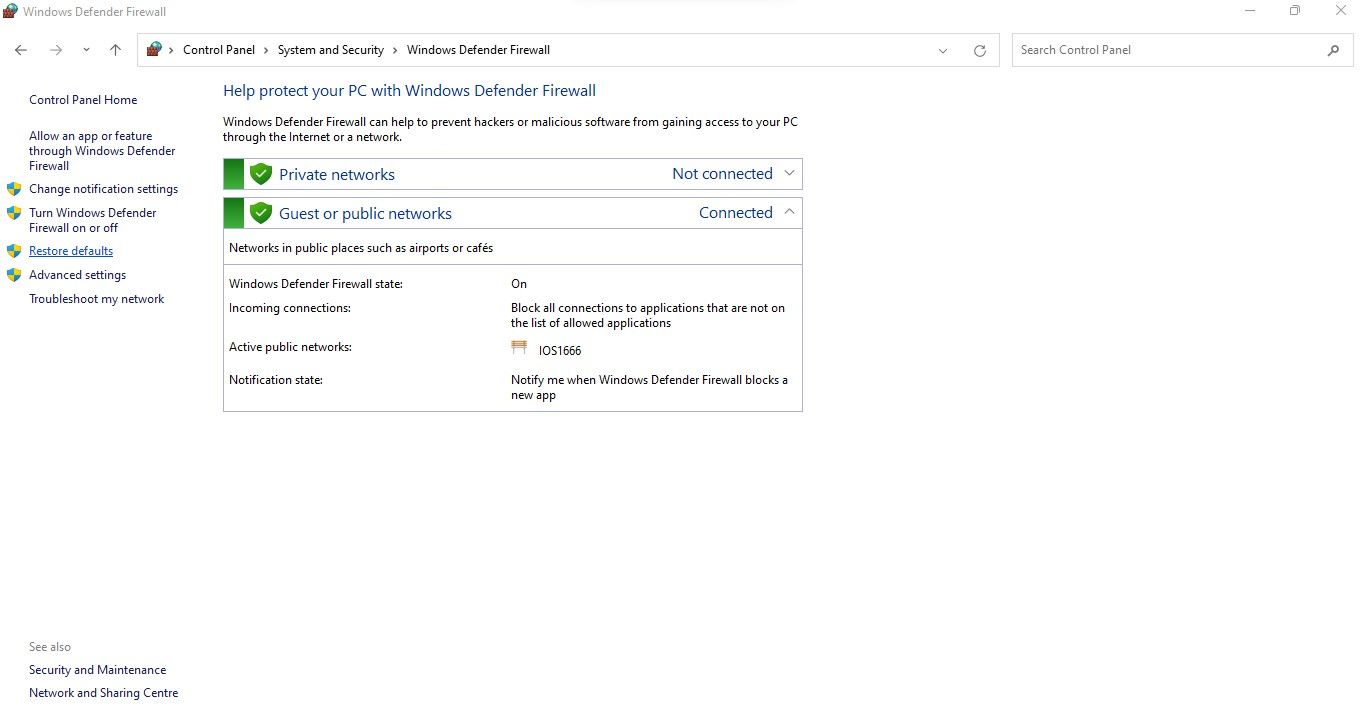
- Click Windows Defender Firewall.
- In the left sidebar, click Restore defaults.

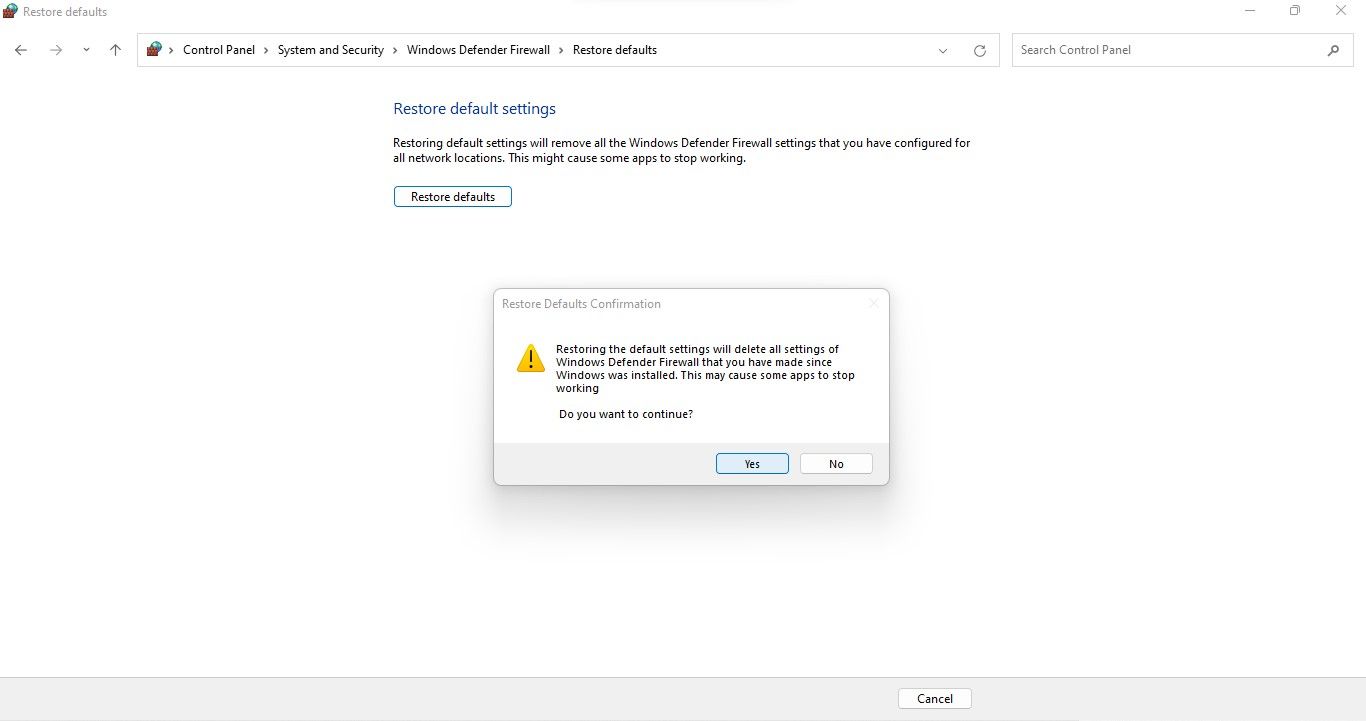
- Click Restore defaults button.
- When the confirmation pop-up appears, select Yes.

6. Disable Antivirus and Other Security Software
If the folders that revert to read-only mode reside on the same drive where your operating system is installed, Microsoft Defender might temper the folder permissions.
To rule out this potential cause, temporarily turn off the Microsoft Defender Firewall and see if your folders stop reverting to read-only mode after that. If they do, whitelist those folders from Microsoft Defender and turn on the security suite again. If you use any third-party security software, disable that as well since it can also restrict your access.
Whether disabling the built-in or third-party security suites fixes the issue or not, you should enable them again to keep your device protected from viruses.
7. Forcefully Remove the Read-Only Attribute
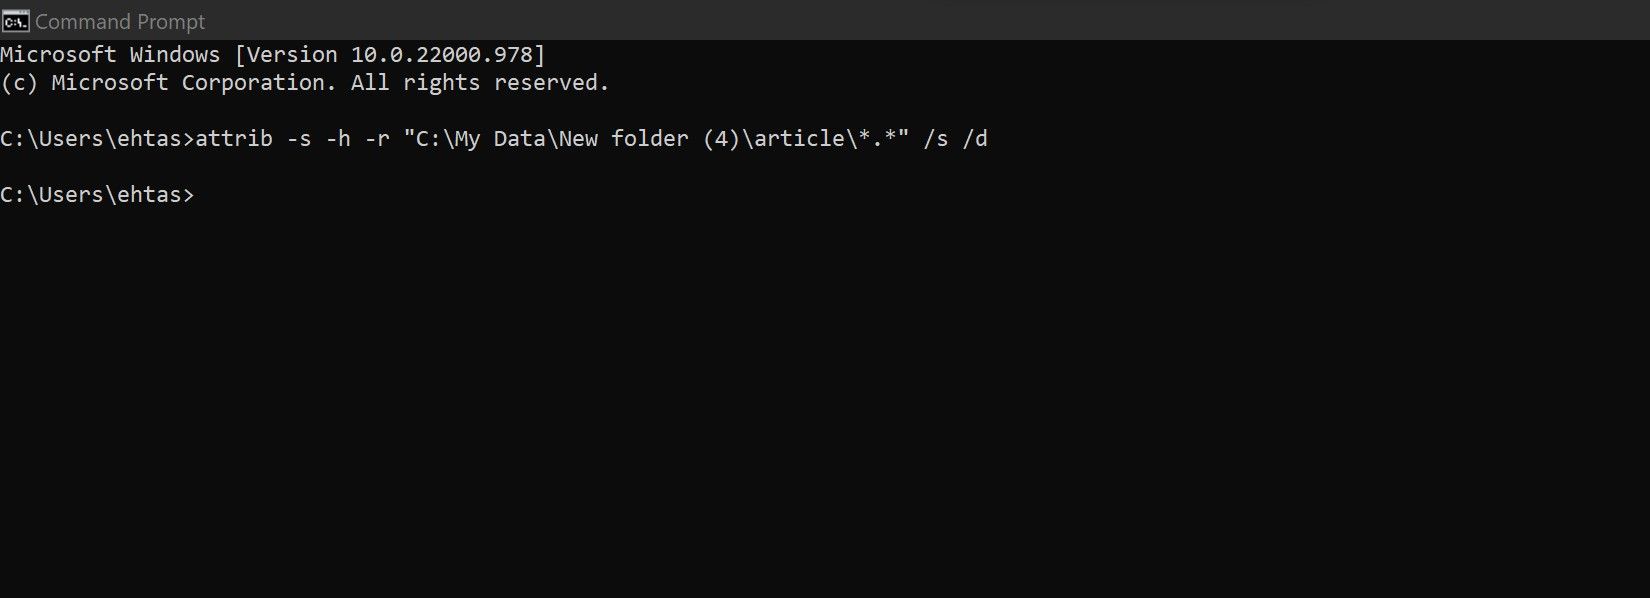
If none of the fixes have resolved the issue of folders reverting to read-only mode, you should remove the read-only attribute forcibly using Command Prompt. Here’s how:
- Search for “Command Prompt” in Windows Search and open the Command Prompt app.
- Enter the following command by specifying the drive and pasting the path to the read-only folder.
attrib -s -h -r "Drive:\path_to_folder\*.*" /s /d - Hit Enter.

8. Run the SFC and CHKDSK Scans
Corrupted system files and bad hard drive sectors can also alter the folder’s permission access. Run the SFC and Chkdsk scans to ensure that’s not the case. SFC can help you search for and fix corrupted system files, whereas Chkdsk can find bad sectors on your hard drive that could be causing the issue.
If you’ve never run these scans before, check out our guide on how to run SFC and Chkdsk scans . Hopefully, running these scans will fix the underlying issue with your files and folders. If neither of these scans finds any problems, proceed to the next step.
9. Uninstall Any Recent Windows Updates
If the issue under discussion occurred after installing a Windows update, you should uninstall it and revert to the previous version of Windows. Check out our article on manually uninstalling Windows 10 and 11 updates if you’re unfamiliar with the process.
10. Relocate the Folders to Another Drive
While it may initially seem strange, relocating the folders whose permissions get restricted to another drive also resolved the issue for some users. Therefore, move your folders from one drive to another, remove the read-only attribute, and see if they revert to read-only again. If relocating the folder to a different drive does not resolve the issue, go to the next fix.
11. Go to Previous Restore Point
A System Restore allows Windows users to restore their system to its current state if they accidentally mess something up in the future. It’s a quick way to undo changes that mess up your system.
Thus, if uninstalling the Windows update also doesn’t work, apply the restore point you created previously. This will undo any system changes that may have resulted in the issue under discussion and return your device to its original state.
If you’re unfamiliar with the process, check out our article that explains how to perform a system restore in Windows 11 . For Windows 10, the process is nearly the same.
Keep Your Files and Folders Editable
Hopefully, applying the fixes mentioned in the article will help you prevent your folder from reverting to read-only mode. Moreover, to stop files from opening in read-only mode in a specific app, such as OneNote, you’ll have to change the app settings.
In this article, we’ll explain why your folders revert to read-only mode and what you can do to prevent it.
Also read:
- [New] Keep It Lighthearted A Straightforward Guide to Posting GIFs on Instagram for 2024
- [Updated] Expert Director of Visuals and Music for 2024
- $50 Mobile Discounts & Expert Insights on Cracking Ransomware Codes - Podcast with ChatGPT
- Digital Doppelganger Designs Sketching an Animated Self
- El Retorno | Free Book
- In 2024, Photo Fusion at Home & Online Synergy Guide
- Keeping Calculator Top-Displayed in Windows
- Quick Steps to Disconnect and Erase Apple Account on iPhone
- Reestablishing Active Slack Signals in Windows 11
- Setting Up Microsoft's Defender on Edge: Win 11 Guide
- Streamline Your Browsing with Mouse Gestures in Microsoft Edge
- StreamMastery 101 The Beginner's Path to Livestrancing Podcasts
- Subtlety Shifts: Concealing Win 11'S Control
- Understanding the Regulatory Landscape of Crypto Trading and Investment Opportunities with YL Software Insights
- Windows WASD: Segregating Sounds Effectively?
- Title: Deciphering and Disabling Read-Only Properties in Win11
- Author: Joseph
- Created at : 2025-01-09 23:07:07
- Updated at : 2025-01-10 19:34:07
- Link: https://windows11.techidaily.com/deciphering-and-disabling-read-only-properties-in-win11/
- License: This work is licensed under CC BY-NC-SA 4.0.
