Customizing Windows File Explorer Path Settings

Customizing Windows File Explorer Path Settings
To access the D: drive, you normally have to open File Explorer, click on This PC in the Navigation pane, and expand the Devices and drives section. With a simple hack, you can add it to the Navigation pane so you can easily access it straight from there. It will require you to tweak the Windows Registry, but don’t worry; we’ll show you an extremely easy way of going about it.
Before You Proceed…
We are going to create a Registry file to add the D: drive to the Navigation Pane. This file will make changes to the Windows registry, and you need to be careful not to mess up the Windows Registry . A slip-up could make Windows unusable.
Furthermore, we highly recommend that you learn how to back up and restore the Windows Registry . That way, you have a way of returning it to the state it was in before you made any changes that broke it.
How Do I Add the D: Drive to the Navigation Pane in File Explorer?
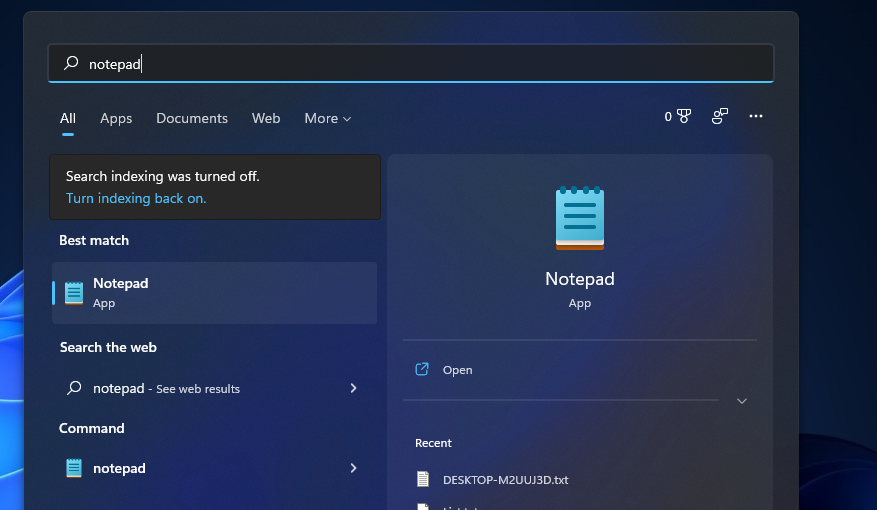
Start by pressing Win + S to bring up Windows Search. Then, type notepad in the Search box, and when Notepad shows up in the search results, click on it to launch it.

Then copy and paste the below text into Notepad:
`Windows Registry Editor Version 5.00
[HKEY_CURRENT_USER\Software\Classes\CLSID{0525388b-89d9-4112-bf4d-2aaccb716a7f}]
@=”D: Drive”
“System.IsPinnedToNamespaceTree”=dword:00000001
“SortOrderIndex”=dword:00000050
[HKEY_CURRENT_USER\Software\Classes\CLSID{0525388b-89d9-4112-bf4d-2aaccb716a7f}\DefaultIcon]
@=hex(2):69,00,6d,00,61,00,67,00,65,00,72,00,65,00,73,00,2e,00,64,00,6c,00,6c,\
00,2c,00,2d,00,33,00,32,00,00,00
[HKEY_CURRENT_USER\Software\Classes\CLSID{0525388b-89d9-4112-bf4d-2aaccb716a7f}\InProcServer32]
@=hex(2):43,00,3a,00,5c,00,57,00,49,00,4e,00,44,00,4f,00,57,00,53,00,5c,00,73,\
00,79,00,73,00,74,00,65,00,6d,00,33,00,32,00,5c,00,73,00,68,00,65,00,6c,00,\
6c,00,33,00,32,00,2e,00,64,00,6c,00,6c,00,00,00
[HKEY_CURRENT_USER\Software\Classes\CLSID{0525388b-89d9-4112-bf4d-2aaccb716a7f}\Instance]
“CLSID”=”{0E5AAE11-A475-4c5b-AB00-C66DE400274E}”
[HKEY_CURRENT_USER\Software\Classes\CLSID{0525388b-89d9-4112-bf4d-2aaccb716a7f}\Instance\InitPropertyBag]
“Attributes”=dword:00000011
“TargetFolderPath”=hex(2):44,00,3a,00,5c,00,00,00
[HKEY_CURRENT_USER\Software\Classes\CLSID{0525388b-89d9-4112-bf4d-2aaccb716a7f}\ShellFolder]
“FolderValueFlags”=dword:00000028
“Attributes”=dword:f080004d
[HKEY_CURRENT_USER\SOFTWARE\Microsoft\Windows\CurrentVersion\Explorer\HideDesktopIcons\NewStartPanel]
“{0525388b-89d9-4112-bf4d-2aaccb716a7f}”=dword:00000001
[HKEY_CURRENT_USER\SOFTWARE\Microsoft\Windows\CurrentVersion\Explorer\Desktop\NameSpace{0525388b-89d9-4112-bf4d-2aaccb716a7f}]
@=”D: Drive”`
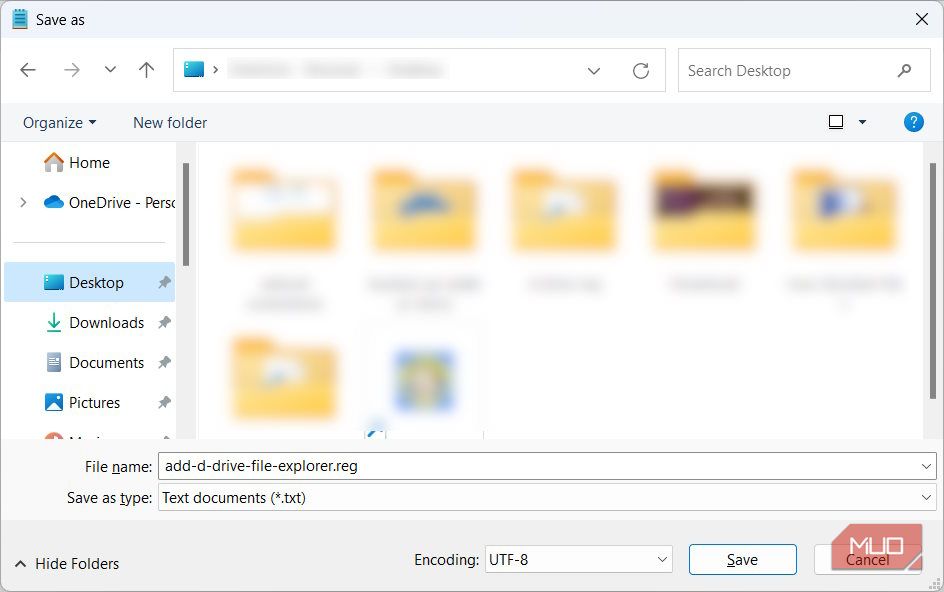
Press Ctrl + S, name the file add-d-drive-file-explorer.reg, and then click Save. Don’t forget to add the REG file extension to let Windows know it’s working with a Registry file.

Next, double-click the Registry file you just created and click Yes on the UAC prompt. You’ll then be asked if you want to continue with the merge, so click Yes. Afterward, press Win + E to open File Explorer.

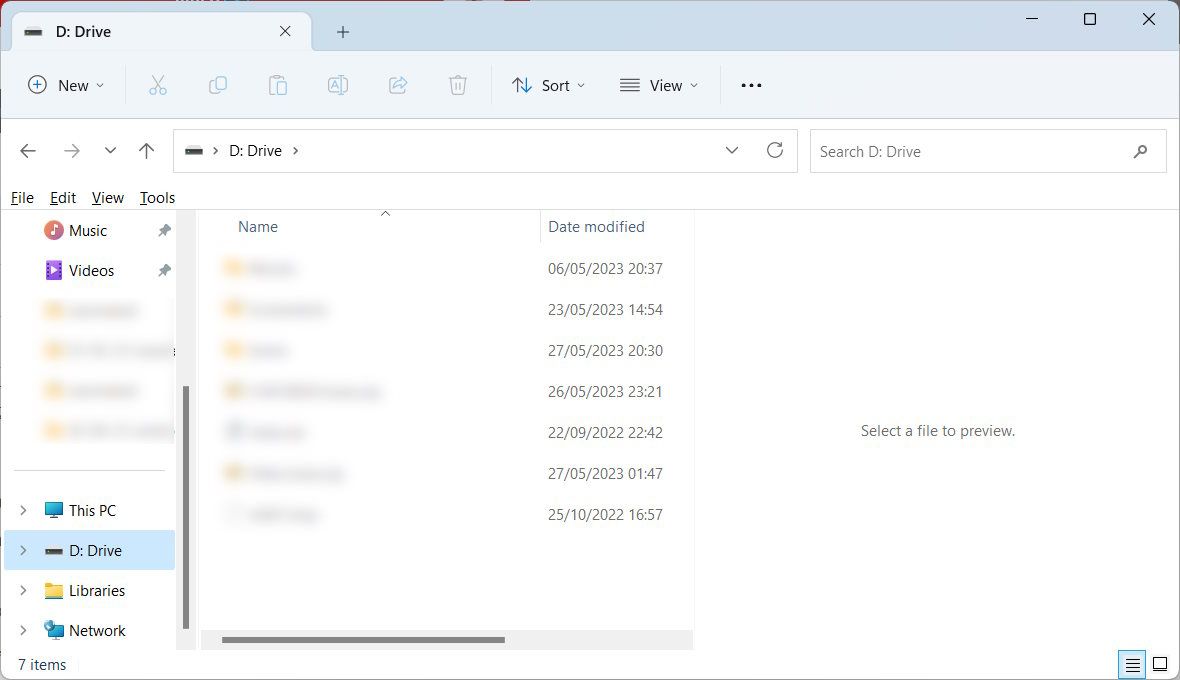
The D: drive should now be visible in the bottom part of the Navigation pane.
How Do I Remove the D: Drive From the Navigation Pane in File Explorer?
To remove the D: drive from the navigation pane, open Notepad and then copy and paste the below text:
`Windows Registry Editor Version 5.00
[-HKEY_CURRENT_USER\Software\Classes\CLSID{0525388b-89d9-4112-bf4d-2aaccb716a7f}][HKEY_CURRENT_USER\SOFTWARE\Microsoft\Windows\CurrentVersion\Explorer\HideDesktopIcons\NewStartPanel]
“{0525388b-89d9-4112-bf4d-2aaccb716a7f}”=-
[-HKEY_CURRENT_USER\SOFTWARE\Microsoft\Windows\CurrentVersion\Explorer\Desktop\NameSpace{0525388b-89d9-4112-bf4d-2aaccb716a7f}]`
Save the file as remove-d-drive-file-explorer.reg. Afterward, double-click the registry file and click Yes on the UAC prompt. When asked if you want to continue with the merge, click Yes again.
Now the D: drive should be gone from the navigation pane in File Explorer.
Create an Easier Way to Access the D: Drive on Your Windows Computer
With this guide, you will remove an extra step when accessing the D: drive on your Windows computer. Once you have created the registry files, adding and removing the D: drive from the Navigation pane will be easy. While the registry files are safe, don’t forget to create a backup of your Registry or a system restore point for good measure.
Also read:
- [New] In 2024, Designing Effective Video Previews for Channels
- [New] In 2024, Tailoring Video Content to Youtube's Niche Needs
- [New] Pursuing Passion Professionally A Guide for Aspiring Designers
- [Updated] Allocating Money Wisely in YouTube Advertising
- [Updated] Visual Branding Mastery Implementing Watermarks & Logos Into Video Content
- 2024年に失われたリングの動画を取り戻せる手順
- Fixing the 'GeForce Experience Settings Not Available' Hurdle, Windows 11
- Fixing the PowerShell Not Found Issue on Windows OS
- Get Your Hands on MacOS 15 Sequoia Early Access! Download Instructions for Mac Users | ZDNet Coverage.
- In 2024, Mastering Quantum HDR Principles
- Innovative Designs and Advanced Tech - Year's Best Windows Laptops
- MP4からMOVへの変換: 3つの最優秀無料ツール
- Navigating High Dynamic Range (HDR) in Windows 11: A Step-by-Step Manual
- Navigating to System32 in Windows 11
- Restoring Audio Clarity and Functionality in Valorant (Windows)
- Retrieve Missing 5GHz Connection, Now Easily for Windows 11
- The Obsidian Way to Uncluttered, Vivid Note-Taking
- Top 5 Benefits of Using ChatGPT for Enhanced Cryptocurrency Investments
- Which Offers Smoother Windows Setup? Chocolatey or WM
- Title: Customizing Windows File Explorer Path Settings
- Author: Joseph
- Created at : 2025-01-09 14:45:43
- Updated at : 2025-01-16 11:36:58
- Link: https://windows11.techidaily.com/customizing-windows-file-explorer-path-settings/
- License: This work is licensed under CC BY-NC-SA 4.0.