Bless Your PC: God Mode Enhancements

Bless Your PC: God Mode Enhancements
God Mode enables you to access hundreds of Control Panel applets from a single All Tasks window. That’s a handy thing to activate in Windows 11 for accessing Control Panel settings and creating shortcuts that open them.
Many users activate God Mode by setting up desktop shortcuts that open the All Tasks window. However, you can instead add a God Mode option to the desktop’s context menu in Windows 11. Then the All Tasks window will be directly accessible on your right-click menu. This is how you can add God Mode to Windows 11’s context menu.
How to Add God Mode to the Context Menu by Manually Editing the Registry
You can add God Mode to Windows 11’s desktop context menu by manually tweaking the registry. The tweaking required is relatively simple to apply and involves adding a couple of new registry entries to the Shell key. Follow these steps to manually add God Mode to Windows 11’s context menu:
Open the Registry Editor (see how to open the Registry Editor for instructions).
Click in the address bar at the top of Registry Editor to delete the current key location.
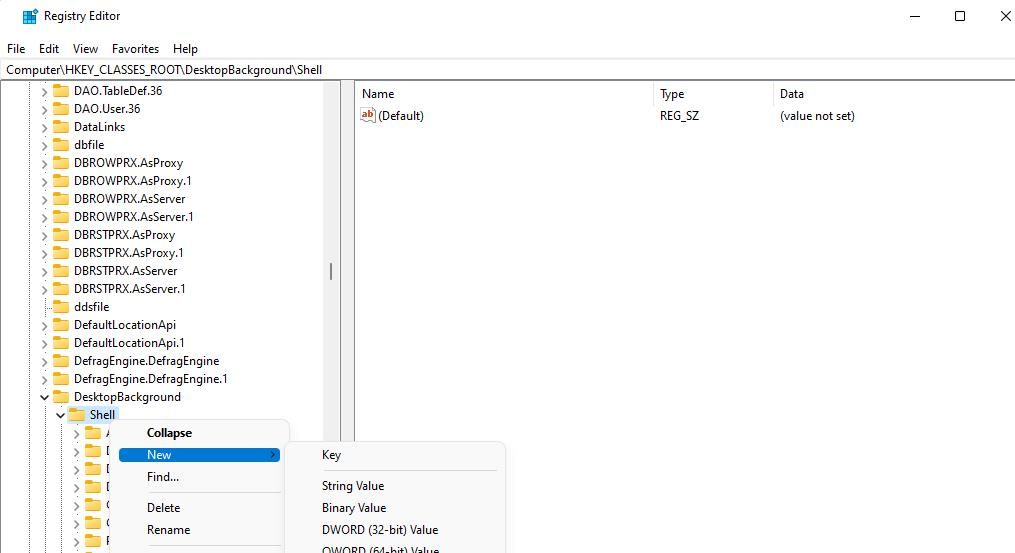
Input this Shell key path in the address bar and hit Enter:
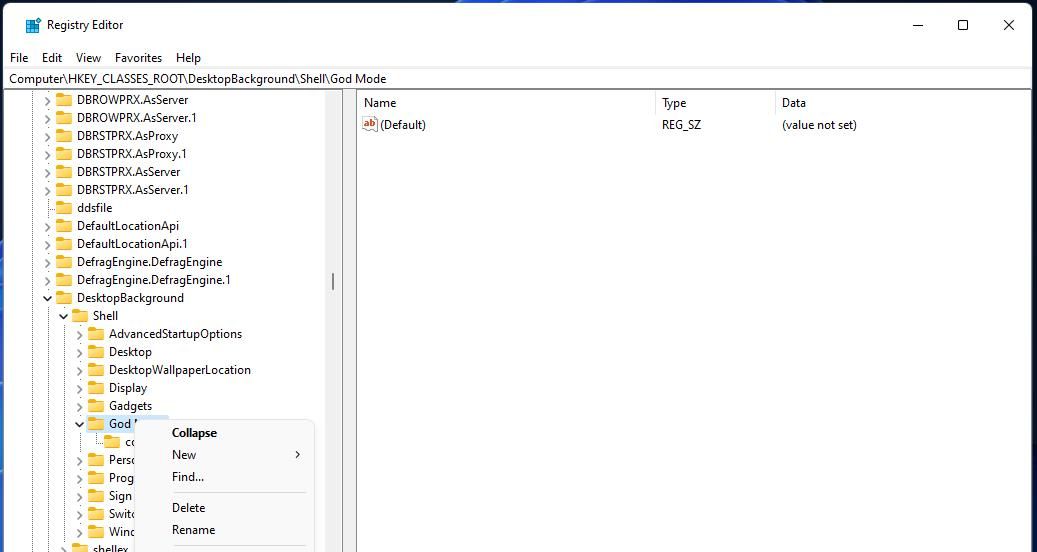
Computer\HKEY_CLASSES_ROOT\DesktopBackground\Shell\Right-click on Shell in Registry Editor’s navigation sidebar to select New and Key.

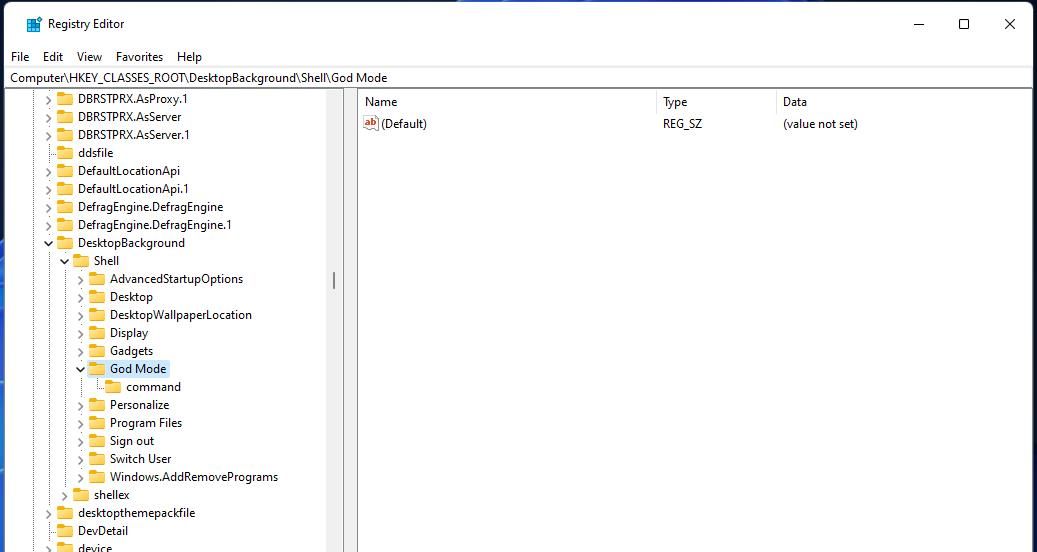
Type God Mode in the key’s text box.
Right-click God Mode and select the New > Key context menu options again.
Input command within the subkey’s text box.

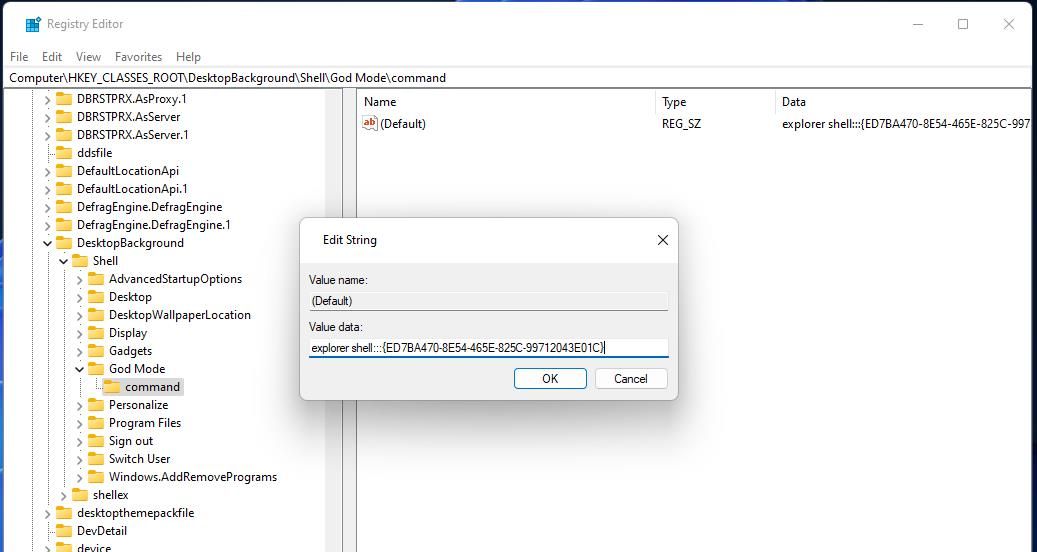
Double-click on the (Default) string for the new command key you’ve added to the registry.
- Input explorer shell:::{ED7BA470-8E54-465E-825C-99712043E01C} within the Data value box and click OK.

- Click on the Registry Editor’s X button.
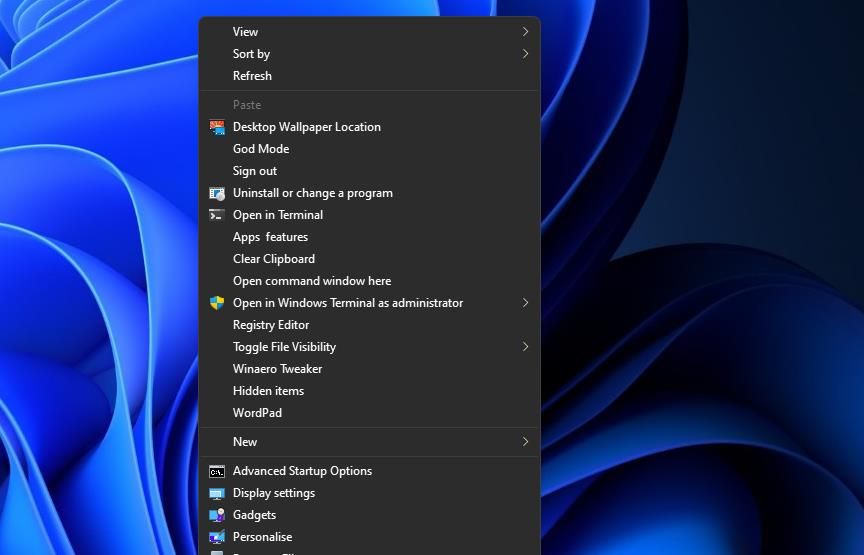
Check out the new God Mode option on your context menu for opening Task View. Right-click somewhere on the desktop background image and select Show more options. Then select God Mod to bring up the Task View window. You can open a multitude of Control Panel applets from there.
If you ever change your mind about having a God Mode context menu option, open the Shell key in Registry Editor again. Then right-click on the God Mode key you added and select delete. Click Yes to erase the God Mode key along with its command subkey.
How to Add God Mode to the Context Menu With Right-Click Extender
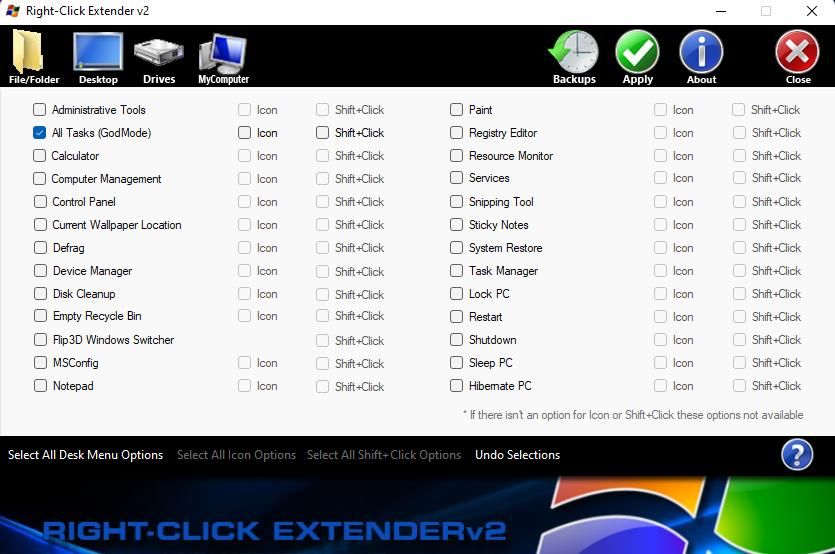
The manual registry tweak method is straightforward, but you can add God Mode to the context menu with third-party software instead if preferred. Right-Click Extender is customization software that includes an option for adding God Mode to the context menu. This is how you can add God Mode to your context menu with Right-Click Extender:
- Open this Right-Click Extender download page.
- Click on the Download and Secure Download (US) options and download the file.
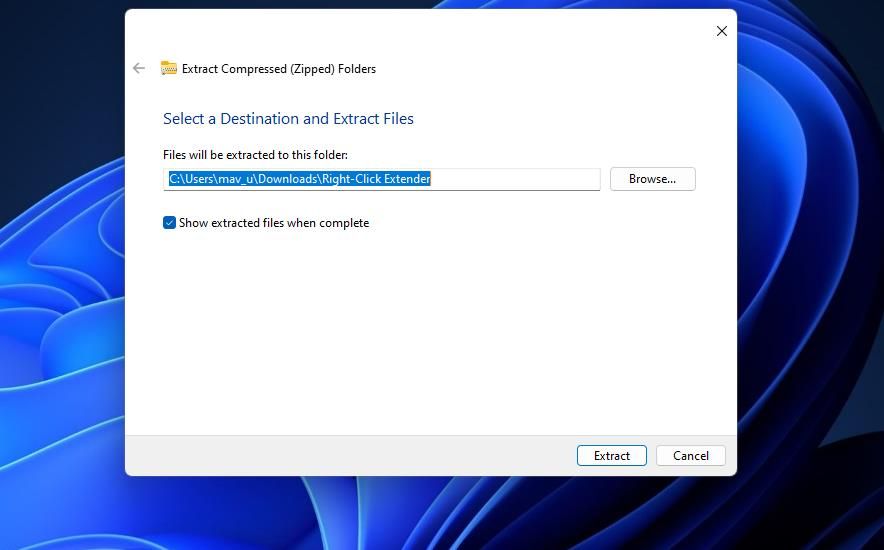
- Extract the Right-Click Extender archive by following the instructions within this guide to unzipping ZIP files in Windows .

- Open the extracted Right-Click Extender directory and its Right-Click Extender v2 subfolder.
- Double-click the Right-Click Extender v2 application file.
- Click on the Desktop tab in Right-Click Extender.
- Select the All Tasks (GodMode) setting and its Icon checkbox.

- Press the green Apply button.
Now you’ll see a new God Mode option on Windows 11’s classic context menu. This option will also have an icon by it. Click on God Mode to view the list of Control Panel applets.
How to Create Control Panel Shortcuts From God Mode’s All Tasks Window
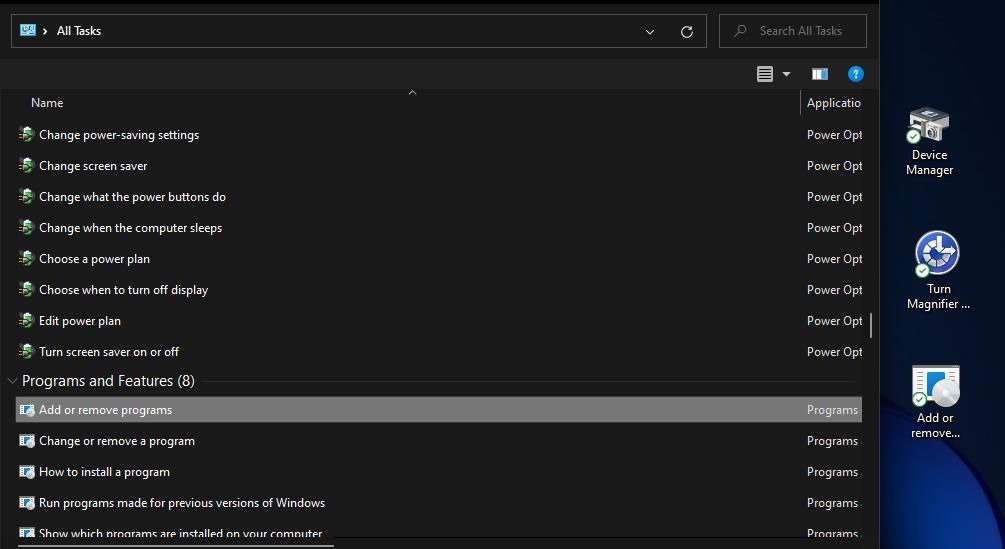
The Task View window the God Mode context menu option opens makes hundreds of Control Panel applets more accessible. You can open whatever Control Panel settings you need from that window. However, the list of applets shown in that window is quite long.
Task View makes it easy to create desktop shortcuts for opening the Control Panel applets you need to access more regularly. To do so, left-click an applet or utility in the Task View window, drag it onto the desktop, and release the mouse button. Then you can click on the desktop shortcut to open its Control Panel applet whenever needed.
Make the Most of God Mode on Windows
Adding God Mode to your desktop’s context menu will enable you to access a plethora of Control Panel applets and tools within a single window in a couple of clicks. That will save you from rummaging through the Control Panel to find certain applets and settings when needed. Plus, you can make more essential Control Panel applets even more accessible by creating shortcuts for them from the Task View window.
Many users activate God Mode by setting up desktop shortcuts that open the All Tasks window. However, you can instead add a God Mode option to the desktop’s context menu in Windows 11. Then the All Tasks window will be directly accessible on your right-click menu. This is how you can add God Mode to Windows 11’s context menu.
Also read:
- [New] Clearer Photos with Blur Effects Apps for 2024
- [New] In 2024, Discovering the Hidden Gems in ASMR Creation
- [New] In 2024, Enhancing Visibility & Following on Instagram
- 2024 Approved Skyrocket Your E-Commerce with These 15 Facebook Analytics
- Crafting Musical Narratives in Public Spaces: How My Portable MP3 Player Shapes Social Interactions
- Excel Expert Tips: How to Print Selected Cell Range Effortlessly
- Expert Strategies for Effortless Integration of Directories, Win 11
- How to Download Fonts for All Languages on Windows
- In 2024, Sonic Boom The Guide to Musical Snapchat Videos
- Master the Art of DSS to MP3 Transformation for Perfect Audio Playback
- Mastering Terminal: Personalize Colors & Style
- Remove the Lock Screen Fingerprint Of Your Tecno Phantom V Flip
- Resolving Non-Existent Device Alerts on Windows 10/11
- WinRAR's Corrected Compression: Overcoming Sum Errors
- Title: Bless Your PC: God Mode Enhancements
- Author: Joseph
- Created at : 2025-01-18 20:27:27
- Updated at : 2025-01-22 20:03:04
- Link: https://windows11.techidaily.com/bless-your-pc-god-mode-enhancements/
- License: This work is licensed under CC BY-NC-SA 4.0.
