
Advanced Tips for Adding Sound in Snipping Tool Recordings (Max 156)
Advanced Tips for Adding Sound in Snipping Tool Recordings (Max 156)
The Snipping Tool is the native screen capture and video recording tool in Windows 11. And now, Microsoft is testing an audio capture feature along with video in the Windows Insider channel. We will discuss this feature in detail and how to enable it on your Windows 11 PC. Let’s begin.
The Snipping Tool Gets an Audio Recording Feature
The Sniping Tool got a major facelift after getting video capture support in Windows 11. After that came the Text Actions feature that can read text from screenshots, which is another useful add-on. You can already annotate the captured screenshots in the tool, so adding audio capture support makes it a complete package for users.
How to Enable and Use the Audio Recording Feature in the Snipping Tool
The Snipping Tool’s audio recording feature is limited to Windows Insider users at the time of writing. It is available for users enrolled in the Canary channel after a recent update, so you must first update your Windows PC to the latest available build and install it. Non-Insiders can use UUP Dump to download the Windows Insider builds without enrolling in the program .
After updating your PC, go to the Microsoft Store app and check for any available updates for the Snipping Tool. The audio recording feature is available in version 11.2309.16.0 of the app, so update to this or any higher version.
First, you need to allow the Snipping Tool to use your system’s microphone. Follow the steps below:
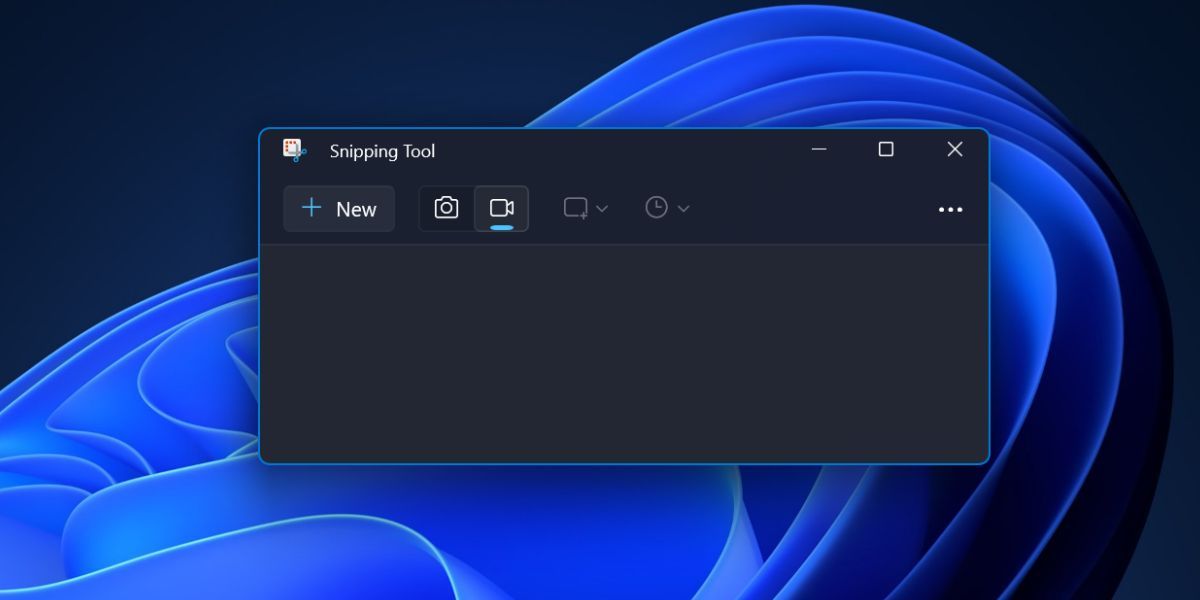
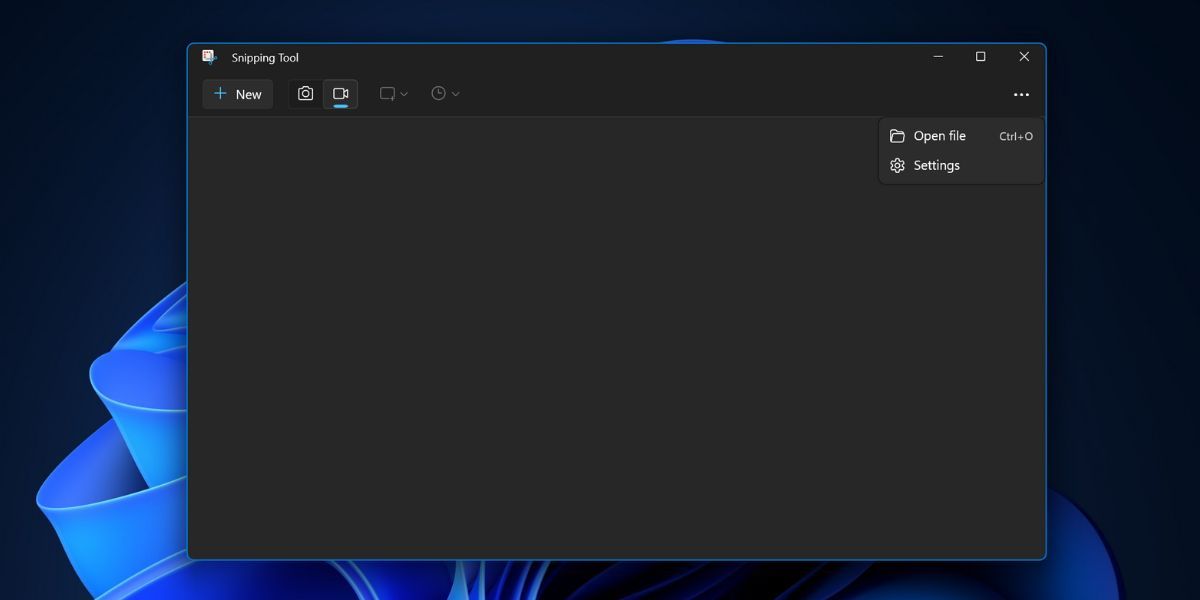
- Press the Win key to open the Start menu. Type Snipping Tool and press the Enter key to launch the app.
- Click on the video record icon to select it.
- Click on the New button.

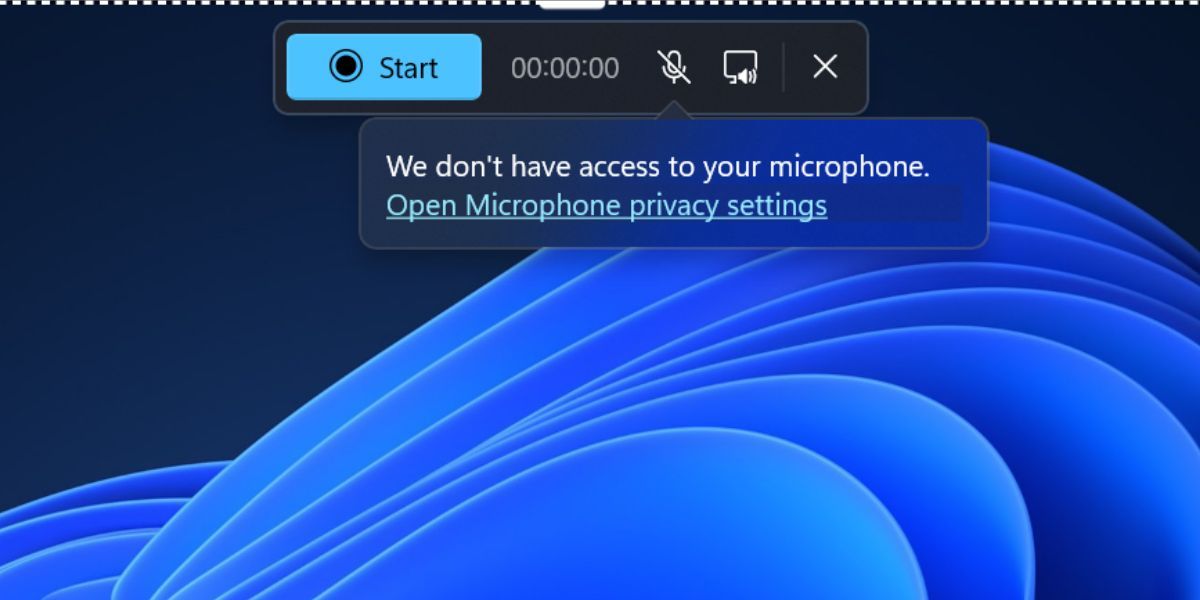
- Click and drag the selection tool to highlight the area you want to record. You will notice two new icons in the top bar alongside the timer and Start button; these enable you to control the system audio recording and microphone audio recording.
- Click on the microphone icon. You will have to allow the app to use your PC’s microphone for audio recordings.
- Then, click on the Open Microphone privacy settings option. Click on the Yes button to continue.
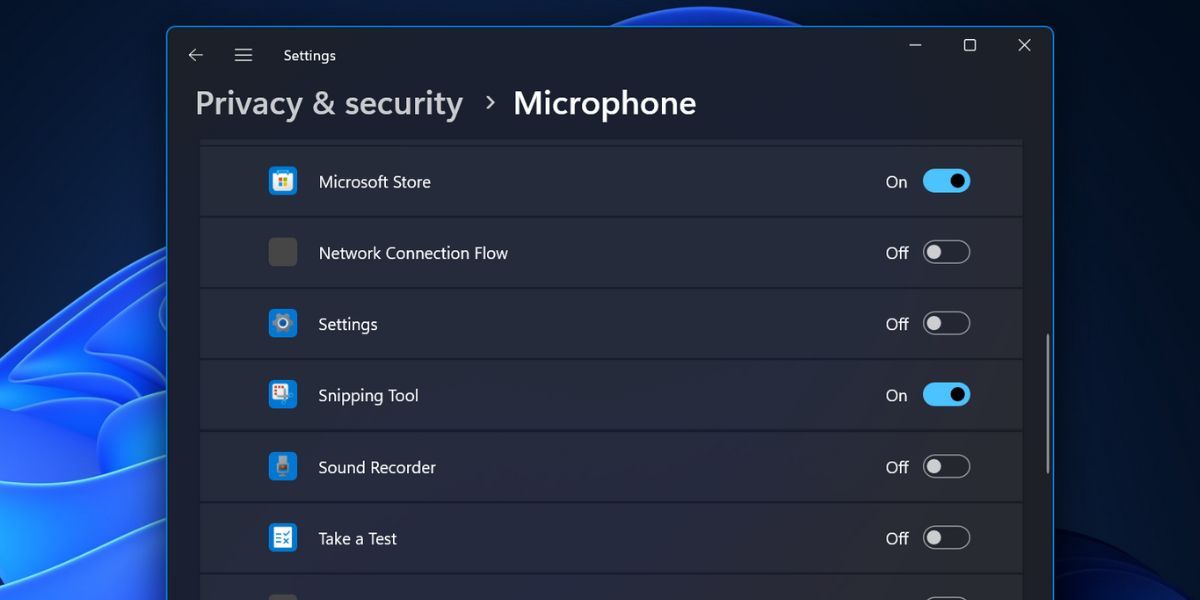
- Navigate to the Let apps and access your microphone section. Scroll down and find the Snipping Tool app in the list.
- Click on the toggle to allow the Snipping Tool to access the system’s microphone.
- Close the Settings app.
Now, the Snipping Tool is ready to capture audio. Here’s how to do it:
- Relaunch the Snipping Tool app.
- Click on the video record icon and then click on the New icon.
- Click and drag with your mouse to select the screen area you want to capture.
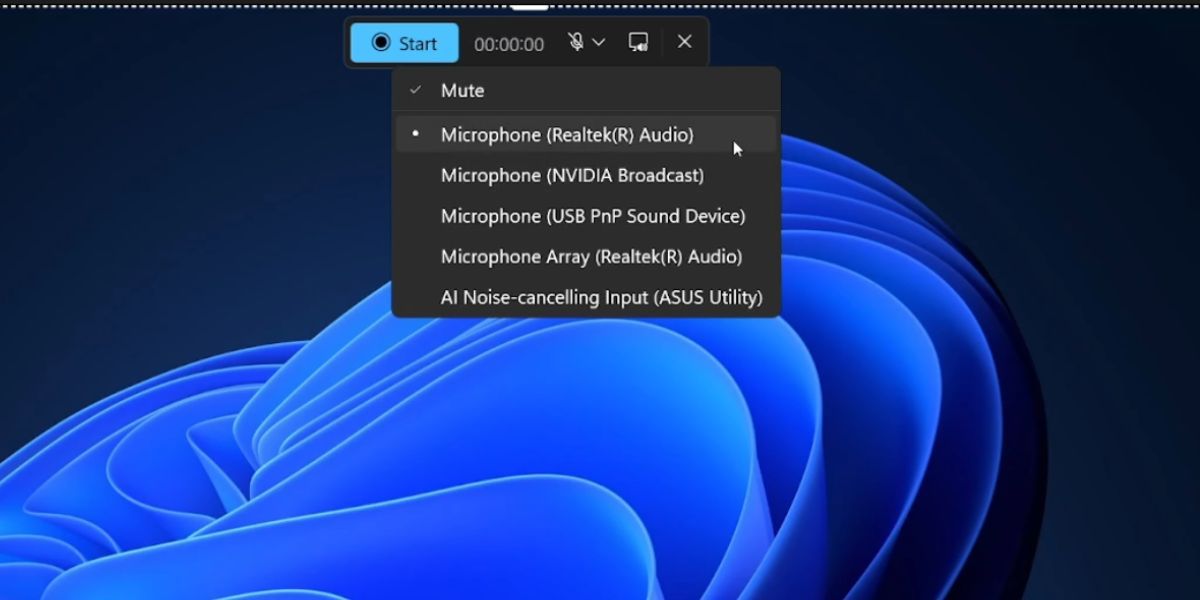
- Click on the microphone icon to open the drop-down menu. Select the audio recording device that you want to use from the list (internal or external mic).
- Click on the microphone icon again. Since it is muted by default, click on the Mute option to deselect it.
- Click on Mute System Audio if you want to mute the system sounds while recording the audio.
- Hit the Start button to proceed to record the screen and your audio.
- Once done, click on the s top recording icon.
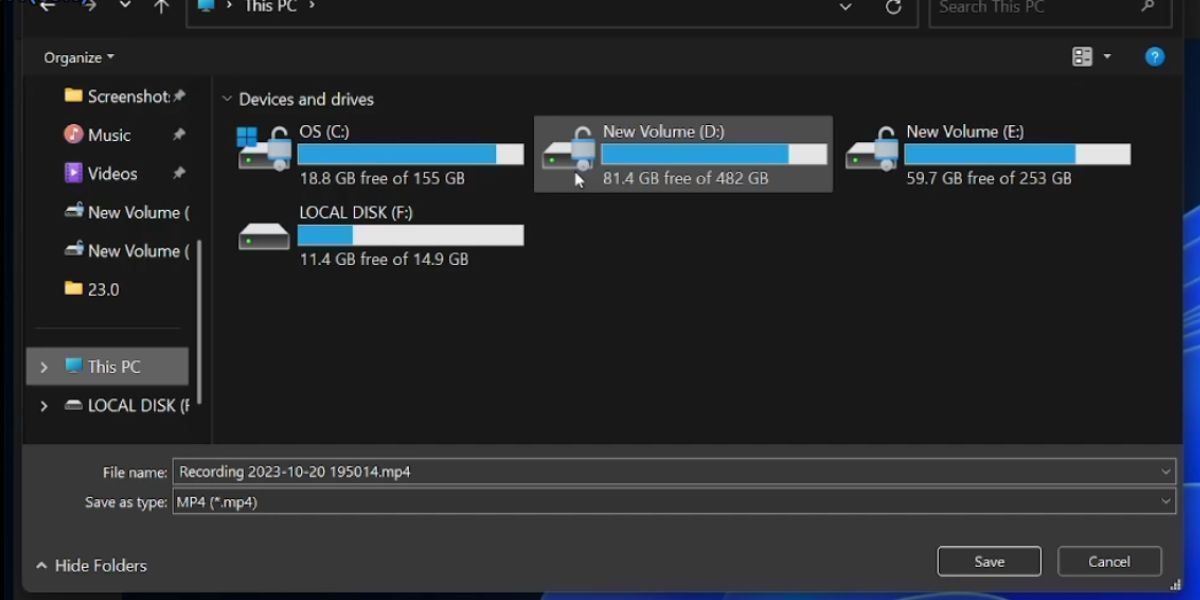
- Play the clip to check the recorded session. Press Ctrl + S to open the Save window. Enter a name for your video clip and save it to a preferred location on your PC.
How to Change the Audio Capture Settings in the Snipping Tool
Follow the steps below to tweak the audio capture settings:
- Open the Snipping Tool app.
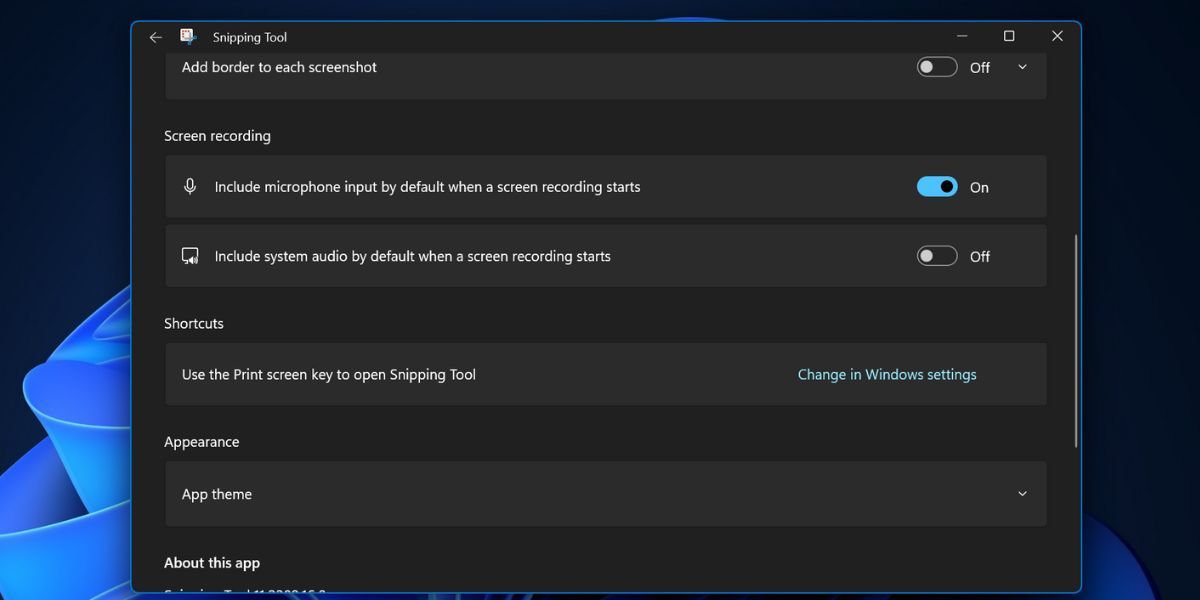
- Navigate to the top right corner and click on the see more (ellipsis) icon, then select Settings. Scroll down to the Screen recording section.
- If you want to always enable microphone recording, click the toggle next to Include microphone input by default when a screen recording starts.
- To prevent the system audio capture, disable the toggle next to Include system audio by default when a screen recording starts.
- Close the Snipping Tool.
Is the Audio Recording Feature Any Good?
If you use an external microphone , the quality of the audio capture is decent. Since you can select the audio input device and mute or unmute the audio capture while video recording, you also have the option to add a voiceover while recording a video, which you can use as a video guide.
The Snipping Tool saves the video recording with the audio capture in MP4 format; it doesn’t create a separate file for the audio recording. But you can use editing apps like Clipchamp to separate the audio recording from the video and then tweak it.
Capture Audio Along With Your Screen
The Snipping Tool is getting more love from Microsoft and the new audio recording feature makes it a decent app for recording video with audio. You don’t need to use third-party apps like OBS Studio anymore. However, it will take some time for the feature to become available to everyone.
Also read:
- [New] Insights Into Instagram An In-Depth Analysis Guide for Professionals
- [New] Mastering the Art of Invisible Viewership on Instagram Live
- [Updated] In 2024, Bringing Rhythm to Instagram's Visual Narratives
- [Updated] In 2024, Mastering the Art of Finding Image Collections for Media
- 4 Ways to Fix the Windows PowerShell Cannot Be Loaded Because Running Scripts Is Disabled Error
- Applying Local Group Policies to Individual Users: Windows 11 Guide
- Best Fit: The Ideal VMs That Complement Your Windows 11 PC
- Bypassing Inaccessible Router Settings in Windows
- Comprehensive Solution to Stop 0xF0831 in Windows 11
- Cracking Code: Repaired Windows Family Security Glitches
- Customizing Your Command Prompt Palette
- Discover the Art of Tracking Network Activity via Netstat in Win11
- Efficiently Convert iPhone Photos (JPG, PNG) Into PDF Format
- In 2024, Which Pokémon can Evolve with a Moon Stone For OnePlus 12R? | Dr.fone
- Simplify Coding Tasks by Adding CodeGPT to VS Code
- Transform Your Photos Effortlessly: Premium Features of the Free LightZone Editor on Windows, Mac & Linux
- Updated In 2024, Edit FLV Videos for Free Top 5 Software Options
- Title: Advanced Tips for Adding Sound in Snipping Tool Recordings (Max 156)
- Author: Joseph
- Created at : 2025-01-17 17:02:05
- Updated at : 2025-01-22 19:01:54
- Link: https://windows11.techidaily.com/advanced-tips-for-adding-sound-in-snipping-tool-recordings-max-156/
- License: This work is licensed under CC BY-NC-SA 4.0.