
Achieving Optimal Security in Win 11 with MS Defender Application Guard for Edge
Achieving Optimal Security in Win 11 with MS Defender Application Guard for Edge
If you work in an environment that deals with sensitive data, then you must install Microsoft Defender Application Guard for Edge on your Windows computer. It opens Microsoft Edge in an isolated container so that suspicious or potentially harmful files will not be able to access trusted resources.
In this guide, we will show you different methods to install Microsoft Defender Application Guard for Edge on your Windows 11 PC.

1. How to Install Microsoft Defender Application Guard Using Windows Settings
Installing Microsoft Defender Application Guard for Edge on your Windows PC is a quick and simple process. You just need to access the Windows Settings app, and then follow a few steps to enable the feature. Here’s how to do it:
- PressWin + I on your keyboard to open the Settings app. See our guide if you’re having trouble opening Windows Settings .
- On the left, clickPrivacy and security , and then on the right, clickWindows Security .
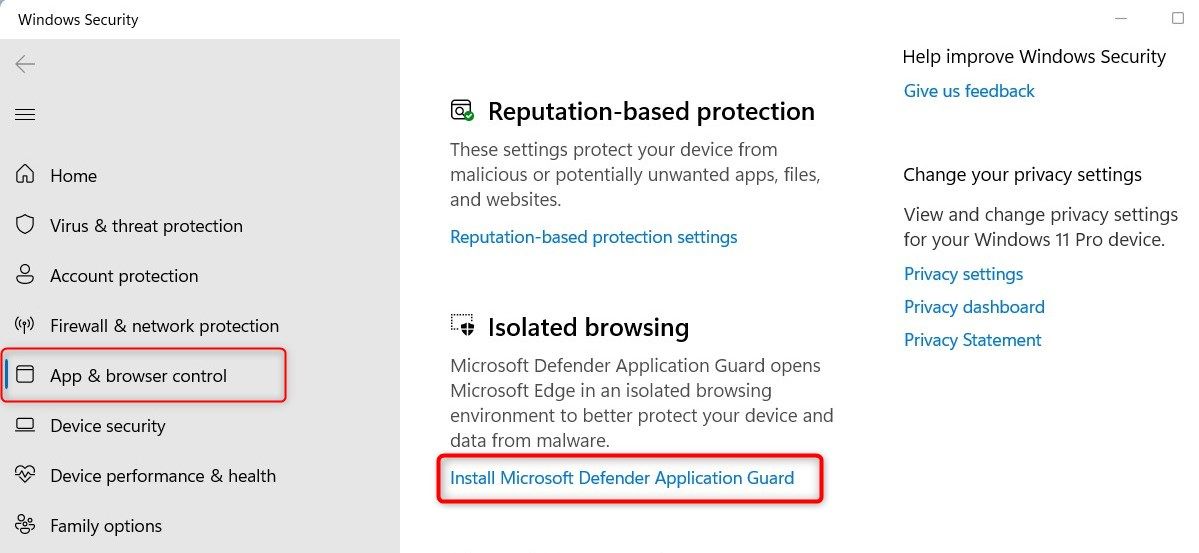
- Under the Protection areas, clickApp & browser control .
- Then, on the Windows Security page, click theInstall Microsoft Defender Application Guard link below Isolated browsing.

- If you see the UAC prompt on your computer screen, click Yes to confirm your action.
- Next, check the box next toMicrosoft Defender Application Guard and clickOK .

Once you perform the above steps, you must need to restart your computer to finish installing the requested changes. This way you can install the feature on your computer.
If you have already installed Microsoft Defender Application Guard and want to uninstall it, the process is quite easy. All you need to do is follow the steps mentioned above until you reach the Windows Security page.
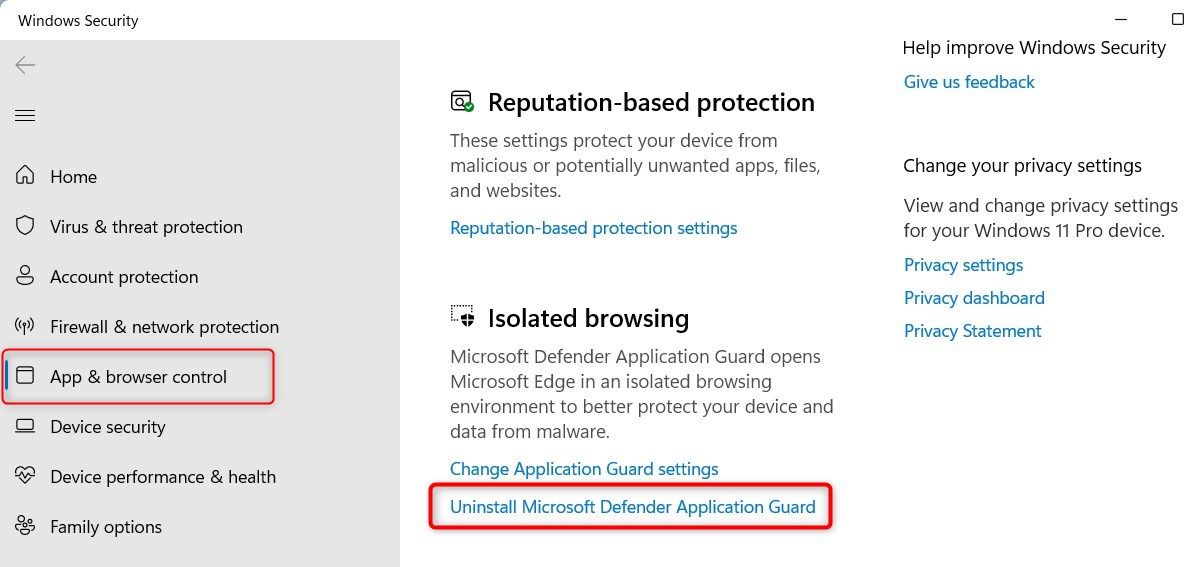
Then clickUninstall Microsoft Defender Application Guard and uncheck the box next toMicrosoft Defender Application Guard .
2. How to Install Microsoft Defender Application Guard Using the Control Panel
You can also install Microsoft Defender Application Guard for Edge on your Windows 11 computer using the classic Control Panel. Here’s how to do it:
- Search forControl Panel in the Start menu and open it.
- SelectPrograms and Features from the menu items.
- From the left pane, clickTurn Windows features on or off .
- Tick the box next toMicrosoft Defender Application Guard and clickOK .
- Then restart your computer for the changes to take effect.
In order to uninstall it, follow the same steps and uncheck the box next toMicrosoft Defender Application Guard . Then click OK and reboot your computer to save the changes.

3. How to Install Microsoft Defender Application Guard Using Local Group Policy Editor
Another method to install Microsoft Defender Application Guard is through the Local Group Policy Editor. This method requires some advanced knowledge and might be challenging for some users but don’t worry; if you follow the steps, you’ll be okay.
You’ll also find that if you’re on Windows Home, the below instructions won’t work. This is because it’s not enabled by default on Home. Fortunately, you can learn how to access the Group Policy Editor on Windows Home before you perform this fix.
Follow the steps given below to install Microsoft Defender Application Guard using Local Group Policy Editor:
- Press theWin + R shortcut key to launch the Run window.
- Typegpedit.msc in the dialog box and press Enter or clickOK .
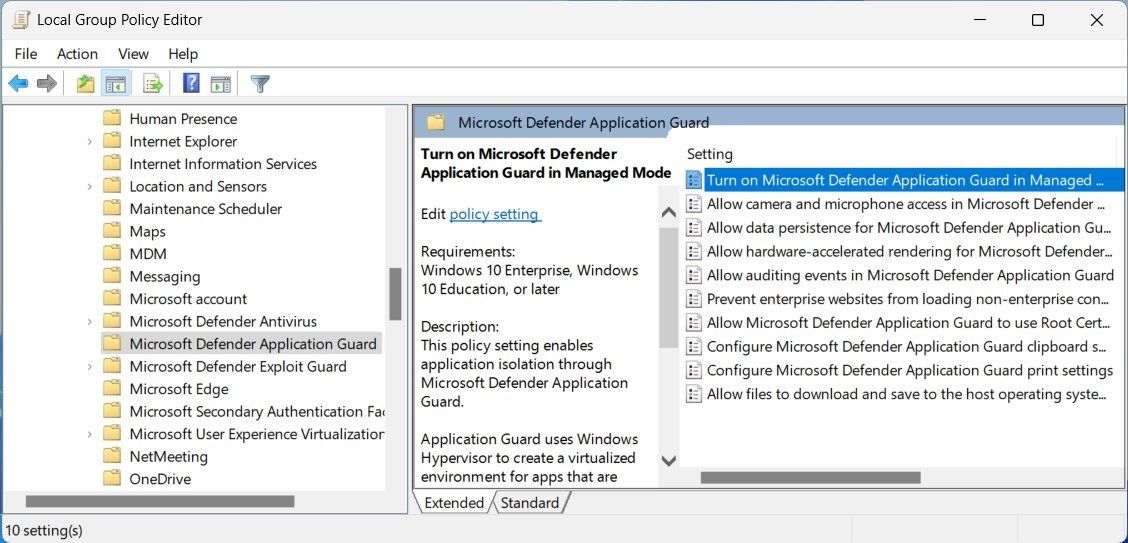
- In the Local Group Policy Editor window, navigate to the following path:
Computer Configuration > Administrative Templates > Windows Components > Microsoft Defender Application Guard - Now go to the right pane and double-click on the Turn On Microsoft Defender Application Guard in Managed Mode policy.
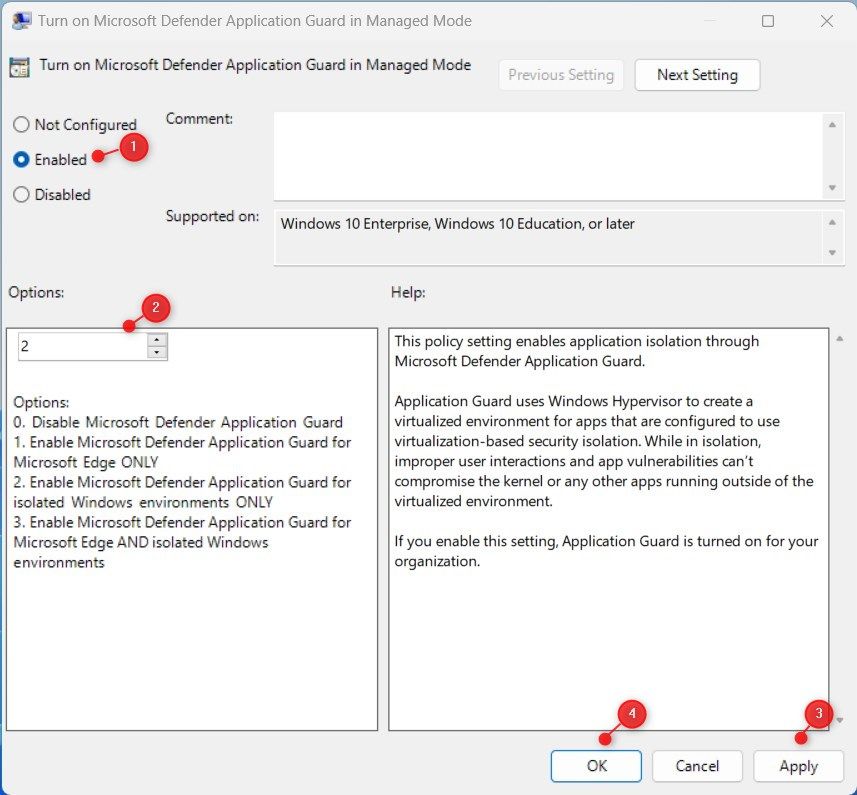
- This will open a new window, select theEnabled checkbox.
- You can now go toOptions and change it to2 or3 .
- Once done, clickApply and thenOK to save all the changes you have made.
Now restart your computer and Microsoft Defender Application Guard will be installed on your PC.
4. How to Install Microsoft Defender Application Guard Using Command Prompt
If you are comfortable with the command prompt, you can also install Microsoft Defender Application Guard using the Command Prompt. Follow the steps here:
- Right-click on Start and selectRun from the menu list.
- In the dialog box, typecmd and then pressCtrl + Shift + Enter on your keyboard.
- If UAC prompts, clickYes to run the command prompt with admin access.
- In the elevated command prompt window, type the following command and hit Enter:
Dism /online /Enable-Feature /FeatureName:"Windows-Defender-ApplicationGuard" - When Command Prompt asks you to restart, typeY and hit Enter to complete this operation.
Once you restart your computer, Microsoft Defender Application Guard will be installed and ready to use. In case you want to uninstall the Application Guard, you can do so by using the same command prompt steps. Just make sure to run the following command instead:
Dism /online /Disable-Feature /FeatureName:"Windows-Defender-ApplicationGuard"
At this point, you may be asked to restart your computer. To proceed, typeY and press Enter. After restarting, you will have successfully installed Microsoft Defender Application Guard on your system.
5. How to Install Microsoft Defender Application Guard Using Windows PowerShell
Alternatively, you can use Windows PowerShell to install Microsoft Defender Application Guard for Edge on Windows 11. This is also a command-line process but is different from the Command Prompt application. Follow these steps to install Microsoft Defender Application Guard using Windows PowerShell:
- Open Windows PowerShell with admin access. If you need help, see our guide on how to open Windows PowerShell as an administrator .
- Once you’re in the PowerShell window, type the following command:
Enable-WindowsOptionalFeature -Online -FeatureName "Windows-Defender-ApplicationGuard" - Now pressEnter on your keyboard to execute it.
- When PowerShell asks you to restart your computer, typeY and hit Enter.
Upon restarting the computer, you will have successfully installed Microsoft Defender Application Guard on your system. Now you can make sure that you are browsing in a secure and protected environment.
If you ever want to uninstall Microsoft Defender Application Guard, you can do so by using the same PowerShell command. Just make sure to useDisable -WindowsOptionalFeature instead ofEnable . So, this way the command should look like this:
Disable-WindowsOptionalFeature -Online -FeatureName "Windows-Defender-ApplicationGuard"
Now press Enter on your keyboard to execute the command and restart your system. Once it is done, Microsoft Defender Application Guard will be uninstalled from your PC.
This is how you can install and uninstall Microsoft Defender Application Guard using Windows PowerShell on Windows 11.

Get Microsoft Defender Application Guard and Stay Safe
Microsoft Defender Application Guard uses isolated secure containers to protect your device from malicious files and threats. In the above-described methods, you can follow the installation steps and remain safe while browsing the web.
- Title: Achieving Optimal Security in Win 11 with MS Defender Application Guard for Edge
- Author: Joseph
- Created at : 2024-07-29 04:20:26
- Updated at : 2024-07-30 04:20:26
- Link: https://windows11.techidaily.com/achieving-optimal-security-in-win-11-with-ms-defender-application-guard-for-edge/
- License: This work is licensed under CC BY-NC-SA 4.0.