Eliminating Obstacles in Capturing Whole-Screen with Windows Snipping Tool

Eliminating Obstacles in Capturing Whole-Screen with Windows Snipping Tool
The Snip & Sketch tool in Windows helps you capture screenshots of the entire screen or a certain portion of it. However, in some cases, the tool may fail to cover the whole screen, resulting in cropped screenshots that leave out parts of the screen.
If you are facing a similar issue, we’ve got you covered. Below, we’ll cover the different reasons you might be facing the problem and the solutions you can try to fix it for good.
Why Isn’t the Snip & Sketch Tool Covering the Entire Screen?
Here are a few reasons that might prevent the Snip & Sketch tool from covering your entire screen.
- Incorrect scaling settings : if you are using multiple monitors and the scaling of your secondary display is set to a value other than 100%, the Snip & Sketch tool can have problems capturing the entire screen.
- Issue within the snipping tool : The tool itself may be facing a corruption error or just be outdated, which is affecting its functionality.
- Conflicting apps : if you are using a program with functionality similar to that of the snipping tool, it can cause conflict with the processes of Snip & Sketch, leading to the problem at hand.
Now that we have identified the possible causes, let’s explore some effective troubleshooting methods to help you quickly resolve the issue.
1. Adjust the Scale Levels
Incorrect scaling settings are the primary cause of the Snip & Sketch tool’s inability to capture the entire screen. This typically affects users using multiple displays.
Ideally, the scaling settings of both displays should be the same. If that’s not possible for you, you can also set the bigger scaling ratio monitor as your primary display to fix the problem.
Here is how you can change the scaling settings:
- Press the Win + I keys together to open the Settings app.
- Navigate toSystem >Display .
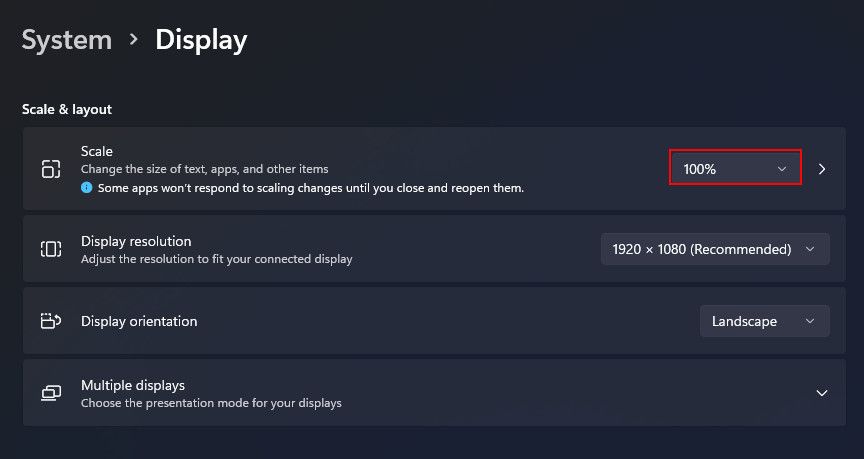
- In the right pane, head over to the Scale & layout section and expand the dropdown menu under it.
- Select100% (or whatever scaling setting you have on your other display) from the list of options available.

- Close the Settings app and reboot to save the changes.
Hopefully, upon reboot, you will no longer face the problem.
Another way to fix the issue in this scenario is by setting the bigger scaling ratio monitor as your primary display. This is because Windows tends to prioritize the primary display when it comes to scaling. It will set the scaling of the secondary monitor based on the primary one.
To change your primary display on Windows, follow these steps:
- Press the Win + I keys together to open the Settings app.
- Navigate toSystem >Display .
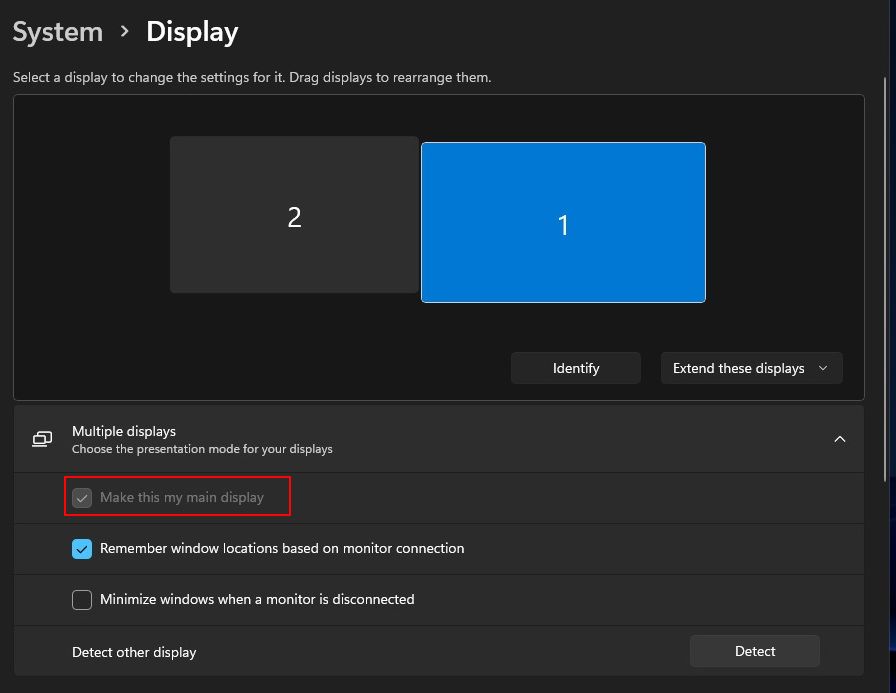
- You should now be able to see the displays installed. Click on theIdentify button to see which display is the primary one.
- Click on the screen that you want to make your primary display and expand theMultiple displays option.
- Choose theMake this my main display option.

We also recommend keeping the main display positioned on the right side since it may cause the system to handle scaling differently, resolving the error in the process.
2. Restart Snip & Sketch
Several users also noticed that closing Snip & Sketch and quitting it from the taskbar, then launching it using the Search utility of Windows also fixes the problem. However, this is only a workaround and won’t permanently solve the problem.
Follow these steps to proceed:
- Exit the snipping tool and click the upward arrow in the taskbar to view hidden icons.
- Right-click on Snip & Sketch and chooseQuit .
- Once done, press the Win + S keys together to launch the Windows Search utility.
- Search for the snipping tool and launch it.
- Finally, click on theNew button in the tool and choose the full-screen mode.
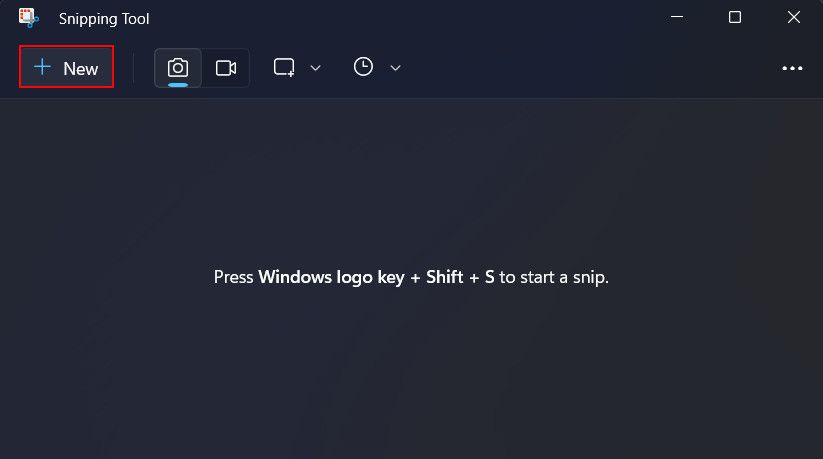
You should now be able to capture the entire screen successfully. If you encounter the problem again, repeat this process to solve it. But if you want a more permanent solution, check out the following step.
3. Update Snip & Sketch
The issue can also occur if the Snip & Sketch app itself is outdated, which causes it to malfunction. In this case, an easy solution that can fix the problem is updating the snipping utility.
Since the Snip & Sketch tool is a Microsoft Store app, you can use the Store utility to update it. Here’s how to update Microsoft Store apps in Windows, so check it out to learn how to keep Snip & Sketch (and all other Microsoft Store apps) updated.
4. Repair/Reset Snip & Sketch
If the problem is within the snipping app and updating it has not worked, you can also use the Repair tool offered with the app by default. This feature will attempt to fix any issues that might be causing the app to malfunction.
If the repair tool fails to identify and resolve the issue, you can reset the app, which will revert it to its default, error-free state.
Here is how to do that:
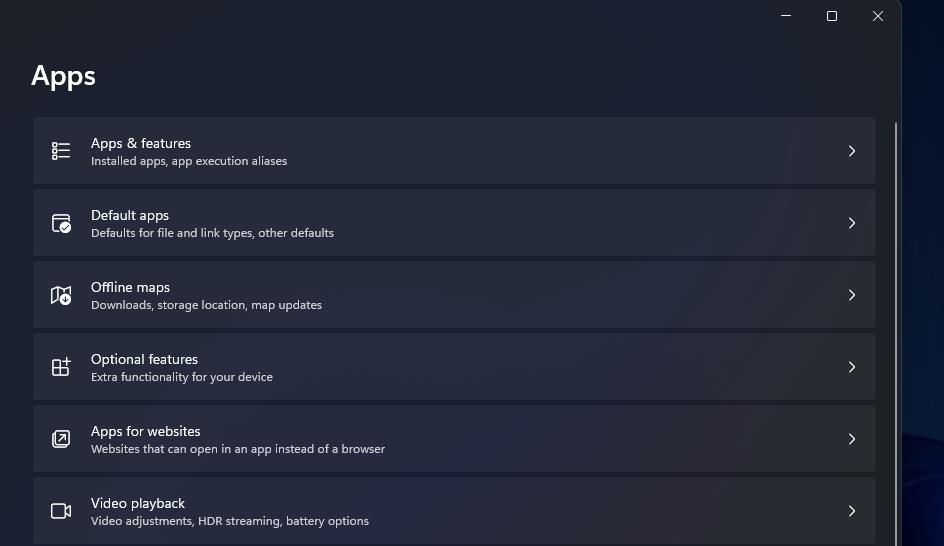
- Open the Settings app and choose Apps from the list on the left side.
- Click onApps & features .

- Now, scroll down the following window to look for Snip & Sketch.
- Click on the three dots associated with it and chooseAdvanced options .
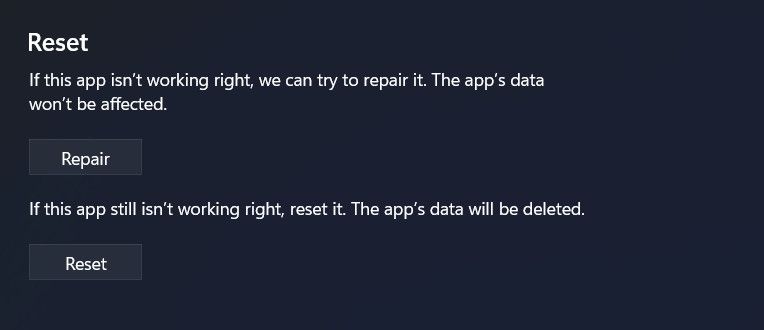
- Next, head to the Reset section and click theRepair button.

- Wait for the process to complete, then check if the issue is resolved.
- If it persists, click theReset button in the same section and follow the on-screen instructions to proceed.
Once the tool has been reset, it should work correctly. If the problem appears again in the future, you can consider using any of the other ways to take screenshots in Windows 11 until Microsoft releases an official fix for this problem.
Snip With Ease
The Snip & Sketch tool in Windows is a useful utility that can help you save on-screen information quickly. That said, it can be frustrating when the tool fails to work, especially if your work depends on it. Hopefully, the methods we’ve mentioned above will help you successfully fix the problem.
Also read:
- [New] 2024 Approved Mastering the Art of Smooth iPad Video Recording
- [New] Instant Reddit Archives Retrieval with Ease
- [Updated] 15 Sites Offering Premium-Free Vectr and Illustration Tools & Services
- Fixing Flaky Windows Apps: A Step-by-Step Guide
- Galaxy Showdown: In-Depth Comparison of S23 Ultra Vs. S21 Ultra
- Method for Handling Device Access Issues with Audacity (Win)
- Smooth File Migration to Computer – 5 Proven Techniques
- Step by Step: Setting Up a Trio of Widget Boards in Windows 11
- The Volume of Videos on a 64/128GB Memory Bank
- Tricks to Extend the Wait Window in Windows 10 Before Restarting
- Unveiling the Hidden Potential: Essential Tips on Windows Narrator Commands
- Updated 2024 Approved The Best Free and Paid Sony Vegas Alternatives for Windows
- Wireless Connectivity for Home Theaters: A Step-by-Step Guide to Streaming Perfection
- Title: Eliminating Obstacles in Capturing Whole-Screen with Windows Snipping Tool
- Author: Joseph
- Created at : 2025-02-10 00:10:00
- Updated at : 2025-02-10 17:31:04
- Link: https://windows11.techidaily.com/1719291887266-eliminating-obstacles-in-capturing-whole-screen-with-windows-snipping-tool/
- License: This work is licensed under CC BY-NC-SA 4.0.
